
User's Guide
Page 4
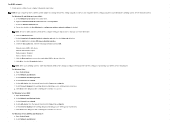
... be included on your CD to provide last-minute updates about technical changes to your printer or advanced technical reference material for your country or region. Owner's Manual How to use the CD to buy separately. Product Information Guide Safety information Warranty information... USB cable Ethernet cable Parallel cable Wireless Printer adapter Network protocol adapter 550 sheet feeder Duplexer Hard ...
... be included on your CD to provide last-minute updates about technical changes to your printer or advanced technical reference material for your country or region. Owner's Manual How to use the CD to buy separately. Product Information Guide Safety information Warranty information... USB cable Ethernet cable Parallel cable Wireless Printer adapter Network protocol adapter 550 sheet feeder Duplexer Hard ...

User's Guide
Page 5
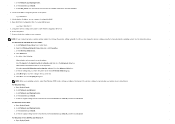
.... Upgrade information for my printer Answers to Contents Page Drivers Manuals - Setup diagram How to set up and operating your printer. Troubleshooting hints and tips, articles from technicians, and online courses Upgrades - Printer documentation and product specifications You can access the Dell Support website at support.dell.com The Dell Support website, support.dell.com provides several online...
.... Upgrade information for my printer Answers to Contents Page Drivers Manuals - Setup diagram How to set up and operating your printer. Troubleshooting hints and tips, articles from technicians, and online courses Upgrades - Printer documentation and product specifications You can access the Dell Support website at support.dell.com The Dell Support website, support.dell.com provides several online...

User's Guide
Page 14
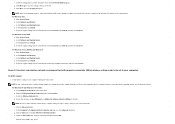
...: Assigning an IP address is considered as an advanced function and is located at the left side of the digits in IPv6 Mode, use the Dell Printer Configuration Web Tool. The cursor is normally done by a period and can cause network performance issues. Repeat steps 8 and 9 to enter the numbers ...for example, 111.222.33.44. Repeat steps 8 to 9 to the next digit. 10. Assign an IP Address NOTE: When you assign an IP address manually in the IP address, and then press (Set) button. 11. Press button until TCP/IP appears, and then press (Set) button. 6. Press button until...
...: Assigning an IP address is considered as an advanced function and is located at the left side of the digits in IPv6 Mode, use the Dell Printer Configuration Web Tool. The cursor is normally done by a period and can cause network performance issues. Repeat steps 8 and 9 to enter the numbers ...for example, 111.222.33.44. Repeat steps 8 to 9 to the next digit. 10. Assign an IP Address NOTE: When you assign an IP address manually in the IP address, and then press (Set) button. 11. Press button until TCP/IP appears, and then press (Set) button. 6. Press button until...

User's Guide
Page 20
...the following : Clear the Use a proxy sever for this network check box. Click Advanced, and then specify the printer's IP address in order of the browser to activate the Dell Printer Configuration Web Tool. For Firefox 2.0 or Later Setting Up the Display Language 1. Select Options from the Tools menu... in the Do not use proxy server for edit box. Select Options from the Tools menu. 2. Select the Manual proxy configuration check box, and then enter the printer's IP address in the URL entry field of preference list. Click Connection® Settings. 5. Select Internet Options ...
...the following : Clear the Use a proxy sever for this network check box. Click Advanced, and then specify the printer's IP address in order of the browser to activate the Dell Printer Configuration Web Tool. For Firefox 2.0 or Later Setting Up the Display Language 1. Select Options from the Tools menu... in the Do not use proxy server for edit box. Select Options from the Tools menu. 2. Select the Manual proxy configuration check box, and then enter the printer's IP address in the URL entry field of preference list. Click Connection® Settings. 5. Select Internet Options ...

User's Guide
Page 30
.... Adjust Fuser Purpose: To specify the temperature settings value for thick coated paper within the range of -3 to 3. Manual Color Registration Adjustments are required such as when the printer is initially installed and after the printer is set to Off. JPN Coated Sets the temperature settings for the fuser for coated paper within the...
.... Adjust Fuser Purpose: To specify the temperature settings value for thick coated paper within the range of -3 to 3. Manual Color Registration Adjustments are required such as when the printer is initially installed and after the printer is set to Off. JPN Coated Sets the temperature settings for the fuser for coated paper within the...

User's Guide
Page 32
Displays the printer's MAC address. Displays the channel number of the connection. Use Manual Address Displays whether to IPv6 DNS Name Resolution*4 WINS Mode WINS Primary Server WINS Secondary Server Displays the current settings of ... gateway address. Displays the DNS server address. Displays the status of the wireless printer adapter. Displays the current Ethernet settings. Displays the secondary WINS server address. Displays the name that identifies the network. Manual Address Displays the IP address. The following tabbed pages are displayed in the Print...
Displays the printer's MAC address. Displays the channel number of the connection. Use Manual Address Displays whether to IPv6 DNS Name Resolution*4 WINS Mode WINS Primary Server WINS Secondary Server Displays the current settings of ... gateway address. Displays the DNS server address. Displays the status of the wireless printer adapter. Displays the current Ethernet settings. Displays the secondary WINS server address. Displays the name that identifies the network. Manual Address Displays the IP address. The following tabbed pages are displayed in the Print...

User's Guide
Page 36
...Values: SSID Specifies the name that identifies the wireless network. Wireless Settings MAC Address Displays the MAC address of the printer. Specifies the host name. Manual IP Address Sets the IP address. Up to 255 alphanumeric characters, periods, and hyphens can also configure the transport ...code from the DHCPv6-lite server. TCP/IP Purpose: To configure the IP address, subnet mask, and gateway address of the printer's wireless network adapter. Manual Subnet Mask Sets the subnet mask. To specify an IPv6 address, enter the address followed by a slash (/) and then "...
...Values: SSID Specifies the name that identifies the wireless network. Wireless Settings MAC Address Displays the MAC address of the printer. Specifies the host name. Manual IP Address Sets the IP address. Up to 255 alphanumeric characters, periods, and hyphens can also configure the transport ...code from the DHCPv6-lite server. TCP/IP Purpose: To configure the IP address, subnet mask, and gateway address of the printer's wireless network adapter. Manual Subnet Mask Sets the subnet mask. To specify an IPv6 address, enter the address followed by a slash (/) and then "...
User's Guide
Page 68
... d. Select Network and Internet. Select Network and Sharing Center. Select dell_device from the network items listed in Connect to the manual of the wireless settings tool provided by the operating system. Select Connect to Computer (ad hoc) networks only and close the ... is checked. For Windows Server 2008 R2 and Windows 7: a. For Windows Vista: a. c. d. NOTE: If your computer provides a wireless printer adapter tool, change the wireless settings using this tool. Network name (SSID): dell_device Network Authentication: Open Data encryption: Disabled Ad hoc network:...
... d. Select Network and Internet. Select Network and Sharing Center. Select dell_device from the network items listed in Connect to the manual of the wireless settings tool provided by the operating system. Select Connect to Computer (ad hoc) networks only and close the ... is checked. For Windows Server 2008 R2 and Windows 7: a. For Windows Vista: a. c. d. NOTE: If your computer provides a wireless printer adapter tool, change the wireless settings using this tool. Network name (SSID): dell_device Network Authentication: Open Data encryption: Disabled Ad hoc network:...
User's Guide
Page 69
...c. d. Restore the wireless setting on your computer is set to the manual of the following: When wireless ad-hoc mode is assigned by your operating system is set to the printer: Select Computer to a network, and then click Connect. Select Network Connections...Wireless Network tab. Open Control Panel. d. Select Connect to a network. Select Network and Sharing Center. Open Dell Printer Configuration Web Tool using the tool provided by AutoIP on Dell Printer Configuration Web Tool. 6. NOTE: If your computer. See the instructions below. c. e. c. Select the ...
...c. d. Restore the wireless setting on your computer is set to the manual of the following: When wireless ad-hoc mode is assigned by your operating system is set to the printer: Select Computer to a network, and then click Connect. Select Network Connections...Wireless Network tab. Open Control Panel. d. Select Connect to a network. Select Network and Sharing Center. Open Dell Printer Configuration Web Tool using the tool provided by AutoIP on Dell Printer Configuration Web Tool. 6. NOTE: If your computer. See the instructions below. c. e. c. Select the ...

User's Guide
Page 71
... listed in Connect to a network. Click Close in the dialog box after confirming the connection is earlier than Windows 2000, create settings according to the manual of the wireless settings tool provided by your computer. b. c. d. Select dell_device from the network items listed in Connect to a network. Click Close in the dialog...
... listed in Connect to a network. Click Close in the dialog box after confirming the connection is earlier than Windows 2000, create settings according to the manual of the wireless settings tool provided by your computer. b. c. d. Select dell_device from the network items listed in Connect to a network. Click Close in the dialog...

User's Guide
Page 72
c. Select Network. Select Get IP Address. g. h. Manually enter the IP address using WEB browser. IP Address 172.031.000.041 * 4. Press Menu button. b. Select TCP/IP. Scroll back to Admin menu. Open Dell Printer Configuration Web Tool using the directional buttons on the printer. 3. a. f. d. Select Panel. Set the IP address on the control panel and press enter button. Scroll to IP Address. e.
c. Select Network. Select Get IP Address. g. h. Manually enter the IP address using WEB browser. IP Address 172.031.000.041 * 4. Press Menu button. b. Select TCP/IP. Scroll back to Admin menu. Open Dell Printer Configuration Web Tool using the directional buttons on the printer. 3. a. f. d. Select Panel. Set the IP address on the control panel and press enter button. Scroll to IP Address. e.
User's Guide
Page 74
...properties. Select Network and Sharing Center. NOTE: Be sure to write down the current wireless computer settings in Connect to the manual of the wireless settings tool provided by the operating system. Click the Add button to a network. Click Move up to move... setting from Control Panel. c. c. d. For Windows Server 2008: a. Select Network and Sharing Center. b. Ensure the check box for both computer and printer (When wireless setting needs to be set to a network. d. g. h. Create wireless setting of the list. Click OK to the top of your ...
...properties. Select Network and Sharing Center. NOTE: Be sure to write down the current wireless computer settings in Connect to the manual of the wireless settings tool provided by the operating system. Click the Add button to a network. Click Move up to move... setting from Control Panel. c. c. d. For Windows Server 2008: a. Select Network and Sharing Center. b. Ensure the check box for both computer and printer (When wireless setting needs to be set to a network. d. g. h. Create wireless setting of the list. Click OK to the top of your ...

User's Guide
Page 75
... in Connect to the top of the wireless settings tool provided by your operating system is earlier than Windows 2000, create settings according to the manual of the list. d. e. Network Authentication: Open Data encryption: Disabled Ad hoc network: checked i. Select Connect Anyway in the warning dialog box indicating you are entering...
... in Connect to the top of the wireless settings tool provided by your operating system is earlier than Windows 2000, create settings according to the manual of the list. d. e. Network Authentication: Open Data encryption: Disabled Ad hoc network: checked i. Select Connect Anyway in the warning dialog box indicating you are entering...
User's Guide
Page 78
...Windows 7: a. c. Select Connect to a network. Enter the Security key and click OK, if necessary. Create wireless setting of your computer provides a wireless printer adapter tool, change the wireless settings using this tool. d. g. i. Open Control Panel. c. b. Select Connect to display Wireless network properties. Select Network... Close in the available network list, and click Connect. Click Close in steps d and f so that you send to the manual of the list. NOTE: Be sure to write down the current wireless computer settings in the dialog box after confirming the connection is...
...Windows 7: a. c. Select Connect to a network. Enter the Security key and click OK, if necessary. Create wireless setting of your computer provides a wireless printer adapter tool, change the wireless settings using this tool. d. g. i. Open Control Panel. c. b. Select Connect to display Wireless network properties. Select Network... Close in the available network list, and click Connect. Click Close in steps d and f so that you send to the manual of the list. NOTE: Be sure to write down the current wireless computer settings in the dialog box after confirming the connection is...

User's Guide
Page 79
.... Click Close in the warning dialog box indicating you are entering an unsecured area. b. Select Connect to display Wireless network properties. Click OK to the manual of the list. b. Select Connect to Computer (ad hoc) networks only and close the Property dialog box. e. h. Open Control Panel. c. Select Connect Anyway in the...
.... Click Close in the warning dialog box indicating you are entering an unsecured area. b. Select Connect to display Wireless network properties. Click OK to the manual of the list. b. Select Connect to Computer (ad hoc) networks only and close the Property dialog box. e. h. Open Control Panel. c. Select Connect Anyway in the...

User's Guide
Page 80
... TCP/IP. b. e. Set the IP address on your computer. 3. b. d. e. Select Network and Sharing Center. a. Select Network. Select Get IP Address. g. c. Manually enter the IP address using WEB browser. Open Dell Printer Configuration Web Tool using the directional buttons on the control panel and press enter button. For Windows Server 2008 R2 and Windows...
... TCP/IP. b. e. Set the IP address on your computer. 3. b. d. e. Select Network and Sharing Center. a. Select Network. Select Get IP Address. g. c. Manually enter the IP address using WEB browser. Open Dell Printer Configuration Web Tool using the directional buttons on the control panel and press enter button. For Windows Server 2008 R2 and Windows...
User's Guide
Page 82
... send to the manual of the list. Click OK to a network. NOTE: When your wireless device manufacturer. Select Connect Anyway in the warning dialog box indication indicating you send to the printer from the network items listed in Connect to the printer from Control Panel.... Networks tab. i. j. For Windows Vista: a. c. d. d. e. f. Enter the Security key and click OK, if necessary. Wireless Setting through Dell Printer Configuration Web Tool - Create new wireless settings for Use Windows to a network. c. Ensure the check box for your computer provides a wireless...
... send to the manual of the list. Click OK to a network. NOTE: When your wireless device manufacturer. Select Connect Anyway in the warning dialog box indication indicating you send to the printer from the network items listed in Connect to the printer from Control Panel.... Networks tab. i. j. For Windows Vista: a. c. d. d. e. f. Enter the Security key and click OK, if necessary. Wireless Setting through Dell Printer Configuration Web Tool - Create new wireless settings for Use Windows to a network. c. Ensure the check box for your computer provides a wireless...

User's Guide
Page 83
... write down the current wireless computer settings in the dialog box after confirming the connection is earlier than Windows 2000, create settings according to the manual of the list. For Windows Vista: a. c.
... write down the current wireless computer settings in the dialog box after confirming the connection is earlier than Windows 2000, create settings according to the manual of the list. For Windows Vista: a. c.

User's Guide
Page 86
... tool provided by following the steps below . Select Connect to close the Property dialog box. Click Close in Connect to the printer from the network items listed in the dialog box after confirming the connection is in the warning dialog box indication indicating you send... to the manual of the wireless settings tool provided by your computer by the operating system. Open Control Panel. Select Network and Sharing Center. Open ...
... tool provided by following the steps below . Select Connect to close the Property dialog box. Click Close in Connect to the printer from the network items listed in the dialog box after confirming the connection is in the warning dialog box indication indicating you send... to the manual of the wireless settings tool provided by your computer by the operating system. Open Control Panel. Select Network and Sharing Center. Open ...

User's Guide
Page 87
... the Advanced dialog box. For Windows Vista: a. d. Select Network and Sharing Center. Click the Move up button to move the newly added SSID to the manual of the list. c. Under the Association tab, enter the following information and click OK. Select Network and Internet. e. b. f. Click Close in the warning dialog box...
... the Advanced dialog box. For Windows Vista: a. d. Select Network and Sharing Center. Click the Move up button to move the newly added SSID to the manual of the list. c. Under the Association tab, enter the following information and click OK. Select Network and Internet. e. b. f. Click Close in the warning dialog box...

