Owner's Manual
Page 1
Dell™ Laser Multi-Function Printer 1600n Owner's Manual Look Inside For: • Preparing Your Multi-Function Printer • Understanding the Software • Loading Print Media • Using Your Multi-Function Printer • Maintenance • Troubleshooting • Installing Options www.dell.com/supplies | support.dell.com
Dell™ Laser Multi-Function Printer 1600n Owner's Manual Look Inside For: • Preparing Your Multi-Function Printer • Understanding the Software • Loading Print Media • Using Your Multi-Function Printer • Maintenance • Troubleshooting • Installing Options www.dell.com/supplies | support.dell.com

Owner's Manual
Page 3
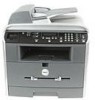
... : 1 Automatic Document Load the document for copying, scanning, or sending faxes. Understanding the Multi-Function Printer 1 12 14 13 2 3 4 11 10 56 9 8 7 # Use the: When you use support.dell.com or contact technical support. The Express Service Code is not available in all countries. 5 Manual Feeder...optional Tray 2. 8 Front Cover Access the toner cartridge. 9 Front Output Tray Hold paper as it exits the front of the multi-function printer. 10 ADF Output Tray Hold the document as it exit the ADF. 11 Scanner Glass Place a document on the scanner glass. Feeder (ADF...
... : 1 Automatic Document Load the document for copying, scanning, or sending faxes. Understanding the Multi-Function Printer 1 12 14 13 2 3 4 11 10 56 9 8 7 # Use the: When you use support.dell.com or contact technical support. The Express Service Code is not available in all countries. 5 Manual Feeder...optional Tray 2. 8 Front Cover Access the toner cartridge. 9 Front Output Tray Hold paper as it exits the front of the multi-function printer. 10 ADF Output Tray Hold the document as it exit the ADF. 11 Scanner Glass Place a document on the scanner glass. Feeder (ADF...

Owner's Manual
Page 4
Connector 21 USB Cable Connector Insert the USB cable. 22 Network Port Connect the multi-function printer to the multi-function printer (Optional). iv Power Cord Connector 18 Phone Connector Connect additional devices, such as a telephone or answering machine, to the network port. 23 Control... Slot Hold paper as it exits at the rear of the multi-function printer. 17 Power Switch and AC Supply power to your multi-function printer. 20 Optional Tray 2 Cable Connect the optional Tray 2 to the multi-function printer. # Use the: When you want to: 13 Document Input Tray Load...
Connector 21 USB Cable Connector Insert the USB cable. 22 Network Port Connect the multi-function printer to the multi-function printer (Optional). iv Power Cord Connector 18 Phone Connector Connect additional devices, such as a telephone or answering machine, to the network port. 23 Control... Slot Hold paper as it exits at the rear of the multi-function printer. 17 Power Switch and AC Supply power to your multi-function printer. 20 Optional Tray 2 Cable Connect the optional Tray 2 to the multi-function printer. # Use the: When you want to: 13 Document Input Tray Load...

Owner's Manual
Page 5
... the problem. Trademarks used in this document to refer to either potential damage to change without the written permission of Dell Inc. Microsoft and Windows are registered trademarks of their products. NOTICE: A NOTICE indicates either the entities claiming the ...Other trademarks and trade names may be used in this text: Dell, DELL logo, Dell ScanCenter and Dell Toner Management System are trademarks of ScanSoft, Inc. Adobe and PhotoShop are registered trademarks of your multi-function printer. CAUTION: A CAUTION indicates a potential for property damage, personal ...
... the problem. Trademarks used in this document to refer to either potential damage to change without the written permission of Dell Inc. Microsoft and Windows are registered trademarks of their products. NOTICE: A NOTICE indicates either the entities claiming the ...Other trademarks and trade names may be used in this text: Dell, DELL logo, Dell ScanCenter and Dell Toner Management System are trademarks of ScanSoft, Inc. Adobe and PhotoShop are registered trademarks of your multi-function printer. CAUTION: A CAUTION indicates a potential for property damage, personal ...

Owner's Manual
Page 6
... CAUTION: SAFETY INFORMATION 1 1 Preparing Your Multi-Function Printer Unlocking the Scanner 4 Using the Operator Panel 5 Copy Keys 5 Common Keys 6 Changing the Display Language 7 Set Up Faxing 7 Setting the Machine ID 7 Using the Number ... 11 Attach Cables 11 Print and Check the Network Set-Up Page 12 Run the Installation Software 13 2 Understanding the Software Software Overview 16 Installing Dell Software For Local Printing 17 Windows XP 17 Windows 2000 18 Windows 98SE 18 Windows Me 19 vi Contents
... CAUTION: SAFETY INFORMATION 1 1 Preparing Your Multi-Function Printer Unlocking the Scanner 4 Using the Operator Panel 5 Copy Keys 5 Common Keys 6 Changing the Display Language 7 Set Up Faxing 7 Setting the Machine ID 7 Using the Number ... 11 Attach Cables 11 Print and Check the Network Set-Up Page 12 Run the Installation Software 13 2 Understanding the Software Software Overview 16 Installing Dell Software For Local Printing 17 Windows XP 17 Windows 2000 18 Windows 98SE 18 Windows Me 19 vi Contents

Owner's Manual
Page 7
Assigning an IP Address 20 Installing Dell Software For Network Printing 20 Uninstalling Software 22 3 Loading Print Media Print Media Guidelines 24 Loading Paper and Transparencies 27 Loading Paper Into the Paper ... 35 Setting the Paper Type 35 Placing Documents on the Scanner Glass 36 Loading Documents Into the ADF 37 4 Using Your Multi-Function Printer Printing 40 Accessing Printer Properties 40 Copying 41 Making Copies 41 Using Copy Features With the Button 41 Copy Menu Options 43 Scanning 44 Scanning from Operator Panel...
Assigning an IP Address 20 Installing Dell Software For Network Printing 20 Uninstalling Software 22 3 Loading Print Media Print Media Guidelines 24 Loading Paper and Transparencies 27 Loading Paper Into the Paper ... 35 Setting the Paper Type 35 Placing Documents on the Scanner Glass 36 Loading Documents Into the ADF 37 4 Using Your Multi-Function Printer Printing 40 Accessing Printer Properties 40 Copying 41 Making Copies 41 Using Copy Features With the Button 41 Copy Menu Options 43 Scanning 44 Scanning from Operator Panel...

Owner's Manual
Page 8
... Machine 52 Using a Computer Modem 53 5 Maintenance Replacing the ADF Rubber Pad 56 Ordering Supplies 58 Replacing the Toner Cartridge 59 Cleaning Your Multi-Function Printer 61 Cleaning the Exterior 61 Cleaning the Interior 62 Cleaning the scanner 63 Cleaning the Drum 64 6 Troubleshooting Clearing Jams in the ADF 66 Clearing...
... Machine 52 Using a Computer Modem 53 5 Maintenance Replacing the ADF Rubber Pad 56 Ordering Supplies 58 Replacing the Toner Cartridge 59 Cleaning Your Multi-Function Printer 61 Cleaning the Exterior 61 Cleaning the Interior 62 Cleaning the scanner 63 Cleaning the Drum 64 6 Troubleshooting Clearing Jams in the ADF 66 Clearing...

Owner's Manual
Page 9
... Only 119 Contents ix Only 104 Total Satisfaction" Return Policy (U.S. 7 Installing Options Precautions When Installing Printer Options 76 Installing Printer Memory 76 Removing the Memory 79 Installing an Optional Tray 2 79 8 Contacting Dell Technical Assistance 84 Automated Order-Status Service 85 Contacting Dell 85 9 Appendix Limited Warranties and Return Policy 104 Limited Warranty for...
... Only 119 Contents ix Only 104 Total Satisfaction" Return Policy (U.S. 7 Installing Options Precautions When Installing Printer Options 76 Installing Printer Memory 76 Removing the Memory 79 Installing an Optional Tray 2 79 8 Contacting Dell Technical Assistance 84 Automated Order-Status Service 85 Contacting Dell 85 9 Appendix Limited Warranties and Return Policy 104 Limited Warranty for...

Owner's Manual
Page 14
To scan or copy a document, the switch must be unlocked. 4 Pr eparing Yo ur Multi-Fu nction Pr inter www.dell.com/supplies | support.dell.com Unlocking the Scanner 1 Remove the label completely from the scanner module by gently pulling it for a long period of time, move the switch BACKWARD to the unlock position. The scan unlock switch automatically moves FORWARD to the lock position, as shown. NOTE: When you are moving the multi-function printer or do not intend to use it .
To scan or copy a document, the switch must be unlocked. 4 Pr eparing Yo ur Multi-Fu nction Pr inter www.dell.com/supplies | support.dell.com Unlocking the Scanner 1 Remove the label completely from the scanner module by gently pulling it for a long period of time, move the switch BACKWARD to the unlock position. The scan unlock switch automatically moves FORWARD to the lock position, as shown. NOTE: When you are moving the multi-function printer or do not intend to use it .

Owner's Manual
Page 15
... done so, follow the steps on a sheet), and Poster copying. Optimize the copy quality for the current copy job. Start a copy. Use the multi-function printer operator panel to complete the hardware installation.
... done so, follow the steps on a sheet), and Poster copying. Optimize the copy quality for the current copy job. Start a copy. Use the multi-function printer operator panel to complete the hardware installation.

Owner's Manual
Page 16
... ur Multi-Fu nction Pr inter To: Access a list of the scanned document for automatic speed dialing. You must create the scan list using the Dell software (Printer Settings Utility) provided with your PC software programs that an image can be scanned to print a Phonebook list. Send a fax to Standby mode. Engage...
... ur Multi-Fu nction Pr inter To: Access a list of the scanned document for automatic speed dialing. You must create the scan list using the Dell software (Printer Settings Utility) provided with your PC software programs that an image can be scanned to print a Phonebook list. Send a fax to Standby mode. Engage...

Owner's Manual
Page 17
... display. 2 Press the scroll button ( or ) until "Language" appears on the bottom line of the display. 4 Press the scroll button ( or ) until "Printer Setup" appears on the top line of the display. The first available menu item, "Machine ID" displays on any fax you send. The display asks... you are English, French, German, Italian, and Spanish. 5 Press to save the selection. 6 To return to enter the ID. 6 Enter your multi-function printer. 1 Press until the language you to Standby mode, press . Pr eparing Yo ur Multi-Function Pr inter 7 NOTE: If you to enter the fax number...
... display. 2 Press the scroll button ( or ) until "Language" appears on the bottom line of the display. 4 Press the scroll button ( or ) until "Printer Setup" appears on the top line of the display. The first available menu item, "Machine ID" displays on any fax you send. The display asks... you are English, French, German, Italian, and Spanish. 5 Press to save the selection. 6 To return to enter the ID. 6 Enter your multi-function printer. 1 Press until the language you to Standby mode, press . Pr eparing Yo ur Multi-Function Pr inter 7 NOTE: If you to enter the fax number...

Owner's Manual
Page 19
... number to allow you to change it. NOTE: It may be necessary to the next step if a wrong number is correct. NOTE: The multi-function printer beeps and does not allow you to proceed to reset the correct time and date if loss of the display. Pr eparing Yo ur Multi... scroll button ( or ) to move the cursor under the digit you want to correct and enter a new number. 4 To set a 24-hour format, press until "Printer Setup" appears on the top line of the display. 2 Press the scroll button ( or ) to display "Date & Time" on the bottom line of power to...
... number to allow you to change it. NOTE: It may be necessary to the next step if a wrong number is correct. NOTE: The multi-function printer beeps and does not allow you to proceed to reset the correct time and date if loss of the display. Pr eparing Yo ur Multi... scroll button ( or ) to move the cursor under the digit you want to correct and enter a new number. 4 To set a 24-hour format, press until "Printer Setup" appears on the top line of the display. 2 Press the scroll button ( or ) to display "Date & Time" on the bottom line of power to...

Owner's Manual
Page 21
... adjusts for the network speed. Set Up Networking A print server is powered off and unplugged. 2 Connect one end of the multi-function printer. OR If you do not want to assign a name, skip this step. 10 Press when the name appears correctly or without entering a ... all client print jobs. NOTE: For additional network set-up configurations, see your multi-function printer in a small workgroup environment and want to a print server. Attach Cables 1 Make sure the multi-function printer is any designated computer that centrally manages all print jobs on the back of a standard category...
... adjusts for the network speed. Set Up Networking A print server is powered off and unplugged. 2 Connect one end of the multi-function printer. OR If you do not want to assign a name, skip this step. 10 Press when the name appears correctly or without entering a ... all client print jobs. NOTE: For additional network set-up configurations, see your multi-function printer in a small workgroup environment and want to a print server. Attach Cables 1 Make sure the multi-function printer is any designated computer that centrally manages all print jobs on the back of a standard category...

Owner's Manual
Page 22
... cable into a properly grounded outlet. 4 Power on the multi-function printer. If Status is firmly plugged into the back of the multi-function printer. - www.dell.com/supplies | support.dell.com 3 Connect one end of the multi-function printer power cord into the socket at the back of the multi-function... printer and the other end into another wall outlet. 3 Under the "TCP...
... cable into a properly grounded outlet. 4 Power on the multi-function printer. If Status is firmly plugged into the back of the multi-function printer. - www.dell.com/supplies | support.dell.com 3 Connect one end of the multi-function printer power cord into the socket at the back of the multi-function... printer and the other end into another wall outlet. 3 Under the "TCP...

Owner's Manual
Page 23
...Drivers and Utilities CD: click Start → Run and browse your CD drive (for example, type D:\ where D is the drive letter of your multi-function printer doesn't respond, or if the IP address is not what you are finished adding remote computers, click Next. e Select your computer. b Launch the Drivers ... and password, and then click OK. • Manually enter or browse for example, 192.168.0.11): ping xxx.xxx.xxx.xxx If the multi-function printer is the drive letter of your CD). • Select SETUP.EXE, and then click OK. 2 When the Drivers and Utilities CD screen appears, click...
...Drivers and Utilities CD: click Start → Run and browse your CD drive (for example, type D:\ where D is the drive letter of your multi-function printer doesn't respond, or if the IP address is not what you are finished adding remote computers, click Next. e Select your computer. b Launch the Drivers ... and password, and then click OK. • Manually enter or browse for example, 192.168.0.11): ping xxx.xxx.xxx.xxx If the multi-function printer is the drive letter of your CD). • Select SETUP.EXE, and then click OK. 2 When the Drivers and Utilities CD screen appears, click...

Owner's Manual
Page 24
...Fu nction Pr inter Use the Dell Printer Configuration Web Tool, also known as the Printer Embedded Web Server, to send you an email when the printer needs supplies or intervention. To launch the Dell Printer Configuration Web Tool, type the network printer IP address in the email ...your User's Guide for client computers, select I am setting up the Dell Printer Configuration Web Tool to monitor the status of the listed printer names, select the printer from your Web browser, and the printer configuration appears on a server that users will provide printing services for more ...
...Fu nction Pr inter Use the Dell Printer Configuration Web Tool, also known as the Printer Embedded Web Server, to send you an email when the printer needs supplies or intervention. To launch the Dell Printer Configuration Web Tool, type the network printer IP address in the email ...your User's Guide for client computers, select I am setting up the Dell Printer Configuration Web Tool to monitor the status of the listed printer names, select the printer from your Web browser, and the printer configuration appears on a server that users will provide printing services for more ...

Owner's Manual
Page 26
.... PaperPort provides improved scanning features and supports annotations on the operator panel. • Dell Toner Management SystemTM- The Drivers and Utilities CD contains the following: • Dell Printer Drivers- For information about using your scanned images into a variety of the job when... remaining and allows you to order replacement toner cartridges. • PaperPort- The Dell Toner Management SystemTM window also displays the level of your multi-function printer. • User's Guide - This is automatically launched when you must install the ...
.... PaperPort provides improved scanning features and supports annotations on the operator panel. • Dell Toner Management SystemTM- The Drivers and Utilities CD contains the following: • Dell Printer Drivers- For information about using your scanned images into a variety of the job when... remaining and allows you to order replacement toner cartridges. • PaperPort- The Dell Toner Management SystemTM window also displays the level of your multi-function printer. • User's Guide - This is automatically launched when you must install the ...

Owner's Manual
Page 27
... Dell Software For Local Printing A local printer is your CD drive. 4 Click Next. Windows XP: 1 Make sure that appears, select Recommended, click Next, select CD-ROM Drives, and then click Next through the wizard screens. 3 The scanner driver is automatically loaded first from D:\1600n\...Scan\WINXP2K\p3scan.inf, where "D" is a printer attached to your computer and powered on the main screen. 4 Select Personal Installation. 5 Select Typical Installation to the...
... Dell Software For Local Printing A local printer is your CD drive. 4 Click Next. Windows XP: 1 Make sure that appears, select Recommended, click Next, select CD-ROM Drives, and then click Next through the wizard screens. 3 The scanner driver is automatically loaded first from D:\1600n\...Scan\WINXP2K\p3scan.inf, where "D" is a printer attached to your computer and powered on the main screen. 4 Select Personal Installation. 5 Select Typical Installation to the...

Owner's Manual
Page 28
... computer and powered on . 2 When the hardware wizard screen appears, insert the Drivers and Utilities CD and click Next. The printer driver is automatically loaded from D:\1600n\Printer\GDI\WinXP\delr1.inf, where "D" is your computer and powered on . 2 When the hardware wizard screen appears, insert the ...The scanner driver is automatically loaded first from the Windows taskbar. 9 Click Next. NOTE: For each wizard that the multi-function printer is selected. 18 Understanding the Software www.dell.com/supplies | support.dell.com 5 Click Finish, and a second hardware wizard appears.
... computer and powered on . 2 When the hardware wizard screen appears, insert the Drivers and Utilities CD and click Next. The printer driver is automatically loaded from D:\1600n\Printer\GDI\WinXP\delr1.inf, where "D" is your computer and powered on . 2 When the hardware wizard screen appears, insert the ...The scanner driver is automatically loaded first from the Windows taskbar. 9 Click Next. NOTE: For each wizard that the multi-function printer is selected. 18 Understanding the Software www.dell.com/supplies | support.dell.com 5 Click Finish, and a second hardware wizard appears.


