

Setup Guide
Page 36
... the documentation for assistance. CPU fan has failed. Possible hard disk drive failure during HDD POST see "Contacting Dell" on page 50 for assistance. CMOS checksum error - Replace the battery. Replace the CPU fan. See the Service Manual on the Dell Support website at checkpoint [nnnn]. Hard-disk drive read failure - Keyboard failure - Previous attempts at booting this...
... the documentation for assistance. CPU fan has failed. Possible hard disk drive failure during HDD POST see "Contacting Dell" on page 50 for assistance. CMOS checksum error - Replace the battery. Replace the CPU fan. See the Service Manual on the Dell Support website at checkpoint [nnnn]. Hard-disk drive read failure - Keyboard failure - Previous attempts at booting this...
Setup Guide
Page 54
... installed on your computer. 52 Check your warranty and return policies before working inside your hard drive. the Service Manual on the Dell™ Support website at support.dell.com. upgrade your operating system. reinstall or replace a worn or defective part. INSPIRON Finding More Information and Resources If you need to: reinstall your computer with new...
... installed on your computer. 52 Check your warranty and return policies before working inside your hard drive. the Service Manual on the Dell™ Support website at support.dell.com. upgrade your operating system. reinstall or replace a worn or defective part. INSPIRON Finding More Information and Resources If you need to: reinstall your computer with new...
Service Manual
Page 11
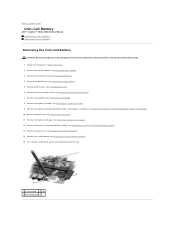
...drive (see Removing the Keyboard). 8. Remove all memory module (see Removing the System Board Assembly). 15. Remove the center control cover (see Removing the Internal Card With Bluetooth® Wireless Technology). 10. Use a plastic scribe to Contents Page Coin-Cell Battery Dell™ Inspiron™ 1525/1526 Service Manual Removing the Coin-Cell Battery Replacing... Removing the Center Control Cover). 7. Remove the ExpressCard cage (see Removing the Hard Drive). 4. Remove the hard drive (see Removing the ExpressCard Cage). 12. Remove the processor thermal-cooling assembly (see...
...drive (see Removing the Keyboard). 8. Remove all memory module (see Removing the System Board Assembly). 15. Remove the center control cover (see Removing the Internal Card With Bluetooth® Wireless Technology). 10. Use a plastic scribe to Contents Page Coin-Cell Battery Dell™ Inspiron™ 1525/1526 Service Manual Removing the Coin-Cell Battery Replacing... Removing the Center Control Cover). 7. Remove the ExpressCard cage (see Removing the Hard Drive). 4. Remove the hard drive (see Removing the ExpressCard Cage). 12. Remove the processor thermal-cooling assembly (see...
Service Manual
Page 26
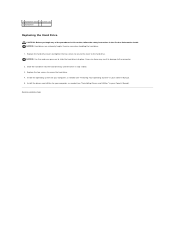
Slide the hard drive into place. Back to slide the hard drive into the hard drive bay until the drive is fully seated. 3. Exercise care when handling the hard drive. 1. 1 hard drive cover 2 screws (2) 3 hard drive Replacing the Hard Drive CAUTION: Before you begin any of the procedures in this section, follow the safety instructions in damage to the hard drive. NOTICE: Use firm and even pressure to Contents...
Slide the hard drive into place. Back to slide the hard drive into the hard drive bay until the drive is fully seated. 3. Exercise care when handling the hard drive. 1. 1 hard drive cover 2 screws (2) 3 hard drive Replacing the Hard Drive CAUTION: Before you begin any of the procedures in this section, follow the safety instructions in damage to the hard drive. NOTICE: Use firm and even pressure to Contents...
Service Manual
Page 29
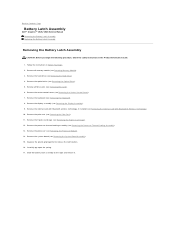
...Dell™ Inspiron™ 1525/1526 Service Manual Removing the Battery Latch Assembly Replacing the Battery Latch Assembly Removing the Battery Latch Assembly CAUTION: Before you begin the following procedure, follow the safety instructions in Before You Begin. 2. Follow the instructions in the Product Information Guide. 1. Remove the hard drive... (see Removing the Internal Card With Bluetooth® Wireless Technology). 10. Remove the internal card with Bluetooth wireless technology, if installed (see Removing the Hard Drive). 4. Remove the ExpressCard...
...Dell™ Inspiron™ 1525/1526 Service Manual Removing the Battery Latch Assembly Replacing the Battery Latch Assembly Removing the Battery Latch Assembly CAUTION: Before you begin the following procedure, follow the safety instructions in Before You Begin. 2. Follow the instructions in the Product Information Guide. 1. Remove the hard drive... (see Removing the Internal Card With Bluetooth® Wireless Technology). 10. Remove the internal card with Bluetooth wireless technology, if installed (see Removing the Hard Drive). 4. Remove the ExpressCard...
Service Manual
Page 46
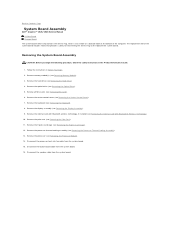
...the ExpressCard cage (see Removing the Hard Drive). 4. Back to the replacement system board. Disconnect the button board cable from the system board. Remove the hard drive (see Removing the ExpressCard Cage). 12.... Remove the display assembly (see Removing the Palm Rest). 11. Remove the palm rest (see Removing the Display Assembly). 9. The replacement kit for the system board includes media that provides a utility for transferring the Service Tag to Contents Page System Board Assembly Dell™ Inspiron™ 1525...
...the ExpressCard cage (see Removing the Hard Drive). 4. Back to the replacement system board. Disconnect the button board cable from the system board. Remove the hard drive (see Removing the ExpressCard Cage). 12.... Remove the display assembly (see Removing the Palm Rest). 11. Remove the palm rest (see Removing the Display Assembly). 9. The replacement kit for the system board includes media that provides a utility for transferring the Service Tag to Contents Page System Board Assembly Dell™ Inspiron™ 1525...
Service Manual
Page 48
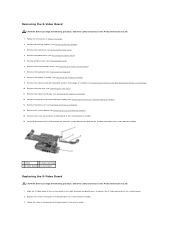
...see Removing the Palm Rest). 11. Align the S-Video board to the system board. 2. Remove all memory modules (see Removing the Hard Drive). 4. Remove the screw securing the S-Video board to the system board assembly. 3. Remove the display assembly (see Removing the ExpressCard ... Module). 14. Remove the hard drive (see Removing Memory Module). 3. Carefully disconnect the S-Video connector from the system board and seperate the S-Video board from the system board assembly. 1 screw 2 S-Video connector 3 S-Video board 4 system board Replacing the S-Video Board CAUTION: ...
...see Removing the Palm Rest). 11. Align the S-Video board to the system board. 2. Remove all memory modules (see Removing the Hard Drive). 4. Remove the screw securing the S-Video board to the system board assembly. 3. Remove the display assembly (see Removing the ExpressCard ... Module). 14. Remove the hard drive (see Removing Memory Module). 3. Carefully disconnect the S-Video connector from the system board and seperate the S-Video board from the system board assembly. 1 screw 2 S-Video connector 3 S-Video board 4 system board Replacing the S-Video Board CAUTION: ...


