
Setup Guide
Page 40
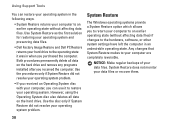
... system and preserving data files. • Dell Factory Image Restore and Dell PC Restore returns your hard drive to the operating state it to your operating system. However, using the Operating System disc also deletes all data on the hard drive. Both procedures permanently delete all data on the hard drive and remove any programs installed after you received...
... system and preserving data files. • Dell Factory Image Restore and Dell PC Restore returns your hard drive to the operating state it to your operating system. However, using the Operating System disc also deletes all data on the hard drive. Both procedures permanently delete all data on the hard drive and remove any programs installed after you received...
Setup Guide
Page 42
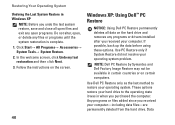
Windows XP: Using Dell™ PC Restore NOTICE: Using Dell PC Restore permanently deletes all data on the hard drive and removes any programs or drivers installed after you undo the last system restore, save and close all open files and exit any open programs. Do not ...→ System Tools→ System Restore. 2. If possible, back up the data before using these options. These options restore your hard drive to restore your operating system problem. Data 40 Use Dell PC Restore only as the last method to the operating state it was in certain countries or on the screen. In...
Windows XP: Using Dell™ PC Restore NOTICE: Using Dell PC Restore permanently deletes all data on the hard drive and removes any programs or drivers installed after you undo the last system restore, save and close all open files and exit any open programs. Do not ...→ System Tools→ System Restore. 2. If possible, back up the data before using these options. These options restore your hard drive to restore your operating system problem. Data 40 Use Dell PC Restore only as the last method to the operating state it was in certain countries or on the screen. In...
Setup Guide
Page 44
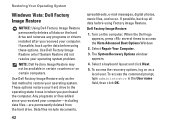
... files include documents, spreadsheets, e-mail messages, digital photos, music files, and so on the hard drive and removes any programs or drivers installed after you received your computer-including data files-are permanently deleted from the hard drive. When the Dell logo appears, press several times to restore your operating system. If possible, back up the...
... files include documents, spreadsheets, e-mail messages, digital photos, music files, and so on the hard drive and removes any programs or drivers installed after you received your computer-including data files-are permanently deleted from the hard drive. When the Dell logo appears, press several times to restore your operating system. If possible, back up the...
Service Manual
Page 4
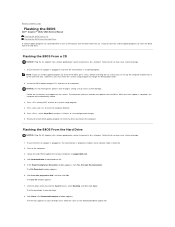
.... Press during POST to download the file. 5. The Save In window appears. 7. Back to Contents Page Flashing the BIOS Dell™ Inspiron™ 1525/1526 Service Manual Flashing the BIOS From a CD Flashing the BIOS From the Hard Drive If a BIOS-update program CD is provided with a new system board, flash the BIOS from the... in and that the AC adapter is plugged in, the main battery is properly installed, and a network cable is complete, the computer will automatically reboot. 3. Remove the flash BIOS update program CD from the CD.
.... Press during POST to download the file. 5. The Save In window appears. 7. Back to Contents Page Flashing the BIOS Dell™ Inspiron™ 1525/1526 Service Manual Flashing the BIOS From a CD Flashing the BIOS From the Hard Drive If a BIOS-update program CD is provided with a new system board, flash the BIOS from the... in and that the AC adapter is plugged in, the main battery is properly installed, and a network cable is complete, the computer will automatically reboot. 3. Remove the flash BIOS update program CD from the CD.
Service Manual
Page 11
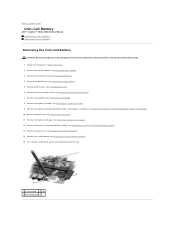
... the instructions in the Product Information Guide. 1. Remove the optical drive (see Removing the Display Assembly). 9. Remove the display assembly (see Removing the Optical Drive). 5. Use a plastic scribe to Contents Page Coin-Cell Battery Dell™ Inspiron™ 1525/1526 Service Manual Removing the Coin-Cell Battery Replacing the Coin-Cell Battery Removing the Coin-Cell Battery CAUTION: Before you begin...
... the instructions in the Product Information Guide. 1. Remove the optical drive (see Removing the Display Assembly). 9. Remove the display assembly (see Removing the Optical Drive). 5. Use a plastic scribe to Contents Page Coin-Cell Battery Dell™ Inspiron™ 1525/1526 Service Manual Removing the Coin-Cell Battery Replacing the Coin-Cell Battery Removing the Coin-Cell Battery CAUTION: Before you begin...

Service Manual
Page 25
... hard drive. Do not remove the hard drive while the computer is on or in Before You Begin. 2. Removing the Hard Drive 1. Remove the two screws (one from each side of the hard drive cover), then pull to Contents Page Hard Drive Dell™ Inspiron™ 1525/1526 Service Manual NOTE: Dell does not guarantee compatibility or provide support for hard drives obtained from the hard drive. CAUTION: Before you remove the hard drive...
... hard drive. Do not remove the hard drive while the computer is on or in Before You Begin. 2. Removing the Hard Drive 1. Remove the two screws (one from each side of the hard drive cover), then pull to Contents Page Hard Drive Dell™ Inspiron™ 1525/1526 Service Manual NOTE: Dell does not guarantee compatibility or provide support for hard drives obtained from the hard drive. CAUTION: Before you remove the hard drive...
Service Manual
Page 29
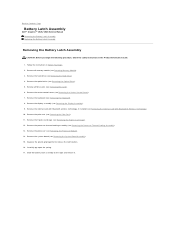
Remove the optical drive (see Removing Mini-Card). 6. Remove all memory module (see Removing Memory Module). 3. Remove the ExpressCard cage (see Removing the Processor Thermal-Cooling Assembly). 13. Remove the processor thermal-cooling assembly (see Removing the ExpressCard Cage). 12. Back to Contents Page Battery Latch Assembly Dell™ Inspiron™ 1525/1526 Service Manual Removing the Battery Latch Assembly Replacing the Battery Latch...
Remove the optical drive (see Removing Mini-Card). 6. Remove all memory module (see Removing Memory Module). 3. Remove the ExpressCard cage (see Removing the Processor Thermal-Cooling Assembly). 13. Remove the processor thermal-cooling assembly (see Removing the ExpressCard Cage). 12. Back to Contents Page Battery Latch Assembly Dell™ Inspiron™ 1525/1526 Service Manual Removing the Battery Latch Assembly Replacing the Battery Latch...
Service Manual
Page 46
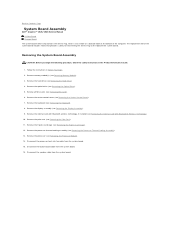
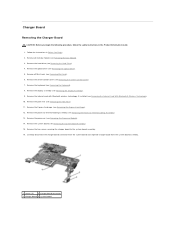
... to Contents Page System Board Assembly Dell™ Inspiron™ 1525/1526 Service Manual S-Video Board Charger Board The system board's BIOS chip contains the Service Tag, which is also visible on a barcode label on the bottom of the computer. Remove the center control cover (see Removing Memory Module). 3. Removing the System Board Assembly CAUTION: Before...
... to Contents Page System Board Assembly Dell™ Inspiron™ 1525/1526 Service Manual S-Video Board Charger Board The system board's BIOS chip contains the Service Tag, which is also visible on a barcode label on the bottom of the computer. Remove the center control cover (see Removing Memory Module). 3. Removing the System Board Assembly CAUTION: Before...
Service Manual
Page 48
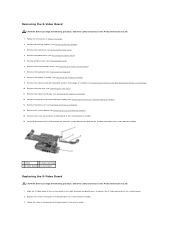
...). 6. Replace the screw securing the S-Video board to the system board assembly. 16. Remove all memory modules (see Removing the Optical Drive). 5. Remove the ExpressCard cage (see Removing the Hard Drive). 4. Remove the screw securing the S-Video board to the system board assembly. 3. Remove the hard drive (see Removing the ExpressCard Cage). 12. Follow the instructions in the right direction and gently...
...). 6. Replace the screw securing the S-Video board to the system board assembly. 16. Remove all memory modules (see Removing the Optical Drive). 5. Remove the ExpressCard cage (see Removing the Hard Drive). 4. Remove the screw securing the S-Video board to the system board assembly. 3. Remove the hard drive (see Removing the ExpressCard Cage). 12. Follow the instructions in the right direction and gently...
Service Manual
Page 49
... Removing the Optical Drive). 5. Remove the processor thermal-cooling assembly (see Removing the Palm Rest). 11. Remove the palm rest (see Removing the Processor Thermal-Cooling Assembly). 13. Remove the ExpressCard cage (see Removing the Processor Module). 14. Remove the processor (see Removing the ExpressCard Cage). 12. Remove the internal card with Bluetooth wireless technology, if installed (see Removing the Hard Drive). 4. Remove the hard drive (see Removing...
... Removing the Optical Drive). 5. Remove the processor thermal-cooling assembly (see Removing the Palm Rest). 11. Remove the palm rest (see Removing the Processor Thermal-Cooling Assembly). 13. Remove the ExpressCard cage (see Removing the Processor Module). 14. Remove the processor (see Removing the ExpressCard Cage). 12. Remove the internal card with Bluetooth wireless technology, if installed (see Removing the Hard Drive). 4. Remove the hard drive (see Removing...


