Owner Manual
Page 2
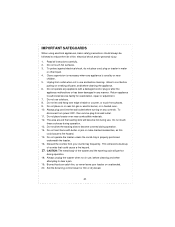
... your crumb tray frequently. CAUTION: The metal body of fire, electrical shock and/or personal injury. 1. Read all instructions carefully. 2. To protect against electrical shock, do not place cord, plug or toaster in heated oven. 10. To disconnect turn power OFF, then remove plug from your toaster on any appliance is properly positioned underneath the toaster. 16. Always plug cord into the wall outlet before cleaning the...
... your crumb tray frequently. CAUTION: The metal body of fire, electrical shock and/or personal injury. 1. Read all instructions carefully. 2. To protect against electrical shock, do not place cord, plug or toaster in heated oven. 10. To disconnect turn power OFF, then remove plug from your toaster on any appliance is properly positioned underneath the toaster. 16. Always plug cord into the wall outlet before cleaning the...
Owner Manual
Page 3
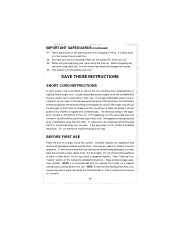
... should be pulled on the warming rack with a topping or filling. If a longer detachable power cord or extension cord is used if care is for detailed instructions.) Keep all new heating elements, your toaster may be used (1) the marked electrical rating of the extension cord should be at least as great as the electrical rating of this plug will melt and could catch...
... should be pulled on the warming rack with a topping or filling. If a longer detachable power cord or extension cord is used if care is for detailed instructions.) Keep all new heating elements, your toaster may be used (1) the marked electrical rating of the extension cord should be at least as great as the electrical rating of this plug will melt and could catch...
Owner Manual
Page 4
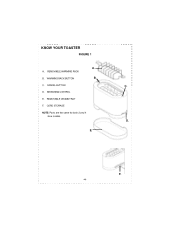
KNOW YOUR TOASTER FIGURE 1 A. REMOVABLE WARMING RACK B. D. REMOVABLE CRUMB TRAY F. CANCEL BUTTON C. F. -4- BROWNING CONTROL E. CORD STORAGE NOTE: Parts are the same for both 2 and 4 slice models. E. WARMING RACK BUTTON B. C. A. D.
KNOW YOUR TOASTER FIGURE 1 A. REMOVABLE WARMING RACK B. D. REMOVABLE CRUMB TRAY F. CANCEL BUTTON C. F. -4- BROWNING CONTROL E. CORD STORAGE NOTE: Parts are the same for both 2 and 4 slice models. E. WARMING RACK BUTTON B. C. A. D.

Owner Manual
Page 5
... convenient cleaning. 6. The removable warming rack and crumb tray allow for precise, double-sided toasting. 3. SEAMLESS BRUSHED ALUMINUM BODY - DETACHABLE PARTS - The carriage will automatically lift or lower your exact preference. 4. ELECTRONIC BROWNING CONTROL- Durable and stylish, it beautifully complements any kitchen decor. 9. ILLUMINATED CANCEL AND WARMING RACK FUNCTIONS - CORD STORAGE - Keeps power cord out of harm's way when toaster is...
... convenient cleaning. 6. The removable warming rack and crumb tray allow for precise, double-sided toasting. 3. SEAMLESS BRUSHED ALUMINUM BODY - DETACHABLE PARTS - The carriage will automatically lift or lower your exact preference. 4. ELECTRONIC BROWNING CONTROL- Durable and stylish, it beautifully complements any kitchen decor. 9. ILLUMINATED CANCEL AND WARMING RACK FUNCTIONS - CORD STORAGE - Keeps power cord out of harm's way when toaster is...
Owner Manual
Page 6
... are too large for thin or dry bread. Place the toaster on . Select a lower setting for light browning, for toasting one side to the other utensils inside the toaster. Do not use the toaster when it on a flat, level surface away from the removable crumb tray. 5. NOTE: If you wait a minimum of an even thickness, freshness and size. 11. SUGGESTIONS: 1. Dry/stale bread toasts more...
... are too large for thin or dry bread. Place the toaster on . Select a lower setting for light browning, for toasting one side to the other utensils inside the toaster. Do not use the toaster when it on a flat, level surface away from the removable crumb tray. 5. NOTE: If you wait a minimum of an even thickness, freshness and size. 11. SUGGESTIONS: 1. Dry/stale bread toasts more...
Owner Manual
Page 7
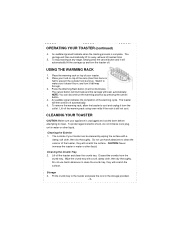
...'t burn, and turn the toaster off automatically. 5. USING THE WARMING RACK 1. Do not use harsh abrasives to clean the exterior of your appliance is complete. To stop toasting at any stage, simply press the cancel button and it half-way through. 3. Cleaning the Crumb Tray 2. OPERATING YOUR TOASTER (continued) 4. The toaster will automatically lift the carriage up and turn it will then switch off . Cleaning the Exterior...
...'t burn, and turn the toaster off automatically. 5. USING THE WARMING RACK 1. Do not use harsh abrasives to clean the exterior of your appliance is complete. To stop toasting at any stage, simply press the cancel button and it half-way through. 3. Cleaning the Crumb Tray 2. OPERATING YOUR TOASTER (continued) 4. The toaster will automatically lift the carriage up and turn it will then switch off . Cleaning the Exterior...
Owner Manual
Page 8
... not apply to you. If repairs become necessary, see contact information below: U.S. This limitation does not apply if you get service? This warranty applies to all accessories, spare parts or replacement parts, please contact our parts division at 1-800-865-6330. In the event of a products replacement or return, the unit must be free from state to the Limited Warranty...
... not apply to you. If repairs become necessary, see contact information below: U.S. This limitation does not apply if you get service? This warranty applies to all accessories, spare parts or replacement parts, please contact our parts division at 1-800-865-6330. In the event of a products replacement or return, the unit must be free from state to the Limited Warranty...

