
Quick Installation Guide
Page 1
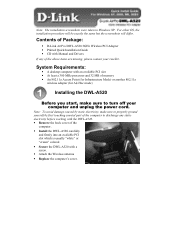
...Link AirPro DWL-A520 5GHz Wireless PCI Adapter • Printed Quick Installation Guide • CD with an available PCI slot • At least a 300 MHz processor and 32 MB of memory • An 802.11a Access Point (for Infrastructure Mode) or another 802.11a wireless adapter (for Ad-Hoc mode) Installing the DWL-A520... the computer to turn off your reseller. System Requirements: • A desktop computer with Manual and Drivers If any static electricity before working with the DWL-A520. • Remove the back cover of the above items are missing, please contact your computer and unplug...
...Link AirPro DWL-A520 5GHz Wireless PCI Adapter • Printed Quick Installation Guide • CD with an available PCI slot • At least a 300 MHz processor and 32 MB of memory • An 802.11a Access Point (for Infrastructure Mode) or another 802.11a wireless adapter (for Ad-Hoc mode) Installing the DWL-A520... the computer to turn off your reseller. System Requirements: • A desktop computer with Manual and Drivers If any static electricity before working with the DWL-A520. • Remove the back cover of the above items are missing, please contact your computer and unplug...

Quick Installation Guide
Page 2
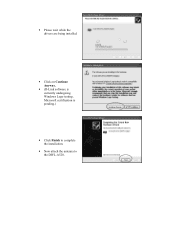
...; Plug in the search • Select Browse to choose the CD-ROM drive. Note: If you have downloaded the drivers from a list or specific location (Advanced) • Click Next Note: If Found New Hardware Wizard does not automatically start, go to Start > Settings > Control Panel > ...-ROM drive. In this location in the power cord and turn on your computer. • The Found New Hardware Wizard screen appears. • Insert the Driver CD into the CD-ROM drive. • Close the Autorun screen and continue with the installation. • Select Install from the web, select the location...
...; Plug in the search • Select Browse to choose the CD-ROM drive. Note: If you have downloaded the drivers from a list or specific location (Advanced) • Click Next Note: If Found New Hardware Wizard does not automatically start, go to Start > Settings > Control Panel > ...-ROM drive. In this location in the power cord and turn on your computer. • The Found New Hardware Wizard screen appears. • Insert the Driver CD into the CD-ROM drive. • Close the Autorun screen and continue with the installation. • Select Install from the web, select the location...
Quick Installation Guide
Page 3
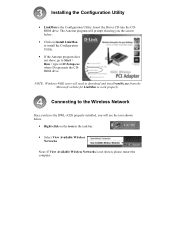
Microsoft certification is currently undergoing Windows Logo testing. • Please wait while the drivers are being installed. • Click on Continue Anyway. • (D-Link software is pending.) • Click Finish to complete the installation. • Now attach the antenna to the DWL-A520.
Microsoft certification is currently undergoing Windows Logo testing. • Please wait while the drivers are being installed. • Click on Continue Anyway. • (D-Link software is pending.) • Click Finish to complete the installation. • Now attach the antenna to the DWL-A520.
Quick Installation Guide
Page 4
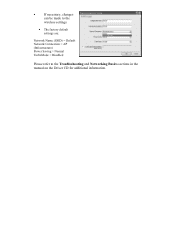
Insert the Driver CD into the CDROM drive. Connecting to the Wireless Network Once you have the DWL-A520 properly installed, you the screen below . • Right-click on Install LinkMon to install the Configuration Utility. • If the Autorun program does not show, ...
Insert the Driver CD into the CDROM drive. Connecting to the Wireless Network Once you have the DWL-A520 properly installed, you the screen below . • Right-click on Install LinkMon to install the Configuration Utility. • If the Autorun program does not show, ...
Quick Installation Guide
Page 7
• If necessary, changes can be made to the wireless settings. • The factory default settings are: Network Name (SSID) = Default Network Connection = AP (Infrastructure) Power Saving = Normal TurboMode = Disabled Please refer to the Troubleshooting and Networking Basics sections in the manual on the Driver CD for additional information.
• If necessary, changes can be made to the wireless settings. • The factory default settings are: Network Name (SSID) = Default Network Connection = AP (Infrastructure) Power Saving = Normal TurboMode = Disabled Please refer to the Troubleshooting and Networking Basics sections in the manual on the Driver CD for additional information.


