
Product Manual
Page 2
ShareCenter Pro DNS-1550-04 User Manual Contents Chapter 1: Introduction 5 1.1 About This Manual 5 1.2 Protocol Support 6 1.3 Hardware Specifications 6 1.4 Client Utility OS Support 7 1.5 Browser Support 7 Chapter 2: Quick Setting-up 9 2.1 Unpacking the ShareCenter® Pro DNS-1550-04 9 2.2 Installing Disk Drives 10 2.3 Connecting the Ethernet cable 13 2.4 Connecting the Power 13 2.5 Shutting Down the ShareCenter Pro DNS-1550-04 13 2.6 Setup Wizard 15 2.7 Replacement of...
ShareCenter Pro DNS-1550-04 User Manual Contents Chapter 1: Introduction 5 1.1 About This Manual 5 1.2 Protocol Support 6 1.3 Hardware Specifications 6 1.4 Client Utility OS Support 7 1.5 Browser Support 7 Chapter 2: Quick Setting-up 9 2.1 Unpacking the ShareCenter® Pro DNS-1550-04 9 2.2 Installing Disk Drives 10 2.3 Connecting the Ethernet cable 13 2.4 Connecting the Power 13 2.5 Shutting Down the ShareCenter Pro DNS-1550-04 13 2.6 Setup Wizard 15 2.7 Replacement of...

Product Manual
Page 4
ShareCenter Pro DNS-1550-04 User Manual 4.2.6 4.2.7 4.2.8 4.2.9 4.2.10 Restoring Backed-up Files 109 Viewing the Backup Event Log 112 Saving the Event Log 113 Clearing the Event Log 115 Setting the Port ... Plug-in Version Numbers 134 4.4.8 Enabling and Disabling Plug-ins 135 4.4.9 Removing Plug-ins 138 4.4.10 Rebooting the ShareCenter® Pro DNS-1550-04.......... 139 4.4.11 Shutting Down the ShareCenter® Pro DNS-1550-04... 141 Chapter 5: Troubleshooting 143 5.1 WebPAM PROe system event log 143 5.2 How to use USB Retrieval to export system information.......... 154 Chapter...
ShareCenter Pro DNS-1550-04 User Manual 4.2.6 4.2.7 4.2.8 4.2.9 4.2.10 Restoring Backed-up Files 109 Viewing the Backup Event Log 112 Saving the Event Log 113 Clearing the Event Log 115 Setting the Port ... Plug-in Version Numbers 134 4.4.8 Enabling and Disabling Plug-ins 135 4.4.9 Removing Plug-ins 138 4.4.10 Rebooting the ShareCenter® Pro DNS-1550-04.......... 139 4.4.11 Shutting Down the ShareCenter® Pro DNS-1550-04... 141 Chapter 5: Troubleshooting 143 5.1 WebPAM PROe system event log 143 5.2 How to use USB Retrieval to export system information.......... 154 Chapter...

Product Manual
Page 5
... avoid them . 5 Important An Important calls attention to an essential step or point required to use , and maintain the ShareCenter® Pro DNS-1550-04. Chapter 1: Introduction 1.1 About This Manual This Product Manual describes how to setup, use : • ShareCenter® NAVI software that you are four levels of notices: Note A Note Provides helpful information...
... avoid them . 5 Important An Important calls attention to an essential step or point required to use , and maintain the ShareCenter® Pro DNS-1550-04. Chapter 1: Introduction 1.1 About This Manual This Product Manual describes how to setup, use : • ShareCenter® NAVI software that you are four levels of notices: Note A Note Provides helpful information...

Product Manual
Page 6
ShareCenter Pro User Manual 1.2 Protocol Support ShareCenter® Pro DNS-1550-04 series supports: • SMB/CIFS for Microsoft Windows • NFS for Linux/Unix • AFP for Mac • FTP • WebDAV for the file transform ... Initiator model 1.3 Hardware Specifications Model Name CPU FLASH SDRAM Smart Fan Gigabit Ethernet USB 2.0 Host port Internal HDD Support Hot Plug # of Bays Power Supply DNS-1550-04(Dual PSU) 1.8 GHz 256 MB 2GB DDRII Yes 2 5 (Front x 1/ Back x 4) 3.5" 3 Gb/s SATAII Yes 4 226W*2 (80 PLUS) Dimension 429(L) x 442(W) x 44(H) mm ( 16.9 x 17.4 x 1.7 inches...
ShareCenter Pro User Manual 1.2 Protocol Support ShareCenter® Pro DNS-1550-04 series supports: • SMB/CIFS for Microsoft Windows • NFS for Linux/Unix • AFP for Mac • FTP • WebDAV for the file transform ... Initiator model 1.3 Hardware Specifications Model Name CPU FLASH SDRAM Smart Fan Gigabit Ethernet USB 2.0 Host port Internal HDD Support Hot Plug # of Bays Power Supply DNS-1550-04(Dual PSU) 1.8 GHz 256 MB 2GB DDRII Yes 2 5 (Front x 1/ Back x 4) 3.5" 3 Gb/s SATAII Yes 4 226W*2 (80 PLUS) Dimension 429(L) x 442(W) x 44(H) mm ( 16.9 x 17.4 x 1.7 inches...

Product Manual
Page 8
Warning The fan contains hazardous moving parts. In a domestic environment this Product may case radio interference in which case the user may be required to the User Manual. Keep fingers away. Please refer to take adequate measures. ShareCenter Pro User Manual Important To configure the ShareCenter® Pro DNS-1550-04, you are advised to install ShareCenter® NAVI. Caution RISK OF EXPLOSION IF BATTERY IS REPLACED BY AN INCORRECT TYPE. VCCI BSMI 8 CE: WARNING This is a class A Product.
Warning The fan contains hazardous moving parts. In a domestic environment this Product may case radio interference in which case the user may be required to the User Manual. Keep fingers away. Please refer to take adequate measures. ShareCenter Pro User Manual Important To configure the ShareCenter® Pro DNS-1550-04, you are advised to install ShareCenter® NAVI. Caution RISK OF EXPLOSION IF BATTERY IS REPLACED BY AN INCORRECT TYPE. VCCI BSMI 8 CE: WARNING This is a class A Product.

Product Manual
Page 10
...drives of disk tray, then you can populate the ShareCenter® Pro DNS-1550-04 series NAS with SATA 1.5 Gb/s or 3.0 Gb/s disk drives. Press the button next to achieve the best data Protection. ShareCenter Pro User Manual 2.2 Installing Disk Drives Note: It is highly recommended to select enterprise... Level HDD to the latch. Your disk drives will become a RAID Volume on the ShareCenter® Pro DNS-1550-04. You can pull the disk tray out from...
...drives of disk tray, then you can populate the ShareCenter® Pro DNS-1550-04 series NAS with SATA 1.5 Gb/s or 3.0 Gb/s disk drives. Press the button next to achieve the best data Protection. ShareCenter Pro User Manual 2.2 Installing Disk Drives Note: It is highly recommended to select enterprise... Level HDD to the latch. Your disk drives will become a RAID Volume on the ShareCenter® Pro DNS-1550-04. You can pull the disk tray out from...

Product Manual
Page 12
Tip: Repeat steps 1 through 4 until all of your disk drives are installed. 12 ShareCenter Pro User Manual 4. Reinstall the drive tray into the ShareCenter® Pro DNS-1550-04 enclosure.
Tip: Repeat steps 1 through 4 until all of your disk drives are installed. 12 ShareCenter Pro User Manual 4. Reinstall the drive tray into the ShareCenter® Pro DNS-1550-04 enclosure.

Product Manual
Page 14
System status LED turns red, and then goes dark System Status LED To restart the ShareCenter® Pro DNS-1550-04, press the power button again. 14 Press and hold the Power button about 5 seconds Power Button Figure 4. ShareCenter Pro User Manual Figure 3.
System status LED turns red, and then goes dark System Status LED To restart the ShareCenter® Pro DNS-1550-04, press the power button again. 14 Press and hold the Power button about 5 seconds Power Button Figure 4. ShareCenter Pro User Manual Figure 3.
Product Manual
Page 15
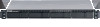
You can quickly set up your DNS-1550-04 system through the WebPAMS PROe Wizard using either the One-Click Setup or using Advance Setup. 2. How to use Automatic Configuration Wizard? ․ Connect to ... PROe The system's Wizard in WebPAM PROe lets you through your browser. (Following steps below to configure automatically by using One-Click Setup, or configure manually by step. On the URL address bar, type in Web-based configuration manager ) ․ 2.1. Select "Admin" and type default password "password" ․ 2.4. Quick Setup by...
You can quickly set up your DNS-1550-04 system through the WebPAMS PROe Wizard using either the One-Click Setup or using Advance Setup. 2. How to use Automatic Configuration Wizard? ․ Connect to ... PROe The system's Wizard in WebPAM PROe lets you through your browser. (Following steps below to configure automatically by using One-Click Setup, or configure manually by step. On the URL address bar, type in Web-based configuration manager ) ․ 2.1. Select "Admin" and type default password "password" ․ 2.4. Quick Setup by...

Product Manual
Page 16
Using Advanced Configuration Wizard 1. ShareCenter Pro User Manual ․ Click NAS tab > Wizard. ․ ․ Click the One-Click Setup button. Click NAS tab > Wizard. 2. The Advanced Configuration box displays: 16 If you ...
Using Advanced Configuration Wizard 1. ShareCenter Pro User Manual ․ Click NAS tab > Wizard. ․ ․ Click the One-Click Setup button. Click NAS tab > Wizard. 2. The Advanced Configuration box displays: 16 If you ...

Product Manual
Page 18
... supply is in use. Step 1. Step 2. Insert the new PSU. Loosen screw (A) on the handle. You may swap either of Power Supply Units (PSU) The DNS-1550-04 supports two hot-swappable PSUs. Select Storage Type: Data Protection or Maximum Capacity, and then click the Next button. 5. Tighten screw (A). 18 Remove the PSU...
... supply is in use. Step 1. Step 2. Insert the new PSU. Loosen screw (A) on the handle. You may swap either of Power Supply Units (PSU) The DNS-1550-04 supports two hot-swappable PSUs. Select Storage Type: Data Protection or Maximum Capacity, and then click the Next button. 5. Tighten screw (A). 18 Remove the PSU...

Product Manual
Page 20
Start your browser. ShareCenter Pro User Manual Chapter 3: WebPAM PROe 3.1 Quick Start The WebPAM PROe is factory-installed on your PC/Mac. You can access WebPAM PROe by using your browser. 2. Browser Support Choose one of the ShareCenter® Pro DNS-1550-04. (Default IP Address: 192.168.0.32) The ...WebPAM PROe login screen displays. 20 In the URL address bar, type in the browser on the ShareCenter® Pro DNS-1550-04 system. WebPAM PROe runs in the IP address of the following browsers to use with WebPAM PROe: • Internet Explorer 7 or above •...
Start your browser. ShareCenter Pro User Manual Chapter 3: WebPAM PROe 3.1 Quick Start The WebPAM PROe is factory-installed on your PC/Mac. You can access WebPAM PROe by using your browser. 2. Browser Support Choose one of the ShareCenter® Pro DNS-1550-04. (Default IP Address: 192.168.0.32) The ...WebPAM PROe login screen displays. 20 In the URL address bar, type in the browser on the ShareCenter® Pro DNS-1550-04 system. WebPAM PROe runs in the IP address of the following browsers to use with WebPAM PROe: • Internet Explorer 7 or above •...

Product Manual
Page 22
ShareCenter Pro User Manual 3.2 Dashboard Tab The Dashboard tab is the default screen of the following icons: the component is OK system has errors 3.2.1 System Status The System Status field displays the status of the NAS components by means of WebPAM PROe. The System Status icon indicates the top-level status of the NAS by displaying: system is OK the component needs attention the component has failed 22
ShareCenter Pro User Manual 3.2 Dashboard Tab The Dashboard tab is the default screen of the following icons: the component is OK system has errors 3.2.1 System Status The System Status field displays the status of the NAS components by means of WebPAM PROe. The System Status icon indicates the top-level status of the NAS by displaying: system is OK the component needs attention the component has failed 22

Product Manual
Page 24
Display the total storage space of devices in the system. 24 Display the current number of the system. − Unconfigured - not assigned to a logical drive. • Device Number. assigned to a logical drive. − Configured - ShareCenter Pro User Manual • Total Physical Capacity.
Display the total storage space of devices in the system. 24 Display the current number of the system. − Unconfigured - not assigned to a logical drive. • Device Number. assigned to a logical drive. − Configured - ShareCenter Pro User Manual • Total Physical Capacity.

Product Manual
Page 26
... and I/O units to identify the unconfigured physical drives in the NAS. CPU usage • Controller thermometer - memory usage • Enclosure information 26 ShareCenter Pro User Manual Identifying Unconfigured Physical Drives Click the Show unconfigured PD(s) box to view the PSU status and the operational status of the devices through the I/O units...
... and I/O units to identify the unconfigured physical drives in the NAS. CPU usage • Controller thermometer - memory usage • Enclosure information 26 ShareCenter Pro User Manual Identifying Unconfigured Physical Drives Click the Show unconfigured PD(s) box to view the PSU status and the operational status of the devices through the I/O units...

Product Manual
Page 28
...). You can be used in your disk arrays. Choose a method from the dropdown menu: GB Truncate - (Default) Reduce the useful 28 ShareCenter Pro User Manual Level 1: Park R/W heads Level 2: Slow down (need to match the smaller ones. When this is designed for the size differences by reducing or...
...). You can be used in your disk arrays. Choose a method from the dropdown menu: GB Truncate - (Default) Reduce the useful 28 ShareCenter Pro User Manual Level 1: Park R/W heads Level 2: Slow down (need to match the smaller ones. When this is designed for the size differences by reducing or...

Product Manual
Page 30
Make and model of physical drives in the NAS. Enclosure number and slot number − Configuration - Click Device tab > Physical Drive. 2. ShareCenter Pro User Manual − Manual − Automatic When done, click the Save button. 3.3.4 Physical Drive Click Device tab > Physical Drive to display the list of the drive − Type - Physical ...
Make and model of physical drives in the NAS. Enclosure number and slot number − Configuration - Click Device tab > Physical Drive. 2. ShareCenter Pro User Manual − Manual − Automatic When done, click the Save button. 3.3.4 Physical Drive Click Device tab > Physical Drive to display the list of the drive − Type - Physical ...

Product Manual
Page 32
Complete the required settings in the Chap Settings window, and then click the Submit button. − User Name − Old Password − New Password − Retype Password Click the button to close the dialog window. 32 Move your mouse over the item you want and click the Setting button. 3. ShareCenter Pro User Manual − iSNS − CHAP − Ping Setting up CHAP 1. Click Device tab > iSCSI > CHAP tab. 2.
Complete the required settings in the Chap Settings window, and then click the Submit button. − User Name − Old Password − New Password − Retype Password Click the button to close the dialog window. 32 Move your mouse over the item you want and click the Setting button. 3. ShareCenter Pro User Manual − iSNS − CHAP − Ping Setting up CHAP 1. Click Device tab > iSCSI > CHAP tab. 2.

Product Manual
Page 34
From the dropdown menu, choose a Proper biding type. Setting up DHCP Server 1. Click Device tab > Network. 2. Click Device tab > Network. 2. Choose to close the dialog window. Click the button to enable or disable a biding. − Networking Binding - Click the DHCP Server button. 34 Click the Setup button. 3. ShareCenter Pro User Manual Advanced Networking Configuration 1. Complete the required settings in the Setup window, and then click the Submit button. − Computer Name − Enable Network Binding -
From the dropdown menu, choose a Proper biding type. Setting up DHCP Server 1. Click Device tab > Network. 2. Click Device tab > Network. 2. Choose to close the dialog window. Click the button to enable or disable a biding. − Networking Binding - Click the DHCP Server button. 34 Click the Setup button. 3. ShareCenter Pro User Manual Advanced Networking Configuration 1. Complete the required settings in the Setup window, and then click the Submit button. − Computer Name − Enable Network Binding -

Product Manual
Page 36
ShareCenter Pro User Manual 3.3.7 UPS Click Device tab > UPS to display the information of the connected external drive in the system. Select the option you want and complete the ...
ShareCenter Pro User Manual 3.3.7 UPS Click Device tab > UPS to display the information of the connected external drive in the system. Select the option you want and complete the ...


