
Product Manual
Page 2
... the Setup Wizard 19 Configuring Additional Hard Drives 26 Using The Web UI 30 Overview Of The Web UI 30 My Favorites 31 Status 32 D-Link ShareCenter Pro 1100 User Manual Status > System Status 32 Status > Hard Drive Status 33 Disk Management 35 Disk Management > Volume 35 Disk Management > iSCSI Target 39 Disk ... Management > Email Alerts 72 System Management > Firmware Upgrade 74 System Management > Logs 75 Network Services 77 Network Services > File Sharing 77 Network Services > Dynamic DNS 82 Network Services > SNMP 83 Network Services > Network Discovery Services....84 i
... the Setup Wizard 19 Configuring Additional Hard Drives 26 Using The Web UI 30 Overview Of The Web UI 30 My Favorites 31 Status 32 D-Link ShareCenter Pro 1100 User Manual Status > System Status 32 Status > Hard Drive Status 33 Disk Management 35 Disk Management > Volume 35 Disk Management > iSCSI Target 39 Disk ... Management > Email Alerts 72 System Management > Firmware Upgrade 74 System Management > Logs 75 Network Services 77 Network Services > File Sharing 77 Network Services > Dynamic DNS 82 Network Services > SNMP 83 Network Services > Network Discovery Services....84 i

Product Manual
Page 3
...Backup > Volume Snapshot 88 Backup > Local Backup 91 Backup > Remote Backup 94 Backup > External Backup 98 Extension Packs 99 Remote User Access 100 Accessing The ShareCenter® Pro Remotely 100 Remote User Access > Changing your Password. 101 Remote User Access > Web File Manager 102 Appendix A: What Is RAID 107 Appendix B: Mapping a Drive... Print Server 112 Appendix D: iSCSI Drive Mapping 120 Appendix E: Hot-Swapping 129 Appendix F: Using Non-English Character Files...........130 Appendix G: Warranty 131 Appendix H: Registration 136 D-Link ShareCenter Pro 1100 User Manual ii
...Backup > Volume Snapshot 88 Backup > Local Backup 91 Backup > Remote Backup 94 Backup > External Backup 98 Extension Packs 99 Remote User Access 100 Accessing The ShareCenter® Pro Remotely 100 Remote User Access > Changing your Password. 101 Remote User Access > Web File Manager 102 Appendix A: What Is RAID 107 Appendix B: Mapping a Drive... Print Server 112 Appendix D: iSCSI Drive Mapping 120 Appendix E: Hot-Swapping 129 Appendix F: Using Non-English Character Files...........130 Appendix G: Warranty 131 Appendix H: Registration 136 D-Link ShareCenter Pro 1100 User Manual ii

Product Manual
Page 4
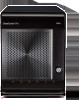
Product Overview Product Overview Introduction The D-Link ShareCenter® Pro 1100 (DNS-1100-04) 4-Bay Network Attached Storage handles the ever-growing data storage requirements for data consolidation and data sharing makes the DNS-1100-04 an ideal storage solution. Its iSCSI capability ...Linux computers on the network can be securely managed. D-Link ShareCenter Pro 1100 User Manual 1 Additionally, the DNS-1100-04 supports a wide array of stability. This utility allows you to locate the ShareCenter® Pro 1100 automatically and map drives to configure the device and set...
Product Overview Product Overview Introduction The D-Link ShareCenter® Pro 1100 (DNS-1100-04) 4-Bay Network Attached Storage handles the ever-growing data storage requirements for data consolidation and data sharing makes the DNS-1100-04 an ideal storage solution. Its iSCSI capability ...Linux computers on the network can be securely managed. D-Link ShareCenter Pro 1100 User Manual 1 Additionally, the DNS-1100-04 supports a wide array of stability. This utility allows you to locate the ShareCenter® Pro 1100 automatically and map drives to configure the device and set...

Product Manual
Page 5
... Requirements For best results, the following minimum requirements are missing, please contact your device. Product Overview Package Contents „„D-Link ShareCenter® Pro 1100 „„CD-ROM with Manual and Software „„Quick Installation Guide „„Power Cord „„CAT5E ... Safari, Chrome 3.0, Opera 10 or higher „„Windows® 7/Vista®/XP (SP3) „„3.5" SATA hard drive(s) D-Link ShareCenter Pro 1100 User Manual 2 If any of the above items are recommended on any system used to do so might damage the unit and void the ...
... Requirements For best results, the following minimum requirements are missing, please contact your device. Product Overview Package Contents „„D-Link ShareCenter® Pro 1100 „„CD-ROM with Manual and Software „„Quick Installation Guide „„Power Cord „„CAT5E ... Safari, Chrome 3.0, Opera 10 or higher „„Windows® 7/Vista®/XP (SP3) „„3.5" SATA hard drive(s) D-Link ShareCenter Pro 1100 User Manual 2 If any of the above items are recommended on any system used to do so might damage the unit and void the ...

Product Manual
Page 6
...drive on /off „„Hard disk hibernation „„Smart Fan Speed Control „„D-Link Green Ethernet D-Link ShareCenter Pro 1100 User Manual 3 Product Overview Features The D-Link ShareCenter® Pro 1100 is packed with password authentication. „„Account management: Manage users/groups and Read/ Write ...;Volume Snapshot „„Up to 64 iSCSI Targets „„SNMP (D-View 6.0 compatible) „„CHAP „„Link Aggregation „„Fail-over/Fail-back „„VLAN tag Support „„DFS Support „„AES Support „...
...drive on /off „„Hard disk hibernation „„Smart Fan Speed Control „„D-Link Green Ethernet D-Link ShareCenter Pro 1100 User Manual 3 Product Overview Features The D-Link ShareCenter® Pro 1100 is packed with password authentication. „„Account management: Manage users/groups and Read/ Write ...;Volume Snapshot „„Up to 64 iSCSI Targets „„SNMP (D-View 6.0 compatible) „„CHAP „„Link Aggregation „„Fail-over/Fail-back „„VLAN tag Support „„DFS Support „„AES Support „...

Product Manual
Page 7
Section 1 - To switch off . D-Link ShareCenter Pro 1100 User Manual 4 Product Overview OLED Screen Hardware Overview Front Panel OLED Button Front Panel Lock Drive Trays Power Button COMPONENT Front Panel Lock OLED Button ...
Section 1 - To switch off . D-Link ShareCenter Pro 1100 User Manual 4 Product Overview OLED Screen Hardware Overview Front Panel OLED Button Front Panel Lock Drive Trays Power Button COMPONENT Front Panel Lock OLED Button ...

Product Manual
Page 8
Cannot read/write A network connection is available The network is active The network is being accessed No disk installed in this bay Disk error . Section 1 - Product Overview Hardware Overview Front Panel Disk LEDs (1-4) LAN LEDs (1-2) Component Disk LED LAN LED Color Green Red Blue Status Static Blinking Off Static Static Blinking Off Description Disk is ready Disk is inactive D-Link ShareCenter Pro 1100 User Manual 5
Cannot read/write A network connection is available The network is active The network is being accessed No disk installed in this bay Disk error . Section 1 - Product Overview Hardware Overview Front Panel Disk LEDs (1-4) LAN LEDs (1-2) Component Disk LED LAN LED Color Green Red Blue Status Static Blinking Off Static Static Blinking Off Description Disk is ready Disk is inactive D-Link ShareCenter Pro 1100 User Manual 5

Product Manual
Page 9
Press this button with an unfolded paperclip for monitoring. D-Link ShareCenter Pro 1100 User Manual 6 The cooling fan is used to the factory default sitting. Connect the included power adapter to print servers, USB storage drives, or a UPS ... Connector USB Ports Gigabit Ethernet Ports Component Gigabit Ethernet Ports Power Connector USB Ports Reset Button Cooling Fan Description Two Gigabit Ethernet Ports connect the ShareCenter® Pro 1100 to the local network.
Press this button with an unfolded paperclip for monitoring. D-Link ShareCenter Pro 1100 User Manual 6 The cooling fan is used to the factory default sitting. Connect the included power adapter to print servers, USB storage drives, or a UPS ... Connector USB Ports Gigabit Ethernet Ports Component Gigabit Ethernet Ports Power Connector USB Ports Reset Button Cooling Fan Description Two Gigabit Ethernet Ports connect the ShareCenter® Pro 1100 to the local network.

Product Manual
Page 10
..., and error messages: yy System Information - This screen shows the percentage of the ShareCenter® Pro {{ The hard drive slots information yy Hard Drive Volume Information - D-Link ShareCenter Pro 1100 User Manual 7 This screen shows the following information: {{ The hostname of the ShareCenter® Pro {{ The IP address of space used on the hard drives. This screen shows...
..., and error messages: yy System Information - This screen shows the percentage of the ShareCenter® Pro {{ The hard drive slots information yy Hard Drive Volume Information - D-Link ShareCenter Pro 1100 User Manual 7 This screen shows the following information: {{ The hostname of the ShareCenter® Pro {{ The IP address of space used on the hard drives. This screen shows...

Product Manual
Page 11
Section 2 - The hard drives do not have to have all hard drives the same size. D-Link ShareCenter Pro 1100 User Manual 8 However, to create a RAID, it would be preferable to be the same size. To install a hard drive, refer to take...to the following steps: Step 1: Remove a hard drive cage from the enclosure. Installing Hard Drives The D-Link ShareCenter® Pro 1100 takes four 3.5" hard disk drives. Hardware Setup Hardware Setup The D-Link ShareCenter® Pro 1100 is a flexible NAS that can hold four hot-swappable drives, provides auto encryption and has dual Ethernet ports...
Section 2 - The hard drives do not have to have all hard drives the same size. D-Link ShareCenter Pro 1100 User Manual 8 However, to create a RAID, it would be preferable to be the same size. To install a hard drive, refer to take...to the following steps: Step 1: Remove a hard drive cage from the enclosure. Installing Hard Drives The D-Link ShareCenter® Pro 1100 takes four 3.5" hard disk drives. Hardware Setup Hardware Setup The D-Link ShareCenter® Pro 1100 is a flexible NAS that can hold four hot-swappable drives, provides auto encryption and has dual Ethernet ports...

Product Manual
Page 12
Section 2 - Step 4: Slide the drive tray into place using the four holes on the sides of the drive tray. D-Link ShareCenter Pro 1100 User Manual 9 Step 3: Place a 3.5" SATA hard drive into the drive tray, and screw it into the enclosure. Hardware Setup Installing Hard Drives (cont.) Step 2: Remove the plastic bracket inside the hard drive cage.
Section 2 - Step 4: Slide the drive tray into place using the four holes on the sides of the drive tray. D-Link ShareCenter Pro 1100 User Manual 9 Step 3: Place a 3.5" SATA hard drive into the drive tray, and screw it into the enclosure. Hardware Setup Installing Hard Drives (cont.) Step 2: Remove the plastic bracket inside the hard drive cage.

Product Manual
Page 13
Section 2 - Hardware Setup Installing Hard Drives (cont.) Step 5: Swing the drive tray door closed until it clicks to install. D-Link ShareCenter Pro 1100 User Manual 10 Follow this process for all the hard drives you wish to secure the drive tray in the enclosure.
Section 2 - Hardware Setup Installing Hard Drives (cont.) Step 5: Swing the drive tray door closed until it clicks to install. D-Link ShareCenter Pro 1100 User Manual 10 Follow this process for all the hard drives you wish to secure the drive tray in the enclosure.

Product Manual
Page 14
Hardware Setup Connecting To The Network Step 1: Plug in one end of the included CAT5e cable into one of the CAT5e cable into your network router or switch. D-Link ShareCenter Pro 1100 User Manual 11 Section 2 - Step 2: Plug the other end of the Gigabit Ethernet ports.
Hardware Setup Connecting To The Network Step 1: Plug in one end of the included CAT5e cable into one of the CAT5e cable into your network router or switch. D-Link ShareCenter Pro 1100 User Manual 11 Section 2 - Step 2: Plug the other end of the Gigabit Ethernet ports.

Product Manual
Page 15
Hardware Setup Connecting Power Step 1: Plug the power adapter into the power connector on the back of the power adapter into a power outlet. Step 2: Plug the other end of the ShareCenter® Pro. Section 2 - D-Link ShareCenter Pro 1100 User Manual 12
Hardware Setup Connecting Power Step 1: Plug the power adapter into the power connector on the back of the power adapter into a power outlet. Step 2: Plug the other end of the ShareCenter® Pro. Section 2 - D-Link ShareCenter Pro 1100 User Manual 12

Product Manual
Page 16
Step 2: Press the Power button on front of the ShareCenter® Pro and wait for the OLED screen to display Welcome to see if the device is powered on correctly. D-Link ShareCenter Pro 1100 User Manual 13 Hardware Setup Powering On The Device Initially Before connecting to the ShareCenter® Pro, test to ShareCenter® Pro. Step 1: The first time you power on , you can insert and lock the hard drives. After the device has successfully powered on , eject all hard drives from the ShareCenter® Pro. Section 2 -
Step 2: Press the Power button on front of the ShareCenter® Pro and wait for the OLED screen to display Welcome to see if the device is powered on correctly. D-Link ShareCenter Pro 1100 User Manual 13 Hardware Setup Powering On The Device Initially Before connecting to the ShareCenter® Pro, test to ShareCenter® Pro. Step 1: The first time you power on , you can insert and lock the hard drives. After the device has successfully powered on , eject all hard drives from the ShareCenter® Pro. Section 2 -

Product Manual
Page 17
... Setup Software Setup Installing, configuring, and creating shares on the fly is just below the IP address information. D-Link ShareCenter Pro 1100 User Manual 14 The Auto-IP address information is recommended that you use the EZ Search Utility provided on the included CD to locate the... device on your network and allows you can use the D-Link EZ Search Utility when accessing and configuring the ShareCenter® Pro for the first time, as it does not receive a DHCP assigned IP address, the ShareCenter® Pro reverts to 169.254.xxx.xxx. It is located on the label ...
... Setup Software Setup Installing, configuring, and creating shares on the fly is just below the IP address information. D-Link ShareCenter Pro 1100 User Manual 14 The Auto-IP address information is recommended that you use the EZ Search Utility provided on the included CD to locate the... device on your network and allows you can use the D-Link EZ Search Utility when accessing and configuring the ShareCenter® Pro for the first time, as it does not receive a DHCP assigned IP address, the ShareCenter® Pro reverts to 169.254.xxx.xxx. It is located on the label ...

Product Manual
Page 18
...web-based configuration manager must be in the IP address of your web browser and type in the same subnet. Alternatively, open it. D-Link ShareCenter Pro 1100 User Manual 15 Step 1: Double-click the easy_search file to the IP address listed for the device. This will automatically be on the ...same subnet as the ShareCenter® Pro. If your default web browser and go to start the EZSearch utility. Make sure your browser is using a DHCP server and the ...
...web-based configuration manager must be in the IP address of your web browser and type in the same subnet. Alternatively, open it. D-Link ShareCenter Pro 1100 User Manual 15 Step 1: Double-click the easy_search file to the IP address listed for the device. This will automatically be on the ...same subnet as the ShareCenter® Pro. If your default web browser and go to start the EZSearch utility. Make sure your browser is using a DHCP server and the ...

Product Manual
Page 19
... connect to map the selected volume. Drive Mapping: Volumes available for the ShareCenter® Pro here. About: Click About to view the software version of the ShareCenter® Pro. Available Drive Letters: Choose an available drive letter. Click Connect to the iSCSI target. D-Link ShareCenter Pro 1100 User Manual 16 Software Setup Running The EZSearch Utility (cont.) Here...
... connect to map the selected volume. Drive Mapping: Volumes available for the ShareCenter® Pro here. About: Click About to view the software version of the ShareCenter® Pro. Available Drive Letters: Choose an available drive letter. Click Connect to the iSCSI target. D-Link ShareCenter Pro 1100 User Manual 16 Software Setup Running The EZSearch Utility (cont.) Here...

Product Manual
Page 20
D-Link ShareCenter Pro 1100 User Manual 17 After logging in to the ShareCenter® Pro by selecting System Administrator (Admin) and leaving the Password field blank, then click the Login button. page will open. Getting Started Getting Started Connecting To The Web UI Log in , the default Web UI homepage will open . If there are no drives installed, the Disk Management > Volume page will open . Section 4 -
D-Link ShareCenter Pro 1100 User Manual 17 After logging in to the ShareCenter® Pro by selecting System Administrator (Admin) and leaving the Password field blank, then click the Login button. page will open. Getting Started Getting Started Connecting To The Web UI Log in , the default Web UI homepage will open . If there are no drives installed, the Disk Management > Volume page will open . Section 4 -

Product Manual
Page 21
Note: If there is only one drive installed in the next section for more information. D-Link ShareCenter Pro 1100 User Manual 18 Please refer to select a RAID level. Section 4 - Getting Started Connecting To The Web UI (cont.) If you to Creating Your First Volume in the system, no RAID volume can be created and the hard drive will appear. The ShareCenter® Pro will detect the capacity of the drive(s) and will prompt you have new drives installed, the Create Volume window will act as a standalone volume.
Note: If there is only one drive installed in the next section for more information. D-Link ShareCenter Pro 1100 User Manual 18 Please refer to select a RAID level. Section 4 - Getting Started Connecting To The Web UI (cont.) If you to Creating Your First Volume in the system, no RAID volume can be created and the hard drive will appear. The ShareCenter® Pro will detect the capacity of the drive(s) and will prompt you have new drives installed, the Create Volume window will act as a standalone volume.