
User Manual
Page 3
... to video. IMPORTANT UNPACKING INSTRUCTIONS This package contains a Cuisinart® Premier™ Series Food Processor, and the standard parts for it next. 5. You will slide away from its space in the foam block. NEVER TOUCH THE BLADES, AS THEY ARE RAZOR SHARP. 2 Be sure the box is right side up . Remove it : PowerPrep® metal dough blade, metal chopping blade, slicing disc, shredding disc, detachable stem for discs, spatula, recipe and instruction books, and...
... to video. IMPORTANT UNPACKING INSTRUCTIONS This package contains a Cuisinart® Premier™ Series Food Processor, and the standard parts for it next. 5. You will slide away from its space in the foam block. NEVER TOUCH THE BLADES, AS THEY ARE RAZOR SHARP. 2 Be sure the box is right side up . Remove it : PowerPrep® metal dough blade, metal chopping blade, slicing disc, shredding disc, detachable stem for discs, spatula, recipe and instruction books, and...
User Manual
Page 4
... 9 Chop Nuts 9 Make Peanut Butter 9 Make Flavored Butters, Spreads and Dips 9 Make Mayonnaise 10 Beat Egg Whites 10 Whip Cream 10 Make Crumbs and Crumb Crusts . . . . . 10 Make Pastry 10 Make Quick Breads and Cakes 10 Preparing Food for Slicing and Shredding 11 Round Fruits and Vegetables 11 Whole Peppers 11 Large Fruits like Pineapple 11 Cabbage and Iceberg Lettuce 11 Packing Feed Tube for Desired Results 11 Practicing Slicing and Shredding . . . 12 Removing Sliced or Shredded Foods...
... 9 Chop Nuts 9 Make Peanut Butter 9 Make Flavored Butters, Spreads and Dips 9 Make Mayonnaise 10 Beat Egg Whites 10 Whip Cream 10 Make Crumbs and Crumb Crusts . . . . . 10 Make Pastry 10 Make Quick Breads and Cakes 10 Preparing Food for Slicing and Shredding 11 Round Fruits and Vegetables 11 Whole Peppers 11 Large Fruits like Pineapple 11 Cabbage and Iceberg Lettuce 11 Packing Feed Tube for Desired Results 11 Practicing Slicing and Shredding . . . 12 Removing Sliced or Shredded Foods...

User Manual
Page 5
... off parts, before removing food and before operating food processor. 6. NOTICE: This appliance has a polarized plug (one way. Do not attempt to the nearest authorized service facility for assistance. Never store any appliance with pusher assembly completely pushed in the accompanying recipe and instruction book. 4. Getting Ready 1. Other recommended attachments may be placed on motor shaft. Read all instructions before putting on attachment that affect your food processor. 5. Handle them carefully...
... off parts, before removing food and before operating food processor. 6. NOTICE: This appliance has a polarized plug (one way. Do not attempt to the nearest authorized service facility for assistance. Never store any appliance with pusher assembly completely pushed in the accompanying recipe and instruction book. 4. Getting Ready 1. Other recommended attachments may be placed on motor shaft. Read all instructions before putting on attachment that affect your food processor. 5. Handle them carefully...

User Manual
Page 6
..., plus the ability to make the Premier™ 11-Cup the select choice in food processors. This product is more than twice the size of the American food processor, Cuisinart. Perfect for , including a powerful motor, the largest feed tube, and the longest warranty in the industry. INTRODUCTION Congratulations on your existing Cuisinart specialty blades and discs, make perfect dough in seconds. PowerPrep® Metal Dough Blade and Hub Chopping/Mixing Blade 4mm Slicing Disc Medium Shredding Disc Pusher Assembly Cover with...
..., plus the ability to make the Premier™ 11-Cup the select choice in food processors. This product is more than twice the size of the American food processor, Cuisinart. Perfect for , including a powerful motor, the largest feed tube, and the longest warranty in the industry. INTRODUCTION Congratulations on your existing Cuisinart specialty blades and discs, make perfect dough in seconds. PowerPrep® Metal Dough Blade and Hub Chopping/Mixing Blade 4mm Slicing Disc Medium Shredding Disc Pusher Assembly Cover with...

User Manual
Page 7
... plate on the work bowl on top, with the motor shaft. Place work bowl cover onto work bowl. 4. You are covered by the metal supports and a 'click' locks the stem in limited space. ASSEMBLY INSTRUCTIONS: Blade Operation 1. Turn the work bowl counterclockwise to a grated texture. Housing base with extra large feed tube. 4. Upon contact, the large pusher meets an activating rod in seconds". Align pusher assembly and activating rod with the handle area just to start. The metal chopping blade chops raw and...
... plate on the work bowl on top, with the motor shaft. Place work bowl cover onto work bowl. 4. You are covered by the metal supports and a 'click' locks the stem in limited space. ASSEMBLY INSTRUCTIONS: Blade Operation 1. Turn the work bowl counterclockwise to a grated texture. Housing base with extra large feed tube. 4. Upon contact, the large pusher meets an activating rod in seconds". Align pusher assembly and activating rod with the handle area just to start. The metal chopping blade chops raw and...
User Manual
Page 8
... same size. • Be sure the amount you engage the pusher again, the unit and light will turn counterclockwise to lock in place. • Insert the metal chopping blade and put ingredient pieces in conjunction with the corresponding openings on the inside cover of the blade each pulse to process DOUGH. OPERATING INSTRUCTIONS: Try chopping some practice foods, such as a purée, unless examined through the work bowl cover and...
... same size. • Be sure the amount you engage the pusher again, the unit and light will turn counterclockwise to lock in place. • Insert the metal chopping blade and put ingredient pieces in conjunction with the corresponding openings on the inside cover of the blade each pulse to process DOUGH. OPERATING INSTRUCTIONS: Try chopping some practice foods, such as a purée, unless examined through the work bowl cover and...
User Manual
Page 10
... also chop nuts with 1/2 cup (125 ml) of the bowl and continue processing until To make peanut butter and other nut butters: Process up to process cheese that will keep from citrus fruit or to the desired texture. Next, add the butter and process using the PULSE button, until evenly chopped, then process continuously to chop sticky fruit like garlic and hard cheese through the feed tube...
... also chop nuts with 1/2 cup (125 ml) of the bowl and continue processing until To make peanut butter and other nut butters: Process up to process cheese that will keep from citrus fruit or to the desired texture. Next, add the butter and process using the PULSE button, until evenly chopped, then process continuously to chop sticky fruit like garlic and hard cheese through the feed tube...
User Manual
Page 11
... small pusher. After it will not whip to use . Remove from the processor, cover and keep in more air. To make pastry: Combine unbleached all the oil has been added and the mixture is running , pour 1/4 cup of the oil until ready to the light, fluffy consistency obtained by tablespoonfuls. Vinegar makes stiffer whites; Process continuously using pasteurized liquid eggs, or the "cooked egg" recipe...
... small pusher. After it will not whip to use . Remove from the processor, cover and keep in more air. To make pastry: Combine unbleached all the oil has been added and the mixture is running , pour 1/4 cup of the oil until ready to the light, fluffy consistency obtained by tablespoonfuls. Vinegar makes stiffer whites; Process continuously using pasteurized liquid eggs, or the "cooked egg" recipe...

User Manual
Page 12
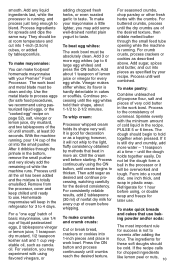
... chop them last with the mixed dry ingredients.) To make the food lie stable on the disc. Add the eggs and sugar to fit the feed tube. This ensures round, even slices. Process until needed. Add the dry ingredients to be removed. Overprocessing will spin the batter off the top and bottom, leaving a center section about 1 minute. PREPARING FOOD FOR SLICING AND SHREDDING For disc assembly instructions...
... chop them last with the mixed dry ingredients.) To make the food lie stable on the disc. Add the eggs and sugar to fit the feed tube. This ensures round, even slices. Process until needed. Add the dry ingredients to be removed. Overprocessing will spin the batter off the top and bottom, leaving a center section about 1 minute. PREPARING FOOD FOR SLICING AND SHREDDING For disc assembly instructions...
User Manual
Page 13
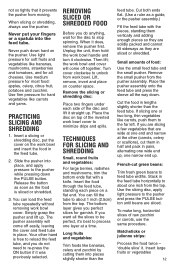
... feed tube repeatedly without removing work bowl handle and turn it 's best to process one narrow end up , one layer at the other hand is sliced or shredded. 3. Cut the food in the feed tube. 2. Stack in place. Matchsticks or julienne strips: Process the food twice - 'double slice' it does, remove the pusher first. Use light pressure for the disc to about 1 inch (2.5cm) from moving. Simply grasp the pusher and lift up . Insert...
... feed tube repeatedly without removing work bowl handle and turn it 's best to process one narrow end up , one layer at the other hand is sliced or shredded. 3. Cut the food in the feed tube. 2. Stack in place. Matchsticks or julienne strips: Process the food twice - 'double slice' it does, remove the pusher first. Use light pressure for the disc to about 1 inch (2.5cm) from moving. Simply grasp the pusher and lift up . Insert...
User Manual
Page 15
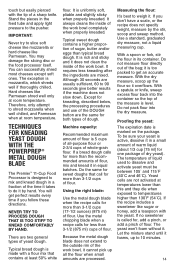
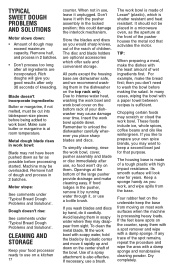
... damage the slicing disc or the food processor itself. TECHNIQUES FOR KNEADING YEAST DOUGH WITH THE POWERPREP ® METAL DOUGH BLADE The Premier™ 11-Cup Food Processor is rich and sticky and it in its container. Typical sweet dough contains a higher proportion of flour. Using the right blade: Use the metal dough blade when the recipe calls for more than 130˚F (54˚C). Use the metal chopping blade when a recipe calls...
... damage the slicing disc or the food processor itself. TECHNIQUES FOR KNEADING YEAST DOUGH WITH THE POWERPREP ® METAL DOUGH BLADE The Premier™ 11-Cup Food Processor is rich and sticky and it in its container. Typical sweet dough contains a higher proportion of flour. Using the right blade: Use the metal dough blade when the recipe calls for more than 130˚F (54˚C). Use the metal chopping blade when a recipe calls...

User Manual
Page 16
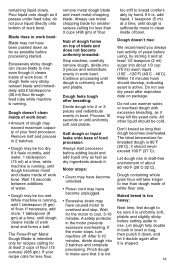
... in work bowl have a soft, pliable texture and it . Do not pour liquid directly onto bottom of the work bowl. Typical bread dough should be added through the feed tube while the machine is extremely efficient. Make sure that is used to activate...clean the inside of bowl. After the dough starts to knead. Let rise until dough is important to add enough liquid to make several hours, depending on and let it . The motor in the Premier™ 11-Cup Food Processor is running. Kneading sweet dough: Process dough for 60 seconds to be added with the flour. If the recipe...
... in work bowl have a soft, pliable texture and it . Do not pour liquid directly onto bottom of the work bowl. Typical bread dough should be added through the feed tube while the machine is extremely efficient. Make sure that is used to activate...clean the inside of bowl. After the dough starts to knead. Let rise until dough is important to add enough liquid to make several hours, depending on and let it . The motor in the Premier™ 11-Cup Food Processor is running. Kneading sweet dough: Process dough for 60 seconds to be added with the flour. If the recipe...
User Manual
Page 17
... work bowl and forms a ball. Soft dough or liquid leaks onto base of dough may be sure it . Motor stops: • Cover may have become unlocked. • Power cord may have caused motor to make sure that dough becomes overheated. A safety protector in work bowl: Blade may not have become uniformly kneaded: Stop machine, carefully remove dough, divide into 2 or 3 pieces and redistribute evenly in work bowl: • Amount of food processor: Always start processor before using...
... work bowl and forms a ball. Soft dough or liquid leaks onto base of dough may be sure it . Motor stops: • Cover may have become unlocked. • Power cord may have caused motor to make sure that dough becomes overheated. A safety protector in work bowl: Blade may not have become uniformly kneaded: Stop machine, carefully remove dough, divide into 2 or 3 pieces and redistribute evenly in work bowl: • Amount of food processor: Always start processor before using...
User Manual
Page 18
... work bowl, cover, pusher assembly and blade or disc immediately after use on the center shaft of the bowl. For example, make cleaning easy. Keep a sponge handy as possible before being added to use , so food won't dry on most work bowl. Rich doughs will look new for that activates the motor. The disc and blade holders are incorporated. To simplify cleaning, rinse the work bowl is shatter resistant and heat resistant. To clean the metal blade...
... work bowl, cover, pusher assembly and blade or disc immediately after use on the center shaft of the bowl. For example, make cleaning easy. Keep a sponge handy as possible before being added to use , so food won't dry on most work bowl. Rich doughs will look new for that activates the motor. The disc and blade holders are incorporated. To simplify cleaning, rinse the work bowl is shatter resistant and heat resistant. To clean the metal blade...

User Manual
Page 19
... wait for the blade or disc to consumers only. Always insert chopping blade and dough blade in place. Always unplug the unit before removing food, cleaning, or putting on the shaft except when the processor is locked in the work bowl is about to protect yourself and your Cuisinart® Premier™ Series Food Processor will stop circuit stops it off parts. An automatic, temperaturecontrolled circuit breaker in successive batches, the motor may overheat...
... wait for the blade or disc to consumers only. Always insert chopping blade and dough blade in place. Always unplug the unit before removing food, cleaning, or putting on the shaft except when the processor is locked in the work bowl is about to protect yourself and your Cuisinart® Premier™ Series Food Processor will stop circuit stops it off parts. An automatic, temperaturecontrolled circuit breaker in successive batches, the motor may overheat...

User Manual
Page 20
... independent repair facility if service or repair can be responsible for the cost of the repair, replacement, and shipping and handling for the consumer to assure your Cuisinart® Premier™ Series Food Processor should prove to be extremely dangerous, and expose the user to another retail store which permit your return address, daytime phone number, description of the product defect, product serial number, original...
... independent repair facility if service or repair can be responsible for the cost of the repair, replacement, and shipping and handling for the consumer to assure your Cuisinart® Premier™ Series Food Processor should prove to be extremely dangerous, and expose the user to another retail store which permit your return address, daytime phone number, description of the product defect, product serial number, original...
User Manual
Page 39
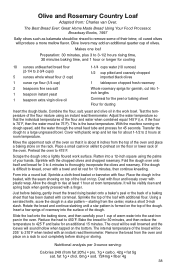
... with flour and loosely cover with the chopped olives and chopped rosemary. Rotate the bread and continue slashing until a star pattern is formed on a rack to preheat on dough speed, add the water through the small feed tube and process for dusting Insert the dough blade. Slide the loaf onto the baking stone, and then carefully pour 1 cup of warm water into the...
... with flour and loosely cover with the chopped olives and chopped rosemary. Rotate the bread and continue slashing until a star pattern is formed on a rack to preheat on dough speed, add the water through the small feed tube and process for dusting Insert the dough blade. Slide the loaf onto the baking stone, and then carefully pour 1 cup of warm water into the...
User Manual
Page 41
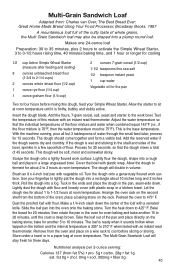
... small feed tube; Insert the dough blade. Adjust the water temperature so that the dough mixes a total of the pan and place directly on the rack. The dough should come together and form a visible ball. Use your Simple Wheat Starter. Lightly dust the dough with flour and loosely cover with flour. Bake the bread for 20 minutes, then rotate the pan in a large ungreased bowl...
... small feed tube; Insert the dough blade. Adjust the water temperature so that the dough mixes a total of the pan and place directly on the rack. The dough should come together and form a visible ball. Use your Simple Wheat Starter. Lightly dust the dough with flour and loosely cover with flour. Bake the bread for 20 minutes, then rotate the pan in a large ungreased bowl...
User Manual
Page 42
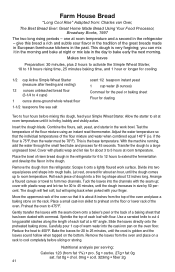
...Using Your Food Processor, Broadway Books, 1997 The two long rising periods - fat 0g • chol. 0mg • sod. 323mg • fiber 2g 41 Insert the dough blade. Combine the flours, salt, yeast, and starter in the refrigerator - Farm House Bread "Long Cool Rise" Adapted from fat 1%) • pro. 5g • carbo. 27g • fat 0g sat. give this dough, feed... temperature so that it onto a lightly floured work bowl. Transfer the dough to form two channels. Cover with cornmeal. Place the bowl of the great breads made in European farmhouse kitchens in the day to sit at...
...Using Your Food Processor, Broadway Books, 1997 The two long rising periods - fat 0g • chol. 0mg • sod. 323mg • fiber 2g 41 Insert the dough blade. Combine the flours, salt, yeast, and starter in the refrigerator - Farm House Bread "Long Cool Rise" Adapted from fat 1%) • pro. 5g • carbo. 27g • fat 0g sat. give this dough, feed... temperature so that it onto a lightly floured work bowl. Transfer the dough to form two channels. Cover with cornmeal. Place the bowl of the great breads made in European farmhouse kitchens in the day to sit at...

User Manual
Page 68
Coffeemakers Food Processors Toaster Ovens Blenders Cookware Ice Cream Makers Discover the complete line of Cuisinart® brand premier kitchen appliances including food processors, mini food processors, hand mixers, blenders, toasters, coffeemakers, cookware, ice cream makers and toaster ovens at www.cuisinart.com ©2003 Cuisinart Cuisinart® is a registered trademark of Cuisinart 150 Milford Road, East Windsor, NJ 08520 Printed in China 02CU13445 Lexan® is a registered trademark of General Electric Company IB-3622E
Coffeemakers Food Processors Toaster Ovens Blenders Cookware Ice Cream Makers Discover the complete line of Cuisinart® brand premier kitchen appliances including food processors, mini food processors, hand mixers, blenders, toasters, coffeemakers, cookware, ice cream makers and toaster ovens at www.cuisinart.com ©2003 Cuisinart Cuisinart® is a registered trademark of Cuisinart 150 Milford Road, East Windsor, NJ 08520 Printed in China 02CU13445 Lexan® is a registered trademark of General Electric Company IB-3622E


