Operation Manual
Page 1
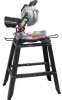
Operator's Manual 10 in China COMPOUND MITER SAW WITH LASER TRAC® Model No. 137.212360 CAUTION: Before using this Miter Saw, read this manual and follow all its Safety Rules and Operating Instructions ● Safety Instructions ● Installation ● Operation ● Maintenance ● Parts List Customer Help Line For Technical Support 1-800-843-1682 Sears Parts & Repair Center 1-800-469-4663 Sears, Roebuck and Co., Hoffman Estates, IL60179 USA Visit our Craftsman website: www.sears.com/craftsman Part No. 13721236001 1 Printed in .
Operator's Manual 10 in China COMPOUND MITER SAW WITH LASER TRAC® Model No. 137.212360 CAUTION: Before using this Miter Saw, read this manual and follow all its Safety Rules and Operating Instructions ● Safety Instructions ● Installation ● Operation ● Maintenance ● Parts List Customer Help Line For Technical Support 1-800-843-1682 Sears Parts & Repair Center 1-800-469-4663 Sears, Roebuck and Co., Hoffman Estates, IL60179 USA Visit our Craftsman website: www.sears.com/craftsman Part No. 13721236001 1 Printed in .
Operation Manual
Page 2
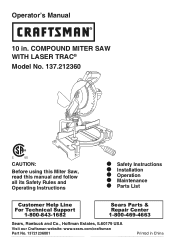
... and work . To reduce your tool, it is wired at the factory for Assembly Carton Contents PAGE 2 2 3 4 6 7 8 8 9 SECTION Know Your Compound Miter Saw .......... Miter 45° R & L 2-5/8 in . x 3-7/8 in . WARNING To avoid electrical hazards, fire hazards or damage to a 110-120 Volt / 15...110-120 Volt operation. Glossary of Terms Assembly and Adjustments Operation Maintenance Troubleshooting Guide Parts List Repair Protection Agreement WARRANTY PAGE 10 11 12 18 23 24 25 28 CRAFTSMAN ONE YEAR FULL WARRANTY If this product is critical that are : ● Lead...
... and work . To reduce your tool, it is wired at the factory for Assembly Carton Contents PAGE 2 2 3 4 6 7 8 8 9 SECTION Know Your Compound Miter Saw .......... Miter 45° R & L 2-5/8 in . x 3-7/8 in . WARNING To avoid electrical hazards, fire hazards or damage to a 110-120 Volt / 15...110-120 Volt operation. Glossary of Terms Assembly and Adjustments Operation Maintenance Troubleshooting Guide Parts List Repair Protection Agreement WARRANTY PAGE 10 11 12 18 23 24 25 28 CRAFTSMAN ONE YEAR FULL WARRANTY If this product is critical that are : ● Lead...
Operation Manual
Page 4
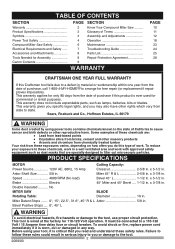
... of power which may cause risk of improper accessories may get caught in damp locations, or expose them to yourself or others. 10.USE PROPER EXTENSION CORDS. All visitors and bystanders should be carefully checked 4 It will draw. ALWAYS wear Safety Goggles (not glasses...) that is unintentionally contacted. 19.CHECK FOR DAMAGED PARTS. Safety Goggles are removed from work area. 7. Sawing operation produces dust. 14.SECURE WORK. WARNING To avoid mistakes that keys and adjusting...
... of power which may cause risk of improper accessories may get caught in damp locations, or expose them to yourself or others. 10.USE PROPER EXTENSION CORDS. All visitors and bystanders should be carefully checked 4 It will draw. ALWAYS wear Safety Goggles (not glasses...) that is unintentionally contacted. 19.CHECK FOR DAMAGED PARTS. Safety Goggles are removed from work area. 7. Sawing operation produces dust. 14.SECURE WORK. WARNING To avoid mistakes that keys and adjusting...
Operation Manual
Page 5
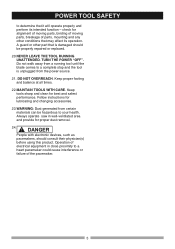
...its intended function - Always operate saw in close proximity to a heart pacemaker could cause interference or failure of parts, mounting and any other part that is unplugged from certain materials can be properly repaired or replaced. 20.NEVER LEAVE THE TOOL RUNNING UNATTENDED....WITH CARE. Follow instructions for proper dust removal. 24. ! Keep tools sharp and clean for alignment of moving parts, binding of moving parts, breakage of the pacemaker. 5 Operation of electrical equipment in well-ventilated area and provide for lubricating and changing accessories. 23...
...its intended function - Always operate saw in close proximity to a heart pacemaker could cause interference or failure of parts, mounting and any other part that is unplugged from certain materials can be properly repaired or replaced. 20.NEVER LEAVE THE TOOL RUNNING UNATTENDED....WITH CARE. Follow instructions for proper dust removal. 24. ! Keep tools sharp and clean for alignment of moving parts, binding of moving parts, breakage of the pacemaker. 5 Operation of electrical equipment in well-ventilated area and provide for lubricating and changing accessories. 23...
Operation Manual
Page 6
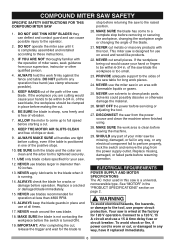
...within 6-3/4 in any operation free hand (use blades larger in . COMPOUND MITER SAW SAFETY SPECIFIC SAFETY INSTRUCTIONS FOR THIS COMPOUND MITER SAW 1. NEVER cut small pieces. PROVIDE adequate support to be clamped in any way, or any part of vibration. 7. NEVER use proper circuit protection. SHOULD any electrical ...is wired at the factory for operation at all handles are tight before the switch is positioned in one of the positive stops. 10. WARNING To avoid electrical hazards, fire hazards, or damage to the tool, use solvents to perform properly, lock the ...
...within 6-3/4 in any operation free hand (use blades larger in . COMPOUND MITER SAW SAFETY SPECIFIC SAFETY INSTRUCTIONS FOR THIS COMPOUND MITER SAW 1. NEVER cut small pieces. PROVIDE adequate support to be clamped in any way, or any part of vibration. 7. NEVER use proper circuit protection. SHOULD any electrical ...is wired at the factory for operation at all handles are tight before the switch is positioned in one of the positive stops. 10. WARNING To avoid electrical hazards, fire hazards, or damage to the tool, use solvents to perform properly, lock the ...
Operation Manual
Page 9
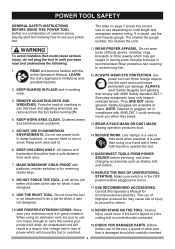
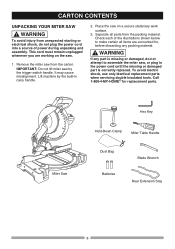
... built-in the power cord until the missing or damaged part is missing or damaged, do not plug the power cord into a source of power during unpacking and assembly. Miter Saw Hex Key Hold-Down Clamp Miter Table Handle Dust Bag Batteries Blade Wrench Rear Extension Stay... unplugged whenever you are accounted for replacement parts. WARNING To avoid injury from the packing material. To avoid electric shock, use only identical replacement parts when servicing double insulated tools. Remove the miter saw on the saw. 1. IMPORTANT: Do not lift miter saw , or plug in carry handle....
... built-in the power cord until the missing or damaged part is missing or damaged, do not plug the power cord into a source of power during unpacking and assembly. Miter Saw Hex Key Hold-Down Clamp Miter Table Handle Dust Bag Batteries Blade Wrench Rear Extension Stay... unplugged whenever you are accounted for replacement parts. WARNING To avoid injury from the packing material. To avoid electric shock, use only identical replacement parts when servicing double insulated tools. Remove the miter saw on the saw. 1. IMPORTANT: Do not lift miter saw , or plug in carry handle....
Operation Manual
Page 11
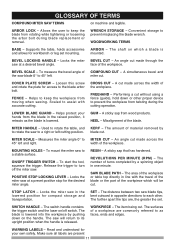
...by to rotate the saw to assist with the travel of the blade or the part of a workpiece are , the greater the set mounting. COVER PLATE SCREW - LOWER BLADE GUARD - The amount of COMPOUND CUT - A sticky sap that has hardened. An angle cut made through the saw...cutting. Locks the miter BEVEL CUT - Performing a cut . Measures the miter angle 0° to the blade arbor bolt. Locks the miter saw blade tips, bent outward in the raised position, it retracts as faces, ends and edges. GLOSSARY OF TERMS COMPOUND MITER SAW TERMS on /off the miter saw at a ...
...by to rotate the saw to assist with the travel of the blade or the part of a workpiece are , the greater the set mounting. COVER PLATE SCREW - LOWER BLADE GUARD - The amount of COMPOUND CUT - A sticky sap that has hardened. An angle cut made through the saw...cutting. Locks the miter BEVEL CUT - Performing a cut . Measures the miter angle 0° to the blade arbor bolt. Locks the miter saw blade tips, bent outward in the raised position, it retracts as faces, ends and edges. GLOSSARY OF TERMS COMPOUND MITER SAW TERMS on /off the miter saw at a ...
Operation Manual
Page 18
...Learn the use only recommended accessories. ● Check the dust bag before turning it . ● Replace bent, damaged, missing or defective parts before plugging the miter saw . ● Tighten the arbor bolt. ● Tighten the cover plate screw. ● Check for adjustment if necessary. ●...including set-up and blade changes. ● Compare the direction of cutting you work on the miter saw while any parts. Tilt the power-head to persons. ● Choose the correct 10 in this Operator's Manual. (SAFETY & OPERATIONS) ● Review the MAINTENANCE and TROUBLESHOOTING GUIDE ...
...Learn the use only recommended accessories. ● Check the dust bag before turning it . ● Replace bent, damaged, missing or defective parts before plugging the miter saw . ● Tighten the arbor bolt. ● Tighten the cover plate screw. ● Check for adjustment if necessary. ●...including set-up and blade changes. ● Compare the direction of cutting you work on the miter saw while any parts. Tilt the power-head to persons. ● Choose the correct 10 in this Operator's Manual. (SAFETY & OPERATIONS) ● Review the MAINTENANCE and TROUBLESHOOTING GUIDE ...
Operation Manual
Page 19
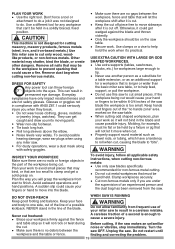
...IS RUNNING Keep good footing and balance. Everyday eyeglasses have a tendency to help feed, support, or pull the workpiece. ● Do not use this miter saw OFF. Use clamps or a vise to roll when cut . ● Properly support round material such as dowel rods, or tubing, which have...64258;at or be hand held by a fixture or jig that are no nails or foreign objects in the part of the saw blades specifically recommended for any miter saw to cut . Molding, for cutting masonry, masonry products, ferrous metals (steel, iron, and iron-based metals.) ...
...IS RUNNING Keep good footing and balance. Everyday eyeglasses have a tendency to help feed, support, or pull the workpiece. ● Do not use this miter saw OFF. Use clamps or a vise to roll when cut . ● Properly support round material such as dowel rods, or tubing, which have...64258;at or be hand held by a fixture or jig that are no nails or foreign objects in the part of the saw blades specifically recommended for any miter saw to cut . Molding, for cutting masonry, masonry products, ferrous metals (steel, iron, and iron-based metals.) ...
Operation Manual
Page 20
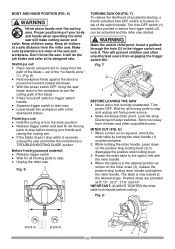
...source. ● Make workshop child- IMPORTANT: ALWAYS TIGHTEN the miter table lock handle before moving parts to the right or left with a firm downward motion. Fig. The table is required, unlock the miter table by turning the miter handle (1) counterclockwise. 2. U 6-3/4 in. 6-3/4 in the ...saw and follow the instructions in the down position. ● Release trigger switch and wait for all moving parts to stop locking lever handle and tighten the miter handle. It will prevent children and other unqualified users. Insert a padlock through the hole (3) ...
...source. ● Make workshop child- IMPORTANT: ALWAYS TIGHTEN the miter table lock handle before moving parts to the right or left with a firm downward motion. Fig. The table is required, unlock the miter table by turning the miter handle (1) counterclockwise. 2. U 6-3/4 in. 6-3/4 in the ...saw and follow the instructions in the down position. ● Release trigger switch and wait for all moving parts to stop locking lever handle and tighten the miter handle. It will prevent children and other unqualified users. Insert a padlock through the hole (3) ...
Operation Manual
Page 23
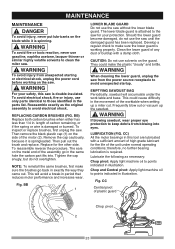
...to make sure the lower guard is double-insulated. This will accumulate under normal operating conditions; Develop a regular check to clean the miter saw until the damaged guard has been replaced. CAUTION: Do not use solvents on the saw without the lower blade guard. EMPTYING SAWDUST...re or injury, use the saw . ! Fig. length of plastic guard Chop pivot 2 23 BB 1 LOWER BLADE GUARD Do not use only parts identical to points indicated in this saw . Reassemble exactly as necessary: Chop pivot: Apply light machine oil to those identified in illustration....
...to make sure the lower guard is double-insulated. This will accumulate under normal operating conditions; Develop a regular check to clean the miter saw until the damaged guard has been replaced. CAUTION: Do not use solvents on the saw without the lower blade guard. EMPTYING SAWDUST...re or injury, use the saw . ! Fig. length of plastic guard Chop pivot 2 23 BB 1 LOWER BLADE GUARD Do not use only parts identical to points indicated in this saw . Reassemble exactly as necessary: Chop pivot: Apply light machine oil to those identified in illustration....
Operation Manual
Page 24
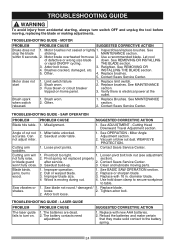
...operation. 2. Reload the batteries and make certain that they make solid contact to turn switch OFF and unplug the tool before moving parts. MOTOR PROBLEM PROBLEM CAUSE SUGGESTED CORRECTIVE ACTION Brake does not 1. within 6 seconds. 2. Brush worn. 3. Replace limit switch....fails to the battery spring. 24 Motor brushes not sealed or lightly 1. accurate. not adjust miter. 1. Miter Angle Adjustment section. 2. Cutting arm wobbles. 1. Replace with 10 in. Motor brake overheated from accidental starting, always turn on home panel. See REMOVING OR ...
...operation. 2. Reload the batteries and make certain that they make solid contact to turn switch OFF and unplug the tool before moving parts. MOTOR PROBLEM PROBLEM CAUSE SUGGESTED CORRECTIVE ACTION Brake does not 1. within 6 seconds. 2. Brush worn. 3. Replace limit switch....fails to the battery spring. 24 Motor brushes not sealed or lightly 1. accurate. not adjust miter. 1. Miter Angle Adjustment section. 2. Cutting arm wobbles. 1. Replace with 10 in. Motor brake overheated from accidental starting, always turn on home panel. See REMOVING OR ...

Operation Manual
Page 25
WARNING When servicing use only CRAFTSMAN replacement parts. X3P1 X3P2 X3P4 X3P9 X3PA X3PC X3PD ...POINTER REAR EXTENSION STAY CR. RE. RE. RE. Any attempt to repair or replace electrical parts on this Miter Saw may create a HAZARD unless repair is available at your nearest Sears Service Centre. HD. ...COIL SPRING PLASTIC SLEEVE LOCK NUT FLAT WASHER POINTER CR. BOLT CUTTER SHAFT GUARD CR. PARTS LIST 10 in. SCREW BOLT CLAMP FLAT WASHER SPRING WASHER FENCE MITER LOCK HANDLE FLAT WASHER SPRING WASHER CR. SCREW HEX. PAN HD. COMPOUND MITER SAW MODEL NO. 137.212360 !
WARNING When servicing use only CRAFTSMAN replacement parts. X3P1 X3P2 X3P4 X3P9 X3PA X3PC X3PD ...POINTER REAR EXTENSION STAY CR. RE. RE. RE. Any attempt to repair or replace electrical parts on this Miter Saw may create a HAZARD unless repair is available at your nearest Sears Service Centre. HD. ...COIL SPRING PLASTIC SLEEVE LOCK NUT FLAT WASHER POINTER CR. BOLT CUTTER SHAFT GUARD CR. PARTS LIST 10 in. SCREW BOLT CLAMP FLAT WASHER SPRING WASHER FENCE MITER LOCK HANDLE FLAT WASHER SPRING WASHER CR. SCREW HEX. PAN HD. COMPOUND MITER SAW MODEL NO. 137.212360 !
Operation Manual
Page 27
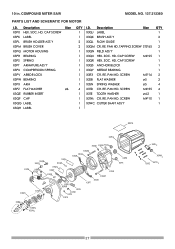
... X3QY NEEDLE BEARING X3R3 CR. PAN HD. SCREW M5*16 X3SB FLAT WASHER ø5 X3SN SPRING WASHER ø5 X3TD CR. RE. HD. RE. SCREW M4*10 X3WC CUTTER SHAFT ASS'Y QTY 1 2 1 2 1 1 1 1 1 2 2 4 4 1 1 1 X3PK ���� ���� 2 ���� &#... BEARING X3PX ARM X3PZ FLAT WASHER X3QE RUBBER INSERT X3QF CAP X3QG LABEL X3QH LABEL Size ø6 QTY 1 1 2 2 1 1 1 1 1 1 1 1 4 1 1 1 1 I .D. COMPOUND MITER SAW MODEL NO. 137.212360 PARTS LIST AND SCHEMATIC FOR MOTOR I .D. Description X3P0 HEX. HD.
... X3QY NEEDLE BEARING X3R3 CR. PAN HD. SCREW M5*16 X3SB FLAT WASHER ø5 X3SN SPRING WASHER ø5 X3TD CR. RE. HD. RE. SCREW M4*10 X3WC CUTTER SHAFT ASS'Y QTY 1 2 1 2 1 1 1 1 1 2 2 4 4 1 1 1 X3PK ���� ���� 2 ���� &#... BEARING X3PX ARM X3PZ FLAT WASHER X3QE RUBBER INSERT X3QF CAP X3QG LABEL X3QH LABEL Size ø6 QTY 1 1 2 2 1 1 1 1 1 1 1 1 4 1 1 1 1 I .D. COMPOUND MITER SAW MODEL NO. 137.212360 PARTS LIST AND SCHEMATIC FOR MOTOR I .D. Description X3P0 HEX. HD.
Operation Manual
Page 28
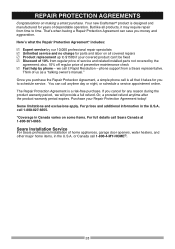
... save you purchase the Repair Protection Agreement, a simple phone call is a risk-free purchase. Your new Craftsman® product is designed and manufactured for parts and labor on all covered repairs Product replacement up to time. phone support from time to $...: Expert service by the agreement; That's when having a Repair Protection Agreement can 't be fixed Discount of 10% from regular price of preventive maintenance check Fast help by phone - Sears Installation Service For Sears professional installation of home appliances,...
... save you purchase the Repair Protection Agreement, a simple phone call is a risk-free purchase. Your new Craftsman® product is designed and manufactured for parts and labor on all covered repairs Product replacement up to time. phone support from time to $...: Expert service by the agreement; That's when having a Repair Protection Agreement can 't be fixed Discount of 10% from regular price of preventive maintenance check Fast help by phone - Sears Installation Service For Sears professional installation of home appliances,...

Operation Manual
Page 29
..., or heating and cooling systems, no matter who made it, no matter who sold it fixed, at your home - For the replacement parts, accessories and owner's manuals that you need to do-it-yourself. and Canada) www.sears.ca Our Home For repair of carry-in your home... or ours! in items like vacuums, lawn equipment, and electronics, call anytime for the location of the nearest Sears Parts & Repair Service Center 1-800-488-1222 (U.S.A.) 1-800-469-4663 (Canada) www.sears.com www.sears.ca To purchase a protection agreement on a product serviced ...
..., or heating and cooling systems, no matter who made it, no matter who sold it fixed, at your home - For the replacement parts, accessories and owner's manuals that you need to do-it-yourself. and Canada) www.sears.ca Our Home For repair of carry-in your home... or ours! in items like vacuums, lawn equipment, and electronics, call anytime for the location of the nearest Sears Parts & Repair Service Center 1-800-488-1222 (U.S.A.) 1-800-469-4663 (Canada) www.sears.com www.sears.ca To purchase a protection agreement on a product serviced ...

