
Instruction Manual
Page 1
... • Stay to the left and behind the edger when in the safety switch and then squeeze the main trigger. Be AWARE of your surroundings. www.sears.com/craftsman Instruction Manual for Electric Edger EZ.Edge.n.Store Model No. 71.79653 BEFORE RETURNING THIS PRODUCT FOR ANY REASON PLEASE FIRST ...CALL (800) 539-6455 IN MOST CASES A CRAFTSMAN REPRESENATIVE WILL BE ABLE TO HELP YOU SOLVE YOUR ISSUE ...
... • Stay to the left and behind the edger when in the safety switch and then squeeze the main trigger. Be AWARE of your surroundings. www.sears.com/craftsman Instruction Manual for Electric Edger EZ.Edge.n.Store Model No. 71.79653 BEFORE RETURNING THIS PRODUCT FOR ANY REASON PLEASE FIRST ...CALL (800) 539-6455 IN MOST CASES A CRAFTSMAN REPRESENATIVE WILL BE ABLE TO HELP YOU SOLVE YOUR ISSUE ...
Instruction Manual
Page 3
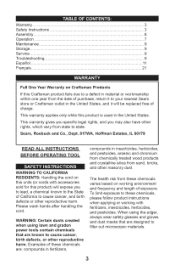
... silica from sand, bricks, and other rights, which vary from the date of purchase, return it to your nearest Sears store or Craftsman outlet in the United States, and it wilt be replaced free of charge. This warranty applies only while this product is used in ... RESIDENTS: Handling the cord on this units (or cords with fertilizers, insecticides, herbicides, and pesticides. WARNING: Certain dusts created when using the edger, always wear safety glasses and gloves and dust masks that are designed to filter out microscopic materials. 3 When using lawn and graden power tools...
... silica from sand, bricks, and other rights, which vary from the date of purchase, return it to your nearest Sears store or Craftsman outlet in the United States, and it wilt be replaced free of charge. This warranty applies only while this product is used in ... RESIDENTS: Handling the cord on this units (or cords with fertilizers, insecticides, herbicides, and pesticides. WARNING: Certain dusts created when using the edger, always wear safety glasses and gloves and dust masks that are designed to filter out microscopic materials. 3 When using lawn and graden power tools...
Instruction Manual
Page 4
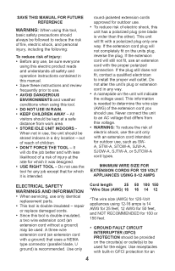
... safety and operation instructions contained in this manual. * Save these instructions and review frequently prior to use. * AVOID DANGEROUS ENVIRONMENTS and weather conditions when using 12-16 amps is needed to determine the wire size (AWG) of the extension cord you should use , the unit should be stored indoors in a dry location... feet. Do not alter the unit's plug or extension cord in use . " STORE IDLE UNIT INDOORS When not in any job except that for the edger. This unit will not completely fit on the unit will do the job better and with built-in GFCI protection for an 4
... safety and operation instructions contained in this manual. * Save these instructions and review frequently prior to use. * AVOID DANGEROUS ENVIRONMENTS and weather conditions when using 12-16 amps is needed to determine the wire size (AWG) of the extension cord you should use , the unit should be stored indoors in a dry location... feet. Do not alter the unit's plug or extension cord in use . " STORE IDLE UNIT INDOORS When not in any job except that for the edger. This unit will not completely fit on the unit will do the job better and with built-in GFCI protection for an 4
Instruction Manual
Page 5
... to contain long hair. Look for any buried electrical or other cables. * AVOID HITTING CURBS, TREES, WALLS, ROCKS, SIDEWALKS AND OTHER SOLID OBJECTS WITH EDGER WHILE USING. * DANGER: KEEP HANDS, FEET AND ALL BODY PARTS AWAY from the receptacle. Be sure work area is turned off position when plugging in... the gauge number, the heavier the cord. * DO NOT ABUSE THE CORD- CHECK FOR BURIED CABLES BEFORE USE: Before edging or trenching with this edger may cause it to see if they are bent or broken. Wear long pants to inspect area for cuts, nicks, or cracks in the unit...
... to contain long hair. Look for any buried electrical or other cables. * AVOID HITTING CURBS, TREES, WALLS, ROCKS, SIDEWALKS AND OTHER SOLID OBJECTS WITH EDGER WHILE USING. * DANGER: KEEP HANDS, FEET AND ALL BODY PARTS AWAY from the receptacle. Be sure work area is turned off position when plugging in... the gauge number, the heavier the cord. * DO NOT ABUSE THE CORD- CHECK FOR BURIED CABLES BEFORE USE: Before edging or trenching with this edger may cause it to see if they are bent or broken. Wear long pants to inspect area for cuts, nicks, or cracks in the unit...
Instruction Manual
Page 6
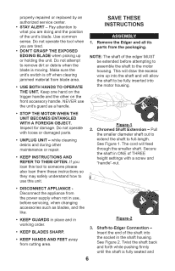
...socket in the shaft housing. See Figure 1. Inspect for damage. Secure the shaft in use, before attempting to assemble the shaft to -Edger Connection = Insert the end of THREE height settings with loose or damaged parts. * UNPLUG UNIT =while cleaning debris and during other on...other maintenance or repair. • KEEP INSTRUCTIONS AND REFER TO THEM OFTEN. " DON'T GRASP THE EXPOSED SAVE THESE INSTRUCTIONS A t, Remove the Edger and all its parts from blade area. If you loan this unit. 2. youaretired. Keep one hand on the front accessory handle. Payattentiotno whayt ...
...socket in the shaft housing. See Figure 1. Inspect for damage. Secure the shaft in use, before attempting to assemble the shaft to -Edger Connection = Insert the end of THREE height settings with loose or damaged parts. * UNPLUG UNIT =while cleaning debris and during other on...other maintenance or repair. • KEEP INSTRUCTIONS AND REFER TO THEM OFTEN. " DON'T GRASP THE EXPOSED SAVE THESE INSTRUCTIONS A t, Remove the Edger and all its parts from blade area. If you loan this unit. 2. youaretired. Keep one hand on the front accessory handle. Payattentiotno whayt ...
Instruction Manual
Page 7
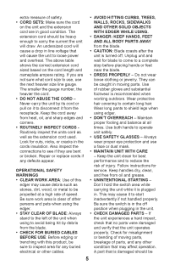
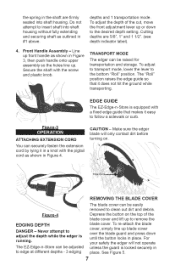
... then push handle onto upper assembly so the holes line up to the desired depth setting. CAUTION - See Figure 5. 7 TRANSPORT MODE The edger can be adjusted to insert shaft into shaft housing. To adjust to transport mode, lower the lever to follow a sidewalk or curb. Never ...attempt to clean out dirt and debris. The EZ-Edge-n-Store can be easily removed to adjust the depth while the edger is locked securely in place. Depress the button on . \\ \ REMOVING THE BLADE COVER Fj_ure-4 EDGING DEPTH DANGER - depths and 1 transportation mode...
... then push handle onto upper assembly so the holes line up to the desired depth setting. CAUTION - See Figure 5. 7 TRANSPORT MODE The edger can be adjusted to insert shaft into shaft housing. To adjust to transport mode, lower the lever to follow a sidewalk or curb. Never ...attempt to clean out dirt and debris. The EZ-Edge-n-Store can be easily removed to adjust the depth while the edger is locked securely in place. Depress the button on . \\ \ REMOVING THE BLADE COVER Fj_ure-4 EDGING DEPTH DANGER - depths and 1 transportation mode...
Instruction Manual
Page 8
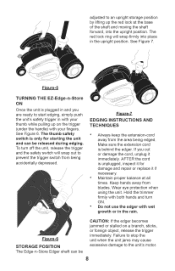
...unit. Fi=_ure-7 EDGING INSTRUCTIONS TECHNIQUES AND * Always keep the extension-cord away from blades. The Edge-n-Store Edger shaft can be 8 adjustetdo anuprighsttoragpeosition byliftinguptheredlockatthebase oftheshaftandmovintgheshaft forwardin, totheuprighptositionT.he redlockringwillsnapfirmlyintoplace intheuprighptositionS.eeFigure7. See Figure 6. Keep hands ...to start edging, simply push the unit's safety trigger in the rain. STORAGE POSITION CAUTION: If the edger becomes jammed or stalled on the trigger (under the handle) with your fingers. TURNING THE EZ=Edge=n=...
...unit. Fi=_ure-7 EDGING INSTRUCTIONS TECHNIQUES AND * Always keep the extension-cord away from blades. The Edge-n-Store Edger shaft can be 8 adjustetdo anuprighsttoragpeosition byliftinguptheredlockatthebase oftheshaftandmovintgheshaft forwardin, totheuprighptositionT.he redlockringwillsnapfirmlyintoplace intheuprighptositionS.eeFigure7. See Figure 6. Keep hands ...to start edging, simply push the unit's safety trigger in the rain. STORAGE POSITION CAUTION: If the edger becomes jammed or stalled on the trigger (under the handle) with your fingers. TURNING THE EZ=Edge=n=...
Instruction Manual
Page 9
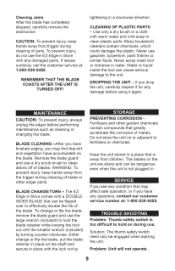
... and secure in . tightening in water. Use only a dry brush or a cloth with the smaller wrench (included) by •=A PREVENTING CORROSION Fertilizers and other edger parts. Water or liquid inside the tool can cause serious damage to clean plastic parts. A A CAUTION: To prevent injury, always unplug the... edger before using it for any questions, contact our customer service number at : 1-800-539-6455 REMEMBER THAT THE BLADE COASTS AFTER THE UNIT IS ...
... and secure in . tightening in water. Use only a dry brush or a cloth with the smaller wrench (included) by •=A PREVENTING CORROSION Fertilizers and other edger parts. Water or liquid inside the tool can cause serious damage to clean plastic parts. A A CAUTION: To prevent injury, always unplug the... edger before using it for any questions, contact our customer service number at : 1-800-539-6455 REMEMBER THAT THE BLADE COASTS AFTER THE UNIT IS ...


