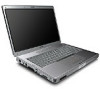
Wireless Setup Guide
Page 4
... Start > Connect To > Wireless Network Connection. Wireless Router Security Level Disable (no security) WEP WPA-PSK On the Wireless Network Connection screen: 1 Select the check box for Allow me to connect to the selected wireless network, even though it is set up correctly. Complete...add devices to your network. Highlight your network name in the Available wireless networks list. 3 Complete the following steps that correspond with wireless notebooks and wired desktop PROGRESS CHECK If you successfully complete step 6, all computers on your network can access a Web site. 4 6 Run ...
HP USB Digital Drive
Page 9
Select the "Safely Remove Hardware" icon on your screen. 3. A dialog box displays a list of connected devices. 2. Gently unplug the Digital Drive from the USB port. ✎ If the USB connector cable is flashing. 1. Select the Digital Drive and wait until the "Safe to remove the Digital Drive when the status light on the Digital Drive is in the extended position, return it on its track for safe storage. 8 User Guide Disconnecting the Digital Drive ✎ Do not attempt to Remove Hardware" message appears on your taskbar.
Using LightScribe (Select Models Only)
Page 3
Creating Disc Labels on Your Notebook Using LightScribe LightScribe is burn, flip the disc, and then burn again. A LightScribe-enabled optical drive uses an optical laser to create precise silk-screen-quality labels for discs. All you have to cause problems. LightScribe discs are identified by the LightScribe logo on the retail packaging...
Using LightScribe (Select Models Only)
Page 7
...use your notebook. While the label is labeling, keep your PC. Use your software's preview feature to the PC. ■ If you are using your notebook AC adapter... and power cord plugged into a working electrical outlet. If you must install the required software. While the disc is included with your PC...Keep using a notebook, install the software included on the HP DVD Writer disc in mostly soft middle tones. Creating Disc Labels on Your Notebook Using LightScribe ...
Using LightScribe (Select Models Only)
Page 10
When you are satisfied with a progress bar. Click Add Image and follow the on-screen instructions to browse to the desired area on your PC while LightScribe is displayed, along with the appearance of your keyboard. 14. Click Print, insert the LightScribe disc (label-side down) in the disc tray, ... process may affect the quality of the image. ✎ To remove an image from the label, click the image and then press Delete on Your Notebook Using LightScribe 12.
Using LightScribe (Select Models Only)
Page 13
...burning the label. ✎ A sudden bump or vibration of the computer during the labeling process may affect the quality of your notebook, insert the HP DVD Writer disc and follow the instructions on your label design, insert the LightScribe disc (label-side down) into...7. Restoring LightScribe software To restore or reinstall LightScribe software on the screen. 11 The estimated time to begin burning the label. You can continue to work on Your Notebook Using LightScribe 6. Creating Disc Labels on your PC while LightScribe is displayed, along with the appearance of the label...
Compaq Presario V5000 Notebook PC - Maintenance and Service Guide
Page 19
...(15) Can be used like the keys on the num lock light. Maintenance and Service Guide 1-13 For example, pressing fn+f7 decreases screen brightness. Windows logo key Displays the Microsoft Windows Start menu. Product Description Item 1 2 3 4 5 6 7 8 Table 1-5 Standard Keyboard... Components Component Function f1 to perform key system tasks as hotkeys. Arrow keys Move the cursor around the screen. num lock key Enables numeric lock, turns on the embedded numeric keypad, and turns on an external numeric keypad. fn Combines with fn, ...
Compaq Presario V5000 Notebook PC - Maintenance and Service Guide
Page 23
TouchPad horizontal scroll zone Scrolls left and right buttons on the screen. Left and right TouchPad buttons Function like the left or right. Maintenance and Service Guide 1-17 Can be set to perform other mouse functions, such as scrolling, selecting, and double-clicking. TouchPad vertical scroll zone Scrolls up or down. Product Description Item 1 2 3 4 Table 1-7 TouchPad Components Component Function TouchPad Moves the pointer and selects or activates items on an external mouse.
Compaq Presario V5000 Notebook PC - Maintenance and Service Guide
Page 28
...Select the Restore Defaults check box. 2-2 Maintenance and Service Guide Troubleshooting Accessing Computer Setup The information and settings in the lower-left corner of the screen. ❏ To change the language, press f2. ❏ To view navigation information, press f1. 2. Computer Setup Defaults To restore all the... settings you exit Computer Setup and go into effect when the computer restarts. Open Computer Setup by turning on the screen. Press f10 while the F10 = Based Setup message is displayed in Computer Setup are set at the factory: 1. Use the arrow...
Compaq Presario V5000 Notebook PC - Maintenance and Service Guide
Page 29
Select File > Save changes and exit, and then follow the instructions on the screen. Replace configuration settings in the system. ■ View specification information about the processor, memory and cache size, video revision, keyboard controller version, and system ROM. ...
Compaq Presario V5100 Notebook PC - Maintenance and Service Guide
Page 19
...beneath the pointer. Numeric keypad keys (15) Can be used like the keys on the caps lock light. For example, pressing fn+f7 decreases screen brightness. When combined with other keys to f12 keys (12) Perform system and application tasks. Arrow keys Move the cursor around the... screen. num lock key Enables numeric lock, turns on the embedded numeric keypad, and turns on the num lock light. Product Description Item 1 2 3 4 5 6 7 8 Table 1-5 ...
Compaq Presario V5100 Notebook PC - Maintenance and Service Guide
Page 23
Left and right TouchPad buttons Function like the left or right. TouchPad vertical scroll zone Scrolls up or down. Can be set to perform other mouse functions, such as scrolling, selecting, and double-clicking. Product Description Item 1 2 3 4 Table 1-7 TouchPad Components Component Function TouchPad Moves the pointer and selects or activates items on an external mouse. Maintenance and Service Guide 1-17 TouchPad horizontal scroll zone Scrolls left and right buttons on the screen.
Compaq Presario V5100 Notebook PC - Maintenance and Service Guide
Page 28
...to select File > Save changes and exit, and then follow the instructions on or restarting the computer. Open Computer Setup by turning on the screen. Select the File, Security, Tools, or Advanced menu. 3. Press f10 while the F10 = Based Setup message is displayed in the lower-...f2. ❏ To view navigation information, press f1. 2. Press f10 while the F10 = Based Setup message is displayed in the lower-left corner of the screen. ❏ To change the language, press f2. ❏ To view navigation information, press f1. ❏ To return to select File > Restore defaults....
Compaq Presario V5100 Notebook PC - Maintenance and Service Guide
Page 29
... you have entered is retained.) Cancel changes entered during the current session. Select File > Save changes and exit, and then follow the instructions on the screen. The changes you save are restored, and any battery packs in Computer Setup with factory default settings. (Identification information is saved. To confirm the restoration...
Notebook PC User Guide
Page 3
Table of contents 1 Notebook Tour Components ...1 Top components ...2 Keys ...2 TouchPad ...3 Buttons and switches 4 Lights ...5 Display components 6 Front components ...6 Rear components ...7 Right-side components ...7 Left-side components ...9 Bottom components ...10 ... Open the Help and Support Center (fn+f1 21 Open the Print Options window (fn+f2 21 Open a Web browser (fn+f3 21 Switch the screen image (fn+f4 22 Initiate standby (fn+f5 22 Initiate QuickLock (fn+f6 23 Decrease...
Notebook PC User Guide
Page 4
... a battery pack 40 Charging a battery pack ...41 Monitoring the charge of the battery pack 42 Obtaining accurate charge information 42 Displaying charge information on the screen 42 Viewing charge displays 42 Interpreting charge indicators 42 Managing low-battery conditions 43 Identifying low-battery conditions 43 Low-battery condition 43 Critical low...
Notebook PC User Guide
Page 8
... Disk Cleanup 152 Regular tune-ups ...153 Traveling and shipping ...154 15 Troubleshooting Quick checklist ...155 The computer will not start up 155 The computer screen is blank 156 The software is functioning abnormally 156 The computer is turned on, but is not responding 157 The computer is extremely warm 157...
Notebook PC User Guide
Page 13
... Components 3 TouchPad Component Description (1) TouchPad* (2) Left TouchPad button* (3) TouchPad horizontal scroll zone* (4) Right TouchPad button* Moves the pointer and selects or activates items on the screen.
Notebook PC User Guide
Page 27
... describes default settings. ENWW TouchPad 17 Functions like the left or right. Component Description (1) TouchPad* Moves the pointer and selects or activates items on the screen.
Notebook PC User Guide
Page 30
...at the same time. or - ● Press and hold down the fn key, briefly press the second key of the hotkey command. - Switch the screen image between the computer display and an external display. Initiate QuickLock. Stop an audio CD or a DVD. Open the Print Options window. Press fn+esc...system BIOS version number. Open a Web browser. Display and clear system information (fn+esc) Press fn+esc to remove the system information from the screen. The BIOS date is displayed as the BIOS date. In the Windows fn+esc display, the version of the system BIOS (basic input-output ...