End User License Agreement
Page 1
... and use of download. DOWNLOADING, OR b. Storage. IF YOU DO NOT ACCEPT THESE LICENSE TERMS, YOUR SOLE REMEDY IS TO RETURN THE ENTIRE UNUSED PRODUCT (HARDWARE AND SOFTWARE) WITHIN 14 DAYS FOR A REFUND SUBJECT TO THE REFUND POLICY OF YOUR PLACE OF PURCHASE. 1. You may contain a EULA in its suppliers reserve...
... and use of download. DOWNLOADING, OR b. Storage. IF YOU DO NOT ACCEPT THESE LICENSE TERMS, YOUR SOLE REMEDY IS TO RETURN THE ENTIRE UNUSED PRODUCT (HARDWARE AND SOFTWARE) WITHIN 14 DAYS FOR A REFUND SUBJECT TO THE REFUND POLICY OF YOUR PLACE OF PURCHASE. 1. You may contain a EULA in its suppliers reserve...
Wireless Setup Guide
Page 2
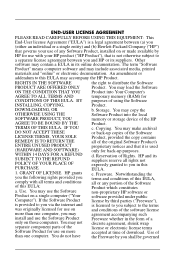
... (purchased separately). Point-to record router security level. Record encryption key. TIP: You can buy a wireless PC Card to get started! During router configuration, use the table below to set up your wireless router. Encryption key...as both a wireless router and a cable/DSL modem. With these 3 pieces, you can buy a wireless-enabled notebook, you 're ready to add wireless capability. No action required. Search for Microsoft Windows XP by visiting Microsoft Windows ... Microsoft® Windows® XP Professional. See the "Comparison of hardware.
... (purchased separately). Point-to record router security level. Record encryption key. TIP: You can buy a wireless PC Card to get started! During router configuration, use the table below to set up your wireless router. Encryption key...as both a wireless router and a cable/DSL modem. With these 3 pieces, you can buy a wireless-enabled notebook, you 're ready to add wireless capability. No action required. Search for Microsoft Windows XP by visiting Microsoft Windows ... Microsoft® Windows® XP Professional. See the "Comparison of hardware.

Wireless Setup Guide
Page 3
... according to the manufacturer's instructions. (During this setup. 2 Make sure that the blue wireless light next to the wireless icon is off. Set up the hardware and software Now that you have tested your setup with the wireless router Ethernet cable connected, remove the cable from the successfully access a computer and...
... according to the manufacturer's instructions. (During this setup. 2 Make sure that the blue wireless light next to the wireless icon is off. Set up the hardware and software Now that you have tested your setup with the wireless router Ethernet cable connected, remove the cable from the successfully access a computer and...

Wireless Setup Guide
Page 4
...2.) 2 Retype the pass phrase in the network: a Select Start > Control Panel > Network and Internet Connections > Set up the router hardware and software, you're ready to add devices to the wireless network by opening your Web browser and accessing a Web site. 5 Connect and... configure any additional wireless-enabled computers or other devices, including wired devices, that correspond with wireless notebooks and wired desktop PROGRESS CHECK If you successfully complete step 6, all computers on your wireless router security level (encryption): PROGRESS CHECK If...
...2.) 2 Retype the pass phrase in the network: a Select Start > Control Panel > Network and Internet Connections > Set up the router hardware and software, you're ready to add devices to the wireless network by opening your Web browser and accessing a Web site. 5 Connect and... configure any additional wireless-enabled computers or other devices, including wired devices, that correspond with wireless notebooks and wired desktop PROGRESS CHECK If you successfully complete step 6, all computers on your wireless router security level (encryption): PROGRESS CHECK If...

HP USB Digital Drive
Page 9
Disconnecting the Digital Drive ✎ Do not attempt to Remove Hardware" message appears on your taskbar. Gently unplug the Digital Drive from the USB port. ✎ If the USB connector cable is flashing. 1. Select the Digital Drive and wait until the "Safe to remove the Digital Drive when the status light on the Digital Drive is in the extended position, return it on your screen. 3. Select the "Safely Remove Hardware" icon on its track for safe storage. 8 User Guide A dialog box displays a list of connected devices. 2.
Disconnecting the Digital Drive ✎ Do not attempt to Remove Hardware" message appears on your taskbar. Gently unplug the Digital Drive from the USB port. ✎ If the USB connector cable is flashing. 1. Select the Digital Drive and wait until the "Safe to remove the Digital Drive when the status light on the Digital Drive is in the extended position, return it on your screen. 3. Select the "Safely Remove Hardware" icon on its track for safe storage. 8 User Guide A dialog box displays a list of connected devices. 2.
HP USB Digital Drive
Page 11
..., have the following items available: ■ The HP USB Digital Drive ■ Conditions under which the problem occurred ■ Error messages that have occurred ■ Hardware and software you are available on the Internet through HP technical support. Accessing Technical Support Support services are using 10 User Guide
..., have the following items available: ■ The HP USB Digital Drive ■ Conditions under which the problem occurred ■ Error messages that have occurred ■ Hardware and software you are available on the Internet through HP technical support. Accessing Technical Support Support services are using 10 User Guide

Compaq Presario V5000 Notebook PC - Maintenance and Service Guide
Page 174
Specifications Hardware IRQ IRQ0 IRQ1 IRQ2 IRQ3 IRQ4 IRQ5* IRQ6 IRQ7* IRQ8 IRQ9* IRQ10* Table 6-6 System Interrupts System Function System timer Standard 101-/102-Key or Microsoft Natural Keyboard Cascaded USB2 Enhanced Host Controller-24CD COM1 Conexant AC-Link Audio Data Fax Modem with SmartCP Diskette drive Parallel port System CMOS/real-time clock Microsoft ACPI-compliant system Realtek RTL8139 Family PCI fast Ethernet Controller 6-10 Maintenance and Service Guide
Specifications Hardware IRQ IRQ0 IRQ1 IRQ2 IRQ3 IRQ4 IRQ5* IRQ6 IRQ7* IRQ8 IRQ9* IRQ10* Table 6-6 System Interrupts System Function System timer Standard 101-/102-Key or Microsoft Natural Keyboard Cascaded USB2 Enhanced Host Controller-24CD COM1 Conexant AC-Link Audio Data Fax Modem with SmartCP Diskette drive Parallel port System CMOS/real-time clock Microsoft ACPI-compliant system Realtek RTL8139 Family PCI fast Ethernet Controller 6-10 Maintenance and Service Guide

Compaq Presario V5000 Notebook PC - Maintenance and Service Guide
Page 180
Specifications Table 6-9 System DMA Hardware DMA System Function DMA0 Not applicable DMA1* Not applicable DMA2* Not applicable DMA3 Not applicable DMA4 Direct memory access controller DMA5* Available for PC Card DMA6 Not assigned DMA7 Not assigned *PC Card controller can use DMA 1, 2, or 5. 6-16 Maintenance and Service Guide
Specifications Table 6-9 System DMA Hardware DMA System Function DMA0 Not applicable DMA1* Not applicable DMA2* Not applicable DMA3 Not applicable DMA4 Direct memory access controller DMA5* Available for PC Card DMA6 Not assigned DMA7 Not assigned *PC Card controller can use DMA 1, 2, or 5. 6-16 Maintenance and Service Guide

Compaq Presario V5100 Notebook PC - Maintenance and Service Guide
Page 174
Specifications Hardware IRQ IRQ0 IRQ1 IRQ2 IRQ3 IRQ4 IRQ5* IRQ6 IRQ7* IRQ8 IRQ9* IRQ10* Table 6-6 System Interrupts System Function System timer Standard 101-/102-Key or Microsoft Natural Keyboard Cascaded USB2 Enhanced Host Controller-24CD COM1 Conexant AC-Link Audio Data Fax Modem with SmartCP Diskette drive Parallel port System CMOS/real-time clock Microsoft ACPI-compliant system Realtek RTL8139 Family PCI fast Ethernet Controller 6-10 Maintenance and Service Guide
Specifications Hardware IRQ IRQ0 IRQ1 IRQ2 IRQ3 IRQ4 IRQ5* IRQ6 IRQ7* IRQ8 IRQ9* IRQ10* Table 6-6 System Interrupts System Function System timer Standard 101-/102-Key or Microsoft Natural Keyboard Cascaded USB2 Enhanced Host Controller-24CD COM1 Conexant AC-Link Audio Data Fax Modem with SmartCP Diskette drive Parallel port System CMOS/real-time clock Microsoft ACPI-compliant system Realtek RTL8139 Family PCI fast Ethernet Controller 6-10 Maintenance and Service Guide

Compaq Presario V5100 Notebook PC - Maintenance and Service Guide
Page 180
Specifications Table 6-9 System DMA Hardware DMA System Function DMA0 Not applicable DMA1* Not applicable DMA2* Not applicable DMA3 Not applicable DMA4 Direct memory access controller DMA5* Available for PC Card DMA6 Not assigned DMA7 Not assigned *PC Card controller can use DMA 1, 2, or 5. 6-16 Maintenance and Service Guide
Specifications Table 6-9 System DMA Hardware DMA System Function DMA0 Not applicable DMA1* Not applicable DMA2* Not applicable DMA3 Not applicable DMA4 Direct memory access controller DMA5* Available for PC Card DMA6 Not assigned DMA7 Not assigned *PC Card controller can use DMA 1, 2, or 5. 6-16 Maintenance and Service Guide
Notebook PC User Guide
Page 3
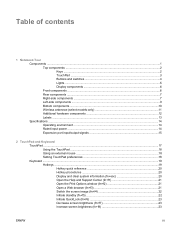
Table of contents 1 Notebook Tour Components ...1 Top components ...2 Keys ...2 TouchPad ...3 Buttons and switches 4 Lights ...5 Display components 6 Front components ...6 Rear components ...7 Right-side components ...7 Left-side components ...9 Bottom components ...10 Wireless antennae (select models only 11 Additional hardware components 12 Labels ...13 Specifications ...14 Operating environment ...14 Rated input power ...14 Expansion port input...
Table of contents 1 Notebook Tour Components ...1 Top components ...2 Keys ...2 TouchPad ...3 Buttons and switches 4 Lights ...5 Display components 6 Front components ...6 Rear components ...7 Right-side components ...7 Left-side components ...9 Bottom components ...10 Wireless antennae (select models only 11 Additional hardware components 12 Labels ...13 Specifications ...14 Operating environment ...14 Rated input power ...14 Expansion port input...
Notebook PC User Guide
Page 5
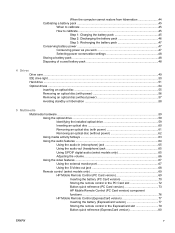
...55 Removing an optical disc (with power 56 Removing an optical disc (without power 57 Avoiding standby or hibernation 58 5 Multimedia Multimedia hardware ...59 Using the optical drive ...59 Identifying the installed optical drive 59 Inserting an optical disc 60 Removing an optical disc (with power...(select models only 69 HP Mobile Remote Control (PC Card version 69 Inserting the battery (PC Card version 70 Storing the remote control in the PC Card slot 72 Button quick reference (PC Card version 73 HP Mobile Remote Control (PC Card version) component functions 76 HP Mobile Remote ...
...55 Removing an optical disc (with power 56 Removing an optical disc (without power 57 Avoiding standby or hibernation 58 5 Multimedia Multimedia hardware ...59 Using the optical drive ...59 Identifying the installed optical drive 59 Inserting an optical disc 60 Removing an optical disc (with power...(select models only 69 HP Mobile Remote Control (PC Card version 69 Inserting the battery (PC Card version 70 Storing the remote control in the PC Card slot 72 Button quick reference (PC Card version 73 HP Mobile Remote Control (PC Card version) component functions 76 HP Mobile Remote ...
Notebook PC User Guide
Page 8
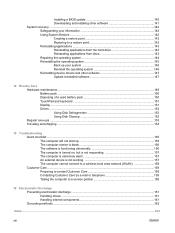
... 145 Back up your system 145 Reinstall the operating system 146 Reinstalling device drivers and other software 147 Update reinstalled software 147 14 Routine Care Hardware maintenance ...149 Battery pack ...150 Disposing of a used battery pack 150 TouchPad and keyboard ...151 Display ...151 Drives ...152 Using Disk Defragmenter 152 Using Disk...
... 145 Back up your system 145 Reinstall the operating system 146 Reinstalling device drivers and other software 147 Update reinstalled software 147 14 Routine Care Hardware maintenance ...149 Battery pack ...150 Disposing of a used battery pack 150 TouchPad and keyboard ...151 Display ...151 Drives ...152 Using Disk Defragmenter 152 Using Disk...

Notebook PC User Guide
Page 11
1 Notebook Tour Components This chapter explains the hardware features of the System Tasks window, select View system information. 3. Select Start > My Computer. 2. You can also add hardware or modify device configurations using Device Manager. In the left pane of the computer. To see a list of installed hardware in most computer models. ENWW Components 1 Select Hardware tab > Device Manager. NOTE Components included with the computer may vary by region and by model. The illustrations in this chapter identify the standard features included in the computer: 1.
1 Notebook Tour Components This chapter explains the hardware features of the System Tasks window, select View system information. 3. Select Start > My Computer. 2. You can also add hardware or modify device configurations using Device Manager. In the left pane of the computer. To see a list of installed hardware in most computer models. ENWW Components 1 Select Hardware tab > Device Manager. NOTE Components included with the computer may vary by region and by model. The illustrations in this chapter identify the standard features included in the computer: 1.

Notebook PC User Guide
Page 13
... down. *This table describes default settings. Functions like the left or right. To view and change TouchPad preferences, select Start > Control Panel > Printers and Other Hardware > Mouse. Functions like the right button on the screen. ENWW Components 3 Can be set to perform other mouse functions, such as scrolling, selecting, and doubleclicking...
... down. *This table describes default settings. Functions like the left or right. To view and change TouchPad preferences, select Start > Control Panel > Printers and Other Hardware > Mouse. Functions like the right button on the screen. ENWW Components 3 Can be set to perform other mouse functions, such as scrolling, selecting, and doubleclicking...

Notebook PC User Guide
Page 22
... the modem cable to a countryspecific modem adapter. *Modem cables, battery packs, and power cords vary in appearance by region and country. 12 Chapter 1 Notebook Tour ENWW Additional hardware components Component Description (1) Battery pack* (2) AC adapter (3) Power cord* Powers the computer when the computer is not connected to DC power. Converts AC power...
... the modem cable to a countryspecific modem adapter. *Modem cables, battery packs, and power cords vary in appearance by region and country. 12 Chapter 1 Notebook Tour ENWW Additional hardware components Component Description (1) Battery pack* (2) AC adapter (3) Power cord* Powers the computer when the computer is not connected to DC power. Converts AC power...

Notebook PC User Guide
Page 27
... items on an external mouse. Scrolls left button on an external mouse. To view and change TouchPad preferences, select Start > Control Panel > Printers and Other Hardware > Mouse. Can be set to perform other mouse functions, such as scrolling, selecting, and doubleclicking. (2) Left TouchPad button* (3) TouchPad horizontal scroll zone* (4) Right TouchPad button...
... items on an external mouse. Scrolls left button on an external mouse. To view and change TouchPad preferences, select Start > Control Panel > Printers and Other Hardware > Mouse. Can be set to perform other mouse functions, such as scrolling, selecting, and doubleclicking. (2) Left TouchPad button* (3) TouchPad horizontal scroll zone* (4) Right TouchPad button...

Notebook PC User Guide
Page 28
... computer. To scroll up and down using one of the TouchPad (disabled by default). To access Mouse Properties, select Start> Control Panel > Printers and Other Hardware > Mouse. 18 Chapter 2 TouchPad and Keyboard ENWW Other features, such as you would the left -hand and right-hand use (right-hand preference is enabled...
... computer. To scroll up and down using one of the TouchPad (disabled by default). To access Mouse Properties, select Start> Control Panel > Printers and Other Hardware > Mouse. 18 Chapter 2 TouchPad and Keyboard ENWW Other features, such as you would the left -hand and right-hand use (right-hand preference is enabled...
Notebook PC User Guide
Page 30
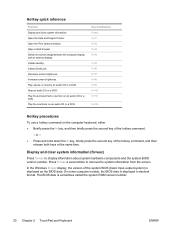
... and hold down the fn key, briefly press the second key of the hotkey command. - Press fn+esc a second time to display information about system hardware components and the system BIOS version number. On some computer models, the BIOS date is displayed as the BIOS date. Increase screen brightness. Key Combination...
... and hold down the fn key, briefly press the second key of the hotkey command. - Press fn+esc a second time to display information about system hardware components and the system BIOS version number. On some computer models, the BIOS date is displayed as the BIOS date. Increase screen brightness. Key Combination...

Notebook PC User Guide
Page 31
... information about your Windows operating system, the Help and Support Center provides ● Information about your computer, such as model and serial number, installed software, hardware components, and specifications. ● Answers to quickly access your home page and the Internet. After you have set up your computer. ● Tutorials to use...
... information about your Windows operating system, the Help and Support Center provides ● Information about your computer, such as model and serial number, installed software, hardware components, and specifications. ● Answers to quickly access your home page and the Internet. After you have set up your computer. ● Tutorials to use...


