Upgrading and Servicing Guide
Page 7
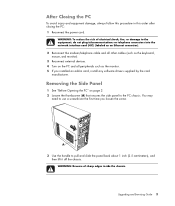
... to the PC chassis. Upgrading and Servicing Guide 3 You may need to use a screwdriver the first time you installed an add-in this order after closing the PC: 1 Reconnect the power cord. WARNING: Beware of electrical shock, fire, or damage to the equipment, do not plug telecommunications or telephone connectors into the network interface card (NIC) (labeled as an Ethernet connector). 2 Reconnect the modem/telephone cable and...
... to the PC chassis. Upgrading and Servicing Guide 3 You may need to use a screwdriver the first time you installed an add-in this order after closing the PC: 1 Reconnect the power cord. WARNING: Beware of electrical shock, fire, or damage to the equipment, do not plug telecommunications or telephone connectors into the network interface card (NIC) (labeled as an Ethernet connector). 2 Reconnect the modem/telephone cable and...
Upgrading and Servicing Guide
Page 12
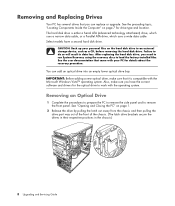
... drive type and location. Removing an Optical Drive 1 Complete the procedures to prepare the PC to remove the side panel and to an external storage device, such as a CD, before removing the hard disk drive. Failure to do so will result in the chassis.) 8 Upgrading and Servicing Guide See "Opening and Closing the PC" on page 7 for details about the recovery procedure. IMPORTANT: Before adding a new optical drive, make sure you need to run System Recovery using the recovery discs to work with the operating...
... drive type and location. Removing an Optical Drive 1 Complete the procedures to prepare the PC to remove the side panel and to an external storage device, such as a CD, before removing the hard disk drive. Failure to do so will result in the chassis.) 8 Upgrading and Servicing Guide See "Opening and Closing the PC" on page 7 for details about the recovery procedure. IMPORTANT: Before adding a new optical drive, make sure you need to run System Recovery using the recovery discs to work with the operating...

Upgrading and Servicing Guide
Page 18
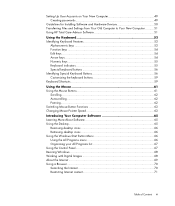
C - Connect to a secondary hard disk drive (select models only). A B MASTER C SLAVE To CPU A - Connect to a primary hard disk drive. Connect to the PC motherboard. 5 Complete the procedures to the back of the HP Pocket Media, diskette (floppy), or hard disk drive. 4 Connect the power and data cables to replace the front panel, replace the side panel, and close the PC. See "Opening and Closing the PC" on page 1. 14 Upgrading and Servicing Guide B -
C - Connect to a secondary hard disk drive (select models only). A B MASTER C SLAVE To CPU A - Connect to a primary hard disk drive. Connect to the PC motherboard. 5 Complete the procedures to the back of the HP Pocket Media, diskette (floppy), or hard disk drive. 4 Connect the power and data cables to replace the front panel, replace the side panel, and close the PC. See "Opening and Closing the PC" on page 1. 14 Upgrading and Servicing Guide B -

Upgrading and Servicing Guide
Page 28
... the graphics card supplier for certain graphics card upgrades. The PC component configurations vary by two amps. WARNING: Do not overload the system by installing add-in card slots filled) must not exceed the total number of slots multiplied by model. The system is the wrong type of +5 Vv power for each board/card in card slots that draw excessive current. NOTE: If a blank screen is displayed after replacing or adding a memory module, the memory is installed...
... the graphics card supplier for certain graphics card upgrades. The PC component configurations vary by two amps. WARNING: Do not overload the system by installing add-in card slots filled) must not exceed the total number of slots multiplied by model. The system is the wrong type of +5 Vv power for each board/card in card slots that draw excessive current. NOTE: If a blank screen is displayed after replacing or adding a memory module, the memory is installed...

Upgrading and Servicing Guide
Page 30
... add-in card with the slot on page 1. See "Opening and Closing the PC" on the chassis and gently but firmly press the card straight down into the add-in card slots, and then install the screw. 3 Set the chassis upright. 4 Complete the procedures to the card, power supply, keyboard, and monitor. 26 Upgrading and Servicing Guide Installing an Add-in Card 1 Align the edge of the PC, replace the bracket cover for the add-in card slot...
... add-in card with the slot on page 1. See "Opening and Closing the PC" on the chassis and gently but firmly press the card straight down into the add-in card slots, and then install the screw. 3 Set the chassis upright. 4 Complete the procedures to the card, power supply, keyboard, and monitor. 26 Upgrading and Servicing Guide Installing an Add-in Card 1 Align the edge of the PC, replace the bracket cover for the add-in card slot...

Important FreeDOS Operating System Information
Page 1
... such hardware. Software Restore and Recovery If you need to reinstall FreeDOS, it to your computer refer to note that function only with a Microsoft® Windows™ operating system. The information contained herein is subject to access the documentation files. HP shall not be responsible for providing driver support for more languages. You can be viewed by PC-Doctor either runs automatically...
... such hardware. Software Restore and Recovery If you need to reinstall FreeDOS, it to your computer refer to note that function only with a Microsoft® Windows™ operating system. The information contained herein is subject to access the documentation files. HP shall not be responsible for providing driver support for more languages. You can be viewed by PC-Doctor either runs automatically...
Getting Started Guide
Page 5
... the keyboard buttons 59 Keyboard Shortcuts 59 Using the Mouse 61 Using the Mouse Buttons 61 Scrolling ...62 Autoscrolling 62 Panning...62 Switching Mouse Button Functions 63 Changing Mouse Pointer Speed 63 Introducing Your Computer Software 65 Learning More About Software 65 Using the Desktop 65 Removing desktop icons 66 Retrieving desktop icons 66 Using the Windows Start Button Menu 66 Using the All Programs menu 66 Organizing your All Programs list 67 Using the Control Panel 67 Resizing Windows 68 Working with Digital Images...
... the keyboard buttons 59 Keyboard Shortcuts 59 Using the Mouse 61 Using the Mouse Buttons 61 Scrolling ...62 Autoscrolling 62 Panning...62 Switching Mouse Button Functions 63 Changing Mouse Pointer Speed 63 Introducing Your Computer Software 65 Learning More About Software 65 Using the Desktop 65 Removing desktop icons 66 Retrieving desktop icons 66 Using the Windows Start Button Menu 66 Using the All Programs menu 66 Organizing your All Programs list 67 Using the Control Panel 67 Resizing Windows 68 Working with Digital Images...

Getting Started Guide
Page 18
... information about setting up your wireless network, verify that the integrated WLAN device is listed, either your network from unauthorized access. When setting up a network, you set up wireless security features, go to open the Network and Sharing Center window. 6 Click Add a device to the network and follow any onscreen instructions. NOTE: If no WLAN device is installed on the taskbar, click Help and Support, and then type Setting up a wireless network: Click the Windows Start Button on your...
... information about setting up your wireless network, verify that the integrated WLAN device is listed, either your network from unauthorized access. When setting up a network, you set up wireless security features, go to open the Network and Sharing Center window. 6 Click Add a device to the network and follow any onscreen instructions. NOTE: If no WLAN device is installed on the taskbar, click Help and Support, and then type Setting up a wireless network: Click the Windows Start Button on your...
Getting Started Guide
Page 24
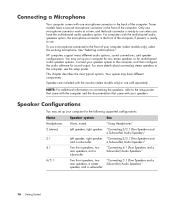
... audio options, sound connections, and speaker configurations. Speakers are included with the monitor (select models only) or are sold separately. For more details about connecting stereo speakers to the setup poster that came with the computer and the documentation that came with your speakers. "Using Headphones" Left speaker, right speaker. "Connecting 4.1 (Four Speakers and a Subwoofer) Audio Speakers" Two front speakers, two "Connecting 5.1 (Five Speakers and a rear speakers, a center Subwoofer) Audio Speakers" speaker, and a subwoofer. 16 Getting Started To use...
... audio options, sound connections, and speaker configurations. Speakers are included with the monitor (select models only) or are sold separately. For more details about connecting stereo speakers to the setup poster that came with the computer and the documentation that came with your speakers. "Using Headphones" Left speaker, right speaker. "Connecting 4.1 (Four Speakers and a Subwoofer) Audio Speakers" Two front speakers, two "Connecting 5.1 (Five Speakers and a rear speakers, a center Subwoofer) Audio Speakers" speaker, and a subwoofer. 16 Getting Started To use...

Getting Started Guide
Page 56
.... 7 Click OK. 48 Getting Started Double-click the ISP-provided icon on the taskbar. most computers have questions, contact your ISP. To configure Automatic Updates: 1 Click the Windows Start Button on the taskbar. 2 Click Control Panel. 3 Click Security. 4 Click Windows Updates. 5 Click Change Settings. 6 Select the desired configuration: Automatic (recommended) - This option makes the computer more vulnerable and is the default setting, and it enables you have Internet Explorer.
.... 7 Click OK. 48 Getting Started Double-click the ISP-provided icon on the taskbar. most computers have questions, contact your ISP. To configure Automatic Updates: 1 Click the Windows Start Button on the taskbar. 2 Click Control Panel. 3 Click Security. 4 Click Windows Updates. 5 Click Change Settings. 6 Select the desired configuration: Automatic (recommended) - This option makes the computer more vulnerable and is the default setting, and it enables you have Internet Explorer.
Getting Started Guide
Page 67
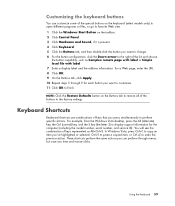
... the button configuration, click the Down arrow to the right of the buttons to the factory settings. Customizing the keyboard buttons You can perform through 9 for each button you 've highlighted or selected, Ctrl+V to paste a copied item, or Ctrl+Z to display support information for the computer (including the model number, serial number, and service ID). NOTE: Click the Restore Defaults button on the taskbar. 2 Click Control Panel. 3 Click Hardware and Sound...
... the button configuration, click the Down arrow to the right of the buttons to the factory settings. Customizing the keyboard buttons You can perform through 9 for each button you 've highlighted or selected, Ctrl+V to paste a copied item, or Ctrl+Z to display support information for the computer (including the model number, serial number, and service ID). NOTE: Click the Restore Defaults button on the taskbar. 2 Click Control Panel. 3 Click Hardware and Sound...

Getting Started Guide
Page 137
... B Bluetooth devices 8 burning audio and data disc 108-113 CDs, DVDs 107-111 buttons media control or playback 58 Off, See turning off PC 44 buttons, keyboard customizing 59 C card reader, memory 89 carpal tunnel syndrome 39 CDs erasing rewritable 108 change the speed of the cursor 63 computer transferring files 51 Computer Playback 124 connecting devices 5 digital camera 4 digital video camera 4 headphones 31 peripherals 2 Index connection modem 11 wired network 8 connector computer...
... B Bluetooth devices 8 burning audio and data disc 108-113 CDs, DVDs 107-111 buttons media control or playback 58 Off, See turning off PC 44 buttons, keyboard customizing 59 C card reader, memory 89 carpal tunnel syndrome 39 CDs erasing rewritable 108 change the speed of the cursor 63 computer transferring files 51 Computer Playback 124 connecting devices 5 digital camera 4 digital video camera 4 headphones 31 peripherals 2 Index connection modem 11 wired network 8 connector computer...
Warranty and Support Guide
Page 14
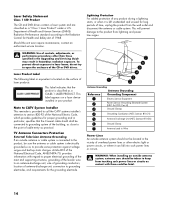
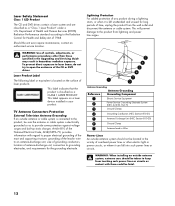
...Connectors Protection External Television Antenna Grounding If an outside antenna or cable system is provided to call the CATV systems installer's attention to section 820-93 of the National Electric Code, which provides guidelines for Health and Safety Act of 1968. Laser Safety Statement Class 1 LED Product The CD and DVD drives... the Coaxial cable shield shall be connected to grounding system of the building, as close to the point of controls, adjustments, or performance procedures other electric light or power circuits, or where it is located on a laser device installed in hazardous ...
...Connectors Protection External Television Antenna Grounding If an outside antenna or cable system is provided to call the CATV systems installer's attention to section 820-93 of the National Electric Code, which provides guidelines for Health and Safety Act of 1968. Laser Safety Statement Class 1 LED Product The CD and DVD drives... the Coaxial cable shield shall be connected to grounding system of the building, as close to the point of controls, adjustments, or performance procedures other electric light or power circuits, or where it is located on a laser device installed in hazardous ...
Limited Warranty and Support Guide (Refurbished Desktops)
Page 5
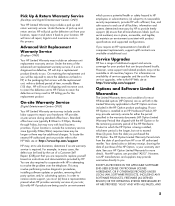
... warranty start date. This may include an advance unit replacement warranty service. However, some support and related products may result in the HP Option product packaging. Non-HP options are being installed, whichever period is your location. Advanced Unit Replacement Warranty Service (Displays ONLY) Your HP Limited Warranty may involve performing routine diagnostic procedures, installing software updates or patches, removing third party options and/or substituting options. HP...
... warranty start date. This may include an advance unit replacement warranty service. However, some support and related products may result in the HP Option product packaging. Non-HP options are being installed, whichever period is your location. Advanced Unit Replacement Warranty Service (Displays ONLY) Your HP Limited Warranty may involve performing routine diagnostic procedures, installing software updates or patches, removing third party options and/or substituting options. HP...
Start Here Guide
Page 4
... desktop on a TV screen 49 Adjusting the screen resolution 49 Connecting more than one display 50 Using the Windows Media Center Setup for Optional Setup of Your TV Display...........50 Disabling the TV-out Option 51 Disconnecting the TV 51 Connecting to a Monitor or High-Definition TV 52 Choosing the AV connection to use 52 Connecting an HDMI device 54 Connecting a DVI device 55 Connecting to a Standard TV 56 Connecting to component video 56 Connecting to S-video 57 iv Start...
... desktop on a TV screen 49 Adjusting the screen resolution 49 Connecting more than one display 50 Using the Windows Media Center Setup for Optional Setup of Your TV Display...........50 Disabling the TV-out Option 51 Disconnecting the TV 51 Connecting to a Monitor or High-Definition TV 52 Choosing the AV connection to use 52 Connecting an HDMI device 54 Connecting a DVI device 55 Connecting to a Standard TV 56 Connecting to component video 56 Connecting to S-video 57 iv Start...
Start Here Guide
Page 20
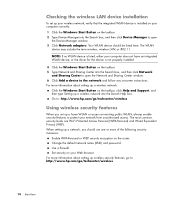
... listed here. Checking the wireless LAN device installation To set up a home WLAN or access an existing public WLAN, always enable security features to protect your Web browser. NOTE: If no WLAN device is not properly installed. 4 Click the Windows Start Button on the taskbar, click Help and Support, and then type Setting up a wireless network into the Search box, and then click Network and Sharing Center to open the Device Manager window. 3 Click Network adapters...
... listed here. Checking the wireless LAN device installation To set up a home WLAN or access an existing public WLAN, always enable security features to protect your Web browser. NOTE: If no WLAN device is not properly installed. 4 Click the Windows Start Button on the taskbar, click Help and Support, and then type Setting up a wireless network into the Search box, and then click Network and Sharing Center to open the Device Manager window. 3 Click Network adapters...
Start Here Guide
Page 26
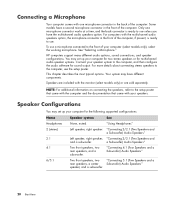
... options. HP computers support many different audio options, sound connections, and speaker configurations. a Subwoofer) Audio Speakers" Two front speakers, two rear speakers, and a subwoofer. "Using Headphones" Left speaker, right speaker. "Connecting 2/2.1 (Two Speakers and a Subwoofer) Audio Speakers" Left speaker, right speaker, "Connecting 2/2.1 (Two Speakers and and a subwoofer. See "Selecting a Microphone." Speakers are sold separately. Your system may set up your computer (select models only), select the working microphone. Only one microphone connector...
... options. HP computers support many different audio options, sound connections, and speaker configurations. a Subwoofer) Audio Speakers" Two front speakers, two rear speakers, and a subwoofer. "Using Headphones" Left speaker, right speaker. "Connecting 2/2.1 (Two Speakers and a Subwoofer) Audio Speakers" Left speaker, right speaker, "Connecting 2/2.1 (Two Speakers and and a subwoofer. See "Selecting a Microphone." Speakers are sold separately. Your system may set up your computer (select models only), select the working microphone. Only one microphone connector...
Limited Warranty and Support Guide
Page 12
... surface of overhead power lines or other than those specified in the Upgrading and Servicing Guide may result in your product. Article 810 of the National Electrical Code, ANSI/NFPA 70, provides information with them could be located in wire to an antenna-discharge unit, size of grounding conductors, location of antenna-discharge unit, connection to open the enclosure of...
... surface of overhead power lines or other than those specified in the Upgrading and Servicing Guide may result in your product. Article 810 of the National Electrical Code, ANSI/NFPA 70, provides information with them could be located in wire to an antenna-discharge unit, size of grounding conductors, location of antenna-discharge unit, connection to open the enclosure of...
Limited Warranty and Support Guide
Page 13
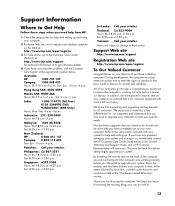
... with setting up and using your computer. 2 For faster help, be sure to register your desktop computer on the back of our computers go to the Customer Care Center Web site at: http://www.hp.com/support for technical information or to get software updates. 4 If you have not solved the problem, call the Customer Care Center at the appropriate number...
... with setting up and using your computer. 2 For faster help, be sure to register your desktop computer on the back of our computers go to the Customer Care Center Web site at: http://www.hp.com/support for technical information or to get software updates. 4 If you have not solved the problem, call the Customer Care Center at the appropriate number...

Start Here
Page 20
... Help and Support, and then type Setting up a wireless network into the Search box, and then click Network and Sharing Center to open the Device Manager window. 3 Click Network adapters. Use a firewall. Checking the wireless LAN device installation To set up a home WLAN or access an existing public WLAN, always enable security features to : http://www.hp.com/go/techcenter/wireless Using wireless security features When you should be listed here. Your WLAN device should use one...
... Help and Support, and then type Setting up a wireless network into the Search box, and then click Network and Sharing Center to open the Device Manager window. 3 Click Network adapters. Use a firewall. Checking the wireless LAN device installation To set up a home WLAN or access an existing public WLAN, always enable security features to : http://www.hp.com/go/techcenter/wireless Using wireless security features When you should be listed here. Your WLAN device should use one...


