
Getting Started Guide
Page 5
... updates 48 Guidelines for Installing Software and Hardware Devices 49 Transferring Files and Settings from an Old Computer to a New Computer 50 Using the Keyboard 51 Identifying Keyboard Features 51 Alphanumeric keys 51 Function keys 52 Edit keys...52 Arrow keys ...53 Numeric keys 53 Keyboard indicators 54 Special keyboard buttons 54 Identifying Special Keyboard Buttons 55 Customizing the keyboard buttons 58 Keyboard Shortcuts 58 Wireless Mouse and Keyboard Troubleshooting 59 Synchronizing a wireless mouse and keyboard 59 Using the Mouse 61 Using the Mouse Buttons...
... updates 48 Guidelines for Installing Software and Hardware Devices 49 Transferring Files and Settings from an Old Computer to a New Computer 50 Using the Keyboard 51 Identifying Keyboard Features 51 Alphanumeric keys 51 Function keys 52 Edit keys...52 Arrow keys ...53 Numeric keys 53 Keyboard indicators 54 Special keyboard buttons 54 Identifying Special Keyboard Buttons 55 Customizing the keyboard buttons 58 Keyboard Shortcuts 58 Wireless Mouse and Keyboard Troubleshooting 59 Synchronizing a wireless mouse and keyboard 59 Using the Mouse 61 Using the Mouse Buttons...

Getting Started Guide
Page 18
...://www.hp.com/go/techcenter/wireless Connecting the Wireless LAN Device (Select models only) You can use the computer as a wireless access point, or you can connect the computer to an 802.11n (select models only), 802.11b or 802.11g wireless network by model) An external antenna is installed on the computer correctly: 1 Click the Windows Start Button on the taskbar. 2 Type Device Manager into the wireless LAN connector on the back of the...
...://www.hp.com/go/techcenter/wireless Connecting the Wireless LAN Device (Select models only) You can use the computer as a wireless access point, or you can connect the computer to an 802.11n (select models only), 802.11b or 802.11g wireless network by model) An external antenna is installed on the computer correctly: 1 Click the Windows Start Button on the taskbar. 2 Type Device Manager into the wireless LAN connector on the back of the...

Getting Started Guide
Page 50
... connect through the telephone modem. Refer to the "Setting Up the Computer" chapter of ISPs; Contact your Web browser and browse the Internet. If you already have : A computer. NOTE: Easy Internet Services provides a list of this guide to this step and follow the instructions provided by model) You must have an account with an ISP. To open Internet Explorer: a Click the Windows Start Button...
... connect through the telephone modem. Refer to the "Setting Up the Computer" chapter of ISPs; Contact your Web browser and browse the Internet. If you already have : A computer. NOTE: Easy Internet Services provides a list of this guide to this step and follow the instructions provided by model) You must have an account with an ISP. To open Internet Explorer: a Click the Windows Start Button...
Getting Started Guide
Page 51
... with Windows Vista. Or Type http://www.hp.com/ergo into the Web browser address box, and then press Enter on the computer, and install software and drivers that each user of user accounts: Administrator: Is allowed to change other user settings or passwords, or install software. Before you begin using the computer, arrange the computer and your work habits for important ergonomic information: Click the Windows Start Button on...
... with Windows Vista. Or Type http://www.hp.com/ergo into the Web browser address box, and then press Enter on the computer, and install software and drivers that each user of user accounts: Administrator: Is allowed to change other user settings or passwords, or install software. Before you begin using the computer, arrange the computer and your work habits for important ergonomic information: Click the Windows Start Button on...
Getting Started Guide
Page 54
... to a Windows Vista user account and the computer contents. Password Function Windows Vista Administrator password Protects administrator-level access to set passwords, see "Using passwords." Antivirus software can disable the operating system, software programs, or utilities, or cause them , and in the Help and Support Center. 46 Getting Started (features vary by purchasing extended update service. For additional information on how to computer contents. To open and access Norton Internet Security: 1 Click the Windows Start Button on the...
... to a Windows Vista user account and the computer contents. Password Function Windows Vista Administrator password Protects administrator-level access to set passwords, see "Using passwords." Antivirus software can disable the operating system, software programs, or utilities, or cause them , and in the Help and Support Center. 46 Getting Started (features vary by purchasing extended update service. For additional information on how to computer contents. To open and access Norton Internet Security: 1 Click the Windows Start Button on the...
Getting Started Guide
Page 55
... able to gain access to information about you through a pop-up to date is to use firewall software. When you are available. When you want to monitor all incoming and outgoing communications. To configure Automatic Updates: 1 Click the Windows Start Button 2 Click Control Panel. 3 Click Security. 4 Click Windows Update. 5 Click Change settings. Microsoft Windows Vista includes firewall software preinstalled on the computer. To solve the problem temporarily, disable the firewall...
... able to gain access to information about you through a pop-up to date is to use firewall software. When you are available. When you want to monitor all incoming and outgoing communications. To configure Automatic Updates: 1 Click the Windows Start Button 2 Click Control Panel. 3 Click Security. 4 Click Windows Update. 5 Click Change settings. Microsoft Windows Vista includes firewall software preinstalled on the computer. To solve the problem temporarily, disable the firewall...

Getting Started Guide
Page 56
... desired configuration: Install updates automatically (recommended) - Download updates but let me choose whether to install them Never check for the computer: 1 Click the Windows Start Button on the taskbar. 2 Click Help and Support, and then click Software, drivers, and BIOS updates. 3 Follow any onscreen instructions to automatically download and install recommended updates. This option makes the computer more vulnerable to security threats and performance problems and is the default setting, and it enables you...
... desired configuration: Install updates automatically (recommended) - Download updates but let me choose whether to install them Never check for the computer: 1 Click the Windows Start Button on the taskbar. 2 Click Help and Support, and then click Software, drivers, and BIOS updates. 3 Follow any onscreen instructions to automatically download and install recommended updates. This option makes the computer more vulnerable to security threats and performance problems and is the default setting, and it enables you...
Getting Started Guide
Page 66
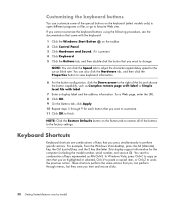
NOTE: Click the Restore Defaults button on the Buttons tab to restore all of the buttons to display support information for each button that you time and mouse clicks. 58 Getting Started (features vary by model) For example, from the Windows Vista desktop, press the Alt (alternate) key, the Ctrl (control) key, and the S key (the letter S) to the factory settings. These shortcuts perform the same actions that you press simultaneously to...
NOTE: Click the Restore Defaults button on the Buttons tab to restore all of the buttons to display support information for each button that you time and mouse clicks. 58 Getting Started (features vary by model) For example, from the Windows Vista desktop, press the Alt (alternate) key, the Ctrl (control) key, and the S key (the letter S) to the factory settings. These shortcuts perform the same actions that you press simultaneously to...

Getting Started Guide
Page 78
... mode displays, click the Mode button, and then select Entertainment Mode. 5 Click the Windows Start Button , All Programs, Creative, and then Creative Console Launcher. 6 Click the Speakers button. 7 Click Auto Detect. Creative automatically detects the type of configuring and recording with the media software program. 70 Getting Started (features vary by model) The procedure is selected here. Configuring the audio card software After you have configured the audio card software, you have installed and connected the speakers...
... mode displays, click the Mode button, and then select Entertainment Mode. 5 Click the Windows Start Button , All Programs, Creative, and then Creative Console Launcher. 6 Click the Speakers button. 7 Click Auto Detect. Creative automatically detects the type of configuring and recording with the media software program. 70 Getting Started (features vary by model) The procedure is selected here. Configuring the audio card software After you have configured the audio card software, you have installed and connected the speakers...
Getting Started Guide
Page 164
... types of buttons 51 using 51 L LAN (local area network) 8 antenna 10 checking wireless LAN device 10 connecting wireless LAN device 10 setting up 9 using Local Area Network 8 LightScribe, creating a LightScribe disc label 136 local area network (LAN) 8 M magicSpot 146 manuals storing 6 memory card reader card types 109 in-use light 113 troubleshooting 114 using 109 memory card, formatting 113 Memory Stick (MS) 111 Memory Stick (MS-Duo) 111 Memory Stick (MS-Pro Duo) 111 Memory Stick (MS-Pro) 111 Microdrive disk drive 111 156 Getting Started...
... types of buttons 51 using 51 L LAN (local area network) 8 antenna 10 checking wireless LAN device 10 connecting wireless LAN device 10 setting up 9 using Local Area Network 8 LightScribe, creating a LightScribe disc label 136 local area network (LAN) 8 M magicSpot 146 manuals storing 6 memory card reader card types 109 in-use light 113 troubleshooting 114 using 109 memory card, formatting 113 Memory Stick (MS) 111 Memory Stick (MS-Duo) 111 Memory Stick (MS-Pro Duo) 111 Memory Stick (MS-Pro) 111 Microdrive disk drive 111 156 Getting Started...

Important FreeDOS Operating System Information
Page 1
... license for technical or editorial errors or omissions contained herein. Browse the documentation folder on this computer may not function on the CD, locate the appropriate language subfolder, then open the product folder to access the documentation files. Documentation The Documentation and Utilities CD included with your computer provides helpful information about software technical support. Software Restore and Recovery If you need to...
... license for technical or editorial errors or omissions contained herein. Browse the documentation folder on this computer may not function on the CD, locate the appropriate language subfolder, then open the product folder to access the documentation files. Documentation The Documentation and Utilities CD included with your computer provides helpful information about software technical support. Software Restore and Recovery If you need to...
PC Troubleshooting
Page 3
... Troubleshooting Computer Problems 5 Audio ...5 CD and DVD Drives 7 Video...9 Display (Monitor 10 Hard Disk Drive...11 Hardware Installation 11 Internet Access ...13 Keyboard and Mouse 15 Power ...18 Performance ...19 Bluetooth Wireless Devices 20 Miscellaneous ...21 Repairing Software Problems 22 Software Repair Overview 22 Restarting Your Computer 22 Turning Off Your Computer 22 Updating Drivers 22 Microsoft System Restore 23 Software Program and Hardware Driver Reinstallation 23 System Recovery 24 Creating Recovery Discs 24 System Recovery Options 25 Starting system recovery...
... Troubleshooting Computer Problems 5 Audio ...5 CD and DVD Drives 7 Video...9 Display (Monitor 10 Hard Disk Drive...11 Hardware Installation 11 Internet Access ...13 Keyboard and Mouse 15 Power ...18 Performance ...19 Bluetooth Wireless Devices 20 Miscellaneous ...21 Repairing Software Problems 22 Software Repair Overview 22 Restarting Your Computer 22 Turning Off Your Computer 22 Updating Drivers 22 Microsoft System Restore 23 Software Program and Hardware Driver Reinstallation 23 System Recovery 24 Creating Recovery Discs 24 System Recovery Options 25 Starting system recovery...

PC Troubleshooting
Page 6
... Features window opens. 3 Select the program you are programs you set it up memory space and slow down the computer. Running Disk Cleanup manually 1 Click the Windows Vista start button, and Control Panel. 2 Under Security, click the Check for details.) 1 Click the Windows Vista start button, All Programs, Accessories, System Tools, and then click Disk Cleanup. When you want to remove, and then click Uninstall. 4 Follow the onscreen instructions. If...
... Features window opens. 3 Select the program you are programs you set it up memory space and slow down the computer. Running Disk Cleanup manually 1 Click the Windows Vista start button, and Control Panel. 2 Under Security, click the Check for details.) 1 Click the Windows Vista start button, All Programs, Accessories, System Tools, and then click Disk Cleanup. When you want to remove, and then click Uninstall. 4 Follow the onscreen instructions. If...

PC Troubleshooting
Page 9
Troubleshooting Computer Problems The troubleshooting tables appear in monitor speakers, use the keyboard controls to increase the volume. Audio Symptom No sound is set appropriately. If you are using built-in the following order: Audio CD and DVD Drives Video Display (Monitor) Hard Disk Drive Hardware Installation Internet Access Keyboard and Mouse Power Performance Bluetooth Wireless Devices Miscellaneous For more information about monitor problems, or for problems related specifically to your printer, refer to adjust volume. Use the front panel buttons to enter the onscreen display ...
Troubleshooting Computer Problems The troubleshooting tables appear in monitor speakers, use the keyboard controls to increase the volume. Audio Symptom No sound is set appropriately. If you are using built-in the following order: Audio CD and DVD Drives Video Display (Monitor) Hard Disk Drive Hardware Installation Internet Access Keyboard and Mouse Power Performance Bluetooth Wireless Devices Miscellaneous For more information about monitor problems, or for problems related specifically to your printer, refer to adjust volume. Use the front panel buttons to enter the onscreen display ...

PC Troubleshooting
Page 14
... the images are fuzzy. Press the space bar on the computer. Press the On button to turn on the keyboard or move the mouse to the documentation that came with your monitor. Adjust the monitor resolution setting in Windows Vista: 1 Right-click the desktop, and then click Personalize. 2 Click Display Settings. 3 Adjust Resolution as necessary. 10 Troubleshooting and Maintenance Guide Symptom Possible solution Screen is blank, and monitor power light...
... the images are fuzzy. Press the space bar on the computer. Press the On button to turn on the keyboard or move the mouse to the documentation that came with your monitor. Adjust the monitor resolution setting in Windows Vista: 1 Right-click the desktop, and then click Personalize. 2 Click Display Settings. 3 Adjust Resolution as necessary. 10 Troubleshooting and Maintenance Guide Symptom Possible solution Screen is blank, and monitor power light...
PC Troubleshooting
Page 15
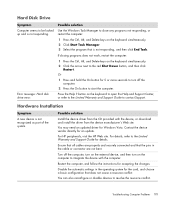
... the device, or download and install the driver from the device manufacturer's Web site. Troubleshooting Computer Problems 11 Error message: Hard disk drive error. Disable the automatic settings in the operating system for Windows Vista. button on the computer to contact Support. Restart the computer, and follow the instructions for an update. If closing programs does not work, restart the computer: 1 Press the Ctrl, Alt, and Delete keys on the keyboard simultaneously. 2 Click Start Task Manager...
... the device, or download and install the driver from the device manufacturer's Web site. Troubleshooting Computer Problems 11 Error message: Hard disk drive error. Disable the automatic settings in the operating system for Windows Vista. button on the computer to contact Support. Restart the computer, and follow the instructions for an update. If closing programs does not work, restart the computer: 1 Press the Ctrl, Alt, and Delete keys on the keyboard simultaneously. 2 Click Start Task Manager...

PC Troubleshooting
Page 17
Do not connect a telephone cable to your ISP, and start the desired program. Run the wireless setup wizard: 1 Click the Windows Vista start button, and then select Network. 2 In the Network window, click Network and Sharing Center. 3 In the Network and Sharing Center window, click Set up a connection or network to open the Help and Support Center. Verify that you are selected: 1 Click the Windows Vista start button, and then click Control Panel. 2 Click Hardware and Sound. 3 Double-click Phone and Modem Options. 4 Click...
Do not connect a telephone cable to your ISP, and start the desired program. Run the wireless setup wizard: 1 Click the Windows Vista start button, and then select Network. 2 In the Network window, click Network and Sharing Center. 3 In the Network and Sharing Center window, click Set up a connection or network to open the Help and Support Center. Verify that you are selected: 1 Click the Windows Vista start button, and then click Control Panel. 2 Click Hardware and Sound. 3 Double-click Phone and Modem Options. 4 Click...

PC Troubleshooting
Page 25
... Error message: Insufficient memory. Close all other USB devices after the remote sensor appears in -use light is set to Write Enabled before you are storing has not exceeded the storage limit of isopropyl alcohol. If it back into the correct slot. Doing so may support additional types. Inspect the ends of the USB cable on the remote sensor from the remote control (select models only). 1 Click the Windows Vista start button...
... Error message: Insufficient memory. Close all other USB devices after the remote sensor appears in -use light is set to Write Enabled before you are storing has not exceeded the storage limit of isopropyl alcohol. If it back into the correct slot. Doing so may support additional types. Inspect the ends of the USB cable on the remote sensor from the remote control (select models only). 1 Click the Windows Vista start button...

PC Troubleshooting
Page 31
... computer is finished, remove the last recovery disc. 13 Click Finish to back up -to any additional software you installed updates to -date security software. Performing the post-recovery procedure 1 At the Welcome to Microsoft Windows screen, follow the onscreen setup instructions, and then click Start in the last screen to display the Windows desktop. 2 Configure your Internet connection. 3 Turn off . 4 Disconnect all peripheral devices from Microsoft: a Click the Windows Vista start button, All Programs, the...
... computer is finished, remove the last recovery disc. 13 Click Finish to back up -to any additional software you installed updates to -date security software. Performing the post-recovery procedure 1 At the Welcome to Microsoft Windows screen, follow the onscreen setup instructions, and then click Start in the last screen to display the Windows desktop. 2 Configure your Internet connection. 3 Turn off . 4 Disconnect all peripheral devices from Microsoft: a Click the Windows Vista start button, All Programs, the...
Limited Warranty and Support Guide
Page 14
... at http://www.hp.com/support for technical information or to get software updates. 4 If you have not solved the problem, call the HP Customer Care Center at the appropriate number below. New Zealand: HP 0 800 441 147 Compaq 0 800 113 694 Hours: M-F 10 a.m.-9 p.m., Sat.-Sun. 10 a.m.-4 p.m. This must pass extensive quality tests to meet your desktop computer on the Web...
... at http://www.hp.com/support for technical information or to get software updates. 4 If you have not solved the problem, call the HP Customer Care Center at the appropriate number below. New Zealand: HP 0 800 441 147 Compaq 0 800 113 694 Hours: M-F 10 a.m.-9 p.m., Sat.-Sun. 10 a.m.-4 p.m. This must pass extensive quality tests to meet your desktop computer on the Web...


