
End User License Agreement
Page 2
... be an indirect transfer, such as expressly provided in relation to support services related to comply with /for which the recovery solution was originally purchased. ADDITIONAL SOFTWARE. In case of the HP Product with any product identification, copyright notices or proprietary...upgrade eligibility. 3. entirely by HP as eligible for the upgrade. UPGRADES. TRANSFER. All intellectual property rights in this EULA. 5. Recovery Solution. You shall not remove any term or condition of the Software Product to do so is mandated under applicable law notwithstanding this ...
... be an indirect transfer, such as expressly provided in relation to support services related to comply with /for which the recovery solution was originally purchased. ADDITIONAL SOFTWARE. In case of the HP Product with any product identification, copyright notices or proprietary...upgrade eligibility. 3. entirely by HP as eligible for the upgrade. UPGRADES. TRANSFER. All intellectual property rights in this EULA. 5. Recovery Solution. You shall not remove any term or condition of the Software Product to do so is mandated under applicable law notwithstanding this ...
Resolving Start Up and No Boot Problems Checklist
Page 1
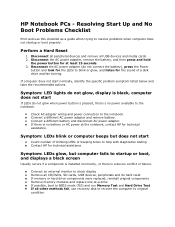
...beeping tones to help with diagnostics testing Contact HP for technical assistance. Connect a different AC power adapter and remove battery. HP Notebook PCs - Check AC adapter wiring and power connection to resolve problems when computer does not startup or boot properly. Resolving Start Up and No... Boot Problems Checklist Print and use recovery disk to recover the computer to original condition. Reconnect the AC power adapter (do hard reset If memory or hard drive components ...
...beeping tones to help with diagnostics testing Contact HP for technical assistance. Connect a different AC power adapter and remove battery. HP Notebook PCs - Check AC adapter wiring and power connection to resolve problems when computer does not startup or boot properly. Resolving Start Up and No... Boot Problems Checklist Print and use recovery disk to recover the computer to original condition. Reconnect the AC power adapter (do hard reset If memory or hard drive components ...
Getting Started - Windows 7
Page 6
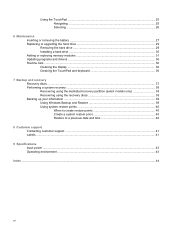
... ...36 Routine care ...36 Cleaning the display ...36 Cleaning the TouchPad and keyboard 36 7 Backup and recovery Recovery discs ...37 Performing a system recovery ...38 Recovering using the dedicated recovery partition (select models only 38 Recovering using the recovery discs 39 Backing up your information ...39 Using Windows Backup and Restore 39 Using system restore points...
... ...36 Routine care ...36 Cleaning the display ...36 Cleaning the TouchPad and keyboard 36 7 Backup and recovery Recovery discs ...37 Performing a system recovery ...38 Recovering using the dedicated recovery partition (select models only 38 Recovering using the recovery discs 39 Backing up your information ...39 Using Windows Backup and Restore 39 Using system restore points...
Getting Started - Windows 7
Page 7
For instructions, refer to Backup and recovery on the manufacturer's Web site. 1 The software is important to take the following steps: ● Set up HP QuickWeb-Immediately access your music, digital photos, ... network so that you set up and register the computer, it is preinstalled on the computer and includes a limited subscription for additional information. ● Create recovery discs-Recover the operating system and software to factory settings in case of the software preinstalled on page 23 for free updates. For more information...
For instructions, refer to Backup and recovery on the manufacturer's Web site. 1 The software is important to take the following steps: ● Set up HP QuickWeb-Immediately access your music, digital photos, ... network so that you set up and register the computer, it is preinstalled on the computer and includes a limited subscription for additional information. ● Create recovery discs-Recover the operating system and software to factory settings in case of the software preinstalled on page 23 for free updates. For more information...
Getting Started - Windows 7
Page 43
...connected directly to a USB port on the computer, not to a USB port on a regular basis to 20 discs may be sure that you create recovery discs immediately after software setup. Guidelines: ● Purchase high-quality DVD-R, DVD+R, or CD-R discs. If you use CDs, up to maintain ... tasks for safeguarding your information and restoring it must be created per computer. The software allows the creation of only one set of recovery discs can restore your most recent backup. DVDs have a much higher storage capacity than CDs. HP recommends that you should continue to...
...connected directly to a USB port on the computer, not to a USB port on a regular basis to 20 discs may be sure that you create recovery discs immediately after software setup. Guidelines: ● Purchase high-quality DVD-R, DVD+R, or CD-R discs. If you use CDs, up to maintain ... tasks for safeguarding your information and restoring it must be created per computer. The software allows the creation of only one set of recovery discs can restore your most recent backup. DVDs have a much higher storage capacity than CDs. HP recommends that you should continue to...
Getting Started - Windows 7
Page 44
...on -screen instructions. Follow the on -screen instructions. 38 Chapter 7 Backup and recovery Then, press f11 while the "F11 (HP Recovery)" message is displayed at the factory. The next time you open Recovery Manager, you to repair or restore the computer to continue the disc creation process.... ESC key for Startup Menu" message is displayed on the screen. 2. This type of recovery restores the computer to create a set of recovery discs (entire drive backup) as soon as you set of recovery discs: 1. ● Number each disc before inserting it into the optical drive. ●...
...on -screen instructions. Follow the on -screen instructions. 38 Chapter 7 Backup and recovery Then, press f11 while the "F11 (HP Recovery)" message is displayed at the factory. The next time you open Recovery Manager, you to repair or restore the computer to continue the disc creation process.... ESC key for Startup Menu" message is displayed on the screen. 2. This type of recovery restores the computer to create a set of recovery discs (entire drive backup) as soon as you set of recovery discs: 1. ● Number each disc before inserting it into the optical drive. ●...
Getting Started - Windows 7
Page 45
... be a time-saver if you to an optical disc or an external hard drive. Backing up all personal files. 2. Insert the first recovery disc into the optical drive on -screen instructions. Back up your system at the following times: ● At regularly scheduled times NOTE: ... Before the computer is connected to AC power before you add or modify hardware or software Guidelines: ● Create system restore points using the recovery discs 1. Follow the on your settings. NOTE: Windows® includes the User Account Control feature to complete the backup process. Guidelines: ●...
... be a time-saver if you to an optical disc or an external hard drive. Backing up all personal files. 2. Insert the first recovery disc into the optical drive on -screen instructions. Back up your system at the following times: ● At regularly scheduled times NOTE: ... Before the computer is connected to AC power before you add or modify hardware or software Guidelines: ● Create system restore points using the recovery discs 1. Follow the on your settings. NOTE: Windows® includes the User Account Control feature to complete the backup process. Guidelines: ●...
Getting Started - Windows 7
Page 46
... data files saved or e-mails created since the last restore point. Click the System Protection tab. 4. Follow the on -screen instructions. 40 Chapter 7 Backup and recovery Select Start > Control Panel > System and Security > System. 2. Select Start > Control Panel > System and Security > System. 2. Restore to a previous date and time To revert to...
... data files saved or e-mails created since the last restore point. Click the System Protection tab. 4. Follow the on -screen instructions. 40 Chapter 7 Backup and recovery Select Start > Control Panel > System and Security > System. 2. Select Start > Control Panel > System and Security > System. 2. Restore to a previous date and time To revert to...
Getting Started - Windows 7
Page 50
...-side 9 right-side 8 top 4 connector, power 9 D Digital Media Slot, identifying 8 drive light 9 E esc key, identifying 6 external monitor port 9 F f11 38 fn key, identifying 6 full system recovery 37 H hard drive installing 30 removing 29 headphone (audio-out) jack 9 I input power 43 integrated webcam light, identifying 10 internal microphones, identifying 10 Internet connection...
...-side 9 right-side 8 top 4 connector, power 9 D Digital Media Slot, identifying 8 drive light 9 E esc key, identifying 6 external monitor port 9 F f11 38 fn key, identifying 6 full system recovery 37 H hard drive installing 30 removing 29 headphone (audio-out) jack 9 I input power 43 integrated webcam light, identifying 10 internal microphones, identifying 10 Internet connection...

Getting Started - Windows 7
Page 51
...12 R recovering a program or driver 37 recovering from the dedicated recovery partition 38 recovering from the recovery discs 39 recovery discs 37 Recovery Manager 37, 38 recovery partition 37 recovery, system 38 regulatory information HP Mobile Broadband Module serial number 42 regulatory...RJ-45 (network) jack, identifying 8 slots Digital Media 8 security cable 8 speaker, identifying 7 supported discs 37 system failure or instability 37 system recovery 38 system restore points 37, 40 T TouchPad buttons 4 using 25 TouchPad zone, identifying 4 U USB ports, identifying 8, 9 using system restore ...
...12 R recovering a program or driver 37 recovering from the dedicated recovery partition 38 recovering from the recovery discs 39 recovery discs 37 Recovery Manager 37, 38 recovery partition 37 recovery, system 38 regulatory information HP Mobile Broadband Module serial number 42 regulatory...RJ-45 (network) jack, identifying 8 slots Digital Media 8 security cable 8 speaker, identifying 7 supported discs 37 system failure or instability 37 system recovery 38 system restore points 37, 40 T TouchPad buttons 4 using 25 TouchPad zone, identifying 4 U USB ports, identifying 8, 9 using system restore ...
Getting Started Mini - Windows XP
Page 6
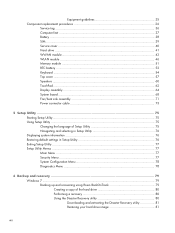
... Cleaning the display ...36 Cleaning the TouchPad and keyboard 36 7 Backup and recovery ...37 Backing up your information ...37 Creating a copy of the hard drive ...38 Performing a recovery ...38 Using the Disaster Recovery utility 38 Downloading and extracting the Disaster Recovery utility 39 Restoring your hard drive image 39 Using the Instant Restore utility...
... Cleaning the display ...36 Cleaning the TouchPad and keyboard 36 7 Backup and recovery ...37 Backing up your information ...37 Creating a copy of the hard drive ...38 Performing a recovery ...38 Using the Disaster Recovery utility 38 Downloading and extracting the Disaster Recovery utility 39 Restoring your hard drive image 39 Using the Instant Restore utility...
Getting Started Mini - Windows XP
Page 7
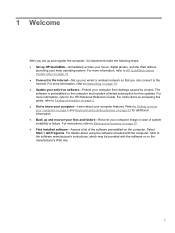
... software-Protect your computer from damage caused by viruses. For more information, refer to the HP Notebook Reference Guide. For instructions, refer to Backup and recovery on page 37. ● Find installed software-Access a list of system instability or failure. 1 Welcome After you set up and register the computer, it is...
... software-Protect your computer from damage caused by viruses. For more information, refer to the HP Notebook Reference Guide. For instructions, refer to Backup and recovery on page 37. ● Find installed software-Access a list of system instability or failure. 1 Welcome After you set up and register the computer, it is...

Getting Started Mini - Windows XP
Page 43
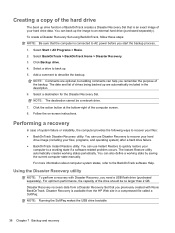
... your computer. Note the following guidelines: ● Store personal files in the My Documents folder and back up your information Successful recovery after software setup. Display the screen. 2. Backing up this chapter. As you add new software and data files, you have completely... information, perform a search for these steps: 1. Backing up your files and folders. Therefore, HP recommends that you download the Disaster Recovery utility SoftPaq, and then extract it into a word-processing document, follow these topics in this folder regularly. ● Back up your files....
... your computer. Note the following guidelines: ● Store personal files in the My Documents folder and back up your information Successful recovery after software setup. Display the screen. 2. Backing up this chapter. As you add new software and data files, you have completely... information, perform a search for these steps: 1. Backing up your files and folders. Therefore, HP recommends that you download the Disaster Recovery utility SoftPaq, and then extract it into a word-processing document, follow these topics in this folder regularly. ● Back up your files....
Getting Started Mini - Windows XP
Page 44
... a network drive. 7. For more information about computer system states, refer to describe the backup. Disaster Recovery recovers data from a Disaster Recovery Set that the computer is available from the HP Web site in the description. 6. Select BackOnTrack > BackOnTrack Home > Disaster... computer to an external hard drive (purchased separately). Add a comment to the BackOnTrack software Help. Using the Disaster Recovery utility NOTE: To perform a recovery with Roxio BackOnTrack. Select a drive to back up the image to a working state if a software-related problem ...
... a network drive. 7. For more information about computer system states, refer to describe the backup. Disaster Recovery recovers data from a Disaster Recovery Set that the computer is available from the HP Web site in the description. 6. Select BackOnTrack > BackOnTrack Home > Disaster... computer to an external hard drive (purchased separately). Add a comment to the BackOnTrack software Help. Using the Disaster Recovery utility NOTE: To perform a recovery with Roxio BackOnTrack. Select a drive to back up the image to a working state if a software-related problem ...

Getting Started Mini - Windows XP
Page 45
...the bootable USB flash drive containing the extracted Disaster Recovery utility to proceed with the recovery. At the Roxio BackOnTrack Disaster Recovery screen, select Disaster Recovery, and then click Next. 6. Click Next to a USB port on your computer. 2. Performing a recovery 39 Connect a USB flash drive to the external ... your country or region. 3. Using the Instant Restore utility You can also access the utility by turning on the screen reports a successful recovery, click Finish. If prompted to select the USB flash drive, and then press enter. 5. Use the arrow keys to do so, ...
...the bootable USB flash drive containing the extracted Disaster Recovery utility to proceed with the recovery. At the Roxio BackOnTrack Disaster Recovery screen, select Disaster Recovery, and then click Next. 6. Click Next to a USB port on your computer. 2. Performing a recovery 39 Connect a USB flash drive to the external ... your country or region. 3. Using the Instant Restore utility You can also access the utility by turning on the screen reports a successful recovery, click Finish. If prompted to select the USB flash drive, and then press enter. 5. Use the arrow keys to do so, ...
Getting Started Mini - Windows XP
Page 46
... the computer. When the computer logo is displayed. 3. When the Roxio BackOnTrack screen is not functioning, follow the on-screen instructions. 40 Chapter 7 Backup and recovery Using the Instant Restore utility when the operating system is not functioning To recover information when the operating system is displayed, follow these steps: 1. Select...
... the computer. When the computer logo is displayed. 3. When the Roxio BackOnTrack screen is not functioning, follow the on-screen instructions. 40 Chapter 7 Backup and recovery Using the Instant Restore utility when the operating system is not functioning To recover information when the operating system is displayed, follow these steps: 1. Select...

Getting Started Mini - Windows XP
Page 51
... arrow keys, identifying 6 audio-in (microphone) jack, identifying 9 audio-out (headphone) jack, identifying 9 left-side 9 right-side 8 top 4 connector, power 9 D Digital Media Slot, identifying 8 Disaster Recovery utility 38 drive light 9 E esc key, identifying 6 external monitor port 9 F fn key, identifying 6 H hard drive installing 30 removing 29 headphone (audio-out) jack 9 B BackOnTrack backup...
... arrow keys, identifying 6 audio-in (microphone) jack, identifying 9 audio-out (headphone) jack, identifying 9 left-side 9 right-side 8 top 4 connector, power 9 D Digital Media Slot, identifying 8 Disaster Recovery utility 38 drive light 9 E esc key, identifying 6 external monitor port 9 F fn key, identifying 6 H hard drive installing 30 removing 29 headphone (audio-out) jack 9 B BackOnTrack backup...

Getting Started Mini - Windows XP
Page 52
... 14 notification icons 15 setting up 12 starting 13 starting Windows 17 turning off 12 turning on 12 QuickWeb software 1 R recovery, system 38 regulatory information HP Mobile Broadband Module serial number 42 regulatory label 42 wireless 42 RJ-45 (network) jack, ...security cable slot, identifying 8 serial number label 41 serial number, computer 41 setup of WLAN 18 slots Digital Media 8 security cable 8 speaker, identifying 7 system recovery 38 T TouchPad buttons 4 using 25 TouchPad zone, identifying 4 U USB ports, identifying 8, 9 V vents, identifying 7, 9 W webcam light, identifying 10 webcam...
... 14 notification icons 15 setting up 12 starting 13 starting Windows 17 turning off 12 turning on 12 QuickWeb software 1 R recovery, system 38 regulatory information HP Mobile Broadband Module serial number 42 regulatory label 42 wireless 42 RJ-45 (network) jack, ...security cable slot, identifying 8 serial number label 41 serial number, computer 41 setup of WLAN 18 slots Digital Media 8 security cable 8 speaker, identifying 7 system recovery 38 T TouchPad buttons 4 using 25 TouchPad zone, identifying 4 U USB ports, identifying 8, 9 V vents, identifying 7, 9 W webcam light, identifying 10 webcam...
HP Mini 110 and Compaq Mini CQ10 - Maintenance and Service Guide
Page 8
... Utility 76 Exiting Setup Utility ...77 Setup Utility Menus ...77 Main Menu ...77 Security Menu ...77 System Configuration Menu 78 Diagnostics Menu 78 6 Backup and recovery ...79 Windows 7 ...79 Backing up and recovering using Roxio BackOnTrack 79 Creating a copy of the hard drive 80 Performing...
... Utility 76 Exiting Setup Utility ...77 Setup Utility Menus ...77 Main Menu ...77 Security Menu ...77 System Configuration Menu 78 Diagnostics Menu 78 6 Backup and recovery ...79 Windows 7 ...79 Backing up and recovering using Roxio BackOnTrack 79 Creating a copy of the hard drive 80 Performing...
HP Mini 110 and Compaq Mini CQ10 - Maintenance and Service Guide
Page 9
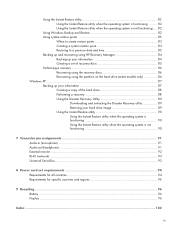
...Restoring to a previous date and time 83 Backing up and recovering using HP Recovery Manager 84 Backing up your information 84 Creating a set of recovery discs 85 Performing a recovery 86 Recovering using the recovery discs 86 Recovering using the partition on the hard drive (select models only ...XP ...87 Backing up your information 87 Creating a copy of the hard drive 88 Performing a recovery 88 Using the Disaster Recovery Utility 89 Downloading and extracting the Disaster Recovery utility 89 Restoring your hard drive image 89 Using the Instant Restore utility 90 Using the Instant...
...Restoring to a previous date and time 83 Backing up and recovering using HP Recovery Manager 84 Backing up your information 84 Creating a set of recovery discs 85 Performing a recovery 86 Recovering using the recovery discs 86 Recovering using the partition on the hard drive (select models only ...XP ...87 Backing up your information 87 Creating a copy of the hard drive 88 Performing a recovery 88 Using the Disaster Recovery Utility 89 Downloading and extracting the Disaster Recovery utility 89 Restoring your hard drive image 89 Using the Instant Restore utility 90 Using the Instant...


