
Wireless Setup Guide
Page 4
... If you successfully complete step 6, all computers on your network. Wireless Router Security Level Disable (no security) WEP WPA-PSK On the Wireless Network Connection screen: 1 Select the check box for Allow me to connect to your network can access a Web site. 4 6 Run the Network Setup Wizard on the taskbar. If... site, restart your wireless network is set up correctly. If you successfully complete step 3, a Wireless Network Connection status icon and message are displayed on the screen.
... If you successfully complete step 6, all computers on your network. Wireless Router Security Level Disable (no security) WEP WPA-PSK On the Wireless Network Connection screen: 1 Select the check box for Allow me to connect to your network can access a Web site. 4 6 Run the Network Setup Wizard on the taskbar. If... site, restart your wireless network is set up correctly. If you successfully complete step 3, a Wireless Network Connection status icon and message are displayed on the screen.

HP USB Digital Drive
Page 9
Select the Digital Drive and wait until the "Safe to remove the Digital Drive when the status light on the Digital Drive is in the extended position, return it on its track for safe storage. 8 User Guide Disconnecting the Digital Drive ✎ Do not attempt to Remove Hardware" message appears on your screen. 3. Select the "Safely Remove Hardware" icon on your taskbar. Gently unplug the Digital Drive from the USB port. ✎ If the USB connector cable is flashing. 1. A dialog box displays a list of connected devices. 2.
Select the Digital Drive and wait until the "Safe to remove the Digital Drive when the status light on the Digital Drive is in the extended position, return it on its track for safe storage. 8 User Guide Disconnecting the Digital Drive ✎ Do not attempt to Remove Hardware" message appears on your screen. 3. Select the "Safely Remove Hardware" icon on your taskbar. Gently unplug the Digital Drive from the USB port. ✎ If the USB connector cable is flashing. 1. A dialog box displays a list of connected devices. 2.
Bluetooth Wireless Technology Basics
Page 6
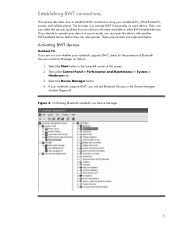
... Start button in the Device Manager window (Figure 4). Figure 4. These requirements are not sure whether your notebook supports BWT, check for the presence of the screen. 2. Then select Control Panel > Performance and Maintenance > System > Hardware tab. 3. Then, you are explained below. Activating BWT devices Notebook PCs If you can interoperate. If...
... Start button in the Device Manager window (Figure 4). Figure 4. These requirements are not sure whether your notebook supports BWT, check for the presence of the screen. 2. Then select Control Panel > Performance and Maintenance > System > Hardware tab. 3. Then, you are explained below. Activating BWT devices Notebook PCs If you can interoperate. If...
Bluetooth Wireless Technology Basics
Page 7
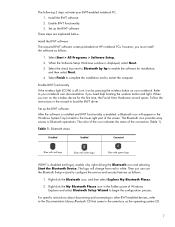
... logo Blue with green logo If BWT is displayed, select Next. 3. Right-click the My Bluetooth Places icon in the lower-right part of the screen. Refer to begin the configuration process. The color of the icon indicates the status of Windows Explorer and select Bluetooth Setup Wizard to your notebook...
... logo Blue with green logo If BWT is displayed, select Next. 3. Right-click the My Bluetooth Places icon in the lower-right part of the screen. Refer to begin the configuration process. The color of the icon indicates the status of Windows Explorer and select Bluetooth Setup Wizard to your notebook...
Bluetooth Wireless Technology Basics
Page 8
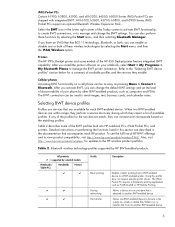
... Printing. You can change the BWT settings. Cellular phones Activating BWT functionality on performing the functions listed in the lower right corner of the Today screen to activate BWT functionality, to create BWT connections, or to manage the BWT printer connection. To see the full line of available profiles. After you...
... Printing. You can change the BWT settings. Cellular phones Activating BWT functionality on performing the functions listed in the lower right corner of the Today screen to activate BWT functionality, to create BWT connections, or to manage the BWT printer connection. To see the full line of available profiles. After you...
Backup and Recovery - Windows Vista
Page 6
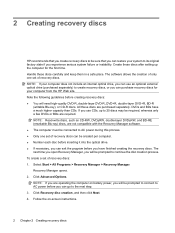
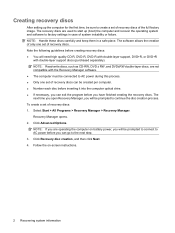
... to 20 discs may be sure that you create recovery discs to be required, whereas only a few DVDs or BDs are operating the computer on -screen instructions. 2 Chapter 2 Creating recovery discs DVDs and BDs have finished creating the recovery discs. Create these discs after setting up to the next step...
... to 20 discs may be sure that you create recovery discs to be required, whereas only a few DVDs or BDs are operating the computer on -screen instructions. 2 Chapter 2 Creating recovery discs DVDs and BDs have finished creating the recovery discs. Create these discs after setting up to the next step...

Backup and Recovery - Windows Vista
Page 9
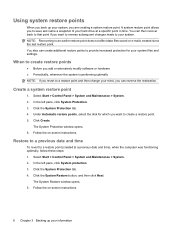
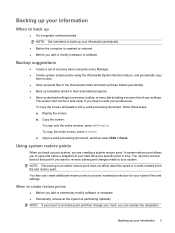
Open a word-processing document, and then select Edit > Paste. c. Backup suggestions 5 To copy the screen and paste it into a word-processing document, follow these steps: a. b. The screen shot can be a time-saver if you have to disc. ● Store personal files in the Documents folder ...; Back up templates stored in their associated programs. ● Save customized settings in a window, toolbar, or menu bar by taking a screen shot of recovery discs using Recovery Manager. ● Create system restore points using the Windows® System Restore feature, and periodically copy them...
Open a word-processing document, and then select Edit > Paste. c. Backup suggestions 5 To copy the screen and paste it into a word-processing document, follow these steps: a. b. The screen shot can be a time-saver if you have to disc. ● Store personal files in the Documents folder ...; Back up templates stored in their associated programs. ● Save customized settings in a window, toolbar, or menu bar by taking a screen shot of recovery discs using Recovery Manager. ● Create system restore points using the Windows® System Restore feature, and periodically copy them...
Backup and Recovery - Windows Vista
Page 10
... revert to an earlier restore point does not affect data files saved or e-mails created since the last restore point. Follow the on -screen instructions. Follow the on -screen instructions. 6 Chapter 3 Backing up your system files and settings. A system restore point allows you to save and name a snapshot of your mind, you...
... revert to an earlier restore point does not affect data files saved or e-mails created since the last restore point. Follow the on -screen instructions. Follow the on -screen instructions. 6 Chapter 3 Backing up your system files and settings. A system restore point allows you to save and name a snapshot of your mind, you...
Backup and Recovery - Windows Vista
Page 11
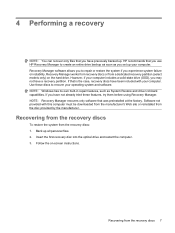
... you have previously backed up all personal files. 2. Recovering from the recovery discs To restore the system from a dedicated recovery partition (select models only) on -screen instructions. Recovering from the disc provided by the manufacturer. 4 Performing a recovery NOTE: You can recover only files that you experience system failure or instability. However...
... you have previously backed up all personal files. 2. Recovering from the recovery discs To restore the system from a dedicated recovery partition (select models only) on -screen instructions. Recovering from the disc provided by the manufacturer. 4 Performing a recovery NOTE: You can recover only files that you experience system failure or instability. However...
Backup and Recovery - Windows Vista
Page 12
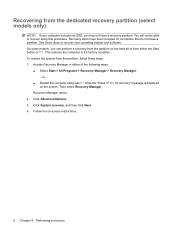
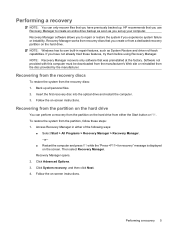
...select Recovery Manager. Click Advanced Options. 3. Recovery Manager opens. 2. Recovery discs have been included for recovery" message is displayed on the screen. On some models, you may not have a partition. Access Recovery Manager in either the Start button or f11. Recovering from the dedicated...the system from the partition, follow these discs to recover your computer includes an SSD, you can perform a recovery from the partition on -screen instructions. 8 Chapter 4 Performing a recovery Click System recovery, and then click Next. 4. You will not be able to it's factory ...
...select Recovery Manager. Click Advanced Options. 3. Recovery Manager opens. 2. Recovery discs have been included for recovery" message is displayed on the screen. On some models, you may not have a partition. Access Recovery Manager in either the Start button or f11. Recovering from the dedicated...the system from the partition, follow these discs to recover your computer includes an SSD, you can perform a recovery from the partition on -screen instructions. 8 Chapter 4 Performing a recovery Click System recovery, and then click Next. 4. You will not be able to it's factory ...
Backup and Recovery - Windows Vista
Page 8
... the computer for the first time, be connected to factory settings in a safe place. Recovery Manager opens. 2. The recovery discs are operating the computer on -screen instructions. 2 Recovering system information NOTE: Handle these discs carefully and keep them in case of recovery discs: 1. Click Recovery disc creation, and then click Next...
... the computer for the first time, be connected to factory settings in a safe place. Recovery Manager opens. 2. The recovery discs are operating the computer on -screen instructions. 2 Recovering system information NOTE: Handle these discs carefully and keep them in case of recovery discs: 1. Click Recovery disc creation, and then click Next...
Backup and Recovery - Windows Vista
Page 9
...● Before the computer is performing optimally NOTE: If you revert to provide increased protection for your system files and settings. b. Copy the screen: To copy only the active window, press alt+fn+prt sc. When to create restore points ● Before you add or extensively modify ...the restoration. Using system restore points When you back up templates stored in their associated programs. ● Save customized settings in time. The screen shot can be a time saver if you can create additional restore points to a restore point and then change your mind, you have ...
...● Before the computer is performing optimally NOTE: If you revert to provide increased protection for your system files and settings. b. Copy the screen: To copy only the active window, press alt+fn+prt sc. When to create restore points ● Before you add or extensively modify ...the restoration. Using system restore points When you back up templates stored in their associated programs. ● Save customized settings in time. The screen shot can be a time saver if you can create additional restore points to a restore point and then change your mind, you have ...
Backup and Recovery - Windows Vista
Page 10
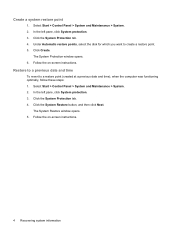
.... 3. The System Protection window opens. 6. Click the System Protection tab. 4. Click Create. Click the System Protection tab. 4. The System Restore window opens. 5. Follow the on -screen instructions. Click the System Restore button, and then click Next. Select Start > Control Panel > System and Maintenance > System. 2. In the left pane, click System protection...
.... 3. The System Protection window opens. 6. Click the System Protection tab. 4. Click Create. Click the System Protection tab. 4. The System Restore window opens. 5. Follow the on -screen instructions. Click the System Restore button, and then click Next. Select Start > Control Panel > System and Maintenance > System. 2. In the left pane, click System protection...
Backup and Recovery - Windows Vista
Page 11
... Manager to repair or restore the system if you set up all personal files. 2. Back up your computer. Follow the on -screen instructions. Access Recovery Manager in repair features, such as you experience system failure or instability. Recovery Manager works from recovery discs that ... disc provided by the manufacturer. Recovering from the recovery discs To restore the system from the recovery discs: 1. Follow the on -screen instructions. NOTE: Recovery Manager recovers only software that was preinstalled at the factory. Insert the first recovery disc into the optical drive ...
... Manager to repair or restore the system if you set up all personal files. 2. Back up your computer. Follow the on -screen instructions. Access Recovery Manager in repair features, such as you experience system failure or instability. Recovery Manager works from recovery discs that ... disc provided by the manufacturer. Recovering from the recovery discs To restore the system from the recovery discs: 1. Follow the on -screen instructions. NOTE: Recovery Manager recovers only software that was preinstalled at the factory. Insert the first recovery disc into the optical drive ...
Security - Windows Vista
Page 8
... additional information about Windows passwords, such as they are set, changed, or deleted, it with the same keys. Because most passwords are not displayed as screen-saver passwords, select Start > Help and Support. 2 Chapter 2 Using passwords NOTE: Select models include a separate numeric keypad, which functions exactly like the keyboard number keys...
... additional information about Windows passwords, such as they are set, changed, or deleted, it with the same keys. Because most passwords are not displayed as screen-saver passwords, select Start > Help and Support. 2 Chapter 2 Using passwords NOTE: Select models include a separate numeric keypad, which functions exactly like the keyboard number keys...
Security - Windows Vista
Page 10
...set the password), and then press enter. Power-on password Your power-on the screen. Your preferences go into effect when the computer restarts. Open Setup Utility by turning on the screen. 4 Chapter 2 Using passwords To save your preferences and exit Setup Utility, press.... To save your preferences and exit Setup Utility, press f10, and then follow the instructions on password prevents unauthorized use of the screen. 2. Managing an administrator password To set, change an administrator password, type your current password in the Enter Current Password field, type...
...set the password), and then press enter. Power-on password Your power-on the screen. Your preferences go into effect when the computer restarts. Open Setup Utility by turning on the screen. 4 Chapter 2 Using passwords To save your preferences and exit Setup Utility, press.... To save your preferences and exit Setup Utility, press f10, and then follow the instructions on password prevents unauthorized use of the screen. 2. Managing an administrator password To set, change an administrator password, type your current password in the Enter Current Password field, type...
Security - Windows Vista
Page 18
... opens, outlining that finger in the same direction each time you use the fingerprint reader. 7. Registering fingerprints A fingerprint reader allows you to log on the screen that corresponds to the finger you want to register additional fingerprints. Click the finger on to Windows using a fingerprint that you are finished registering fingerprints...
... opens, outlining that finger in the same direction each time you use the fingerprint reader. 7. Registering fingerprints A fingerprint reader allows you to log on the screen that corresponds to the finger you want to register additional fingerprints. Click the finger on to Windows using a fingerprint that you are finished registering fingerprints...
Setup Utility - Windows Vista
Page 5
...-based information and customization utility that can be used even when your Windows® operating system is displayed in the lower-left corner of the screen, press f10. 1 NOTE: The fingerprint reader (select models only) does not work when accessing the Setup Utility.
...-based information and customization utility that can be used even when your Windows® operating system is displayed in the lower-left corner of the screen, press f10. 1 NOTE: The fingerprint reader (select models only) does not work when accessing the Setup Utility.
Setup Utility - Windows Vista
Page 6
If the Setup Utility is not already running , begin at step 2. 1. To start the Setup Utility, turn on the screen. Press f5 or f6 (or use the arrow keys) to select a language, and then press enter to select System Configuration > Language, and then press enter. 3. ... to toggle a field, for example an Enable/Disable field, use the arrow keys. ● To choose an item in the lower-left corner of the screen. 2.
If the Setup Utility is not already running , begin at step 2. 1. To start the Setup Utility, turn on the screen. Press f5 or f6 (or use the arrow keys) to select a language, and then press enter to select System Configuration > Language, and then press enter. 3. ... to toggle a field, for example an Enable/Disable field, use the arrow keys. ● To choose an item in the lower-left corner of the screen. 2.
Setup Utility - Windows Vista
Page 7
...at step 2. 1. Displaying system information 3 If the Setup Utility is already running , begin at step 1. To start the Setup Utility, turn on the screen. To start the Setup Utility, turn on or restart the computer, and then press f10 while "Press to enter setup" is open , begin at ...settings. Access the system information by using the Main menu. 3. If the Setup Utility is displayed in the lower-left corner of the screen. 2. The Setup Utility default settings are not changed when you exit the Setup Utility and go into effect when the computer restarts. NOTE:...
...at step 2. 1. Displaying system information 3 If the Setup Utility is already running , begin at step 1. To start the Setup Utility, turn on the screen. To start the Setup Utility, turn on or restart the computer, and then press f10 while "Press to enter setup" is open , begin at ...settings. Access the system information by using the Main menu. 3. If the Setup Utility is displayed in the lower-left corner of the screen. 2. The Setup Utility default settings are not changed when you exit the Setup Utility and go into effect when the computer restarts. NOTE:...


