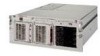

Service Guide
Page 2
..., L.P. Microsoft, Windows, and Windows NT are trademarks of Intel Corporation in the United States and/or other countries. Intel and Pentium are set forth in U.S. Compaq ProLiant DL580 Server Maintenance and Service Guide Third Edition (March 2001) Part Number 152301-003 Spare Part Number 178139-001 All other product names mentioned herein may be...
..., L.P. Microsoft, Windows, and Windows NT are trademarks of Intel Corporation in the United States and/or other countries. Intel and Pentium are set forth in U.S. Compaq ProLiant DL580 Server Maintenance and Service Guide Third Edition (March 2001) Part Number 152301-003 Spare Part Number 178139-001 All other product names mentioned herein may be...

Service Guide
Page 3
... ix Compaq Authorized Reseller ix Chapter 1 Illustrated Parts Catalog Mechanical Parts Exploded View 1-2 Mechanical Spare Parts List 1-3 System Components Exploded View 1-4 System Components Spare Parts List 1-5 Chapter 2 Removal and Replacement Procedures Electrostatic Discharge Information 2-2 Symbols on Equipment 2-3 Preparation Procedures 2-4 Hot-Pluggable Parts 2-4 Non-Hot-Pluggable Parts 2-4 Powering Down the Server 2-5 Rack Warnings 2-6 Server...
... ix Compaq Authorized Reseller ix Chapter 1 Illustrated Parts Catalog Mechanical Parts Exploded View 1-2 Mechanical Spare Parts List 1-3 System Components Exploded View 1-4 System Components Spare Parts List 1-5 Chapter 2 Removal and Replacement Procedures Electrostatic Discharge Information 2-2 Symbols on Equipment 2-3 Preparation Procedures 2-4 Hot-Pluggable Parts 2-4 Non-Hot-Pluggable Parts 2-4 Powering Down the Server 2-5 Rack Warnings 2-6 Server...
Service Guide
Page 4
iv Compaq ProLiant DL580 Server Maintenance and Service Guide Removal and Replacement Procedures continued Cable Routing Diagrams 2-20 24X or Higher Low-Profile CD-ROM Signal and Power Cables 2-20 ... 3-2 Default Configuration 3-4 Default Configuration Messages 3-4 INSPECT...3-4 Utilities Access...3-5 Running the Utilities from the System Partition 3-5 Running the Utilities from Diskette 3-6 Running the Utilities from the Compaq SmartStart and Support Software CD 3-6 Power-On Self-Test 3-7 POST Error Messages 3-7
iv Compaq ProLiant DL580 Server Maintenance and Service Guide Removal and Replacement Procedures continued Cable Routing Diagrams 2-20 24X or Higher Low-Profile CD-ROM Signal and Power Cables 2-20 ... 3-2 Default Configuration 3-4 Default Configuration Messages 3-4 INSPECT...3-4 Utilities Access...3-5 Running the Utilities from the System Partition 3-5 Running the Utilities from Diskette 3-6 Running the Utilities from the Compaq SmartStart and Support Software CD 3-6 Power-On Self-Test 3-7 POST Error Messages 3-7

Service Guide
Page 5
... the IML 3-53 Event List ...3-55 Event Messages 3-55 Rapid Error Recovery 3-58 Automatic Server Recovery-2 3-58 Server Health Logs 3-68 ASR-2 Integrated Management Log Messages 3-68 Storage Fault Recovery Tracking 3-71... Storage Automatic Reconstruction 3-71 Network Interface Fault Recovery Tracking 3-71 Memory Fault Recovery Tracking 3-71 Remote Management Features 3-72 ROMPaq Error Recovery Options 3-73 ROMPaq Disaster Recovery 3-73 Redundant ROM Image Recovery 3-74 Compaq...
... the IML 3-53 Event List ...3-55 Event Messages 3-55 Rapid Error Recovery 3-58 Automatic Server Recovery-2 3-58 Server Health Logs 3-68 ASR-2 Integrated Management Log Messages 3-68 Storage Fault Recovery Tracking 3-71... Storage Automatic Reconstruction 3-71 Network Interface Fault Recovery Tracking 3-71 Memory Fault Recovery Tracking 3-71 Remote Management Features 3-72 ROMPaq Error Recovery Options 3-73 ROMPaq Disaster Recovery 3-73 Redundant ROM Image Recovery 3-74 Compaq...

Service Guide
Page 6
vi Compaq ProLiant DL580 Server Maintenance and Service Guide Connectors, Switches, and LED Indicators continued LED Indicators ...4-11 Front Bezel LED Indicators 4-12 Interlock Status LED Indicators 4-13 Internal Diagnostics ...
vi Compaq ProLiant DL580 Server Maintenance and Service Guide Connectors, Switches, and LED Indicators continued LED Indicators ...4-11 Front Bezel LED Indicators 4-12 Interlock Status LED Indicators 4-13 Internal Diagnostics ...

Service Guide
Page 7
... parts catalog, troubleshooting, and step-by individuals who are hazardous. Symbols in Text These symbols may be performed by -step disassembly guide when servicing the Compaq ProLiant™ DL580 server. CAUTION: Text set off in this equipment. WARNING: To reduce the risk of personal injury from electric shock and hazardous energy levels, only authorized...
... parts catalog, troubleshooting, and step-by individuals who are hazardous. Symbols in Text These symbols may be performed by -step disassembly guide when servicing the Compaq ProLiant™ DL580 server. CAUTION: Text set off in this equipment. WARNING: To reduce the risk of personal injury from electric shock and hazardous energy levels, only authorized...

Service Guide
Page 8
... IMPORTANT: Any indications of electric shock or damage to the rack if it is extended at a time. viii Compaq ProLiant DL580 Server Maintenance and Service Guide Compaq Technician Notes WARNING: Only authorized technicians trained by unplugging all times. The full weight of the computer. WARNING: To.... Improper repairs can create a safety hazard. The grounding plug is easily accessible at all power cords from the system by Compaq should attempt to repair this equipment. CAUTION: The computer is designed to allow only subassembly/module level repair. Do not disable...
... IMPORTANT: Any indications of electric shock or damage to the rack if it is extended at a time. viii Compaq ProLiant DL580 Server Maintenance and Service Guide Compaq Technician Notes WARNING: Only authorized technicians trained by unplugging all times. The full weight of the computer. WARNING: To.... Improper repairs can create a safety hazard. The grounding plug is easily accessible at all power cords from the system by Compaq should attempt to repair this equipment. CAUTION: The computer is designed to allow only subassembly/module level repair. Do not disable...

Service Guide
Page 10
1 Chapter Illustrated Parts Catalog This chapter provides the illustrated parts breakdown and a spare parts list for the names of referenced spare parts. See Table 1-1 and Table 1-2 for the Compaq ProLiant™ DL580 server.
1 Chapter Illustrated Parts Catalog This chapter provides the illustrated parts breakdown and a spare parts list for the names of referenced spare parts. See Table 1-1 and Table 1-2 for the Compaq ProLiant™ DL580 server.

Service Guide
Page 11
Exploded view of the ProLiant DL580 server mechanical parts 1-2 Compaq ProLiant DL580 Server Maintenance and Service Guide Mechanical Parts Exploded View 2b 4a 3 6 1b 4b 1a 5 2a Figure 1-1.
Exploded view of the ProLiant DL580 server mechanical parts 1-2 Compaq ProLiant DL580 Server Maintenance and Service Guide Mechanical Parts Exploded View 2b 4a 3 6 1b 4b 1a 5 2a Figure 1-1.

Service Guide
Page 13
1-4 Compaq ProLiant DL580 Server Maintenance and Service Guide System Components Exploded View 31 24 11 27 25 7 12a 13 15 32 8 9 7 26 1 23 22 29 30 21 28 14 43 10 Figure 1-2. Exploded view of the ProLiant DL580 server system components
1-4 Compaq ProLiant DL580 Server Maintenance and Service Guide System Components Exploded View 31 24 11 27 25 7 12a 13 15 32 8 9 7 26 1 23 22 29 30 21 28 14 43 10 Figure 1-2. Exploded view of the ProLiant DL580 server system components

Service Guide
Page 15
1-6 Compaq ProLiant DL580 Server Maintenance and Service Guide Table 1-2 System Components Spare Parts List continued Item Description Boards 21 SCSI hard drive backplane board 22 Power backplane board (with ...
1-6 Compaq ProLiant DL580 Server Maintenance and Service Guide Table 1-2 System Components Spare Parts List continued Item Description Boards 21 SCSI hard drive backplane board 22 Power backplane board (with ...
Service Guide
Page 17
...operate properly. 2 Chapter Removal and Replacement Procedures This chapter provides subassembly/module-level removal and replacement procedures for the Compaq ProLiant DL580 server. WARNING: To reduce the risk of personal injury or damage to deal with products capable of producing hazardous energy ...only by individuals who are recommended: Torx T-15 screwdriver 4-mm flat-blade screwdriver Phillips screwdriver Wire cutters From the Compaq SmartStart™ and Support Software CD: Drive Array Advanced Diagnostics (DAAD) software System Configuration Utility software Diagnostics software...
...operate properly. 2 Chapter Removal and Replacement Procedures This chapter provides subassembly/module-level removal and replacement procedures for the Compaq ProLiant DL580 server. WARNING: To reduce the risk of personal injury or damage to deal with products capable of producing hazardous energy ...only by individuals who are recommended: Torx T-15 screwdriver 4-mm flat-blade screwdriver Phillips screwdriver Wire cutters From the Compaq SmartStart™ and Support Software CD: Drive Array Advanced Diagnostics (DAAD) software System Configuration Utility software Diagnostics software...

Service Guide
Page 18
...-dissipating material. Proper packaging and grounding techniques are necessary precautions to the work area free of static electricity can damage static-sensitive devices or microcircuitry. 2-2 Compaq ProLiant DL580 Server Maintenance and Service Guide Electrostatic Discharge Information A discharge of nonconductive materials such as conductive tubes, bags, or boxes. Avoid touching pins, leads, or circuitry...
...-dissipating material. Proper packaging and grounding techniques are necessary precautions to the work area free of static electricity can damage static-sensitive devices or microcircuitry. 2-2 Compaq ProLiant DL580 Server Maintenance and Service Guide Electrostatic Discharge Information A discharge of nonconductive materials such as conductive tubes, bags, or boxes. Avoid touching pins, leads, or circuitry...

Service Guide
Page 20
... access panel can be sure that: The access panel is not necessary to the chassis. The standby position removes power from the server. 2-4 Compaq ProLiant DL580 Server Maintenance and Service Guide Preparation Procedures The system power in the ProLiant DL580 server does not completely power down . Hot-Pluggable Parts If it is hot-pluggable or non-hot-pluggable.
... access panel can be sure that: The access panel is not necessary to the chassis. The standby position removes power from the server. 2-4 Compaq ProLiant DL580 Server Maintenance and Service Guide Preparation Procedures The system power in the ProLiant DL580 server does not completely power down . Hot-Pluggable Parts If it is hot-pluggable or non-hot-pluggable.

Service Guide
Page 21
...all AC power cords from the AC outlets, and then from the server. 56.24 - 70.31 kg 124 - 155 lb WARNING: To reduce the risk of personal injury or damage to the Compaq ProLiant DL580 Server Setup and Installation Guide for further information on a sturdy table or ...workbench. For electrostatic discharge information, see "Server Warnings and Precautions" later in this chapter. 5. To reduce the risk of personal...
...all AC power cords from the AC outlets, and then from the server. 56.24 - 70.31 kg 124 - 155 lb WARNING: To reduce the risk of personal injury or damage to the Compaq ProLiant DL580 Server Setup and Installation Guide for further information on a sturdy table or ...workbench. For electrostatic discharge information, see "Server Warnings and Precautions" later in this chapter. 5. To reduce the risk of personal...
Service Guide
Page 22
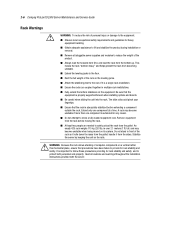
... modules to reduce the weight of the rack on the rails. handle it is extended for heavy equipment handling. Stabilize the server by keeping the unit on the leveling jacks. Attach the stabilizing feet to the rack if it from the pallet. The ... when installing options and boards. Ensure that the equipment is important to follow these precautions providing for rack stability and safety. 2-6 Compaq ProLiant DL580 Server Maintenance and Service Guide Rack Warnings WARNING: To reduce the risk of personal injury or damage to the equipment: Observe local occupational...
... modules to reduce the weight of the rack on the rails. handle it is extended for heavy equipment handling. Stabilize the server by keeping the unit on the leveling jacks. Attach the stabilizing feet to the rack if it from the pallet. The ... when installing options and boards. Ensure that the equipment is important to follow these precautions providing for rack stability and safety. 2-6 Compaq ProLiant DL580 Server Maintenance and Service Guide Rack Warnings WARNING: To reduce the risk of personal injury or damage to the equipment: Observe local occupational...

Service Guide
Page 23
...the AC power supply branch circuit that could bridge live parts. CAUTION: Protect the server from power fluctuations and temporary interruptions with the system unit cover on. CAUTION: The ProLiant DL580 server must always be performed by individuals who are detailed to the product. Do not ...personnel have access to all watches, rings, or loose jewelry when working in the product documentation. Removal and Replacement Procedures 2-7 Server Warnings and Precautions WARNING: The installation of internal options and routine maintenance and service of this product should not exceed 80 ...
...the AC power supply branch circuit that could bridge live parts. CAUTION: Protect the server from power fluctuations and temporary interruptions with the system unit cover on. CAUTION: The ProLiant DL580 server must always be performed by individuals who are detailed to the product. Do not ...personnel have access to all watches, rings, or loose jewelry when working in the product documentation. Removal and Replacement Procedures 2-7 Server Warnings and Precautions WARNING: The installation of internal options and routine maintenance and service of this product should not exceed 80 ...

Service Guide
Page 24
... surfaces, allow the internal system components to service the internal components. Remove the top access panel to cool before removing them. 2-8 Compaq ProLiant DL580 Server Maintenance and Service Guide Top Access Panel The ProLiant DL580 server ships standard in this chapter. 2. Figure 2-1. See "Preparation Procedures" earlier in a rack-mount configuration. NOTE: The PCI Hot Plug access door...
... surfaces, allow the internal system components to service the internal components. Remove the top access panel to cool before removing them. 2-8 Compaq ProLiant DL580 Server Maintenance and Service Guide Top Access Panel The ProLiant DL580 server ships standard in this chapter. 2. Figure 2-1. See "Preparation Procedures" earlier in a rack-mount configuration. NOTE: The PCI Hot Plug access door...

Service Guide
Page 26
Removing the Power On/Standby switch with LED indicators Reverse steps 1 through 5 to replace the Power On/Standby switch with LED indicators. Using a 4-mm flat-blade screwdriver, press in the tabs on each side of the switch, then pull the switch out from the front bezel. 2 1 1 Figure 2-3. 2-10 Compaq ProLiant DL580 Server Maintenance and Service Guide 5.
Removing the Power On/Standby switch with LED indicators Reverse steps 1 through 5 to replace the Power On/Standby switch with LED indicators. Using a 4-mm flat-blade screwdriver, press in the tabs on each side of the switch, then pull the switch out from the front bezel. 2 1 1 Figure 2-3. 2-10 Compaq ProLiant DL580 Server Maintenance and Service Guide 5.

Service Guide
Page 27
Removal and Replacement Procedures 2-11 Front Bezel To remove the front bezel: 1. See "Power On/Standby Switch with LED Indicators" earlier in this chapter. 3. Loosen the captive T-15 screw , then pull the front bezel away from the server. 3 2 1 Figure 2-4. Remove the Power On/Standby switch. Remove the 14 Torx T-15 screws . 4. Removing the front bezel Reverse steps 1 through 4 to replace the front bezel. See "Preparation Procedures" earlier in this chapter. 2. Perform the preparation procedures.
Removal and Replacement Procedures 2-11 Front Bezel To remove the front bezel: 1. See "Power On/Standby Switch with LED Indicators" earlier in this chapter. 3. Loosen the captive T-15 screw , then pull the front bezel away from the server. 3 2 1 Figure 2-4. Remove the Power On/Standby switch. Remove the 14 Torx T-15 screws . 4. Removing the front bezel Reverse steps 1 through 4 to replace the front bezel. See "Preparation Procedures" earlier in this chapter. 2. Perform the preparation procedures.

