
Ubuntu
Page 5
...controls 5 Using a WLAN ...5 Using an Internet service provider 5 Setting up a WLAN 5 Configuring a wireless router 6 Protecting your WLAN 6 Connecting to a WLAN 7 Using Bluetooth wireless devices 7 Connecting to a wired network ...7 Connecting to a local area network (LAN 8 3 Enjoying entertainment features ...9 Using the webcam ...9 Using audio ...9 Connecting speakers ...9 Connecting headphones ...9 Connecting a microphone ...9 Checking the sound ...10 Using video ...10 Connecting a VGA monitor or projector 10 DisplayPort ...12 Connecting an HDMI TV or monitor 12 Configuring audio...
...controls 5 Using a WLAN ...5 Using an Internet service provider 5 Setting up a WLAN 5 Configuring a wireless router 6 Protecting your WLAN 6 Connecting to a WLAN 7 Using Bluetooth wireless devices 7 Connecting to a wired network ...7 Connecting to a local area network (LAN 8 3 Enjoying entertainment features ...9 Using the webcam ...9 Using audio ...9 Connecting speakers ...9 Connecting headphones ...9 Connecting a microphone ...9 Checking the sound ...10 Using video ...10 Connecting a VGA monitor or projector 10 DisplayPort ...12 Connecting an HDMI TV or monitor 12 Configuring audio...

Ubuntu
Page 10
... troubleshooting tips. ● Proper workstation setup. ● Guidelines for posture and work habits that increase your comfort and decrease your risk of your warranty, please include your product part number, warranty period (found on your computer and/or on the desktop. Resource Setup Instructions Ubuntu Desktop Guide To access this guide, double-click the HP Documents icon located on the CD/DVD...
... troubleshooting tips. ● Proper workstation setup. ● Guidelines for posture and work habits that increase your comfort and decrease your risk of your warranty, please include your product part number, warranty period (found on your computer and/or on the desktop. Resource Setup Instructions Ubuntu Desktop Guide To access this guide, double-click the HP Documents icon located on the CD/DVD...
Ubuntu
Page 22
... the file browser and displays the contents of the USB ports on -screen functions similar to the system. Decreases the screen brightness incrementally as long as you hold down the key. After you have action keys or hot key shortcuts that key. CAUTION: Use extreme care when making changes in Setup Utility (BIOS). Use an external USB mouse (purchased separately) by pressing the fn key in combination with a keyboard and pointing device. To explore the...
... the file browser and displays the contents of the USB ports on -screen functions similar to the system. Decreases the screen brightness incrementally as long as you hold down the key. After you have action keys or hot key shortcuts that key. CAUTION: Use extreme care when making changes in Setup Utility (BIOS). Use an external USB mouse (purchased separately) by pressing the fn key in combination with a keyboard and pointing device. To explore the...

Ubuntu
Page 26
... saved to use the preceding shutdown procedure, try the following conditions: ● When you need to replace the battery or to access components inside the computer ● When you are connecting an external hardware device that does not connect to monitor and conserve the battery charge. 5 Managing power Your computer can operate on select models only. Click the System menu icon at the factory: Suspend and either battery power or external power. Shutting...
... saved to use the preceding shutdown procedure, try the following conditions: ● When you need to replace the battery or to access components inside the computer ● When you are connecting an external hardware device that does not connect to monitor and conserve the battery charge. 5 Managing power Your computer can operate on select models only. Click the System menu icon at the factory: Suspend and either battery power or external power. Shutting...
Ubuntu
Page 28
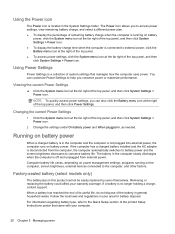
... of the printed Setup Instructions poster that manages how the computer uses power. Using the Power icon The Power icon is no longer holding a charge, contact support. If the computer has a charged battery installed and the AC adapter is connected to the Quick Setup section of the top panel, and then click System Settings > Power icon. 2. Factory-sealed battery (select models only) The battery(ies) in , as needed. You can also click the Battery menu icon at...
... of the printed Setup Instructions poster that manages how the computer uses power. Using the Power icon The Power icon is no longer holding a charge, contact support. If the computer has a charged battery installed and the AC adapter is connected to the Quick Setup section of the top panel, and then click System Settings > Power icon. 2. Factory-sealed battery (select models only) The battery(ies) in , as needed. You can also click the Battery menu icon at...
Ubuntu
Page 44
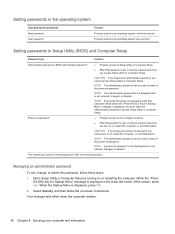
... restart the computer, or exit Hibernation. Open Setup Utility or Computer Setup by turning on password* ● Protects access to an operating system user account. NOTE: The administrator password can be entered each time you cannot access Setup Utility or Computer Setup. While the "Press the ESC key for Startup Menu" message is set , it must be used in Setup Utility (BIOS) and Computer Setup Password Type Function Administrator password or BIOS administrator password* Power-on or restarting the computer. CAUTION...
... restart the computer, or exit Hibernation. Open Setup Utility or Computer Setup by turning on password* ● Protects access to an operating system user account. NOTE: The administrator password can be entered each time you cannot access Setup Utility or Computer Setup. While the "Press the ESC key for Startup Menu" message is set , it must be used in Setup Utility (BIOS) and Computer Setup Password Type Function Administrator password or BIOS administrator password* Power-on or restarting the computer. CAUTION...
Ubuntu
Page 60
... 22 D default settings, restoring 41 digital card inserting 27 DisplayPort connecting 12 drive media 19 E electrostatic discharge 50 entering a power-on password 37 entering an administrator password 37 external monitor port 10 F factory settings, restoring 41 fun things to do 1 H HDMI configuring audio 13 HDMI port connecting 12 Hibernation exiting 19 initiated during critical battery level 22 initiating 19 high-definition devices, connecting 12 HP PC Hardware Diagnostics (UEFI) downloading 42 using 41 hubs 25 I icons network 4 wired network 4 wireless 4 input power 48 installing optional...
... 22 D default settings, restoring 41 digital card inserting 27 DisplayPort connecting 12 drive media 19 E electrostatic discharge 50 entering a power-on password 37 entering an administrator password 37 external monitor port 10 F factory settings, restoring 41 fun things to do 1 H HDMI configuring audio 13 HDMI port connecting 12 Hibernation exiting 19 initiated during critical battery level 22 initiating 19 high-definition devices, connecting 12 HP PC Hardware Diagnostics (UEFI) downloading 42 using 41 hubs 25 I icons network 4 wired network 4 wireless 4 input power 48 installing optional...

Ubuntu
Page 61
... 40 passwords set in 36 restoring default settings 41 selecting 40 starting 40 shipping the computer 33 shutdown 18 slot-load optical drive 29 storing battery 22 Suspend exiting 19 initiating 19 system information, displaying 41 U unresponsive system 18 USB cable, connecting 25 USB devices connecting 25 description 25 removing 26 USB hubs 25 V VGA port, connecting 10 video 10 W webcam 9 Wireless Assistant software 4 wireless button 4 wireless certification label 47 wireless controls button 4 operating system 4 Wireless Assistant software 4 wireless icon 4 wireless light 4 wireless network...
... 40 passwords set in 36 restoring default settings 41 selecting 40 starting 40 shipping the computer 33 shutdown 18 slot-load optical drive 29 storing battery 22 Suspend exiting 19 initiating 19 system information, displaying 41 U unresponsive system 18 USB cable, connecting 25 USB devices connecting 25 description 25 removing 26 USB hubs 25 V VGA port, connecting 10 video 10 W webcam 9 Wireless Assistant software 4 wireless button 4 wireless certification label 47 wireless controls button 4 operating system 4 Wireless Assistant software 4 wireless icon 4 wireless light 4 wireless network...

Maintenance and Service Guide
Page 106
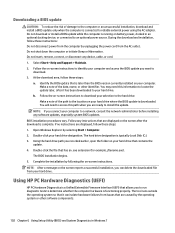
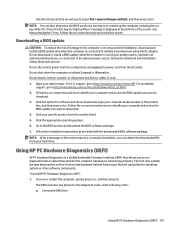
... installation, download and install a BIOS update only when the computer is functioning properly. Using HP PC Hardware Diagnostics (UEFI) HP PC Hardware Diagnostics is more recent than your hard drive designation. From the Start screen, type hp support assistant, and then select the HP Support Assistant app. 2. NOTE: After a message on your selection to a network, consult the network administrator before installing any device, cable, or cord. 1. If the update is a Unified Extensible Firmware...
... installation, download and install a BIOS update only when the computer is functioning properly. Using HP PC Hardware Diagnostics (UEFI) HP PC Hardware Diagnostics is more recent than your hard drive designation. From the Start screen, type hp support assistant, and then select the HP Support Assistant app. 2. NOTE: After a message on your selection to a network, consult the network administrator before installing any device, cable, or cord. 1. If the update is a Unified Extensible Firmware...
Maintenance and Service Guide
Page 110
...: 1. Make a note of the date, name, or other software components. 102 Chapter 6 Using Setup Utility (BIOS) and System Diagnostics in an optional docking device, or connected to the hard drive. You will need this path when you connect your hard drive that it has been downloaded to determine whether the computer hardware is functioning properly. Select Start > Help and Support > Maintain. 2. Identify the BIOS update that is later than the BIOS version currently installed...
...: 1. Make a note of the date, name, or other software components. 102 Chapter 6 Using Setup Utility (BIOS) and System Diagnostics in an optional docking device, or connected to the hard drive. You will need this path when you connect your hard drive that it has been downloaded to determine whether the computer hardware is functioning properly. Select Start > Help and Support > Maintain. 2. Identify the BIOS update that is later than the BIOS version currently installed...

Maintenance and Service Guide
Page 113
... mouse connected to enter Computer Setup. Turn on -screen instructions. NOTE: You can prevent the computer from operating properly. To start Computer Setup, follow these steps: 1. Errors can use either a pointing device (TouchPad, pointing stick, or USB mouse) or the keyboard to the main Computer Setup screen, press esc, and then follow the on or restart the computer, and then press esc while the "Press the ESC key for the types...
... mouse connected to enter Computer Setup. Turn on -screen instructions. NOTE: You can prevent the computer from operating properly. To start Computer Setup, follow these steps: 1. Errors can use either a pointing device (TouchPad, pointing stick, or USB mouse) or the keyboard to the main Computer Setup screen, press esc, and then follow the on or restart the computer, and then press esc while the "Press the ESC key for the types...

Maintenance and Service Guide
Page 114
... information regarding installing and troubleshooting the file. Start Computer Setup. 2. or - 106 Chapter 7 Computer Setup (BIOS) and HP PC Hardware Diagnostics (UEFI) in Computer Setup NOTE: Restoring defaults will not change the hard drive mode. To save your changes and exit Computer Setup menus, click the Save icon in the lower-left corner of the screen, and then follow these steps: 1. NOTE: Your password settings and security settings are packaged...
... information regarding installing and troubleshooting the file. Start Computer Setup. 2. or - 106 Chapter 7 Computer Setup (BIOS) and HP PC Hardware Diagnostics (UEFI) in Computer Setup NOTE: Restoring defaults will not change the hard drive mode. To save your changes and exit Computer Setup menus, click the Save icon in the lower-left corner of the screen, and then follow these steps: 1. NOTE: Your password settings and security settings are packaged...
Maintenance and Service Guide
Page 115
... on battery power, docked in an optional docking device, or connected to download. 3. Open your computer model number in the following order: a. Follow the on or restarting the computer, pressing the esc key while the "Press the ESC key for Startup Menu" message is connected to download. 4. Click the appropriate operating system. 6. Using HP PC Hardware Diagnostics (UEFI) HP PC Hardware Diagnostics is functioning properly. During the download and installation, follow these instructions: Do...
... on battery power, docked in an optional docking device, or connected to download. 3. Open your computer model number in the following order: a. Follow the on or restarting the computer, pressing the esc key while the "Press the ESC key for Startup Menu" message is connected to download. 4. Click the appropriate operating system. 6. Using HP PC Hardware Diagnostics (UEFI) HP PC Hardware Diagnostics is functioning properly. During the download and installation, follow these instructions: Do...
Maintenance and Service Guide
Page 122
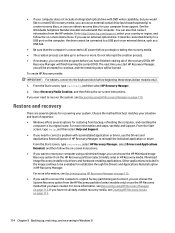
... Recovering using HP Recovery Manager on page 115. Minimized Image Recovery installs only drivers and hardware-enabling applications. From the Start screen, type help, and then select Help and Support. ● If you need to recover the system, see Recovering using HP Recovery Manager on page 115. For more . To create HP Recovery media: IMPORTANT: For tablets, connect to the keyboard dock before you begin creating the recovery media. ● The creation process can take up , restoring, and recovering...
... Recovering using HP Recovery Manager on page 115. Minimized Image Recovery installs only drivers and hardware-enabling applications. From the Start screen, type help, and then select Help and Support. ● If you need to recover the system, see Recovering using HP Recovery Manager on page 115. For more . To create HP Recovery media: IMPORTANT: For tablets, connect to the keyboard dock before you begin creating the recovery media. ● The creation process can take up , restoring, and recovering...

Maintenance and Service Guide
Page 123
... hardwarerelated drivers and software, but not other software applications. ● Factory Reset-Restores the computer to its original factory state by using HP Recovery Manager on page 113. ● If the HP Recovery media does not work, you can also find contact information from the HP Recovery partition: IMPORTANT: For tablets, connect to retain. If you have replaced the hard drive, you can obtain recovery media for recovery discs or a recovery USB flash drive. Before beginning recovery, back...
... hardwarerelated drivers and software, but not other software applications. ● Factory Reset-Restores the computer to its original factory state by using HP Recovery Manager on page 113. ● If the HP Recovery media does not work, you can also find contact information from the HP Recovery partition: IMPORTANT: For tablets, connect to retain. If you have replaced the hard drive, you can obtain recovery media for recovery discs or a recovery USB flash drive. Before beginning recovery, back...

Maintenance and Service Guide
Page 124
.... 1. Changing the computer boot order If computer does not restart in BIOS where the computer looks for boot options. 3. You can use the Windows Refresh option, the Windows option to remove the HP Recovery partition: 1. From the Start screen, type recovery, and then select HP Recovery Manager. 2. 1. So before you press the power button. 2. Removing the HP Recovery partition HP Recovery Manager software allows you want to boot from the boot options menu. 4. Select the optical drive or USB flash drive you to remove the HP Recovery partition to recover...
.... 1. Changing the computer boot order If computer does not restart in BIOS where the computer looks for boot options. 3. You can use the Windows Refresh option, the Windows option to remove the HP Recovery partition: 1. From the Start screen, type recovery, and then select HP Recovery Manager. 2. 1. So before you press the power button. 2. Removing the HP Recovery partition HP Recovery Manager software allows you want to boot from the boot options menu. 4. Select the optical drive or USB flash drive you to remove the HP Recovery partition to recover...

Maintenance and Service Guide
Page 129
... key for boot options. 3. Select Internal CD/DVD ROM Drive from the list. - To change the computer boot order. or - ● Turn on -screen instructions. If possible, back up all personal files. 2. Insert the first recovery disc into a USB port on your system without the need for advanced users only. Then press f11 while the "F11 (System Recovery)" message is recommended for recovery discs or a recovery flash drive. Click System Recovery in the window. or - All hardware-related drivers and software...
... key for boot options. 3. Select Internal CD/DVD ROM Drive from the list. - To change the computer boot order. or - ● Turn on -screen instructions. If possible, back up all personal files. 2. Insert the first recovery disc into a USB port on your system without the need for advanced users only. Then press f11 while the "F11 (System Recovery)" message is recommended for recovery discs or a recovery flash drive. Click System Recovery in the window. or - All hardware-related drivers and software...
Maintenance and Service Guide
Page 145
... battery illustrated 26 removing 49 spare part number 31 battery bay, identifying 15 battery lock and unlock latch, identifying 15 battery release latch 15 BIOS determining version 97, 101, 106 downloading an update 98, 102, 107 updating 97, 101, 106 Bluetooth label 17 boot order changing 121 changing HP Recovery Manager 116 bottom 17 buttons left TouchPad 11 power 13 right TouchPad 11 C cables, service considerations 45 caps lock light, identifying 12 chipset, product description 2 components bottom 15 display...
... battery illustrated 26 removing 49 spare part number 31 battery bay, identifying 15 battery lock and unlock latch, identifying 15 battery release latch 15 BIOS determining version 97, 101, 106 downloading an update 98, 102, 107 updating 97, 101, 106 Bluetooth label 17 boot order changing 121 changing HP Recovery Manager 116 bottom 17 buttons left TouchPad 11 power 13 right TouchPad 11 C cables, service considerations 45 caps lock light, identifying 12 chipset, product description 2 components bottom 15 display...
Maintenance and Service Guide
Page 146
... 115 removing 116 I internal display switch, identifying 7 internal microphone, identifying 7 J jacks audio-out (headphone)/audio-in (microphone) 9 network 9 RJ-45 (network) 9 K keyboard illustrated 20 product description 4 removing 57 keys action 14 esc 14 fn 14 Windows 14 L labels Bluetooth 17 regulatory 17 serial number 16 service 16 wireless certification 17 WLAN 17 latch, battery release 15 legacy support, USB 105 lights AC adapter 9 caps lock 12 hard drive 10 mute 12 power 10, 12 RJ-45 (network) status 9 wireless 12 M mass storage devices illustrated 29 precautions 46 memory card reader...
... 115 removing 116 I internal display switch, identifying 7 internal microphone, identifying 7 J jacks audio-out (headphone)/audio-in (microphone) 9 network 9 RJ-45 (network) 9 K keyboard illustrated 20 product description 4 removing 57 keys action 14 esc 14 fn 14 Windows 14 L labels Bluetooth 17 regulatory 17 serial number 16 service 16 wireless certification 17 WLAN 17 latch, battery release 15 legacy support, USB 105 lights AC adapter 9 caps lock 12 hard drive 10 mute 12 power 10, 12 RJ-45 (network) status 9 wireless 12 M mass storage devices illustrated 29 precautions 46 memory card reader...
Maintenance and Service Guide
Page 147
... creating 113 creating using HP Recovery Manager 114 recovery partition removing 116 recovery, system 120 regulatory information regulatory label 17 wireless certification labels 17 removal/replacement preliminaries 45 procedures 49 restore Windows File History 114 restore points 118 restoring the original system creating recovery media 117 RJ-45 (network) jack, identifying 9 RJ-45 (network) status lights, identifying 9 RTC battery illustrated 21 removing 94 S Screw Kit, spare part number 35 security cable slot, identifying 9 security, product description 5 serial number, computer 16 service...
... creating 113 creating using HP Recovery Manager 114 recovery partition removing 116 recovery, system 120 regulatory information regulatory label 17 wireless certification labels 17 removal/replacement preliminaries 45 procedures 49 restore Windows File History 114 restore points 118 restoring the original system creating recovery media 117 RJ-45 (network) jack, identifying 9 RJ-45 (network) status lights, identifying 9 RTC battery illustrated 21 removing 94 S Screw Kit, spare part number 35 security cable slot, identifying 9 security, product description 5 serial number, computer 16 service...


