User Manual
Page 2
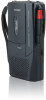
...; Voice-activated recording system Selectable 2-speed recording and playback Integrated omni-directional condenser microphone with recording level control Integrated full-range speaker 3.5mm headphone jack for private listening 3.5mm microphone jack for purchasing the Coby CXR123 VoiceActivated Microcassette recorder. Please read this manual as well as other helpful guides. Visit the Coby website at www.adobe.com. To view PDF documents, download and install the free...
...; Voice-activated recording system Selectable 2-speed recording and playback Integrated omni-directional condenser microphone with recording level control Integrated full-range speaker 3.5mm headphone jack for private listening 3.5mm microphone jack for purchasing the Coby CXR123 VoiceActivated Microcassette recorder. Please read this manual as well as other helpful guides. Visit the Coby website at www.adobe.com. To view PDF documents, download and install the free...
User Manual
Page 3
English Table of Contents Controls at a Glance 4 Getting Started 6 Installing Batteries 6 Earphone Jack 6 Microphone Jack 6 Recording 7 Cue and Review 8 Controls 9 Tape Speed 9 Pause...9 Fast Forward and Rewind 9 Voice Activated System (VAS 10 Volume/VAS Sensitivity Control 10 Quick Review and Quick Recording 10 Tape Playback 11 Tape Erase 11 Edit a Recording 11 Support 12 Safety Notices 13 Important Safety Instructions 15 www.cobyusa.com Page 3
English Table of Contents Controls at a Glance 4 Getting Started 6 Installing Batteries 6 Earphone Jack 6 Microphone Jack 6 Recording 7 Cue and Review 8 Controls 9 Tape Speed 9 Pause...9 Fast Forward and Rewind 9 Voice Activated System (VAS 10 Volume/VAS Sensitivity Control 10 Quick Review and Quick Recording 10 Tape Playback 11 Tape Erase 11 Edit a Recording 11 Support 12 Safety Notices 13 Important Safety Instructions 15 www.cobyusa.com Page 3
User Manual
Page 5
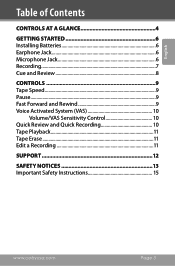
PLAY button 9. F.FWD & REW switch (Fast-forward & Rewind) 10. Volume control dial 4. Battery compartment (located on back panel) Load 2 x 1.5V "AA" batteries 13. Recording indicator 14. 3V DC In power jack (optional) 15. RECORD button 11. English Controls at a Glance 1. 3.5mm earphone jack 2. 3.5mm external microphone jack 3. STOP / EJECT button 8. Microcassette compartment www.cobyusa.com Page 5 SPEED switch 7. Voice-activated system switch (VAS) 5. Built-in microphone 6. PAUSE button 12.
PLAY button 9. F.FWD & REW switch (Fast-forward & Rewind) 10. Volume control dial 4. Battery compartment (located on back panel) Load 2 x 1.5V "AA" batteries 13. Recording indicator 14. 3V DC In power jack (optional) 15. RECORD button 11. English Controls at a Glance 1. 3.5mm earphone jack 2. 3.5mm external microphone jack 3. STOP / EJECT button 8. Microcassette compartment www.cobyusa.com Page 5 SPEED switch 7. Voice-activated system switch (VAS) 5. Built-in microphone 6. PAUSE button 12.
User Manual
Page 6
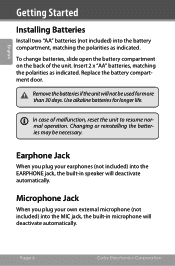
... MIC jack, the built-in speaker will deactivate automatically. English Getting Started Installing Batteries Install two "AA" batteries (not included) into the EARPHONE jack, the built-in microphone will not be necessary. Changing or reinstalling the batteries may be used for longer life. In case of the unit. Replace the battery compartment door. Remove the batteries if the unit will deactivate automatically. Page 6 Coby Electronics Corporation To change batteries, slide open...
... MIC jack, the built-in speaker will deactivate automatically. English Getting Started Installing Batteries Install two "AA" batteries (not included) into the EARPHONE jack, the built-in microphone will not be necessary. Changing or reinstalling the batteries may be used for longer life. In case of the unit. Replace the battery compartment door. Remove the batteries if the unit will deactivate automatically. Page 6 Coby Electronics Corporation To change batteries, slide open...
User Manual
Page 7
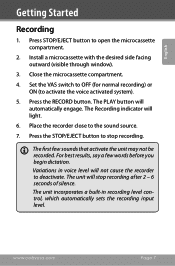
.... The unit incorporates a built-in voice level will light. 6. The PLAY button will stop recording. The first few words before you begin dictation. Install a microcassette with the desired side facing outward (visible through window). 3. Close the microcassette compartment. 4. Place the recorder close to deactivate. The Recording indicator will not cause the recorder to the sound source. 7. Variations in recording level control, which automatically sets the recording input level. Press the RECORD button. English Getting Started Recording 1.
.... The unit incorporates a built-in voice level will light. 6. The PLAY button will stop recording. The first few words before you begin dictation. Install a microcassette with the desired side facing outward (visible through window). 3. Close the microcassette compartment. 4. Place the recorder close to deactivate. The Recording indicator will not cause the recorder to the sound source. 7. Variations in recording level control, which automatically sets the recording input level. Press the RECORD button. English Getting Started Recording 1.

User Manual
Page 8
The recorded portion will produce a "chattering" sound during playback, you can fast forward or rewind the tape by sliding and holding the F.FWD-REW switch down or up. Page 8 Coby Electronics Corporation Release the switch to be easily distinguished. English Getting Started Cue and Review To locate a specific portion of the tape during scanning, allowing the recorded and unrecorded portions of the tape to resume normal playback.
The recorded portion will produce a "chattering" sound during playback, you can fast forward or rewind the tape by sliding and holding the F.FWD-REW switch down or up. Page 8 Coby Electronics Corporation Release the switch to be easily distinguished. English Getting Started Cue and Review To locate a specific portion of the tape during scanning, allowing the recorded and unrecorded portions of the tape to resume normal playback.
User Manual
Page 9
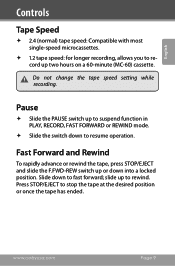
... switch up to rewind. slide up or down into a locked position. Do not change the tape speed setting while recording. English Controls Tape Speed 2.4 (normal) tape speed: Compatible with most single-speed microcassettes. 1.2 tape speed: for longer recording, allows you to record up to suspend function in PLAY, RECORD, FAST FORWARD or REWIND mode. Slide the switch down to resume operation. Pause Slide the PAUSE switch up two hours on a 60-minute (MC-60) cassette...
... switch up to rewind. slide up or down into a locked position. Do not change the tape speed setting while recording. English Controls Tape Speed 2.4 (normal) tape speed: Compatible with most single-speed microcassettes. 1.2 tape speed: for longer recording, allows you to record up to suspend function in PLAY, RECORD, FAST FORWARD or REWIND mode. Slide the switch down to resume operation. Pause Slide the PAUSE switch up two hours on a 60-minute (MC-60) cassette...
User Manual
Page 10
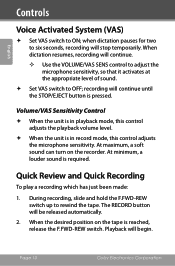
The RECORD button will continue. —— Use the VOLUME/VAS SENS control to adjust the microphone sensitivity, so that it activates at the appropriate level of sound. Set VAS switch to six seconds, recording will stop temporarily. English Controls Voice Activated System (VAS) Set VAS switch to rewind the tape. When dictation resumes, recording will be released automatically. 2. During recording, slide and hold the F.FWD-REW switch up to ON; Quick Review and Quick Recording To play a recording which...
The RECORD button will continue. —— Use the VOLUME/VAS SENS control to adjust the microphone sensitivity, so that it activates at the appropriate level of sound. Set VAS switch to six seconds, recording will stop temporarily. English Controls Voice Activated System (VAS) Set VAS switch to rewind the tape. When dictation resumes, recording will be released automatically. 2. During recording, slide and hold the F.FWD-REW switch up to ON; Quick Review and Quick Recording To play a recording which...
User Manual
Page 11
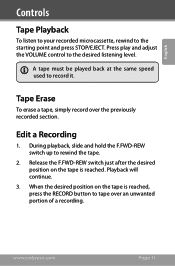
... tape is reached, press the RECORD button to tape over the previously recorded section. During playback, slide and hold the F.FWD-REW switch up to record it. English Controls Tape Playback To listen to your recorded microcassette, rewind to the desired listening level. Playback will continue. 3. www.cobyusa.com Page 11 Tape Erase To erase a tape, simply record over an unwanted portion of a recording. Press play and adjust the VOLUME control to the starting point and press STOP/EJECT. Edit a Recording...
... tape is reached, press the RECORD button to tape over the previously recorded section. During playback, slide and hold the F.FWD-REW switch up to record it. English Controls Tape Playback To listen to your recorded microcassette, rewind to the desired listening level. Playback will continue. 3. www.cobyusa.com Page 11 Tape Erase To erase a tape, simply record over an unwanted portion of a recording. Press play and adjust the VOLUME control to the starting point and press STOP/EJECT. Edit a Recording...
User Manual
Page 12
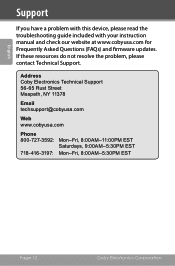
English Support If you have a problem with this device, please read the troubleshooting guide included with your instruction manual and check our website at www.cobyusa.com for Frequently Asked Questions (FAQs) and firmware updates. Address Coby Electronics Technical Support 56-65 Rust Street Maspeth, NY 11378 Email [email protected] Web www.cobyusa.com Phone 800-727-3592: Mon-Fri, 8:00AM-11:00PM...
English Support If you have a problem with this device, please read the troubleshooting guide included with your instruction manual and check our website at www.cobyusa.com for Frequently Asked Questions (FAQs) and firmware updates. Address Coby Electronics Technical Support 56-65 Rust Street Maspeth, NY 11378 Email [email protected] Web www.cobyusa.com Phone 800-727-3592: Mon-Fri, 8:00AM-11:00PM...
User Manual
Page 13
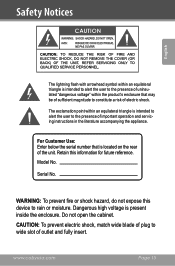
... the user to the presence of important operation and servicing instructions in the literature accompanying the appliance. Model No. Do not open the cabinet. CAUTION: To prevent electric shock, match wide blade of plug to wide slot of the unit. The exclamation point within the product's enclosure that is present inside the enclosure. For Customer Use: Enter below the serial number...
... the user to the presence of important operation and servicing instructions in the literature accompanying the appliance. Model No. Do not open the cabinet. CAUTION: To prevent electric shock, match wide blade of plug to wide slot of the unit. The exclamation point within the product's enclosure that is present inside the enclosure. For Customer Use: Enter below the serial number...
User Manual
Page 14
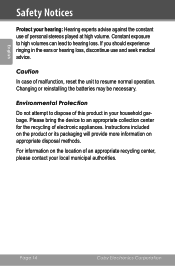
... experts advise against the constant use and seek medical advice. If you should experience ringing in your household garbage. Changing or reinstalling the batteries may be necessary. Constant exposure to high volumes can lead to an appropriate collection center for the recycling of personal stereos played at high volume. Please bring the device to hearing loss.
... experts advise against the constant use and seek medical advice. If you should experience ringing in your household garbage. Changing or reinstalling the batteries may be necessary. Constant exposure to high volumes can lead to an appropriate collection center for the recycling of personal stereos played at high volume. Please bring the device to hearing loss.
User Manual
Page 15
....cobyusa.com Page 15 Do not use this product from the type of the product and to protect it from battery power or other sources, refer to the operating instructions. 10. Use of power supply to operate from overheating. If you are provided...parts that could result in the cabinet are not sure of the type of other similar surface. Attachments: Use only attachments recommended by placing the product on the product. These openings should be hazardous. 7. English Safety Notices Important Safety Instructions 1. Read Instructions: All the safety and operating instructions...
....cobyusa.com Page 15 Do not use this product from the type of the product and to protect it from battery power or other sources, refer to the operating instructions. 10. Use of power supply to operate from overheating. If you are provided...parts that could result in the cabinet are not sure of the type of other similar surface. Attachments: Use only attachments recommended by placing the product on the product. These openings should be hazardous. 7. English Safety Notices Important Safety Instructions 1. Read Instructions: All the safety and operating instructions...
User Manual
Page 16
... ensure that your service technician has used replacement parts specified by the operating instructions as opening or removing covers may result in proper operating condition. 16. Page 16 Coby Electronics Corporation Replacement Parts: When replacement parts are required, be situated away from the wall outlet and refer servicing to its normal operation; Refer all servicing to rain or water; f) when the product exhibits a distinct change in fire, electric...
... ensure that your service technician has used replacement parts specified by the operating instructions as opening or removing covers may result in proper operating condition. 16. Page 16 Coby Electronics Corporation Replacement Parts: When replacement parts are required, be situated away from the wall outlet and refer servicing to its normal operation; Refer all servicing to rain or water; f) when the product exhibits a distinct change in fire, electric...

User Manual
Page 46
Page 46 Coby Electronics Corporation
Page 46 Coby Electronics Corporation


