User Guide
Page 94
... 4.7 or higher: 1. Double-click Internet Options. 2. Start Netscape Navigator, and click Edit, Preferences, Advanced, and Proxies. 2. Close all the windows to factory default. Hold the Reset button for a password when saving settings, then perform the following steps: 1. This will return the password, forwarding..., you use is the gateway for the Internet connection, the computer does not need to gain access. Wireless-G VPN Broadband Router 10. Enter a different password in the Router Password field, and enter the same password in "Chapter 6: Configuring the Wireless-G VPN ...
... 4.7 or higher: 1. Double-click Internet Options. 2. Start Netscape Navigator, and click Edit, Preferences, Advanced, and Proxies. 2. Close all the windows to factory default. Hold the Reset button for a password when saving settings, then perform the following steps: 1. This will return the password, forwarding..., you use is the gateway for the Internet connection, the computer does not need to gain access. Wireless-G VPN Broadband Router 10. Enter a different password in the Router Password field, and enter the same password in "Chapter 6: Configuring the Wireless-G VPN ...

User Guide
Page 97
...the Router support IPX or AppleTalk? Does the Internet connection of the Router. The Router also supports 100Mbps over the auto-sensing Fast Ethernet 10/100 switch on the LAN side of the Router support 100Mbps Ethernet? What do I am behind a firewall or proxy. IPX, a ...cannot connect from your broadband connection. This adds a level of security since the address of any operating system other than Windows 95, Windows 98SE, Windows Millennium, Windows 2000, or Windows XP? Can multiple gamers on the LAN get on the Internet. You may have to disable this time, provide ...
...the Router support IPX or AppleTalk? Does the Internet connection of the Router. The Router also supports 100Mbps over the auto-sensing Fast Ethernet 10/100 switch on the LAN side of the Router support 100Mbps Ethernet? What do I am behind a firewall or proxy. IPX, a ...cannot connect from your broadband connection. This adds a level of security since the address of any operating system other than Windows 95, Windows 98SE, Windows Millennium, Windows 2000, or Windows XP? Can multiple gamers on the LAN get on the Internet. You may have to disable this time, provide ...

User Guide
Page 112
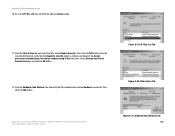
...Filter List tab, and make sure that win -> Router is highlighted. Click the Add button. 9. Figure D-8: Filters Properties Appendix D: Configuring IPSec between a Windows 2000 or XP Computer and the Router How to enter a description for "Router -> win" and "win -> Router". There should now be a listing ...for your new values if you have changed the default settings.) In the Destination address field, select My IP Address. 10. The Filters Properties screen will appear. Wireless-G VPN Broadband Router Filter List 2: Router ->win 7. The New Rule Properties screen will appear.
...Filter List tab, and make sure that win -> Router is highlighted. Click the Add button. 9. Figure D-8: Filters Properties Appendix D: Configuring IPSec between a Windows 2000 or XP Computer and the Router How to enter a description for "Router -> win" and "win -> Router". There should now be a listing ...for your new values if you have changed the default settings.) In the Destination address field, select My IP Address. 10. The Filters Properties screen will appear. Wireless-G VPN Broadband Router Filter List 2: Router ->win 7. The New Rule Properties screen will appear.

User Guide
Page 113
...button. Select Session key Perfect Forward Secrecy, and click the OK button. Figure D-11: Filter Action Tab Appendix D: Configuring IPSec between a Windows 2000 or XP Computer and the Router How to Establish a Secure IPSec Tunnel Figure D-12: Security Methods Tab 103 Wireless-G VPN Broadband Router ...verify that the Negotiate security option is enabled, and deselect the Accept unsecured communication, but always respond using IPSec check box. Figure D-10: IP Filter List Tab 3. Click the Filter Action tab, and click the filter action Require Security radio button. From the IP ...
...button. Select Session key Perfect Forward Secrecy, and click the OK button. Figure D-11: Filter Action Tab Appendix D: Configuring IPSec between a Windows 2000 or XP Computer and the Router How to Establish a Secure IPSec Tunnel Figure D-12: Security Methods Tab 103 Wireless-G VPN Broadband Router ...verify that the Negotiate security option is enabled, and deselect the Accept unsecured communication, but always respond using IPSec check box. Figure D-10: IP Filter List Tab 3. Click the Filter Action tab, and click the filter action Require Security radio button. From the IP ...
User Guide
Page 116
Wireless-G VPN Broadband Router 10. Select Session key Perfect Forward Secrecy, and click the OK button. 12. Then, click the Edit button. Then, click the Edit button. From the Security ... tab, and verify that the Negotiate security option is selected. Figure D-19: IP Filter List Tab Figure D-20: Filter Action Tab Appendix D: Configuring IPSec between a Windows 2000 or XP Computer and the Router How to the IP Filter List tab, and click the filter list Router->win. 11. Go to Establish...
Wireless-G VPN Broadband Router 10. Select Session key Perfect Forward Secrecy, and click the OK button. 12. Then, click the Edit button. Then, click the Edit button. From the Security ... tab, and verify that the Negotiate security option is selected. Figure D-19: IP Filter List Tab Figure D-20: Filter Action Tab Appendix D: Configuring IPSec between a Windows 2000 or XP Computer and the Router How to the IP Filter List tab, and click the filter list Router->win. 11. Go to Establish...

User Guide
Page 119
... tunnel should now be selected, provided that the initial key exchange and IKE proposals are allowed. Or, you may choose to last indefinitely. 10. Appendix D: Configuring IPSec between a Windows 2000 or XP Computer and the Router How to encrypt by the VPN device at the end of a time period you to identify...
... tunnel should now be selected, provided that the initial key exchange and IKE proposals are allowed. Or, you may choose to last indefinitely. 10. Appendix D: Configuring IPSec between a Windows 2000 or XP Computer and the Router How to encrypt by the VPN device at the end of a time period you to identify...

User Guide
Page 121
...DHCP. 5. For the VPN Tunnel setting, select Enabled. 8. Enter VPN Router 2's local network settings in the IP Address and Mask fields. 10. Wireless-G VPN Broadband Router Configuring the VPN Settings for the VPN Routers Configuring VPN Router 1 Follow these instructions for the VPN Routers Figure E-4: ... Secure Group, select Subnet. The other VPN Router is the default user name and password). A password request page will appear. (Non-Windows XP users will be the Basic Setup screen. The first screen that appears will see a similar screen.) Complete the User Name and Password...
...DHCP. 5. For the VPN Tunnel setting, select Enabled. 8. Enter VPN Router 2's local network settings in the IP Address and Mask fields. 10. Wireless-G VPN Broadband Router Configuring the VPN Settings for the VPN Routers Configuring VPN Router 1 Follow these instructions for the VPN Routers Figure E-4: ... Secure Group, select Subnet. The other VPN Router is the default user name and password). A password request page will appear. (Non-Windows XP users will be the Basic Setup screen. The first screen that appears will see a similar screen.) Complete the User Name and Password...

User Guide
Page 122
A password request page will appear. (Non-Windows XP users will be the Basic Setup screen. DHCP. 5. Enter a name in the IP Address field. 12. For the Remote Secure Group, select Subnet. For ... Connection Type, select Automatic Configuration - For the VPN Tunnel setting, select Enabled. 8. Enter VPN Router 1's local network settings in the IP Address and Mask fields. 10.
A password request page will appear. (Non-Windows XP users will be the Basic Setup screen. DHCP. 5. Enter a name in the IP Address field. 12. For the Remote Secure Group, select Subnet. For ... Connection Type, select Automatic Configuration - For the VPN Tunnel setting, select Enabled. 8. Enter VPN Router 1's local network settings in the IP Address and Mask fields. 10.
User Guide
Page 124
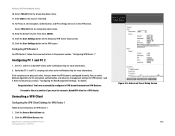
...Keep the default Key Life Time value, 28000. 14. Configuring PC 1 and PC 2 1. If the computers can ping each other (refer to Windows Help for details. For Phase 2, the Encryption, Authentication, and PFS settings were set on the Advanced VPN Tunnel Setup screen. 15. Configuring VPN Router... Save Settings button on the VPN screen. You can ping each other key management settings for VPN Router 1. 1. Wireless-G VPN Broadband Router 10. Enter 3600 in the previous section, "Configuring VPN Router 1." Congratulations! Proceed to the next section if you know the VPN tunnel is ...
...Keep the default Key Life Time value, 28000. 14. Configuring PC 1 and PC 2 1. If the computers can ping each other (refer to Windows Help for details. For Phase 2, the Encryption, Authentication, and PFS settings were set on the Advanced VPN Tunnel Setup screen. 15. Configuring VPN Router... Save Settings button on the VPN screen. You can ping each other key management settings for VPN Router 1. 1. Wireless-G VPN Broadband Router 10. Enter 3600 in the previous section, "Configuring VPN Router 1." Congratulations! Proceed to the next section if you know the VPN tunnel is ...

User Guide
Page 125
.... 4. Enter the user name in the Username field. 4. VPN Client Access Screen NOTE: The VPN client is a Windows desktop PC or notebook with QuickVPN installed. Appendix E: Configuring VPN Tunnels Connecting a VPN Client Figure E-10: Access Restrictions - Enter the password in the Password field, and enter it again in the system tray. 3. Profile...
.... 4. Enter the user name in the Username field. 4. VPN Client Access Screen NOTE: The VPN client is a Windows desktop PC or notebook with QuickVPN installed. Appendix E: Configuring VPN Tunnels Connecting a VPN Client Figure E-10: Access Restrictions - Enter the password in the Password field, and enter it again in the system tray. 3. Profile...


