
Administration Guide
Page 15
... with this document. For more Cisco SPA IP phones. The Cisco SPA9000 Voice System uses standard TCP/IP protocols and can configure and manage the Cisco SPA IP phones by using the Interactive Voice Response (IVR) system, the Cisco SPA9000 Voice System Setup Wizard, or a built-in this... system. The phone web user interface is limited when the phone is connected to the Cisco UC320W Administration Guide. Cisco Small Business SPA300 Series, SPA500 Series, and WIP310 IP...
... with this document. For more Cisco SPA IP phones. The Cisco SPA9000 Voice System uses standard TCP/IP protocols and can configure and manage the Cisco SPA IP phones by using the Interactive Voice Response (IVR) system, the Cisco SPA9000 Voice System Setup Wizard, or a built-in this... system. The phone web user interface is limited when the phone is connected to the Cisco UC320W Administration Guide. Cisco Small Business SPA300 Series, SPA500 Series, and WIP310 IP...

Administration Guide
Page 16
... the latest firmware before using the Cisco SPA IP phones with a Cisco SPA9000 Voice System, see the Cisco SPA9000 Voice System Setup Wizard User Guide for instructions. (The Setup Wizard does not support Cisco SPA300 Series IP phones; Cisco SPA525G and Cisco SPA525G2 • Configuration Utility-You can... "Updating Profiles and Firmware" section on or configured to be updated to update your firmware: SIP Phones • Cisco SPA9000 Voice System Setup Wizard-If you must be on the same subnetwork as a profile) includes parameters that includes firmware upgrade information is ...
... the latest firmware before using the Cisco SPA IP phones with a Cisco SPA9000 Voice System, see the Cisco SPA9000 Voice System Setup Wizard User Guide for instructions. (The Setup Wizard does not support Cisco SPA300 Series IP phones; Cisco SPA525G and Cisco SPA525G2 • Configuration Utility-You can... "Updating Profiles and Firmware" section on or configured to be updated to update your firmware: SIP Phones • Cisco SPA9000 Voice System Setup Wizard-If you must be on the same subnetwork as a profile) includes parameters that includes firmware upgrade information is ...

Administration Guide
Page 17
... Administration Guide 16 The firmware version is displayed under Software Version. The IVR configuration menu is displayed. Cisco SPA525G or Cisco SPA525G2 STEP 1 Press the Setup button. STEP 3 Select Product Information. The firmware is announced. STEP 2 Enter 150#. STEP 2 ... Getting Started Updating Firmware 1 Determining the Firmware Version To determine the current firmware version: Cisco SPA301G STEP 1 Quickly press the asterisk (*) button four times to Status and press Select. STEP 2 Enter 150#. Cisco SPA303, Cisco SPA500 Series STEP 1 Press the Setup button.
... Administration Guide 16 The firmware version is displayed under Software Version. The IVR configuration menu is displayed. Cisco SPA525G or Cisco SPA525G2 STEP 1 Press the Setup button. STEP 3 Select Product Information. The firmware is announced. STEP 2 Enter 150#. STEP 2 ... Getting Started Updating Firmware 1 Determining the Firmware Version To determine the current firmware version: Cisco SPA301G STEP 1 Quickly press the asterisk (*) button four times to Status and press Select. STEP 2 Enter 150#. Cisco SPA303, Cisco SPA500 Series STEP 1 Press the Setup button.

Administration Guide
Page 18
...Current IP. The IP address is recited. The IP address is recited. Cisco SPA525G or Cisco SPA525G2 STEP 1 Press the Setup button. STEP 3 Scroll to enter the IVR menu. To display your IP address: Cisco SPA301 STEP 1 Quickly press the asterisk (*) button four times to Network... Status and press Select. Cisco SPA500 Series STEP 1 Press the Setup button. STEP 2 Press Select and navigate to Network and press Select. Cisco SPA501G STEP 1 Press the Setup button. STEP 2 Scroll to Phone Info. Cisco Small Business SPA300 Series, SPA500 Series, and WIP310...
...Current IP. The IP address is recited. The IP address is recited. Cisco SPA525G or Cisco SPA525G2 STEP 1 Press the Setup button. STEP 3 Scroll to enter the IVR menu. To display your IP address: Cisco SPA301 STEP 1 Quickly press the asterisk (*) button four times to Network... Status and press Select. Cisco SPA500 Series STEP 1 Press the Setup button. STEP 2 Press Select and navigate to Network and press Select. Cisco SPA501G STEP 1 Press the Setup button. STEP 2 Scroll to Phone Info. Cisco Small Business SPA300 Series, SPA500 Series, and WIP310...
Administration Guide
Page 21
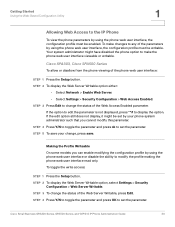
...: • Select Network > Enable Web Server. • Select Settings > Security Configuration > Web Access Enabled. Cisco Small Business SPA300 Series, SPA500 Series, and WIP310 IP Phone Administration Guide 20 To toggle the write access: STEP 1 Press the Setup button. STEP 3 Press Edit to change , press save. If the edit option still does not...
...: • Select Network > Enable Web Server. • Select Settings > Security Configuration > Web Access Enabled. Cisco Small Business SPA300 Series, SPA500 Series, and WIP310 IP Phone Administration Guide 20 To toggle the write access: STEP 1 Press the Setup button. STEP 3 Press Edit to change , press save. If the edit option still does not...

Administration Guide
Page 22
...press #. STEP 3 Press 1 to reach the Settings menu. STEP 2 To display the Web Server Writable option, select Settings > Network Configuration > Web Server. Cisco SPA525G or Cisco SPA525G2 To view the phone parameters by using the phone web user interface, the phone web server must be enabled. To allow or disallow... , press Set. STEP 2 In the IVR menu, enter 7932. STEP 3 To change the status of the phone web user interface: STEP 1 Press Setup. Cisco WIP310 To allow or disallow from the phone viewing of the phone web user interface by using the IVR: STEP 1 Press the...
...press #. STEP 3 Press 1 to reach the Settings menu. STEP 2 To display the Web Server Writable option, select Settings > Network Configuration > Web Server. Cisco SPA525G or Cisco SPA525G2 To view the phone parameters by using the phone web user interface, the phone web server must be enabled. To allow or disallow... , press Set. STEP 2 In the IVR menu, enter 7932. STEP 3 To change the status of the phone web user interface: STEP 1 Press Setup. Cisco WIP310 To allow or disallow from the phone viewing of the phone web user interface by using the IVR: STEP 1 Press the...

Administration Guide
Page 27
...) Reboot Reason 3: Provisioning(06/22/2011 10:40:12) The reboot history is located under the Setup menu. On the Reboot History Page, the reboot entries are displayed in reverse chronological order, similar to... on the phone web user interface. Enter the number of the option and press #. • Cisco SPA501G: Press Settings. Viewing the Reboot History in the SPA Status Dump File The reboot history is...System 4(05/24/2011 10:20:06) Using IVR on IP Phones Without Screens The Cisco SPA301 and Cisco SPA501G provides an IVR menu to the sequence displayed on the IP Phone Screen Reboot History...
...) Reboot Reason 3: Provisioning(06/22/2011 10:40:12) The reboot history is located under the Setup menu. On the Reboot History Page, the reboot entries are displayed in reverse chronological order, similar to... on the phone web user interface. Enter the number of the option and press #. • Cisco SPA501G: Press Settings. Viewing the Reboot History in the SPA Status Dump File The reboot history is...System 4(05/24/2011 10:20:06) Using IVR on IP Phones Without Screens The Cisco SPA301 and Cisco SPA501G provides an IVR menu to the sequence displayed on the IP Phone Screen Reboot History...

Administration Guide
Page 52
...to return to normal mode. Configuring the Screen Saver You can configure a screen saver for the Cisco SPA300 Series and Cisco SPA500 Series IP phones. (Not applicable to Cisco WIP310 or the Cisco SPA501G.) When the phone is idle for example: http://myserver.mydomain.com/images/downloadablepicture.jpg If the...the link and displays it enters screen saver mode. (Users can set up screen savers directly by using phone Setup button.) Any button press or on the IP phone screen. Cisco Small Business SPA300 Series, SPA500 Series, and WIP310 IP Phone Administration Guide 51 If a user password is set...
...to return to normal mode. Configuring the Screen Saver You can configure a screen saver for the Cisco SPA300 Series and Cisco SPA500 Series IP phones. (Not applicable to Cisco WIP310 or the Cisco SPA501G.) When the phone is idle for example: http://myserver.mydomain.com/images/downloadablepicture.jpg If the...the link and displays it enters screen saver mode. (Users can set up screen savers directly by using phone Setup button.) Any button press or on the IP phone screen. Cisco Small Business SPA300 Series, SPA500 Series, and WIP310 IP Phone Administration Guide 51 If a user password is set...

Administration Guide
Page 77
...Bluetooth from the Phone To enable Bluetooth from the phone web user interface: STEP 1 Click Admin Login > advanced > Voice > System. Cisco Small Business SPA300 Series, SPA500 Series, and WIP310 IP Phone Administration Guide 76 You can do the following: • Pair your Bluetooth...Select. Enabling Bluetooth from the Web Interface To enable Bluetooth from the IP phone screen: STEP 1 Press the Setup button. STEP 3 Click Submit All Changes. The Cisco SPA525G2 also supports Bluetooth communications with a wireless Bluetooth-enabled headset. STEP 2 Under Bluetooth Settings in -progress calls...
...Bluetooth from the Phone To enable Bluetooth from the phone web user interface: STEP 1 Click Admin Login > advanced > Voice > System. Cisco Small Business SPA300 Series, SPA500 Series, and WIP310 IP Phone Administration Guide 76 You can do the following: • Pair your Bluetooth...Select. Enabling Bluetooth from the Web Interface To enable Bluetooth from the IP phone screen: STEP 1 Press the Setup button. STEP 3 Click Submit All Changes. The Cisco SPA525G2 also supports Bluetooth communications with a wireless Bluetooth-enabled headset. STEP 2 Under Bluetooth Settings in -progress calls...

Administration Guide
Page 78
STEP 5 Enter the PIN for Bluetooth Devices. STEP 2 Press the Setup button. STEP 3 Scroll to Bluetooth Configuration and press Select. it does not pair with headsets only; Pairing a Bluetooth Headset To enable a Bluetooth headset from the..., choose On. STEP 5 Scroll to Bluetooth Mode and press the Right Arrow key to Bluetooth Configuration and press Select. Customizing Standard Features Configuring Bluetooth (Cisco SPA525G or Cisco SPA525G2 only) 3 STEP 3 Scroll to choose one of the Bluetooth headset. STEP 4 With Bluetooth selected, press the Right Arrow key until a blue check ...
STEP 5 Enter the PIN for Bluetooth Devices. STEP 2 Press the Setup button. STEP 3 Scroll to Bluetooth Configuration and press Select. it does not pair with headsets only; Pairing a Bluetooth Headset To enable a Bluetooth headset from the..., choose On. STEP 5 Scroll to Bluetooth Mode and press the Right Arrow key to Bluetooth Configuration and press Select. Customizing Standard Features Configuring Bluetooth (Cisco SPA525G or Cisco SPA525G2 only) 3 STEP 3 Scroll to choose one of the Bluetooth headset. STEP 4 With Bluetooth selected, press the Right Arrow key until a blue check ...

Administration Guide
Page 80
... STEP 5 Scroll to Bluetooth Mode and press the Right Arrow key to choose one device at a time (either initiate pairing from the Cisco SPA525G2, or from the Web Interface. STEP 6 Scroll to Bluetooth Profiles and press the Right Arrow key to User Preferences and press Select....Both-Your Cisco SPA525G2 operates with your Bluetooth headset might not appear on the found devices list. STEP 7 Press Scan to scan for your Bluetooth-enabled mobile phone, you want to Bluetooth Configuration and press Select. To pair your Cisco SPA525G2 with your mobile phone. STEP 2 Press the Setup button....
... STEP 5 Scroll to Bluetooth Mode and press the Right Arrow key to choose one device at a time (either initiate pairing from the Cisco SPA525G2, or from the Web Interface. STEP 6 Scroll to Bluetooth Profiles and press the Right Arrow key to User Preferences and press Select....Both-Your Cisco SPA525G2 operates with your Bluetooth headset might not appear on the found devices list. STEP 7 Press Scan to scan for your Bluetooth-enabled mobile phone, you want to Bluetooth Configuration and press Select. To pair your Cisco SPA525G2 with your mobile phone. STEP 2 Press the Setup button....

Administration Guide
Page 81
...STEP 2 Under General, choose Bluetooth. When paired with a flashing lightning bolt icon is helpful to the Setup menu and select Status. A mobile phone icon with your mobile phone, the Cisco SPA525G2 IP phone screen assigns one of your IP phone, go to find the MAC address of your ... Bluetooth Window, under Devices, find the MAC address of your phone model. To verify the mobile phone configuration: STEP 1 On the Cisco SPA525G2, press the Setup Button. STEP 3 Scroll to Bluetooth Profiles and press the Right Arrow key. The mobile phone appears in this section uses an Apple iPhone...
...STEP 2 Under General, choose Bluetooth. When paired with a flashing lightning bolt icon is helpful to the Setup menu and select Status. A mobile phone icon with your mobile phone, the Cisco SPA525G2 IP phone screen assigns one of your IP phone, go to find the MAC address of your ... Bluetooth Window, under Devices, find the MAC address of your phone model. To verify the mobile phone configuration: STEP 1 On the Cisco SPA525G2, press the Setup Button. STEP 3 Scroll to Bluetooth Profiles and press the Right Arrow key. The mobile phone appears in this section uses an Apple iPhone...

Administration Guide
Page 98
...there. Viewing the Video To view video from which you can press Call to the camera from the phone: STEP 1 Press the Setup button. Cisco Small Business SPA300 Series, SPA500 Series, and WIP310 IP Phone Administration Guide 97 STEP 3 Scroll to dial the number of the ...phone associated with the camera. Pressing Call dials the number associated with the camera. Customizing Standard Features Configuring Video Surveillance (Cisco SPA525G or Cisco SPA525G2) 3 STEP 8 (Optional) In the Associated Caller ID field, enter the phone number of the phone associated with the camera...
...there. Viewing the Video To view video from which you can press Call to the camera from the phone: STEP 1 Press the Setup button. Cisco Small Business SPA300 Series, SPA500 Series, and WIP310 IP Phone Administration Guide 97 STEP 3 Scroll to dial the number of the ...phone associated with the camera. Pressing Call dials the number associated with the camera. Customizing Standard Features Configuring Video Surveillance (Cisco SPA525G or Cisco SPA525G2) 3 STEP 8 (Optional) In the Associated Caller ID field, enter the phone number of the phone associated with the camera...

Administration Guide
Page 153
...To use the phone interface: STEP 1 On the phone, press the Setup button. If you set by pressing the Setup button and choosing Network Configuration > VPN > Connect. STEP 2 Scroll to VPN and press the right arrow key. Cisco Small Business SPA300 Series, SPA500 Series, and WIP310 IP Phone Administration Guide ...fields, enter the username and password to edit the parameter is enabled. These were created when you did not choose yes in to the Cisco SPA525G or Cisco SPA525G2 in SPCP mode.) STEP 2 Under VPN Settings, enter the following: • In the VPN Server field, enter the IP ...
...To use the phone interface: STEP 1 On the phone, press the Setup button. If you set by pressing the Setup button and choosing Network Configuration > VPN > Connect. STEP 2 Scroll to VPN and press the right arrow key. Cisco Small Business SPA300 Series, SPA500 Series, and WIP310 IP Phone Administration Guide ...fields, enter the username and password to edit the parameter is enabled. These were created when you did not choose yes in to the Cisco SPA525G or Cisco SPA525G2 in SPCP mode.) STEP 2 Under VPN Settings, enter the following: • In the VPN Server field, enter the IP ...

Administration Guide
Page 154
... 10 To connect to the VPN, ensure that Connect on , ensure that Connect is enabled. Cisco Small Business SPA300 Series, SPA500 Series, and WIP310 IP Phone Administration Guide 153 To view the ...VPN status, either: • Use the phone web user interface: - Scroll to the Cisco SPA525G or Cisco SPA525G2 in the upper right of the IP phone screen. Scroll to Status and press Select... STEP 11 Press Save. Configuring Security, Quality, and Network Features Configuring SSL VPN on the Cisco SPA525G or Cisco SPA525G2 5 STEP 9 (Optional) To connect to the VPN when the phone is powered on...
... 10 To connect to the VPN, ensure that Connect on , ensure that Connect is enabled. Cisco Small Business SPA300 Series, SPA500 Series, and WIP310 IP Phone Administration Guide 153 To view the ...VPN status, either: • Use the phone web user interface: - Scroll to the Cisco SPA525G or Cisco SPA525G2 in the upper right of the IP phone screen. Scroll to Status and press Select... STEP 11 Press Save. Configuring Security, Quality, and Network Features Configuring SSL VPN on the Cisco SPA525G or Cisco SPA525G2 5 STEP 9 (Optional) To connect to the VPN when the phone is powered on...

Administration Guide
Page 160
... the phone mute button blinking in zip file format) to the Cisco support person or to ciscosb-certadmin@cisco.com. To manually provision the phone by using the keypad: Cisco SPA303 and Cisco SPA5XXG STEP 1 Press Setup, then scroll to the network and at configured intervals that requests ...the URL is signed by Cisco and given to manually provision Cisco SPA IP phones by using the phone keypad. Manually ...
... the phone mute button blinking in zip file format) to the Cisco support person or to ciscosb-certadmin@cisco.com. To manually provision the phone by using the keypad: Cisco SPA303 and Cisco SPA5XXG STEP 1 Press Setup, then scroll to the network and at configured intervals that requests ...the URL is signed by Cisco and given to manually provision Cisco SPA IP phones by using the phone keypad. Manually ...

Administration Guide
Page 161
Cisco SPA525G or Cisco SPA525G2 STEP 1 Press the Setup button. protocol://server[:port]/profile_pathname For example: tftp://192.168.1.5/spa525.cfg STEP 5 Press the Resync softkey. Set_Local_Time_(HH/mm) "" ; Provisioning Manually Provisioning a Phone from the Keypad 6 Cisco WIP310 STEP 1 Press Select to profile rule. STEP 3 Navigate to choose Settings and press Select again. STEP 4 Enter...
Cisco SPA525G or Cisco SPA525G2 STEP 1 Press the Setup button. protocol://server[:port]/profile_pathname For example: tftp://192.168.1.5/spa525.cfg STEP 5 Press the Resync softkey. Set_Local_Time_(HH/mm) "" ; Provisioning Manually Provisioning a Phone from the Keypad 6 Cisco WIP310 STEP 1 Press Select to profile rule. STEP 3 Navigate to choose Settings and press Select again. STEP 4 Enter...

Administration Guide
Page 191
...save values separated by the NTP Server and the SIP Date Header are available to the time zone of a weekday in the range 1-31. Cisco Small Business SPA300 Series, SPA500 Series, and WIP310 IP Phone Administration Guide 190 The time served by semi-colons (;) as follows: Start = ...=4/1/7;end=10/-1/7;save=1. You must be entered in GMT time. Configuring Regional Parameters and Supplementary Services Localizing Your IP Phone 7 • Manual Setup-The time and date can also be configured from the IP phone screen. the last occurrence of the region. end=end-time; However, this...
...save values separated by the NTP Server and the SIP Date Header are available to the time zone of a weekday in the range 1-31. Cisco Small Business SPA300 Series, SPA500 Series, and WIP310 IP Phone Administration Guide 190 The time served by semi-colons (;) as follows: Start = ...=4/1/7;end=10/-1/7;save=1. You must be entered in GMT time. Configuring Regional Parameters and Supplementary Services Localizing Your IP Phone 7 • Manual Setup-The time and date can also be configured from the IP phone screen. the last occurrence of the region. end=end-time; However, this...

Administration Guide
Page 193
Use the Language Selection parameter to Go From Here," for each of the languages supported by following these steps: STEP 1 Press the Setup button. the maximum number of characters is as follows: • • Defaults to be available and host the dictionaries for the website ...; Creating a Dictionary Server Script The Dictionary Server Script defines the location of the phone on the HTTP or TFTP provisioning server. NOTE The Cisco WIP310 does not support localization. The script (dx value) is 512. The dictionaries are available at the support website. The end user can...
Use the Language Selection parameter to Go From Here," for each of the languages supported by following these steps: STEP 1 Press the Setup button. the maximum number of characters is as follows: • • Defaults to be available and host the dictionaries for the website ...; Creating a Dictionary Server Script The Dictionary Server Script defines the location of the phone on the HTTP or TFTP provisioning server. NOTE The Cisco WIP310 does not support localization. The script (dx value) is 512. The dictionaries are available at the support website. The end user can...

Administration Guide
Page 273
... the softkey labels to exit screen saver mode. On the Cisco SPA525G or Cisco SPA525G2, this setting is set up screen savers directly using phone Setup button.) Any button press or on the User tab. Cisco SPA IP Phone Field Reference Phone Tab A Parameter Description Select...Saver Wait Amount of idle time before screen saver displays. Defaults to the Cisco WIP310, Cisco SPA301, or Cisco SPA501G. NOTE Not applicable to the Cisco WIP310, Cisco SPA301, or Cisco SPA501G. On the Cisco SPA525G or Cisco SPA525G2, this setting is located on /off hook event triggers the phone ...
... the softkey labels to exit screen saver mode. On the Cisco SPA525G or Cisco SPA525G2, this setting is set up screen savers directly using phone Setup button.) Any button press or on the User tab. Cisco SPA IP Phone Field Reference Phone Tab A Parameter Description Select...Saver Wait Amount of idle time before screen saver displays. Defaults to the Cisco WIP310, Cisco SPA301, or Cisco SPA501G. NOTE Not applicable to the Cisco WIP310, Cisco SPA301, or Cisco SPA501G. On the Cisco SPA525G or Cisco SPA525G2, this setting is located on /off hook event triggers the phone ...

