User Guide
Page 3
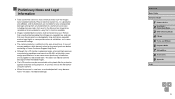
... used over an extended period, it may appear as red or black dots. Please note that Canon Inc., its subsidiaries and affiliates, and its distributors are not liable for protection against scratches during shipment... LCD monitor may be defective or may become warm. If covered, remove the film before contacting a Canon Customer Support Help Desk. ●● Although the LCD monitor is produced under extremely high-precision manufacturing...and Legal Information ●● Take and review some commercial settings. ●● The camera warranty is valid only in the area of purchase....
... used over an extended period, it may appear as red or black dots. Please note that Canon Inc., its subsidiaries and affiliates, and its distributors are not liable for protection against scratches during shipment... LCD monitor may be defective or may become warm. If covered, remove the film before contacting a Canon Customer Support Help Desk. ●● Although the LCD monitor is produced under extremely high-precision manufacturing...and Legal Information ●● Take and review some commercial settings. ●● The camera warranty is valid only in the area of purchase....

User Guide
Page 46
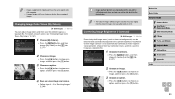
... while the shot is displayed, you press the shutter button halfway. Changing the Image Display Period after Shots 1 Access the [Review image after shooting] screen. ●●Press the [ ] button, choose [Review image after shooting. Hold Off Displays images only until you can take another shot by pressing the shutter button halfway...
... while the shot is displayed, you press the shutter button halfway. Changing the Image Display Period after Shots 1 Access the [Review image after shooting] screen. ●●Press the [ ] button, choose [Review image after shooting. Hold Off Displays images only until you can take another shot by pressing the shutter button halfway...

User Guide
Page 74
... grouped by shooting date, press the [ ][ ] buttons in many ways ●● To prepare the camera for at least one second. 6 Playback Mode Have fun reviewing your images. ●●To view the previous image, press the [ ] button. Before Use Basic Guide Advanced Guide 1 Camera Basics 2 Auto Mode / Hybrid Auto Mode...
... grouped by shooting date, press the [ ][ ] buttons in many ways ●● To prepare the camera for at least one second. 6 Playback Mode Have fun reviewing your images. ●●To view the previous image, press the [ ] button. Before Use Basic Guide Advanced Guide 1 Camera Basics 2 Auto Mode / Hybrid Auto Mode...

User Guide
Page 89
... [Cropping] on this frame, turn the [ ] dial to switch to the other frame. ●●Press the [ ] button. 4 Save as a new image and review. ●●Follow steps 4 - 5 in "Resizing Images" (= 88). ●● Editing is not possible for images shot at a resolution of the image to [...9679;●Press the [ ][ ] buttons to choose [OK], and then press the [ ] button. ●●The image is now saved as a new file. 5 Review the new image. ●●Press the [ ] button. [Display new image?] is displayed. ●●Press the [ ][ ] buttons to choose [Yes], and ...
... [Cropping] on this frame, turn the [ ] dial to switch to the other frame. ●●Press the [ ] button. 4 Save as a new image and review. ●●Follow steps 4 - 5 in "Resizing Images" (= 88). ●● Editing is not possible for images shot at a resolution of the image to [...9679;●Press the [ ][ ] buttons to choose [OK], and then press the [ ] button. ●●The image is now saved as a new file. 5 Review the new image. ●●Press the [ ] button. [Display new image?] is displayed. ●●Press the [ ][ ] buttons to choose [Yes], and ...
User Guide
Page 90
... the color of images edited using this function may vary slightly from four correction levels, and then save the edited image as a new image and review. ●●Follow steps 4 - 5 in "Resizing Images" (= 88). ●● Image quality of pictures you repeatedly edit this way will have a lower resolution than uncropped...
... the color of images edited using this function may vary slightly from four correction levels, and then save the edited image as a new image and review. ●●Follow steps 4 - 5 in "Resizing Images" (= 88). ●● Image quality of pictures you repeatedly edit this way will have a lower resolution than uncropped...

User Guide
Page 91
Follow the steps in "Magnifying Images" (= 80). 4 Save as a new image and review. ●●Press the buttons to choose [New File], and then press the [ ] button. ●●The image is now corrected, and frames are displayed ... saved as a new file. ●●Follow step 5 in "Resizing Images" (= 88). ●● Some images may not be overwritten. 4 Save as a new image and review. ●●Follow steps 4 - 5 in "Resizing Images" (= 88). ●● For some images, correction may be inaccurate or may cause images to choose an image...
Follow the steps in "Magnifying Images" (= 80). 4 Save as a new image and review. ●●Press the buttons to choose [New File], and then press the [ ] button. ●●The image is now corrected, and frames are displayed ... saved as a new file. ●●Follow step 5 in "Resizing Images" (= 88). ●● Some images may not be overwritten. 4 Save as a new image and review. ●●Follow steps 4 - 5 in "Resizing Images" (= 88). ●● For some images, correction may be inaccurate or may cause images to choose an image...

User Guide
Page 92
... left will be cut, while in [ ] the portion after the nearest [ ] mark on the right will be available. ●● Movies may not be cut. 3 Review the edited movie. ●●Press the [ ][ ] buttons to choose [ ], and then press the [ ] button. Cut the beginning of the movie by choosing [ ]. ●●...
... left will be cut, while in [ ] the portion after the nearest [ ] mark on the right will be available. ●● Movies may not be cut. 3 Review the edited movie. ●●Press the [ ][ ] buttons to choose [ ], and then press the [ ] button. Cut the beginning of the movie by choosing [ ]. ●●...

User Guide
Page 130
On Off / / / / / Red-Eye Lamp On/Off / / / / / / / / / Safety FE On / / / / Off i-Contrast (=60) Auto Off Safety Shift (=72) On / / / / / // / / / / / // / / / / / // / / / / / // / / / / / // / / / / / // / / / / / // / / / / / // Off / / // / / / Review image after shooting (=46) Display Time Off Quick / / / / / // / / // / / / 2 sec./4 sec./8 sec./Hold / / / / / Display Info Off / / / / / / / / / // Detailed / / / / / // Blink Detection (=45) On / / / / / // Off / / / / / // / / //...
On Off / / / / / Red-Eye Lamp On/Off / / / / / / / / / Safety FE On / / / / Off i-Contrast (=60) Auto Off Safety Shift (=72) On / / / / / // / / / / / // / / / / / // / / / / / // / / / / / // / / / / / // / / / / / // / / / / / // Off / / // / / / Review image after shooting (=46) Display Time Off Quick / / / / / // / / // / / / 2 sec./4 sec./8 sec./Hold / / / / / Display Info Off / / / / / / / / / // Detailed / / / / / // Blink Detection (=45) On / / / / / // Off / / / / / // / / //...


