User Manual
Page 2
... 2 If anything is not included (=2). Before Use Initial Information Package Contents Before use, make sure the following memory cards (commercially available) can be used, regardless of capacity. ●● SD memory cards* ●● SDHC memory cards* ●● SDXC memory cards* * Cards conforming to work with cord) * Do not peel off the adhesive covering from a battery pack. ●...
... 2 If anything is not included (=2). Before Use Initial Information Package Contents Before use, make sure the following memory cards (commercially available) can be used, regardless of capacity. ●● SD memory cards* ●● SDHC memory cards* ●● SDXC memory cards* * Cards conforming to work with cord) * Do not peel off the adhesive covering from a battery pack. ●...
User Manual
Page 3
Please note that Canon Inc., its subsidiaries and affiliates, and its distributors are not liable for any malfunction of a camera or accessory, including memory cards, that is produced under default settings. ●● For convenience, all supported memory cards are used over an extended period, it may... back ●● Shooting modes and on-screen icons and text are represented by the camera shall be defective or may appear as the "memory card". This does not indicate damage. Before Use Basic Guide Advanced Guide 1 Camera Basics 2 Auto Mode 3 Other Shooting Modes 4 P Mode ...
Please note that Canon Inc., its subsidiaries and affiliates, and its distributors are not liable for any malfunction of a camera or accessory, including memory cards, that is produced under default settings. ●● For convenience, all supported memory cards are used over an extended period, it may... back ●● Shooting modes and on-screen icons and text are represented by the camera shall be defective or may appear as the "memory card". This does not indicate damage. Before Use Basic Guide Advanced Guide 1 Camera Basics 2 Auto Mode 3 Other Shooting Modes 4 P Mode ...
User Manual
Page 4
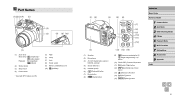
... lever Shoot Only: [ (telephoto)] / [ (wide angle)] Playback: [ (magnify)] / [ (index)] (2) Shutter button (3) Strap mount (4) Power button * Used with NFC feature (=79). (5) Flash (6) Lamp (7) Lens (8) Tripod socket (9) Memory card/battery cover (10) [ ] (N-Mark)* (1) (2) (3) (5) (6) (7) (8) (9) (10) (11) (12) (4) (1) Speaker (2) Microphone (3) AV OUT (Audio/video output) / DIGITAL terminal (4) Screen (Monitor) (5) Indicator (back) (6) [ (Playback)] button (7) Movie button (8) [ (Auto...
... lever Shoot Only: [ (telephoto)] / [ (wide angle)] Playback: [ (magnify)] / [ (index)] (2) Shutter button (3) Strap mount (4) Power button * Used with NFC feature (=79). (5) Flash (6) Lamp (7) Lens (8) Tripod socket (9) Memory card/battery cover (10) [ ] (N-Mark)* (1) (2) (3) (5) (6) (7) (8) (9) (10) (11) (12) (4) (1) Speaker (2) Microphone (3) AV OUT (Audio/video output) / DIGITAL terminal (4) Screen (Monitor) (5) Indicator (back) (6) [ (Playback)] button (7) Movie button (8) [ (Auto...
User Manual
Page 5
... Mode 6 Wi-Fi Functions 7 Setting Menu 8 Accessories 9 Appendix Index 5 Table of Contents Before Use Initial Information 2 Package Contents 2 Compatible Memory Cards 2 Preliminary Notes and Legal Information 3 Conventions in This Guide 3 Part Names 4 Common Camera Operations 10 Safety Precautions 11 Basic Guide Basic Operations ...Holding the Camera 15 Charging the Battery Pack 15 Inserting the Battery Pack and Your Memory Card (Commercially Available 16 Removing the Battery Pack and Memory Card 16 Setting the Date and Time 17 Changing the Date and Time 17 Display Language...
... Mode 6 Wi-Fi Functions 7 Setting Menu 8 Accessories 9 Appendix Index 5 Table of Contents Before Use Initial Information 2 Package Contents 2 Compatible Memory Cards 2 Preliminary Notes and Legal Information 3 Conventions in This Guide 3 Part Names 4 Common Camera Operations 10 Safety Precautions 11 Basic Guide Basic Operations ...Holding the Camera 15 Charging the Battery Pack 15 Inserting the Battery Pack and Your Memory Card (Commercially Available 16 Removing the Battery Pack and Memory Card 16 Setting the Date and Time 17 Changing the Date and Time 17 Display Language...
User Manual
Page 8
... World Clock 107 Lens Retraction Timing 108 Using Eco Mode 108 Power-Saving Adjustment 108 Screen Brightness 109 Hiding the Start-Up Screen 109 Formatting Memory Cards 109 Low-Level Formatting 110 File Numbering 110 Date-Based Image Storage 111 Metric / Non-Metric Display 111 Checking Certification Logos 111 Display Language 111...
... World Clock 107 Lens Retraction Timing 108 Using Eco Mode 108 Power-Saving Adjustment 108 Screen Brightness 109 Hiding the Start-Up Screen 109 Formatting Memory Cards 109 Low-Level Formatting 110 File Numbering 110 Date-Based Image Storage 111 Metric / Non-Metric Display 111 Checking Certification Logos 111 Display Language 111...
User Manual
Page 9
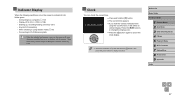
...-Screen Messages 130 On-Screen Information 132 Shooting (Information Display 132 Battery Level 132 Playback (Detailed Information Display 133 Summary of Shots per Memory Card 143 Recording Time per Memory Card 143 Battery Pack NB-11LH 144 Battery Charger CB-2LF/CB-2LFE 144 Index 145 Wi-Fi (Wireless LAN) Precautions 147 Radio Wave...
...-Screen Messages 130 On-Screen Information 132 Shooting (Information Display 132 Battery Level 132 Playback (Detailed Information Display 133 Summary of Shots per Memory Card 143 Recording Time per Memory Card 143 Battery Pack NB-11LH 144 Battery Charger CB-2LF/CB-2LFE 144 Index 145 Wi-Fi (Wireless LAN) Precautions 147 Radio Wave...
User Manual
Page 16
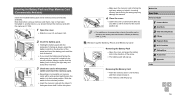
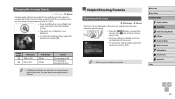
... Use Basic Guide Advanced Guide 1 Camera Basics 2 Auto Mode 3 Other Shooting Modes 4 P Mode 5 Playback Mode 6 Wi-Fi Functions 7 Setting Menu 8 Accessories 9 Appendix Index 16 Inserting memory cards facing the wrong way may damage the camera. 4 Close the cover. ●●Lower the cover (1) and hold it down as you should format the...
... Use Basic Guide Advanced Guide 1 Camera Basics 2 Auto Mode 3 Other Shooting Modes 4 P Mode 5 Playback Mode 6 Wi-Fi Functions 7 Setting Menu 8 Accessories 9 Appendix Index 16 Inserting memory cards facing the wrong way may damage the camera. 4 Close the cover. ●●Lower the cover (1) and hold it down as you should format the...
User Manual
Page 27
... When the following conditions occur, the camera's indicator (=4) blinks green. -- Starting up, recording/reading a memory card -- These actions may corrupt images or damage the camera or memory card. When shooting in Long Shutter mode (=47) -- Display off , open the memory card/battery cover, or shake or jolt the camera. Connecting to vertical display. Clock You can...
... When the following conditions occur, the camera's indicator (=4) blinks green. -- Starting up, recording/reading a memory card -- These actions may corrupt images or damage the camera or memory card. When shooting in Long Shutter mode (=47) -- Display off , open the memory card/battery cover, or shake or jolt the camera. Connecting to vertical display. Clock You can...
User Manual
Page 30
...), see "Camera" (= 141). ●● The subject may be automatically adjusted. 3) Finish recording. ●●Press the movie button again to stop automatically when the memory card becomes full. ●●When you recompose shots, the focus, brightness, and colors will be lit when shooting in focusing, the lamp may be blurred...
...), see "Camera" (= 141). ●● The subject may be automatically adjusted. 3) Finish recording. ●●Press the movie button again to stop automatically when the memory card becomes full. ●●When you recompose shots, the focus, brightness, and colors will be lit when shooting in focusing, the lamp may be blurred...
User Manual
Page 35
... [ ] button. ●●Once the setting is complete, [ ] is displayed. ●●Follow step 2 in the lower-right corner. Shooting will stop automatically when the memory card becomes full. ●● When a delay longer than two seconds is specified, two seconds before the shot, the lamp blinking and self-timer sound will...
... [ ] button. ●●Once the setting is complete, [ ] is displayed. ●●Follow step 2 in the lower-right corner. Shooting will stop automatically when the memory card becomes full. ●● When a delay longer than two seconds is specified, two seconds before the shot, the lamp blinking and self-timer sound will...
User Manual
Page 37
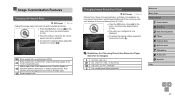
... 4 P Mode 5 Playback Mode 6 Wi-Fi Functions 7 Setting Menu 8 Accessories 9 Appendix Index 37 Guidelines for Choosing Resolution Based on Paper Size (for display on a memory card, see "Number of Shots per Memory Card" (= 143). ●●Press the [ ] button, choose [ ] in the menu, and choose the desired option (= 24). ●●The option you configured...
... 4 P Mode 5 Playback Mode 6 Wi-Fi Functions 7 Setting Menu 8 Accessories 9 Appendix Index 37 Guidelines for Choosing Resolution Based on Paper Size (for display on a memory card, see "Number of Shots per Memory Card" (= 143). ●●Press the [ ] button, choose [ ] in the menu, and choose the desired option (= 24). ●●The option you configured...
User Manual
Page 38
... standard definition ●● In [ ] mode, black bars are displayed on the top and bottom edges of image quality that will fit on a memory card, see "Recording Time per Memory Card" (= 143). ●●Press the [ ] button, choose [ ] in the menu, and choose the desired option (= 24). ●●The option you configured is...
... standard definition ●● In [ ] mode, black bars are displayed on the top and bottom edges of image quality that will fit on a memory card, see "Recording Time per Memory Card" (= 143). ●●Press the [ ] button, choose [ ] in the menu, and choose the desired option (= 24). ●●The option you configured is...
User Manual
Page 59
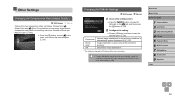
... setting. ●●Choose [IS Mode], and then choose the desired option (=25). For guidelines on how many shots at the moment of Shots per Memory Card" (= 143). ●●Press the [ ] button, choose [ ] in the menu, and choose the desired option (= 24). Other Settings Changing the Compression Ratio ... button (=25). Changing the IS Mode Settings Still Images Movies 1 Access the setting screen. ●●Press the [ ] button, choose [IS Settings] on a memory card, see "Number of shooting. Image stabilization is automatically applied (Intelligent IS) (=32).
... setting. ●●Choose [IS Mode], and then choose the desired option (=25). For guidelines on how many shots at the moment of Shots per Memory Card" (= 143). ●●Press the [ ] button, choose [ ] in the menu, and choose the desired option (= 24). Other Settings Changing the Compression Ratio ... button (=25). Changing the IS Mode Settings Still Images Movies 1 Access the setting screen. ●●Press the [ ] button, choose [IS Settings] on a memory card, see "Number of shooting. Image stabilization is automatically applied (Intelligent IS) (=32).
User Manual
Page 64
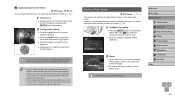
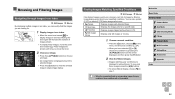
...). You can quickly find the images you move the zoom lever toward [ ]. Finding Images Matching Specified Conditions Still Images Movies Find desired images quickly on a memory card full of images shown. ●●To display fewer images, move the lever. 2 Choose an image. ●●Press the buttons to choose an image...
...). You can quickly find the images you move the zoom lever toward [ ]. Finding Images Matching Specified Conditions Still Images Movies Find desired images quickly on a memory card full of images shown. ●●To display fewer images, move the lever. 2 Choose an image. ●●Press the buttons to choose an image...
User Manual
Page 66
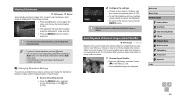
...;●The slideshow will start the slideshow with your settings, choose [Start] and press the [ ] button. ●●To return to play back images from a memory card as follows. Changing Slideshow Settings You can switch to view one of scenes. 1 Choose Smart Shuffle. ●●Press the [ ] button, and then choose [ ] in...
...;●The slideshow will start the slideshow with your settings, choose [Start] and press the [ ] button. ●●To return to play back images from a memory card as follows. Changing Slideshow Settings You can switch to view one of scenes. 1 Choose Smart Shuffle. ●●Press the [ ] button, and then choose [ ] in...
User Manual
Page 67
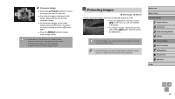
... first cancel protection. To erase them this process and choose [ ] again, and then press the [ ] button. ●● Protected images on a memory card will be erased using the camera's erasure function. Images are less than 50 shots taken with this camera -- To restore the original display, press the..., and then choose [ ] in the following cases: -- 2 Choose an image. ●●Press the buttons to choose the image you format the card (=109, =110). ●● Protected images cannot be erased if you want to view next. ●●Your chosen image is displayed in the ...
... first cancel protection. To erase them this process and choose [ ] again, and then press the [ ] button. ●● Protected images on a memory card will be erased using the camera's erasure function. Images are less than 50 shots taken with this camera -- To restore the original display, press the..., and then choose [ ] in the following cases: -- 2 Choose an image. ●●Press the buttons to choose the image you format the card (=109, =110). ●● Protected images cannot be erased if you want to view next. ●●Your chosen image is displayed in the ...

User Manual
Page 73
... choose an image, and then press the [ ] button. [ ] is displayed. ●●To untag the image, press the [ ] button again. [ ] is only available when the memory card has sufficient free space. Editing Still Images ●● Image editing (=73 - =76) is no longer displayed. ●●Repeat this process to Shooting mode...
... choose an image, and then press the [ ] button. [ ] is displayed. ●●To untag the image, press the [ ] button again. [ ] is only available when the memory card has sufficient free space. Editing Still Images ●● Image editing (=73 - =76) is no longer displayed. ●●Repeat this process to Shooting mode...
User Manual
Page 77
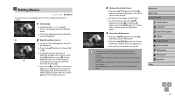
... Movies You can cut (identified by choosing [ ]. ●●If you move [ ]. In this case, the original movie will be erased. ●● If the memory card lacks sufficient space, only [Overwrite] will be available. ●● Movies may not be saved if the battery pack runs out while saving is now...
... Movies You can cut (identified by choosing [ ]. ●●If you move [ ]. In this case, the original movie will be erased. ●● If the memory card lacks sufficient space, only [Overwrite] will be available. ●● Movies may not be saved if the battery pack runs out while saving is now...
User Manual
Page 81
...; You can preset images to connect while the camera is turned on. -- Do not place other immediately. This may damage the devices. -- Also, note that a memory card be in the camera. ●● You can change the image size before sending (=97). ●● You can also send multiple images at your...
...; You can preset images to connect while the camera is turned on. -- Do not place other immediately. This may damage the devices. -- Also, note that a memory card be in the camera. ●● You can change the image size before sending (=97). ●● You can also send multiple images at your...
User Manual
Page 83
...] > [Wi-Fi Settings] > [Target History] > [Off]. ●● To be able to connect without entering the password in step 5 and to make it so that a memory card be in the camera. ●● Once you have registered a smartphone, you can change the image size before sending (=97). ●● You can send...
...] > [Wi-Fi Settings] > [Target History] > [Off]. ●● To be able to connect without entering the password in step 5 and to make it so that a memory card be in the camera. ●● Once you have registered a smartphone, you can change the image size before sending (=97). ●● You can send...