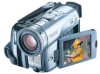
ZoomBrowser EX 6.5 for Windows Instruction Manual
Page 4
... to Open...16 Image Transfer Screen...17 Organize Images Screen...18 How to Use the Main Window 19 Main Window...19 Display Modes ...20 Display Control Panel...20 Browser Area Tasks...21 Properties Window...22 Viewer Window...23 More Advanced Techniques 24 Editing Images...24 Red Eye Correction...24 Auto Adjustment...24... Trimming-Cropping a Portion of an Image 26 Inserting Text...26 Using Other Editing Software...27 Attaching Sounds...28 Creating Panoramic Images-PhotoStitch 29 Editing Movies...30 Converting RAW Images-Digital Photo Professional 31 4
ZoomBrowser EX 6.5 for Windows Instruction Manual
Page 20
... move the displayed portion of Contents Scroll Button Use this to show in Zoom mode. Fit to Window Changes the thumbnail size to specific conditions. 20 Table of the image (drag inside the browser area). Things to Remember Mastering the Basics More Advanced Techniques Display Modes Select a browser area display mode...
ZoomBrowser EX 6.5 for Windows Instruction Manual
Page 30
Movie Size 1920x1080 1280x720 640x480 320x240 Max. Length Under 10 minutes Under 20 minutes Under 30 minutes Under 60 minutes IMPORTANT • Movies edited with this function cannot be transferred back to the camera. • Saving movies takes time, especially MOV ... Movie Length • The length of movies you try to save is shown at right. ABC Procedures 1 Select a task from the left side of Contents 30 You can create original movies by linking movie clips and still images.
DV Messenger Ver 1.0 Instruction Manual
Page 20
... folders] options. • If [Hide extensions for known file types] is selected, remove its check mark. 20 In the [Advanced setting] section, set the [Hidden files and folders] category to show all copies of the [Canon Camera Storage Device] icon that appear in the [Other devices] or [Imaging devices] categories, or that...
DV NETWORK SOLUTION DISK Ver.2 Software Instruction Manual
Page 7
...Installing the DV Network Software 17 Installing the Canon USB Video Driver 19 Installing the AV/C Camera Storage Subunit-WIA Driver 20 Connecting the Camcorder to a Computer 23 Connecting the Camcorder Using a USB Cable 23 Connecting the Camcorder Using a DV Cable 23 DV Messenger ...Preparations for DV Messenger 24 Checking the Camcorder Connection 24 Setting the UPnP Router 26...
DV NETWORK SOLUTION DISK Ver.2 Software Instruction Manual
Page 12
...Sharing recorded video. - Operating the camcorder form the computer. - Remotely accessing the computer (View & Record). Canon USB Video Driver ( 19) Installing the Canon USB Video Driver allows you to use DV Messenger by connecting a camcorder to a computer with a DV... (IEEE1394) cable. Converting analog signals from the tape to the computer using a USB cable. - For details, refer to the camcorder instruction manual. AV/C Camera Storage Subunit-WIA Driver ( 20...
DV NETWORK SOLUTION DISK Ver.2 Software Instruction Manual
Page 13
... OPTURA Pi E ZR20 XL1S ZR25 MC ZR10 ZR30 MC ZR40 ZR60 ZR80 ZR100 F Non-Canon camcorder Please refer to the Canon homepage for latest camcorder models. Available Functions and Drivers by Categories Functions Camcorders ...Categories A B C D E F DV Messenger Version 2 Real-time video communication ( 32) Sharing recorded video ( 51) Camcorder operation ( 49) Sharing images ( 53) Image Capture ( 57) View & Record ( 62) Canon USB Video Driver USB Connection ( 19) Capturing/Recording movies ( 69) When sharing images, an image file exceeding 20...
DV NETWORK SOLUTION DISK Ver.2 Software Instruction Manual
Page 17
... the computer when installing the DV Network Software. DV Messenger can only be installed with the installation. • If you connect the camcorder to install DV Messenger, close the dialog and proceed with Windows Messenger 4.5, 4.6 or 4.7. For the installation procedure of the AV/C Camera Storage ... Network Software E With this procedure, the DV Messenger will be installed and the driver files for details. Users of the Canon USB Video Driver, see Installing the AV/C Camera Storage Subunit-WIA Driver ( 20). Do not connect the camcorder to your computer.
DV NETWORK SOLUTION DISK Ver.2 Software Instruction Manual
Page 20
...: Set the camcorder to CARD PLAY mode.) 3 Connect the camcorder to the computer using the DV cable ( 23). • The driver installation starts automatically. • Depending on the setting of your computer, a video editing program may start ] menu, select [My Computer] and check if the [Canon USB Video] icon.... If the icon does not appear, the installation has not been completed properly. In such case, close the dialog. 4 Restart the computer. 20 Installing the Software And do not need to the computer. Close all programs that are running before installing the driver. Do ...
DV NETWORK SOLUTION DISK Ver.2 Software Instruction Manual
Page 54
... the thumbnail, the file information appears. • Thumbnails may not appear with images not recorded with your camcorder. 5 If you have selected the images you wish to update the thumbnail list. • Files exceeding 20 MB will not be displayed. • If you move the mouse pointer on the DVM panel. 54...
DV NETWORK SOLUTION DISK Ver.2 Software Instruction Manual
Page 58
... delete a sound file from the list, select the file and click [Delete]. Setting of the still image. Select the interval time between 2, 5, 10, 15, 20, 25, 30, 35, 40, 45, 50 and unlimited. If you wish to add a new sound, click [Add], select a sound file and click [OK]. Select the number...
DV NETWORK SOLUTION DISK Ver.2 Software Instruction Manual
Page 83
... memory card cover is displayed on the computer. Images are not correctly displayed in the selection window for image sharing. Î Images not recorded with a Canon camcorder. Î Check if the memory card cover is open , image transfer may not be displayed correctly. Î An image file exceeding... 20 MB will change . Troubleshooting 83 Images that can be shared are connecting via a DV cable, check if an application software using the image transfer function ...
DV NETWORK SOLUTION DISK Ver.2 Software Instruction Manual
Page 87
Uninstall ( 73) and reinstall the driver ( 20). Disconnect the DV cable from the camcorder, close the memory card cover, and reconnect the camcorder to the computer. Use the procedures below for...the Camera icon does not appear in the [Printers and Other Hardware]. - Insert the CD- Downloading Canon Camera Storage Device is not recognized. Î The memory card cover is open. Uninstallation of the ...installed to the computer. AV/C Camera Storage Subunit-WIA Driver Installation The Canon camcorder is connected to the computer via a DV cable, but E is not recognized by the computer. ...
OPTURA40 OPTURA30 Instruction Manual
Page 4
... shock. This indicates a need a special plug adapter. Safety Check - When replacement of any kind into , the product. Contact your nearest Canon Service Center for service. 19. PART H) 14. b. If the product does not operate normally even if you will prevent damage to the ...Upon completion of fire or electric shock. 16. The Adapter can result in performance. NATIONAL ELECTRICAL CODE ANTENNA DISCHARGE UNIT (NEC SECTION 810-20) GROUNDING CONDUCTORS (NEC SECTION 810-21) GROUND CLAMPS POWER SERVICE GROUNDING ELECTRODE SYSTEM (NEC ART 250. Objects and Liquid Entry - Adjust...
OPTURA40 OPTURA30 Instruction Manual
Page 6
...Guide ...9 Basic Functions Preparations Preparing the Power Supply 13 Loading/Unloading a Cassette 16 Installing the Backup Battery 17 Preparing the Camcorder 18 Using the Wireless Controller 20 Setting the Time Zone, Date and Time 21 Recording Recording Movies on a Tape 24 Zooming ...28 Tips for Making Better... Videos 30 Playback Playing Back a Tape ...31 Adjusting the Volume 33 Playing Back on a TV Screen 34 Advanced Functions ...
OPTURA40 OPTURA30 Instruction Manual
Page 11
Advanced Accessory shoe ( 159) Flash ( 101) Focus ring ( 52) Stereo microphone ( 89) Remote sensor ( 20) Assist lamp (White LED)* ( 48) Tripod socket ( 30) 11 Introduction E Terminal cover DC IN terminal ( 13) Backup battery compartment ( 17) S S-video terminal ( 35) Terminal cover MIC terminal ( 63) AV terminal ( 34) / (phones) terminal ( 33, 62) DV terminal ( 83, 92) USB terminal ( 123, 134) * OPTURA40 only.
OPTURA40 OPTURA30 Instruction Manual
Page 20
...in very close range, replace the batteries. markings. 3. Open the battery cover. 2. Make sure to the same mode. ❍ When the camcorder cannot be operated with two AA (R6) batteries. 1. Insert the batteries following the + and - If the wireless controller does not work ... when the remote sensor is subjected to strong light sources or direct sunlight. 20 Close the battery cover. ❍ Camcorder and wireless controller are set to replace both batteries at the camcorder's remote sensor when you press the buttons. Inserting Batteries The wireless controller operates...
OPTURA40 OPTURA30 Instruction Manual
Page 22
... time zone, date and time, you do not need to reset the clock each time you travel to the one of your destination, and the camcorder automatically adjusts the clock. 22 Time zone WELLGTN (Wellington) SAMOA HONOLU. (Honolulu) ANCHOR. (Anchorage) L.A. (Los Angeles) DENVER CHICAGO N.Y. (New York) CARACAS RIO (Rio de Janeiro... (Hong Kong) TOKYO SYDNEY SOLOMON No. Press the MENU button to close the menu and to start the clock. 16 15 14 19 18 17 20 21 1 2 24 23 22 4 3 6 7 9 10 5 8 12 11 13 14 15 16 17 18 19...
OPTURA40 OPTURA30 Instruction Manual
Page 25
... ❍ Bright light may make it is not a malfunction. This is being recorded (LCD MIRROR OFF). " AUTO POWER OFF" appears 20 seconds before rotating it. This has no effect on allowing you to use the viewfinder instead. ❍ You can rotate the LCD panel. ... on the recorded image and does not constitute a malfunction. Less than 99.99% of the pixels may be adjusted manually ( 60). ❍ The camcorder will shut off . Basic Functions Recording ❍ When recording near loud sounds (such as fireworks, drums or concerts), sound may become distorted or may ...
OPTURA40 OPTURA30 Instruction Manual
Page 95
... and select [CARD SETUP]. Changing the Movie Size You can choose from 320 × 240 pixels and 160 × 120 pixels. Recording Time (8 MB) approx. 20 sec. File Size per Second 250 KB/sec. 120 KB/sec. approx. 50 sec. Select [MOVIE SIZE], set it to [160×120] and close...