Starter Guide FAXPHONE L90
Page 11
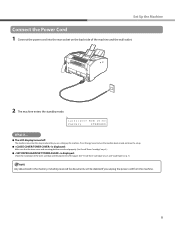
... into the rear socket on the back side of the paper. (See "Install Toner Cartridge," on p. 5 and "Load Paper," on p. 7.) Any data stored in the memory, including received fax documents, will be deleted if you are closed properly. (See "Install Toner Cartridge," on and continue the setup. ˔ is displayed: Make...
... into the rear socket on the back side of the paper. (See "Install Toner Cartridge," on p. 5 and "Load Paper," on p. 7.) Any data stored in the memory, including received fax documents, will be deleted if you are closed properly. (See "Install Toner Cartridge," on and continue the setup. ˔ is displayed: Make...
Starter Guide FAXPHONE L90
Page 20
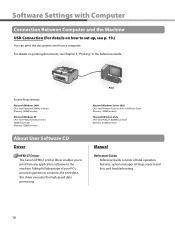
... Windows Server 2003 CPU: Intel Pentium/Celeron series 133MHz or faster Memory: 128MB or more Microsoft Windows Vista CPU: Intel Pentium 800MHz or faster Memory: 512MB or more About User Software CD Driver UFRII LT Driver The Canon UFRII LT printer driver enables you to print from a computer. ... software to the machine. System Requirements Microsoft Windows 2000 CPU: Intel Pentium/133MHz or faster Memory: 128MB or more Microsoft Windows XP CPU: Intel Pentium/Celeron series 300MHz or faster Memory: 128MB or more Manual Reference Guide Reference Guide consists of your PC's processing power to ...
... Windows Server 2003 CPU: Intel Pentium/Celeron series 133MHz or faster Memory: 128MB or more Microsoft Windows Vista CPU: Intel Pentium 800MHz or faster Memory: 512MB or more About User Software CD Driver UFRII LT Driver The Canon UFRII LT printer driver enables you to print from a computer. ... software to the machine. System Requirements Microsoft Windows 2000 CPU: Intel Pentium/133MHz or faster Memory: 128MB or more Microsoft Windows XP CPU: Intel Pentium/Celeron series 300MHz or faster Memory: 128MB or more Manual Reference Guide Reference Guide consists of your PC's processing power to ...
Reference Guide FAXPHONE L90
Page 3
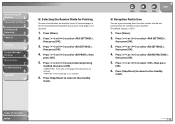
... Dialing Codes → p. 3-14 Specify multiple recipients as a group Redialing → p. 3-19 Send documents to multiple recipients Back Previous Next TOP Receive faxes in memory without printing out Memory Lock Reception → p. 3-25 Reject faxes without their numbers RX Restriction → p. 3-28 Send a fax at a specified time Table of Contents Index Group...
... Dialing Codes → p. 3-14 Specify multiple recipients as a group Redialing → p. 3-19 Send documents to multiple recipients Back Previous Next TOP Receive faxes in memory without printing out Memory Lock Reception → p. 3-25 Reject faxes without their numbers RX Restriction → p. 3-28 Send a fax at a specified time Table of Contents Index Group...
Reference Guide FAXPHONE L90
Page 9
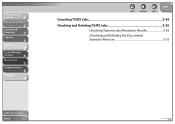
... 8 Appendix 9 Table of Contents Index Back Previous Next TOP Receiving Features...3-23 FAX/TEL: Optional Settings 3-23 DRPD: Optional Settings 3-24 Manual Reception...3-24 Memory Reception...3-25 Memory Lock Reception 3-25 Remote Reception...3-27 Selecting the Receive Mode for Printing 3-28 Reception Restriction ...3-28 Printing Received Documents 3-29 Advanced Features...3-30 Broadcasting...
... 8 Appendix 9 Table of Contents Index Back Previous Next TOP Receiving Features...3-23 FAX/TEL: Optional Settings 3-23 DRPD: Optional Settings 3-24 Manual Reception...3-24 Memory Reception...3-25 Memory Lock Reception 3-25 Remote Reception...3-27 Selecting the Receive Mode for Printing 3-28 Reception Restriction ...3-28 Printing Received Documents 3-29 Advanced Features...3-30 Broadcasting...
Reference Guide FAXPHONE L90
Page 10
Before Using the Machine 1 Document and Paper 2 Sending and Receiving 3 Copying 4 Printing 5 System Manager Settings 6 Maintenance 7 Troubleshooting 8 Appendix 9 Back Previous Next TOP Checking and Deleting TX/RX Jobs 3-35 Checking Transmission/Reception Results 3-35 Checking and Deleting Fax Documents Stored in Memory 3-35 4 Copying ...4-1 Basic Copying Method ...4-2 Scan Settings ...4-3 Image Quality...4-3 Density ...4-3 Zoom Ratio...4-4 Canceling Copy Jobs...4-5 5 Printing...5-1 Printing Documents...5-2 Table of Contents Index ix
Before Using the Machine 1 Document and Paper 2 Sending and Receiving 3 Copying 4 Printing 5 System Manager Settings 6 Maintenance 7 Troubleshooting 8 Appendix 9 Back Previous Next TOP Checking and Deleting TX/RX Jobs 3-35 Checking Transmission/Reception Results 3-35 Checking and Deleting Fax Documents Stored in Memory 3-35 4 Copying ...4-1 Basic Copying Method ...4-2 Scan Settings ...4-3 Image Quality...4-3 Density ...4-3 Zoom Ratio...4-4 Canceling Copy Jobs...4-5 5 Printing...5-1 Printing Documents...5-2 Table of Contents Index ix

Reference Guide FAXPHONE L90
Page 15
Before Using the Machine 1 Document and Paper 2 Sending and Receiving 3 Copying 4 Printing 5 System Manager Settings 6 Maintenance 7 Troubleshooting 8 Appendix 9 Back Previous Next TOP Summary of Reports and Lists 9-19 Printing Reports Automatically 9-20 TX REPORT...9-20 RX REPORT...9-21 ACTIVITY REPORT...9-22 Printing Reports and Lists Manually 9-24 Checking Remaining Memory 9-25 Checking Print and Scan Counts 9-26 Glossary ...9-27 Index ...9-33 Table of Contents Index xiv
Before Using the Machine 1 Document and Paper 2 Sending and Receiving 3 Copying 4 Printing 5 System Manager Settings 6 Maintenance 7 Troubleshooting 8 Appendix 9 Back Previous Next TOP Summary of Reports and Lists 9-19 Printing Reports Automatically 9-20 TX REPORT...9-20 RX REPORT...9-21 ACTIVITY REPORT...9-22 Printing Reports and Lists Manually 9-24 Checking Remaining Memory 9-25 Checking Print and Scan Counts 9-26 Glossary ...9-27 Index ...9-33 Table of Contents Index xiv
Reference Guide FAXPHONE L90
Page 26
... documents for customizing machine operations. Lights when the machine has waiting jobs and stores the data in the memory, including received fax documents, will be deleted if you send. Any data stored in memory. O [Tone] key Press to switch from rotary pulse to access additional fax modes. Mode] key Press to tone...
... documents for customizing machine operations. Lights when the machine has waiting jobs and stores the data in the memory, including received fax documents, will be deleted if you send. Any data stored in memory. O [Tone] key Press to switch from rotary pulse to access additional fax modes. Mode] key Press to tone...
Reference Guide FAXPHONE L90
Page 27
... or the handset of Contents Index Back Previous Next TOP P [System Monitor] key Press to check the sending status, print status, sending/ receiving log, available memory, or printing/scanning count. Q [Address Book] key Press to specify recipients registered under one-touch speed dialing keys or coded speed dialing codes by name...
... or the handset of Contents Index Back Previous Next TOP P [System Monitor] key Press to check the sending status, print status, sending/ receiving log, available memory, or printing/scanning count. Q [Address Book] key Press to specify recipients registered under one-touch speed dialing keys or coded speed dialing codes by name...

Reference Guide FAXPHONE L90
Page 49
... 8 Appendix 9 Table of Contents Index Back Previous Next TOP Receiving Features 3-23 FAX/TEL: Optional Settings 3-23 DRPD: Optional Settings 3-24 Manual Reception 3-24 Memory Reception 3-25 Memory Lock Reception 3-25 Remote Reception 3-27 Selecting the Receive Mode for Printing 3-28 Reception Restriction 3-28 Printing Received Documents 3-29 Advanced Features 3-30 Broadcasting...
... 8 Appendix 9 Table of Contents Index Back Previous Next TOP Receiving Features 3-23 FAX/TEL: Optional Settings 3-23 DRPD: Optional Settings 3-24 Manual Reception 3-24 Memory Reception 3-25 Memory Lock Reception 3-25 Remote Reception 3-27 Selecting the Receive Mode for Printing 3-28 Reception Restriction 3-28 Printing Received Documents 3-29 Advanced Features 3-30 Broadcasting...
Reference Guide FAXPHONE L90
Page 50
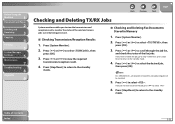
Before Using the Machine 1 Document and Paper 2 Sending and Receiving 3 Copying 4 Printing 5 System Manager Settings 6 Maintenance 7 Troubleshooting 8 Appendix 9 Back Previous Next TOP Canceling TX/RX Jobs 3-34 Checking and Deleting TX/RX Jobs 3-35 Checking Transmission/Reception Results 3-35 Checking and Deleting Fax Documents Stored in Memory 3-35 Table of Contents Index 3-4
Before Using the Machine 1 Document and Paper 2 Sending and Receiving 3 Copying 4 Printing 5 System Manager Settings 6 Maintenance 7 Troubleshooting 8 Appendix 9 Back Previous Next TOP Canceling TX/RX Jobs 3-34 Checking and Deleting TX/RX Jobs 3-35 Checking Transmission/Reception Results 3-35 Checking and Deleting Fax Documents Stored in Memory 3-35 Table of Contents Index 3-4
Reference Guide FAXPHONE L90
Page 68
...: Optional Settings," on p. 3-24. : Switches between fax and voice calls using distinctive ring patterns. For or , make sure an external telephone with built in the memory, including received fax documents, will be deleted if you disconnect the power cord of Contents Index 3-22 Table of the machine. 1. The default setting is...
...: Optional Settings," on p. 3-24. : Switches between fax and voice calls using distinctive ring patterns. For or , make sure an external telephone with built in the memory, including received fax documents, will be deleted if you disconnect the power cord of Contents Index 3-22 Table of the machine. 1. The default setting is...

Reference Guide FAXPHONE L90
Page 69
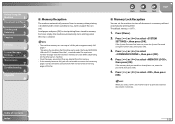
... Paper 2 Sending and Receiving 3 Copying 4 Printing 5 System Manager Settings 6 Maintenance 7 Troubleshooting 8 Appendix 9 Receiving Features You can also set the machine to receive fax documents into memory (memory lock), and use the external telephone connected to the machine to detect the fax tone before it starts ringing, then press [OK]. Table of ringing...
... Paper 2 Sending and Receiving 3 Copying 4 Printing 5 System Manager Settings 6 Maintenance 7 Troubleshooting 8 Appendix 9 Receiving Features You can also set the machine to receive fax documents into memory (memory lock), and use the external telephone connected to the machine to detect the fax tone before it starts ringing, then press [OK]. Table of ringing...
Reference Guide FAXPHONE L90
Page 71
... when the error is . 1. Once the pages are printed, they are deleted from the memory. - Back Previous Next TOP ˙ Memory Lock Reception You can store differs depending on the condition that the other party sends the fax by FAXPHONE L90 with ITU-T Standard Chart No.1, standard mode. Press [ ] or [ ] to select , then press...
... when the error is . 1. Once the pages are printed, they are deleted from the memory. - Back Previous Next TOP ˙ Memory Lock Reception You can store differs depending on the condition that the other party sends the fax by FAXPHONE L90 with ITU-T Standard Chart No.1, standard mode. Press [ ] or [ ] to select , then press...
Reference Guide FAXPHONE L90
Page 72
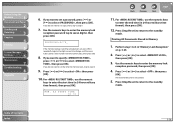
... to change, and then press [Clear]. Press [ ] or [ ] to select , then press [OK]. Use the numeric keys to enter the memory lock reception password (up to the standby mode. MEM. Press [Stop/Reset] to return to seven digits), then press [OK]. Enter a new number... press [OK]. If you do not need to set a password, skip to step 12. 9. Ex. If you do not need to set the timer for memory lock, skip to step 8. 7. Before Using the Machine 1 Document and Paper 2 Sending and Receiving 3 Copying 4 Printing 5 System Manager Settings 6 Maintenance 7...
... to change, and then press [Clear]. Press [ ] or [ ] to select , then press [OK]. Use the numeric keys to enter the memory lock reception password (up to the standby mode. MEM. Press [Stop/Reset] to return to seven digits), then press [OK]. Enter a new number... press [OK]. If you do not need to set a password, skip to step 12. 9. Ex. If you do not need to set the timer for memory lock, skip to step 8. 7. Before Using the Machine 1 Document and Paper 2 Sending and Receiving 3 Copying 4 Printing 5 System Manager Settings 6 Maintenance 7...
Reference Guide FAXPHONE L90
Page 74
... 3-28 Press [ ] or [ ] to select , then press [OK]. 6. Press [ ] or [ ] to select desired printing method, then press [OK]. : Prints after all received pages in the memory before printing them out or prints each page as it is . 1. Press [ ] or [ ] to select , then press [OK]. 4. Press [Stop/Reset] to return to select...
... 3-28 Press [ ] or [ ] to select , then press [OK]. 6. Press [ ] or [ ] to select desired printing method, then press [OK]. : Prints after all received pages in the memory before printing them out or prints each page as it is . 1. Press [ ] or [ ] to select , then press [OK]. 4. Press [Stop/Reset] to return to select...
Reference Guide FAXPHONE L90
Page 77
...sent to a recipient. : The document will be relayed to be retained in remote machines for the delayed sending. Table of transmission (in the memory. 1. Use the numeric keys, one-touch speed dialing keys, coded speed dialing codes, or [Address Book] key to select , then press ...(See "Polling Receiving," on p. 3-32.) : Sends a document to other recipients. (See "Relay," on p. 3-30.) : Retrieve documents stored in memory until manually deleted. Use the numeric keys to the recipient machine's request. TX TIME SET.=20:00 5. Back Previous Next TOP ˙ Polling Polling Sending...
...sent to a recipient. : The document will be relayed to be retained in remote machines for the delayed sending. Table of transmission (in the memory. 1. Use the numeric keys, one-touch speed dialing keys, coded speed dialing codes, or [Address Book] key to select , then press ...(See "Polling Receiving," on p. 3-32.) : Sends a document to other recipients. (See "Relay," on p. 3-30.) : Retrieve documents stored in memory until manually deleted. Use the numeric keys to the recipient machine's request. TX TIME SET.=20:00 5. Back Previous Next TOP ˙ Polling Polling Sending...
Reference Guide FAXPHONE L90
Page 81
... want to cancel the job, press [ ] to step 4. Press [Stop/Reset] to return to the standby mode. ˙ Checking and Deleting Fax Documents Stored in Memory 1. Press [ ] or [ ] to the standby mode. 4. NOTE For , all recipients entered for a broadcasting job will be canceled. 5. If you do not want to delete the...
... want to cancel the job, press [ ] to step 4. Press [Stop/Reset] to return to the standby mode. ˙ Checking and Deleting Fax Documents Stored in Memory 1. Press [ ] or [ ] to the standby mode. 4. NOTE For , all recipients entered for a broadcasting job will be canceled. 5. If you do not want to delete the...
Reference Guide FAXPHONE L90
Page 90
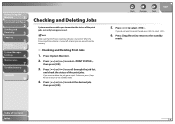
.... 4. When the Processing/Data indicator is turned on. Make sure that the Processing/Data indicator is turned off, all print jobs are erased from the memory. ˙ Checking and Deleting Print Jobs 1. If you do not want to delete the job, go to select . 6. Press [ ] or [ ] to select . Back Previous Next...
.... 4. When the Processing/Data indicator is turned on. Make sure that the Processing/Data indicator is turned off, all print jobs are erased from the memory. ˙ Checking and Deleting Print Jobs 1. If you do not want to delete the job, go to select . 6. Press [ ] or [ ] to select . Back Previous Next...
Reference Guide FAXPHONE L90
Page 96
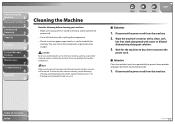
...of Contents Index 7-2 they can damage the machine components. These can stick to avoid scratching the components. - To check the jobs stored in memory, and disconnect the power cord. - Wipe the machine's exterior with a clean, soft, lint-free cloth dampened with water or diluted dishwashing ...detergent solution. 3. Make sure no document is stored in memory, see the following before cleaning your machine: - Disconnect the power cord from the machine. Use a soft cloth to the components or generate ...
...of Contents Index 7-2 they can damage the machine components. These can stick to avoid scratching the components. - To check the jobs stored in memory, and disconnect the power cord. - Wipe the machine's exterior with a clean, soft, lint-free cloth dampened with water or diluted dishwashing ...detergent solution. 3. Make sure no document is stored in memory, see the following before cleaning your machine: - Disconnect the power cord from the machine. Use a soft cloth to the components or generate ...

Reference Guide FAXPHONE L90
Page 102
... you do not have labels "CAUTION! Do not close the paper delivery tray without folding the extension first. In that case, redistribute toner in the memory. If you set in in to after replacing the toner. (See "CONT. PRINTING," on . Table of toner.
... you do not have labels "CAUTION! Do not close the paper delivery tray without folding the extension first. In that case, redistribute toner in the memory. If you set in in to after replacing the toner. (See "CONT. PRINTING," on . Table of toner.


