
User Manual
Page 3
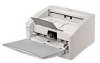
... its many functions. Please read this manual, store it in a safe place for purchasing the Canon DR-4010C Document Scanner. Manuals for regular maintenance, roller replacement Chapter 5 Troubleshooting Troubleshooting information, application uninstall procedure Chapter 6 Appendix Product specifications and dimensional drawings Software Chapter 7 ISIS/TWAIN Driver Settings ISIS/TWAIN driver settings Chapter 8 Job Registration Tool Settings Job...
... its many functions. Please read this manual, store it in a safe place for purchasing the Canon DR-4010C Document Scanner. Manuals for regular maintenance, roller replacement Chapter 5 Troubleshooting Troubleshooting information, application uninstall procedure Chapter 6 Appendix Product specifications and dimensional drawings Software Chapter 7 ISIS/TWAIN Driver Settings ISIS/TWAIN driver settings Chapter 8 Job Registration Tool Settings Job...

User Manual
Page 6
Contents Contents Chapter 1 1-1 1-2 1-3 Chapter 2 2-1 2-2 2-3 2-4 2-5 Chapter 3 3-1 3-2 3-3 3-4 3-5 3-6 3-7 3-8 Chapter 4 4-1 4-2 Before Using the Scanner 1-1 Important Safety Instructions 1-1 Installation Location 1-1 Power ...1-2 Moving the Scanner 1-2 Handling ...1-3 Disposal...1-4 Features of the DR-4010C Document Scanner 1-5 Names and Functions of Parts 1-7 Setup ...2-1 Setup Procedure 2-1 Installation Requirements 2-2 Installing the Software 2-4 Setup Disc 2-4 Software Installation 2-5 Connecting the Scanner to the Computer 2-11 Using a USB Connection 2-11 Using a SCSI ...
Contents Contents Chapter 1 1-1 1-2 1-3 Chapter 2 2-1 2-2 2-3 2-4 2-5 Chapter 3 3-1 3-2 3-3 3-4 3-5 3-6 3-7 3-8 Chapter 4 4-1 4-2 Before Using the Scanner 1-1 Important Safety Instructions 1-1 Installation Location 1-1 Power ...1-2 Moving the Scanner 1-2 Handling ...1-3 Disposal...1-4 Features of the DR-4010C Document Scanner 1-5 Names and Functions of Parts 1-7 Setup ...2-1 Setup Procedure 2-1 Installation Requirements 2-2 Installing the Software 2-4 Setup Disc 2-4 Software Installation 2-5 Connecting the Scanner to the Computer 2-11 Using a USB Connection 2-11 Using a SCSI ...
User Manual
Page 7
Contents Resetting the Counter 4-6 Removing/Attaching the Roller Unit 4-9 Removing and Attaching the Retard Roller 4-11 Chapter 5 Troubleshooting 5-1 5-1 Troubleshooting 5-1 5-2 Uninstalling Software 5-6 Uninstalling the ISIS/TWAIN Driver 5-7 Uninstalling the Job Registration Tool 5-8 Uninstalling CapturePerfect 3.0 5-10 Chapter 6 Appendix ...6-1 6-1 Specifications 6-1 Specifications 6-1 Replacement Parts 6-2 Options ...6-2 External Dimensions 6-3 Index ...6-4 iii
Contents Resetting the Counter 4-6 Removing/Attaching the Roller Unit 4-9 Removing and Attaching the Retard Roller 4-11 Chapter 5 Troubleshooting 5-1 5-1 Troubleshooting 5-1 5-2 Uninstalling Software 5-6 Uninstalling the ISIS/TWAIN Driver 5-7 Uninstalling the Job Registration Tool 5-8 Uninstalling CapturePerfect 3.0 5-10 Chapter 6 Appendix ...6-1 6-1 Specifications 6-1 Specifications 6-1 Replacement Parts 6-2 Options ...6-2 External Dimensions 6-3 Index ...6-4 iii
User Manual
Page 13
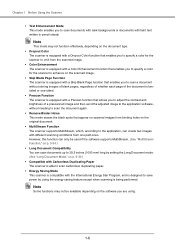
... mm) long by using . 1-6 Note This mode may not be used if the software supports MultiStream. (See "MultiStream Function," on p. 3-34.) • Long Document Compatibility You can only be available depending on the original document. • MultiStream Function The scanner supports MultiStream, which, according to the application, can create two images with the International...
... mm) long by using . 1-6 Note This mode may not be used if the software supports MultiStream. (See "MultiStream Function," on p. 3-34.) • Long Document Compatibility You can only be available depending on the original document. • MultiStream Function The scanner supports MultiStream, which, according to the application, can create two images with the International...

User Manual
Page 16
... section below will appear when you connect the scanner to the scanner OFF. Installation Requirements Installing the Software Connecting the Scanner to the Computer Turning the Power ON IMPORTANT • Be sure to install the software before connecting the scanner to the computer. • If you turn... power to the computer before installing the software, a wizard screen such as shown below . Wizard Screen (Windows 2000) 2-1 In such a ...
... section below will appear when you connect the scanner to the scanner OFF. Installation Requirements Installing the Software Connecting the Scanner to the Computer Turning the Power ON IMPORTANT • Be sure to install the software before connecting the scanner to the computer. • If you turn... power to the computer before installing the software, a wizard screen such as shown below . Wizard Screen (Windows 2000) 2-1 In such a ...

User Manual
Page 18
Chapter 2 Setup • If the CPU, memory, interface card, and other specifications do not satisfy the installation requirements, the scanning speed may be greatly reduced and transmission may take a long time. • Even if the computer satisfies the recommended specifications, the scanning speed may vary, depending on the scan settings. • The ISIS/TWAIN Drivers provided with the scanner do not necessarily operate on all ISISor TWAIN-compatible applications. For details, contact your application software retailer. 2-3
Chapter 2 Setup • If the CPU, memory, interface card, and other specifications do not satisfy the installation requirements, the scanning speed may be greatly reduced and transmission may take a long time. • Even if the computer satisfies the recommended specifications, the scanning speed may vary, depending on the scan settings. • The ISIS/TWAIN Drivers provided with the scanner do not necessarily operate on all ISISor TWAIN-compatible applications. For details, contact your application software retailer. 2-3

User Manual
Page 19
... on the computer with a selected check box is installed. 2-4 Only the software with the rest of the indicated software is configured as follows. Setup Disc When you insert the Setup disc supplied with the scanner into the CD-ROM drive of the DR-4010C is installed. Menu screen Typical Installation Read Manuals All of the...
... on the computer with a selected check box is installed. 2-4 Only the software with the rest of the indicated software is configured as follows. Setup Disc When you insert the Setup disc supplied with the scanner into the CD-ROM drive of the DR-4010C is installed. Menu screen Typical Installation Read Manuals All of the...

User Manual
Page 20
...; Be sure to the computer. 1 Log onto Windows with an account that you have previously uninstalled, select [Custom Installation] and specify the software. • The DR-4010C driver installation comprises the Scanner Driver and Job Tool installation. 2-5 Menu Screen 3 Click [Typical Installation]. The menu screen appears automatically when you select [Typical Installation], all other...
...; Be sure to the computer. 1 Log onto Windows with an account that you have previously uninstalled, select [Custom Installation] and specify the software. • The DR-4010C driver installation comprises the Scanner Driver and Job Tool installation. 2-5 Menu Screen 3 Click [Typical Installation]. The menu screen appears automatically when you select [Typical Installation], all other...
User Manual
Page 21
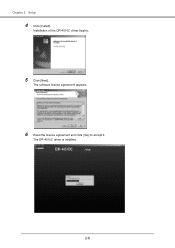
The DR-4010C driver is installed. 2-6 The software license agreement appears. 6 Read the license agreement and click [Yes] to accept it. Chapter 2 Setup 4 Click [Install]. Installation of the DR-4010C driver begins. 5 Click [Next].
The DR-4010C driver is installed. 2-6 The software license agreement appears. 6 Read the license agreement and click [Yes] to accept it. Chapter 2 Setup 4 Click [Install]. Installation of the DR-4010C driver begins. 5 Click [Next].
User Manual
Page 22
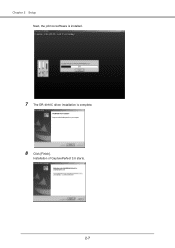
Installation of CapturePerfect 3.0 starts. 2-7 Chapter 2 Setup Next, the job tool software is installed. 7 The DR-4010C driver installation is complete. 8 Click [Finish].
Installation of CapturePerfect 3.0 starts. 2-7 Chapter 2 Setup Next, the job tool software is installed. 7 The DR-4010C driver installation is complete. 8 Click [Finish].

User Manual
Page 23
CapturePerfect is installed. 12 The CapturePerfect installation is complete. 2-8 Chapter 2 Setup 9 Click [Next]. The installation location screen appears. 11 Click [Next]. The software license agreement appears. 10 Read the license agreement and click [Yes] to accept it.
CapturePerfect is installed. 12 The CapturePerfect installation is complete. 2-8 Chapter 2 Setup 9 Click [Next]. The installation location screen appears. 11 Click [Next]. The software license agreement appears. 10 Read the license agreement and click [Yes] to accept it.

User Manual
Page 25
Click [Back] to return to the menu screen. 18 After the software installation is complete, you can connect the scanner to the computer. (See "2-4 Connecting the Scanner to the Computer," on p. 2-11.) 2-10 Chapter 2 Setup 17 Click [Exit].
Click [Back] to return to the menu screen. 18 After the software installation is complete, you can connect the scanner to the computer. (See "2-4 Connecting the Scanner to the Computer," on p. 2-11.) 2-10 Chapter 2 Setup 17 Click [Exit].

User Manual
Page 32
... make the rollers and scanning glass dirty, which can cause the scanner to subsequent documents. CAUTION The results of the document and then scan the photocopy. Embossed Card 3-2 Scanning different sizes and types of the scanner after scanning such documents. (See "Cleaning the Sensor Glass and the Rollers," on p.... the sensor glass. Always clean the internal parts of paper together can lead to smudges in the application software before scanning it. • Scanning documents that glossy paper or business cards may not be scanned correctly, or functions such as they are not stuck...
... make the rollers and scanning glass dirty, which can cause the scanner to subsequent documents. CAUTION The results of the document and then scan the photocopy. Embossed Card 3-2 Scanning different sizes and types of the scanner after scanning such documents. (See "Cleaning the Sensor Glass and the Rollers," on p.... the sensor glass. Always clean the internal parts of paper together can lead to smudges in the application software before scanning it. • Scanning documents that glossy paper or business cards may not be scanned correctly, or functions such as they are not stuck...

User Manual
Page 46
... the application. b a Note The following modes. For more information on a specified printer. „ Scan Batch to Mail Documents are scanned with the preset scanning conditions, the e-mail software application is started, and the scanned image data is attached to a new e-mail message. „ Scan Page Only one ... Familiarize yourself with the preset scanning conditions, and the scanned image data is an ISIS-compatible application developed for Canon document scanners. Select the desired scan mode from the drop-down list (a) or by reading these sources before using 24-bit color, simplex...
... the application. b a Note The following modes. For more information on a specified printer. „ Scan Batch to Mail Documents are scanned with the preset scanning conditions, the e-mail software application is started, and the scanned image data is attached to a new e-mail message. „ Scan Page Only one ... Familiarize yourself with the preset scanning conditions, and the scanned image data is an ISIS-compatible application developed for Canon document scanners. Select the desired scan mode from the drop-down list (a) or by reading these sources before using 24-bit color, simplex...

User Manual
Page 48
Select [Canon DR-4010C] Æ click [OK]. Note This dialog box is not displayed in the list of scanners, re-install the ISIS/TWAIN driver. (See "2-3 Installing the Software," on p. 2-4.) 3. On the [Scan] menu, click [Select Scanner]. 2. Set the Default Page Size and click [OK]. Chapter 3 Basic Operation 2 Follow the procedure below to select the Canon DR-4010C Document Scanner as the scanner to be used. 1. Note If [Canon DR-4010C] is displayed only when you select [Canon DR-4010C] for the first time and click [OK], or when you click [Setup] for [Scanner Selection]. 3-18
Select [Canon DR-4010C] Æ click [OK]. Note This dialog box is not displayed in the list of scanners, re-install the ISIS/TWAIN driver. (See "2-3 Installing the Software," on p. 2-4.) 3. On the [Scan] menu, click [Select Scanner]. 2. Set the Default Page Size and click [OK]. Chapter 3 Basic Operation 2 Follow the procedure below to select the Canon DR-4010C Document Scanner as the scanner to be used. 1. Note If [Canon DR-4010C] is displayed only when you select [Canon DR-4010C] for the first time and click [OK], or when you click [Setup] for [Scanner Selection]. 3-18

User Manual
Page 80
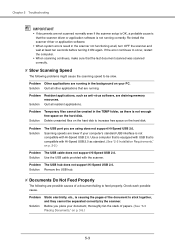
... if the scanner is ON. Problem Solution The scanner's SCSI ID is identical to the documentation for the scanner. (See p. 2-12.) Problem Solution The terminator is not set correctly. Check to the system and set up correctly? • Is there a problem in the PC. Problem The scanner is performed: • Has the application software been installed...
... if the scanner is ON. Problem Solution The scanner's SCSI ID is identical to the documentation for the scanner. (See p. 2-12.) Problem Solution The terminator is not set correctly. Check to the system and set up correctly? • Is there a problem in the PC. Problem The scanner is performed: • Has the application software been installed...
User Manual
Page 81
... provided with Hi-Speed USB 2.0 as anti-virus software, are lower if your document, thoroughly fan the stack of papers. (See "3-3 Placing Documents," on the hard disk. Check each possible cause. Re-install the scanner driver or application software. • When system errors result in the TEMP... is equipped with USB that the scanner driver or application software is causing the pages of a document failing to stick together, and they cannot be created in the scanner not functioning at all resident applications. Quit all , turn OFF the scanner and wait at least ten seconds before...
... provided with Hi-Speed USB 2.0 as anti-virus software, are lower if your document, thoroughly fan the stack of papers. (See "3-3 Placing Documents," on the hard disk. Check each possible cause. Re-install the scanner driver or application software. • When system errors result in the TEMP... is equipped with USB that the scanner driver or application software is causing the pages of a document failing to stick together, and they cannot be created in the scanner not functioning at all resident applications. Quit all , turn OFF the scanner and wait at least ten seconds before...

User Manual
Page 84
Then, re-install the software from the DR-4010C setup disc. (See "2-3 Installing the Software," on p. 2-4.) IMPORTANT Be sure to uninstall them. Note If you are not operating normally, follow the procedure below to log on as an ... Windows XP, double-click the [Add or Remove Programs]. 5-6 Note For Windows XP, click the [Start] button Æ click [Control Panel]. Chapter 5 Troubleshooting 5-2 Uninstalling Software If the ISIS/TWAIN driver, and "CapturePerfect 3.0" are using Windows 2000 Professional or Windows XP. 1 Click the [Start] button Æ click [Settings] Æ [Control...
Then, re-install the software from the DR-4010C setup disc. (See "2-3 Installing the Software," on p. 2-4.) IMPORTANT Be sure to uninstall them. Note If you are not operating normally, follow the procedure below to log on as an ... Windows XP, double-click the [Add or Remove Programs]. 5-6 Note For Windows XP, click the [Start] button Æ click [Control Panel]. Chapter 5 Troubleshooting 5-2 Uninstalling Software If the ISIS/TWAIN driver, and "CapturePerfect 3.0" are using Windows 2000 Professional or Windows XP. 1 Click the [Start] button Æ click [Settings] Æ [Control...

User Manual
Page 91
... • Contact your local authorized Canon dealer or service representative for detailed information about the Bar code module. 6-2 Contact your local authorized Canon dealer or service representative for detailed ...the performance of 20 lb bond (80 g/m2)) Interface Hi-Speed USB 2.0 / SCSI-III Other Functions Double feed detection, Long Document mode Dimensions (with trays closed) 12.5" × 10.9" × 7.3" (W × D × H) 318 mm ...are supported by the application software. • Some functions may not be used if they are subject to change without notice.
... • Contact your local authorized Canon dealer or service representative for detailed information about the Bar code module. 6-2 Contact your local authorized Canon dealer or service representative for detailed ...the performance of 20 lb bond (80 g/m2)) Interface Hi-Speed USB 2.0 / SCSI-III Other Functions Double feed detection, Long Document mode Dimensions (with trays closed) 12.5" × 10.9" × 7.3" (W × D × H) 318 mm ...are supported by the application software. • Some functions may not be used if they are subject to change without notice.

User Manual
Page 93
... Operation Procedure 3-17 Cleaning Feed Path 4-1 Rollers 4-2 Scanner 4-1 Sensor Glass 4-2 Clearing a Paper Jam 3-26 Connection SCSI Connection 2-12 USB Connection 2-11 Connection to the Computer 2-11 D daisy-chain configuration 2-12 DIP switches 2-12 Disposal 1-4 document eject configurations 3-1 document feed tray 3-7 document guides 3-6 Documents 3-1 Double Feed Detection Function 3-30 DR-4010C monitor 3-11 E Eject Tray 3-3 event 3-11 Event...
... Operation Procedure 3-17 Cleaning Feed Path 4-1 Rollers 4-2 Scanner 4-1 Sensor Glass 4-2 Clearing a Paper Jam 3-26 Connection SCSI Connection 2-12 USB Connection 2-11 Connection to the Computer 2-11 D daisy-chain configuration 2-12 DIP switches 2-12 Disposal 1-4 document eject configurations 3-1 document feed tray 3-7 document guides 3-6 Documents 3-1 Double Feed Detection Function 3-30 DR-4010C monitor 3-11 E Eject Tray 3-3 event 3-11 Event...


