
User Manual
Page 3
Manuals for regular maintenance, roller replacement Chapter 5 Troubleshooting Troubleshooting information, application uninstall procedure Chapter 6 Appendix Product specifications and dimensional drawings Software Chapter 7 ISIS/TWAIN Driver Settings ... for using the scanner to familiarize yourself with its capabilities, and to use the scanner. After reading this manual thoroughly before using the scanner. The Software section explains how to make the most of its many functions. Please read this manual, store it in a safe place for purchasing the Canon DR-4010C Document Scanner.
Manuals for regular maintenance, roller replacement Chapter 5 Troubleshooting Troubleshooting information, application uninstall procedure Chapter 6 Appendix Product specifications and dimensional drawings Software Chapter 7 ISIS/TWAIN Driver Settings ... for using the scanner to familiarize yourself with its capabilities, and to use the scanner. After reading this manual thoroughly before using the scanner. The Software section explains how to make the most of its many functions. Please read this manual, store it in a safe place for purchasing the Canon DR-4010C Document Scanner.

User Manual
Page 6
Contents Contents Chapter 1 1-1 1-2 1-3 Chapter 2 2-1 2-2 2-3 2-4 2-5 Chapter 3 3-1 3-2 3-3 3-4 3-5 3-6 3-7 3-8 Chapter 4 4-1 4-2 Before Using the Scanner 1-1 Important Safety Instructions 1-1 Installation Location 1-1 Power ...1-2 Moving the Scanner 1-2 Handling ...1-3 Disposal...1-4 Features of the DR-4010C Document Scanner 1-5 Names and Functions of Parts 1-7 Setup ...2-1 Setup Procedure 2-1 Installation Requirements 2-2 Installing the Software 2-4 Setup Disc 2-4 Software Installation 2-5 Connecting the Scanner to the Computer 2-11 Using a USB Connection 2-11 Using a SCSI...
Contents Contents Chapter 1 1-1 1-2 1-3 Chapter 2 2-1 2-2 2-3 2-4 2-5 Chapter 3 3-1 3-2 3-3 3-4 3-5 3-6 3-7 3-8 Chapter 4 4-1 4-2 Before Using the Scanner 1-1 Important Safety Instructions 1-1 Installation Location 1-1 Power ...1-2 Moving the Scanner 1-2 Handling ...1-3 Disposal...1-4 Features of the DR-4010C Document Scanner 1-5 Names and Functions of Parts 1-7 Setup ...2-1 Setup Procedure 2-1 Installation Requirements 2-2 Installing the Software 2-4 Setup Disc 2-4 Software Installation 2-5 Connecting the Scanner to the Computer 2-11 Using a USB Connection 2-11 Using a SCSI...
User Manual
Page 7
Contents Resetting the Counter 4-6 Removing/Attaching the Roller Unit 4-9 Removing and Attaching the Retard Roller 4-11 Chapter 5 Troubleshooting 5-1 5-1 Troubleshooting 5-1 5-2 Uninstalling Software 5-6 Uninstalling the ISIS/TWAIN Driver 5-7 Uninstalling the Job Registration Tool 5-8 Uninstalling CapturePerfect 3.0 5-10 Chapter 6 Appendix ...6-1 6-1 Specifications 6-1 Specifications 6-1 Replacement Parts 6-2 Options ...6-2 External Dimensions 6-3 Index ...6-4 iii
Contents Resetting the Counter 4-6 Removing/Attaching the Roller Unit 4-9 Removing and Attaching the Retard Roller 4-11 Chapter 5 Troubleshooting 5-1 5-1 Troubleshooting 5-1 5-2 Uninstalling Software 5-6 Uninstalling the ISIS/TWAIN Driver 5-7 Uninstalling the Job Registration Tool 5-8 Uninstalling CapturePerfect 3.0 5-10 Chapter 6 Appendix ...6-1 6-1 Specifications 6-1 Specifications 6-1 Replacement Parts 6-2 Options ...6-2 External Dimensions 6-3 Index ...6-4 iii

User Manual
Page 32
...When scanning a two-sided document that is dry before the ink is not recommended, as paper size detection and deskew may scratch the sensor glass. Always clean the internal parts of the scanner after scanning such documents. (See "Cleaning the Sensor Glass and the Rollers," on the opposite side... of the document and then scan the photocopy. Always make sure to be scannable: • When...
...When scanning a two-sided document that is dry before the ink is not recommended, as paper size detection and deskew may scratch the sensor glass. Always clean the internal parts of the scanner after scanning such documents. (See "Cleaning the Sensor Glass and the Rollers," on the opposite side... of the document and then scan the photocopy. Always make sure to be scannable: • When...

User Manual
Page 38
...scanner while it is not being used. 3-8 IMPORTANT • When scanning multiple page documents that are fastened together, such as invoices, set the edge that are scanning with the bypass mode, and you place several documents that is fed. Roller Unit ■ After you finish scanning, close the document... feed tray and the document eject tray extension to prevent damage to get your hand caught under the roller unit, as the leading edge. • When...
...scanner while it is not being used. 3-8 IMPORTANT • When scanning multiple page documents that are fastened together, such as invoices, set the edge that are scanning with the bypass mode, and you place several documents that is fed. Roller Unit ■ After you finish scanning, close the document... feed tray and the document eject tray extension to prevent damage to get your hand caught under the roller unit, as the leading edge. • When...

User Manual
Page 56
... unit, do not grasp the roller unit in the eject tray, remove the document before closing the document eject tray extension. Doing so may damage the document. 2 Carefully open the upper unit until the jammed document can be removed. Attempting to force the document eject tray extension closed may distort the rollers and lead to feeding errors...
... unit, do not grasp the roller unit in the eject tray, remove the document before closing the document eject tray extension. Doing so may damage the document. 2 Carefully open the upper unit until the jammed document can be removed. Attempting to force the document eject tray extension closed may distort the rollers and lead to feeding errors...

User Manual
Page 65
... from the power outlet. ■ Do not use excessive force when removing or attaching the rollers. Cleaning the Feed Path Dust or paper particles in scanned images. Cleaning the Scanner To clean the exterior of fire or electrical shock. After finishing a large scanning job, turn... OFF the power switch and disconnect the power cord from the document feed opening or inside of the scanner. Precision mechanisms, such as described below to clean the scanner. Doing so may get wet, and cause a malfunction. ■ Never use paint thinner, alcohol...
... from the power outlet. ■ Do not use excessive force when removing or attaching the rollers. Cleaning the Feed Path Dust or paper particles in scanned images. Cleaning the Scanner To clean the exterior of fire or electrical shock. After finishing a large scanning job, turn... OFF the power switch and disconnect the power cord from the document feed opening or inside of the scanner. Precision mechanisms, such as described below to clean the scanner. Doing so may get wet, and cause a malfunction. ■ Never use paint thinner, alcohol...

User Manual
Page 66
... 4 Maintenance Cleaning the Sensor Glass and the Rollers If scanned images have extraneous marks, or if the scanned documents are dirty, the sensor glass or rollers inside the scanner may distort the rollers and lead to keep the interior of the scanner free of the sensor glass and various rollers are shown below. IMPORTANT When opening the...
... 4 Maintenance Cleaning the Sensor Glass and the Rollers If scanned images have extraneous marks, or if the scanned documents are dirty, the sensor glass or rollers inside the scanner may distort the rollers and lead to keep the interior of the scanner free of the sensor glass and various rollers are shown below. IMPORTANT When opening the...

User Manual
Page 67
... on the sensor glass, contact your local authorized Canon dealer or service representative. 4 Dampen a cloth with water, wring it out thoroughly, and then wipe the rollers of the upper unit while turning them and lead to turn the rollers in the lower part of the scanner. Do not try to wipe dirt off the...
... on the sensor glass, contact your local authorized Canon dealer or service representative. 4 Dampen a cloth with water, wring it out thoroughly, and then wipe the rollers of the upper unit while turning them and lead to turn the rollers in the lower part of the scanner. Do not try to wipe dirt off the...

User Manual
Page 68
Doing so may result in personal injury. Chapter 4 Maintenance 6 Wipe the removed rollers with a cloth that has been moistened with water and thoroughly wrung out. 7 Attach the rollers that were removed. (See "Attaching the Roller Unit," on p. 4-10, and "Attaching the Retard Roller," on p. 4-12.) 8 Make sure that the upper unit is completely closed by pushing on both edges with both hands until you hear a click. CAUTION When closing the upper unit, be careful not to close. IMPORTANT Do not force the upper unit to get your fingers caught, as this may damage the scanner. 4-4
Doing so may result in personal injury. Chapter 4 Maintenance 6 Wipe the removed rollers with a cloth that has been moistened with water and thoroughly wrung out. 7 Attach the rollers that were removed. (See "Attaching the Roller Unit," on p. 4-10, and "Attaching the Retard Roller," on p. 4-12.) 8 Make sure that the upper unit is completely closed by pushing on both edges with both hands until you hear a click. CAUTION When closing the upper unit, be careful not to close. IMPORTANT Do not force the upper unit to get your fingers caught, as this may damage the scanner. 4-4
User Manual
Page 69
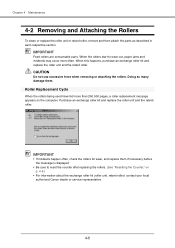
... message appears on p. 4-6.) • For information about the exchange roller kit (roller unit, retard roller,) contact your local authorized Canon dealer or service representative. 4-5 When this happens, purchase an exchange roller kit and replace the roller unit and the retard roller. IMPORTANT • If misfeeds happen often, check the rollers for wear, and replace them . Chapter 4 Maintenance 4-2 Removing...
... message appears on p. 4-6.) • For information about the exchange roller kit (roller unit, retard roller,) contact your local authorized Canon dealer or service representative. 4-5 When this happens, purchase an exchange roller kit and replace the roller unit and the retard roller. IMPORTANT • If misfeeds happen often, check the rollers for wear, and replace them . Chapter 4 Maintenance 4-2 Removing...

User Manual
Page 70
Click the [Start] button, Æ [Settings] on the [Start] menu Æ click [Control Panel]. (For Windows XP, click the [Start] button Æ click [Control Panel].) 2. For Windows XP, switch the Control Panel to Classic View, or select [Printers and Other Hardware] in the working field. Control Panel (Category View) Printers and Other Hardware Control Panel (Classic View) 4-6 Chapter 4 Maintenance Resetting the Counter After replacing the feed rollers, open the [Counter setup] dialog box and reset the counter. 1 Open the [Event settings] dialog box. 1.
Click the [Start] button, Æ [Settings] on the [Start] menu Æ click [Control Panel]. (For Windows XP, click the [Start] button Æ click [Control Panel].) 2. For Windows XP, switch the Control Panel to Classic View, or select [Printers and Other Hardware] in the working field. Control Panel (Category View) Printers and Other Hardware Control Panel (Classic View) 4-6 Chapter 4 Maintenance Resetting the Counter After replacing the feed rollers, open the [Counter setup] dialog box and reset the counter. 1 Open the [Event settings] dialog box. 1.

User Manual
Page 72
Chapter 4 Maintenance 2 Click the [Maintenance] tab. 3 Click the [Reset] button, and then make sure that the counter for the roller being used is set to 0. 4-8
Chapter 4 Maintenance 2 Click the [Maintenance] tab. 3 Click the [Reset] button, and then make sure that the counter for the roller being used is set to 0. 4-8

User Manual
Page 73
... the upper unit, do not grasp the roller unit in the center. Using too much force may distort the rollers and lead to feeding errors. 2 Push the roller lock lever down. 3 While supporting the roller unit with your hand, slide the roller lock lever to damage or personal injury. Doing... so may lead to the right. 4-9 CAUTION Use caution when removing or attaching the roller unit. Removing the Roller Unit 1 Carefully open the...
... the upper unit, do not grasp the roller unit in the center. Using too much force may distort the rollers and lead to feeding errors. 2 Push the roller lock lever down. 3 While supporting the roller unit with your hand, slide the roller lock lever to damage or personal injury. Doing... so may lead to the right. 4-9 CAUTION Use caution when removing or attaching the roller unit. Removing the Roller Unit 1 Carefully open the...

User Manual
Page 74
Chapter 4 Maintenance 4 Move the roller unit to lock the roller unit. 4-10 Attaching the Roller Unit 1 Align the cutout on the roller unit with the shaft pin on the main unit. Note If the cutout and pin do not fit, rotate the roller until the parts are properly matched. 2 Slide the roller lock lever to the left and raise the roller unit into position. 3 Push the roller lock lever up to the right a and then pull it out b.
Chapter 4 Maintenance 4 Move the roller unit to lock the roller unit. 4-10 Attaching the Roller Unit 1 Align the cutout on the roller unit with the shaft pin on the main unit. Note If the cutout and pin do not fit, rotate the roller until the parts are properly matched. 2 Slide the roller lock lever to the left and raise the roller unit into position. 3 Push the roller lock lever up to the right a and then pull it out b.

User Manual
Page 75
..., and open it until the unit clicks into place. Removing the Retard Roller 1 Hold the upper unit as this may damage it stops. Removing and Attaching the Retard Roller To remove or attach the retard roller, proceed as follows. Verify that the upper unit is properly closed. Finally...until it . IMPORTANT When opening the upper unit, do not grasp the roller unit in personal injury. Doing so may damage the scanner. Chapter 4 Maintenance 4 Carefully lower the upper unit. Doing so may distort the rollers and lead to close. CAUTION Do not use excessive force when removing ...
..., and open it until the unit clicks into place. Removing the Retard Roller 1 Hold the upper unit as this may damage it stops. Removing and Attaching the Retard Roller To remove or attach the retard roller, proceed as follows. Verify that the upper unit is properly closed. Finally...until it . IMPORTANT When opening the upper unit, do not grasp the roller unit in personal injury. Doing so may damage the scanner. Chapter 4 Maintenance 4 Carefully lower the upper unit. Doing so may distort the rollers and lead to close. CAUTION Do not use excessive force when removing ...

User Manual
Page 76
Attaching the Retard Roller 1 Position the retard roller so the notch in the roller is facing the scanner's shaft. 4-12 Chapter 4 Maintenance 2 Insert a finger of each hand into the grooves on both ends of the roller cover and remove the cover. 3 Move the roller lock lever down and forward (a,) and then slide it to the right (b.) 4 Shift the retard roller to the right to remove it.
Attaching the Retard Roller 1 Position the retard roller so the notch in the roller is facing the scanner's shaft. 4-12 Chapter 4 Maintenance 2 Insert a finger of each hand into the grooves on both ends of the roller cover and remove the cover. 3 Move the roller lock lever down and forward (a,) and then slide it to the right (b.) 4 Shift the retard roller to the right to remove it.

User Manual
Page 77
Chapter 4 Maintenance 2 Slide the roller lock lever to the left, and insert it into the retard roller slot. 3 Push the roller lock lever towards the back of the scanner to lock the retard roller into place. 4 Replace the roller cover. 5 Push the center of the roller cover down and make sure that it clicks into place. 4-13
Chapter 4 Maintenance 2 Slide the roller lock lever to the left, and insert it into the retard roller slot. 3 Push the roller lock lever towards the back of the scanner to lock the retard roller into place. 4 Replace the roller cover. 5 Push the center of the roller cover down and make sure that it clicks into place. 4-13

User Manual
Page 82
...rollers inside the scanner. Contact your local authorized Canon dealer or your local authorized Canon dealer or service representative to purchase a roller replacement kit. Symptoms Problem Solution The scanned image is too dark (or faint.) The [Brightness] setting is faint, set to an appropriate value. IMPORTANT The retard roller and roller... cannot be replaced. Clean the rollers, see "3-1 Documents," on p. 4-1. Contact your service representative about purchasing a roller replacement kit, and then replace the retard roller and the roller unit. ✘ Saved Image ...
...rollers inside the scanner. Contact your local authorized Canon dealer or your local authorized Canon dealer or service representative to purchase a roller replacement kit. Symptoms Problem Solution The scanned image is too dark (or faint.) The [Brightness] setting is faint, set to an appropriate value. IMPORTANT The retard roller and roller... cannot be replaced. Clean the rollers, see "3-1 Documents," on p. 4-1. Contact your service representative about purchasing a roller replacement kit, and then replace the retard roller and the roller unit. ✘ Saved Image ...
User Manual
Page 83
... Solution Text or images on the rear side of your local authorized Canon dealer or service representative. The scanning glass or rollers inside the scanner may be scratched. Symptoms Problem Solution Double-sided scanning is abnormal in the scanned image. Scanning documents with auto-detection of position. The [Brightness] setting is too low, or...
... Solution Text or images on the rear side of your local authorized Canon dealer or service representative. The scanning glass or rollers inside the scanner may be scratched. Symptoms Problem Solution Double-sided scanning is abnormal in the scanned image. Scanning documents with auto-detection of position. The [Brightness] setting is too low, or...


