
ScanGear Toolbox CS v2.2.0 User's Manual
Page 3
When you use other countries. Trademarks Microsoft and Windows are trademarks or registered trademarks of the respective companies. 3 Selecting the Film Adapter Unit 21 Using ScanGear Toolbox CS 22 Sending Faxes 24 Sending Mail 24 Copying 25 Saving ...27 Custom Functions 1-3 27 Using ScanGear Toolbox CS without Displaying a Toolbar ...
When you use other countries. Trademarks Microsoft and Windows are trademarks or registered trademarks of the respective companies. 3 Selecting the Film Adapter Unit 21 Using ScanGear Toolbox CS 22 Sending Faxes 24 Sending Mail 24 Copying 25 Saving ...27 Custom Functions 1-3 27 Using ScanGear Toolbox CS without Displaying a Toolbar ...

ScanGear Toolbox CS v2.2.0 User's Manual
Page 4
..., automatically start button in front of a single button. When you use a scanner to scan and send images to fax programs or copy them directly to P.21 regarding its settings and usage. 4
..., automatically start button in front of a single button. When you use a scanner to scan and send images to fax programs or copy them directly to P.21 regarding its settings and usage. 4
ScanGear Toolbox CS v2.2.0 User's Manual
Page 21
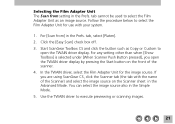
... from ] in the Simple Mode. 5. tab cannot be used to select the Film Adapter Unit as Copy or Custom to execute previewing or scanning images. 21
... from ] in the Simple Mode. 5. tab cannot be used to select the Film Adapter Unit as Copy or Custom to execute previewing or scanning images. 21
User Guide
Page 4
... Module CS-U Control Panel 14 Positioning Originals 16 Previewing ...17 Selecting the Output Device 18 Setting the Resolution and Magnification 19 Setting the Scan Mode 21 Verifying the Image before Scanning 23 Rotating the Image 24 Setting Preferences 25 Output Device 25 Aspect Ratio 25 Unit ...26 Preview Window 26 Calibration...
... Module CS-U Control Panel 14 Positioning Originals 16 Previewing ...17 Selecting the Output Device 18 Setting the Resolution and Magnification 19 Setting the Scan Mode 21 Verifying the Image before Scanning 23 Rotating the Image 24 Setting Preferences 25 Output Device 25 Aspect Ratio 25 Unit ...26 Preview Window 26 Calibration...

User Guide
Page 7
... in your package. § p. 49 § p. 36-48 § p. 51 § p. 50 § pp. 25-28 § p. 52 Close Box § p. 14 Scan Mode § p. 21 Output Device § p. 18 Resolution § pp. 19-20 Magnification § pp. 19-20 Image Size § pp. 19-20 Required/ Free memory §...; p. 21 Zoom In Button § p. 31 Zoom Out Button § p. 32 Tone Adjustment Button § pp. 36-48 Auto Tone Adjustment Button § p. 36 RGB values &#...
... in your package. § p. 49 § p. 36-48 § p. 51 § p. 50 § pp. 25-28 § p. 52 Close Box § p. 14 Scan Mode § p. 21 Output Device § p. 18 Resolution § pp. 19-20 Magnification § pp. 19-20 Image Size § pp. 19-20 Required/ Free memory §...; p. 21 Zoom In Button § p. 31 Zoom Out Button § p. 32 Tone Adjustment Button § pp. 36-48 Auto Tone Adjustment Button § p. 36 RGB values &#...

User Guide
Page 8
...; Position the Original p. 16 • Preview p. 17 • Select the Output Device p. 18 • Set the Resolution and Magnification p. 19 • Set the Scan Mode p. 21 Refer to the scanner's Getting Started guide to attach it . Refer to the scanner's Getting Started guide to install it . STEP 2 Scan § p. 29 •...
...; Position the Original p. 16 • Preview p. 17 • Select the Output Device p. 18 • Set the Resolution and Magnification p. 19 • Set the Scan Mode p. 21 Refer to the scanner's Getting Started guide to attach it . Refer to the scanner's Getting Started guide to install it . STEP 2 Scan § p. 29 •...

User Guide
Page 11
... output image display (p. 19). 4 Set the Scan Mode, Output Device, Resolution and Magnification pp. 18-22 • Scanning mode determines how the image is scanned (p. 21). • Output device setting optimizes the images for particular uses (p. 18). • Resolution determines the amount of detail in Module CS-U will appear. Move the...
... output image display (p. 19). 4 Set the Scan Mode, Output Device, Resolution and Magnification pp. 18-22 • Scanning mode determines how the image is scanned (p. 21). • Output device setting optimizes the images for particular uses (p. 18). • Resolution determines the amount of detail in Module CS-U will appear. Move the...

User Guide
Page 13
STEP 1 Scanning Preparations Step 1 presents the essential preparations for scanning. s Displaying the Plug-in Module CS-U Control Panel w s Positioning Originals w s Previewing w s Selecting the Output Device s Setting the Resolution and Magnification s Setting the Scan Mode w s Verifying the Image Before Scanning s Rotating the Image s Setting Preferences p. 14 p. 16 p. 17 p. 18 p. 19 p. 21 p. 23 p. 24 p. 25 13 The following procedures are explained on the indicated pages.
STEP 1 Scanning Preparations Step 1 presents the essential preparations for scanning. s Displaying the Plug-in Module CS-U Control Panel w s Positioning Originals w s Previewing w s Selecting the Output Device s Setting the Resolution and Magnification s Setting the Scan Mode w s Verifying the Image Before Scanning s Rotating the Image s Setting Preferences p. 14 p. 16 p. 17 p. 18 p. 19 p. 21 p. 23 p. 24 p. 25 13 The following procedures are explained on the indicated pages.

User Guide
Page 20
... Scanning Resolution The higher the magnification and scanning resolution settings, the greater the file size of memory resources. For example, if you scan an A4 (21.0 x 29.7 cm (8.3 x 11.7 in.)) size image in either direction or use the arrow keys to change the resolution. Click inside these boxes to increase or...
... Scanning Resolution The higher the magnification and scanning resolution settings, the greater the file size of memory resources. For example, if you scan an A4 (21.0 x 29.7 cm (8.3 x 11.7 in.)) size image in either direction or use the arrow keys to change the resolution. Click inside these boxes to increase or...

User Guide
Page 21
... images in greater detail. Select this mode reproduces fine text or lines in two colors only: black or white. The scan mode that is unavailable. 21
... images in greater detail. Select this mode reproduces fine text or lines in two colors only: black or white. The scan mode that is unavailable. 21
User Guide
Page 64
... Stand-alone 15 Aspect ratio 25 Auto button 39 Auto Tone Adjustment button 7, 36 Auto Tone Correction 59 B Bits/Bit numbers 59 Black and White 21, 59 Black Eyedropper button 39 Black Eyedropper tool 59 Brightness 43, 59 Brightness/Contrast tab 44 Browser 9, 23 Browser button 7, 11, 23 Buttons 14 ...C Calibration 27, 59 CanoScan Setup Utility CD-ROM 10 Close box 7, 14 Close Plug-in After Scan 27 Color (Documents) 21, 60 Color (Photos) 21, 60 Color balance 45, 59 Color balance tab 45 Color channel 60 ColorSync 6, 9, 49, 60...
... Stand-alone 15 Aspect ratio 25 Auto button 39 Auto Tone Adjustment button 7, 36 Auto Tone Correction 59 B Bits/Bit numbers 59 Black and White 21, 59 Black Eyedropper button 39 Black Eyedropper tool 59 Brightness 43, 59 Brightness/Contrast tab 44 Browser 9, 23 Browser button 7, 11, 23 Buttons 14 ...C Calibration 27, 59 CanoScan Setup Utility CD-ROM 10 Close box 7, 14 Close Plug-in After Scan 27 Color (Documents) 21, 60 Color (Photos) 21, 60 Color balance 45, 59 Color balance tab 45 Color channel 60 ColorSync 6, 9, 49, 60...

User Guide
Page 65
...Save Scanned image 12, 34 Save Settings file 52 Scan 12, 33 Scan area 11, 30 Scan button 7, 12, 33 Scan mode 7, 11, 21, 63 Scanning 63 Scanning resolution 19, 54 Screen gamma value 46 Settings file 52 Shadow mark 39 Shadows 37, 63 Special features 9 Start Plug-... trademarks of their respective companies. 65 While every effort has been made to change the specifications of Canon Inc. CanoScan and Canon Plug-in any form by any means without prior notice. Canon Inc. Adobe and Adobe Photoshop are trademarks of Adobe Systems Incorporated. makes no liability can be reproduced...
...Save Scanned image 12, 34 Save Settings file 52 Scan 12, 33 Scan area 11, 30 Scan button 7, 12, 33 Scan mode 7, 11, 21, 63 Scanning 63 Scanning resolution 19, 54 Screen gamma value 46 Settings file 52 Shadow mark 39 Shadows 37, 63 Special features 9 Start Plug-... trademarks of their respective companies. 65 While every effort has been made to change the specifications of Canon Inc. CanoScan and Canon Plug-in any form by any means without prior notice. Canon Inc. Adobe and Adobe Photoshop are trademarks of Adobe Systems Incorporated. makes no liability can be reproduced...

User Guide
Page 66
... Help Desk: 906. 301255 Tel: 91-5384500 Fax: 91-4117780 CANON AUSTRALIA PTY. Tel: 1-800 OK CANON http://www.ccsi.canon.com CANON (UK) LTD. Hotline-Service Customer Support: (0 21 51) 349-555 Info-Desk: (0 21 51) 349-566 Mailbox: (0 21 51) 349-577 Telefax: (0 21 51) 349-588 CANON ITALIA S.p.A Palazzo L, Strada 6, 20089 Milanofiori-Rozzano (MI), Italy Tel...
... Help Desk: 906. 301255 Tel: 91-5384500 Fax: 91-4117780 CANON AUSTRALIA PTY. Tel: 1-800 OK CANON http://www.ccsi.canon.com CANON (UK) LTD. Hotline-Service Customer Support: (0 21 51) 349-555 Info-Desk: (0 21 51) 349-566 Mailbox: (0 21 51) 349-577 Telefax: (0 21 51) 349-588 CANON ITALIA S.p.A Palazzo L, Strada 6, 20089 Milanofiori-Rozzano (MI), Italy Tel...
Macintosh User Guide
Page 3
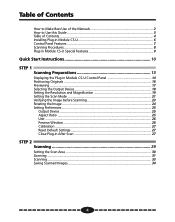
Table of Contents 1 Introduction ...4 About the CanoScan Toolbox CS 4 Obtaining Customer Support ...4 2 Installing the CanoScan Toolbox CS 5 System Requirements...5 Installing the CanoScan Toolbox CS 5 3 The CanoScan Toolbox CS Main Window 6 4 Using the Scanner Button 6 5 Selecting the Scanner ...6 6 Scanning ...7 7 Saving Scanned Images 7 8 Opening Files ...8 Opening a Stored File ...8 Opening ... ...20 Saving an Image to a Catalog...20 Viewing an Image Catalog ...20 Opening a Scanned Image from the Catalog 21 14 Linking Applications to the Canoscan Toolbox CS 22 CanoScan Toolbox CS 3
Table of Contents 1 Introduction ...4 About the CanoScan Toolbox CS 4 Obtaining Customer Support ...4 2 Installing the CanoScan Toolbox CS 5 System Requirements...5 Installing the CanoScan Toolbox CS 5 3 The CanoScan Toolbox CS Main Window 6 4 Using the Scanner Button 6 5 Selecting the Scanner ...6 6 Scanning ...7 7 Saving Scanned Images 7 8 Opening Files ...8 Opening a Stored File ...8 Opening ... ...20 Saving an Image to a Catalog...20 Viewing an Image Catalog ...20 Opening a Scanned Image from the Catalog 21 14 Linking Applications to the Canoscan Toolbox CS 22 CanoScan Toolbox CS 3
Macintosh User Guide
Page 4
...-Service Customer Support: (0 21 51)349-555 Info-Desk: (0 21 51)349-566 Mailbox: (0 21 51)349-577 Telefax: (0 21 51)349-588 CANON ITALIA S.p.A Palazzo L, Strada 6, 20089 Milanofiori-Rozzano (MI), Italy TEL: 02/8248. 1 FAX: 02/8248. 4604 Pronto Canon 02/8249. 2000 http://www.canon.it CANON OY AB Kornetintie, 3,...Tel: (01)835 61 61 Fax: (01)835 68 60 Hotline: 157 30 20 CANON ESPAÑA S.A. CANON EUROPA N.V. About the CanoScan Toolbox CS The CanoScan Toolbox CS provides easy-to-use the CanoScan Toolbox CS to the scanner. Bessenveldstraat 7, 1831 Diegem, Belgium Tel: 02 7220411 Fax: 02...
...-Service Customer Support: (0 21 51)349-555 Info-Desk: (0 21 51)349-566 Mailbox: (0 21 51)349-577 Telefax: (0 21 51)349-588 CANON ITALIA S.p.A Palazzo L, Strada 6, 20089 Milanofiori-Rozzano (MI), Italy TEL: 02/8248. 1 FAX: 02/8248. 4604 Pronto Canon 02/8249. 2000 http://www.canon.it CANON OY AB Kornetintie, 3,...Tel: (01)835 61 61 Fax: (01)835 68 60 Hotline: 157 30 20 CANON ESPAÑA S.A. CANON EUROPA N.V. About the CanoScan Toolbox CS The CanoScan Toolbox CS provides easy-to-use the CanoScan Toolbox CS to the scanner. Bessenveldstraat 7, 1831 Diegem, Belgium Tel: 02 7220411 Fax: 02...

Macintosh User Guide
Page 21
... Catalog View command from the Catalog To open Catalog window to see all of copies to sort the thumbnails by name, type, date or size. CanoScan Toolbox CS 21 3. The Editing toolbox, Brush Size pallet and Color Pallet windows open the Image window.
... Catalog View command from the Catalog To open Catalog window to see all of copies to sort the thumbnails by name, type, date or size. CanoScan Toolbox CS 21 3. The Editing toolbox, Brush Size pallet and Color Pallet windows open the Image window.
User Manual
Page 3
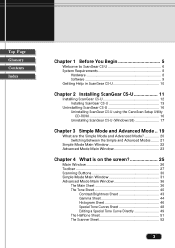
...10 Chapter 2 Installing ScanGear CS-U 11 Installing ScanGear CS-U 12 Installing ScanGear CS-U 13 Uninstalling ScanGear CS-U 16 Uninstalling ScanGear CS-U using the CanoScan Setup Utility CD-ROM 16 Uninstalling ScanGear CS-U (Windows 98 17 Chapter 3 Simple Mode and Advanced Mode .. 19 What are the Simple Mode ...and Advanced Mode 20 Switching Between the Simple and Advanced Modes ........ 21 Simple Mode Main Window 22 Advanced Mode Main Window 23 Chapter 4 What is on the screen 25 Main Window 26 Toolbar 27 Scanning Buttons...
...10 Chapter 2 Installing ScanGear CS-U 11 Installing ScanGear CS-U 12 Installing ScanGear CS-U 13 Uninstalling ScanGear CS-U 16 Uninstalling ScanGear CS-U using the CanoScan Setup Utility CD-ROM 16 Uninstalling ScanGear CS-U (Windows 98 17 Chapter 3 Simple Mode and Advanced Mode .. 19 What are the Simple Mode ...and Advanced Mode 20 Switching Between the Simple and Advanced Modes ........ 21 Simple Mode Main Window 22 Advanced Mode Main Window 23 Chapter 4 What is on the screen 25 Main Window 26 Toolbar 27 Scanning Buttons...

User Manual
Page 21
chapter 3 Simple Mode and Advanced Mode Top Page Glossary Contents Index Switching Between the Simple and Advanced Modes You can switch between the Simple and Advanced Modes simply by clicking a button. • In the Simple Mode main window, click the Advanced Mode button to open the Advanced Mode main window. • In the Advanced Mode main window, click the Simple Mode button to open the Simple Mode main window. Note Simple Mode Advanced Mode 21 If you change the settings in either the Simple Mode or Advanced Mode, the changes will be reflected in the settings of the other mode.
chapter 3 Simple Mode and Advanced Mode Top Page Glossary Contents Index Switching Between the Simple and Advanced Modes You can switch between the Simple and Advanced Modes simply by clicking a button. • In the Simple Mode main window, click the Advanced Mode button to open the Advanced Mode main window. • In the Advanced Mode main window, click the Simple Mode button to open the Simple Mode main window. Note Simple Mode Advanced Mode 21 If you change the settings in either the Simple Mode or Advanced Mode, the changes will be reflected in the settings of the other mode.

User Manual
Page 100
Index Top Page Glossary Contents Index A D Advanced Mode defined ... 20 Main sheet ... 36 main window ... 23 scanning in ... 64 switching to Simple Mode ... 21 Auto Crop button ... 28 Auto Tone button ... 29 Descreen Scanner sheet ... 53 E Edit Image Type button Simple Mode sheet ... 34 C Clear button function ...30 Color ...
Index Top Page Glossary Contents Index A D Advanced Mode defined ... 20 Main sheet ... 36 main window ... 23 scanning in ... 64 switching to Simple Mode ... 21 Auto Crop button ... 28 Auto Tone button ... 29 Descreen Scanner sheet ... 53 E Edit Image Type button Simple Mode sheet ... 34 C Clear button function ...30 Color ...

User Manual
Page 102
... button ... 30 Select Source dialog box ... 59 Selection Main sheet ... 39 Simple Mode scanning in ... 59 selecting custom Image Types ... 34 switching to Advanced Mode ... 21 Simple Mode main window summary ... 22 Simple Mode sheet Color Mode ... 32 Edit Image Type button ... 34 Height ... 34 Image Type ...31 Magazine ...35 Paper...
... button ... 30 Select Source dialog box ... 59 Selection Main sheet ... 39 Simple Mode scanning in ... 59 selecting custom Image Types ... 34 switching to Advanced Mode ... 21 Simple Mode main window summary ... 22 Simple Mode sheet Color Mode ... 32 Edit Image Type button ... 34 Height ... 34 Image Type ...31 Magazine ...35 Paper...