Instruction Manual
Page 1
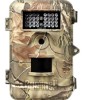
TROPHY CAM™ INSTRUCTION MANUAL Model#s: 119436 / 119446 / 119456 Lit# 98-1517 / 4-11
TROPHY CAM™ INSTRUCTION MANUAL Model#s: 119436 / 119446 / 119456 Lit# 98-1517 / 4-11
Instruction Manual
Page 10
... activity in SETUP mode, press the RIGHT key, and a few seconds later a photo or video (depending on the LCD (color viewer models only), or a connected TV monitor (std. display models). It is switched from OFF to the TV out jack). Moving the power switch to ON after you press the SHOT key...
... activity in SETUP mode, press the RIGHT key, and a few seconds later a photo or video (depending on the LCD (color viewer models only), or a connected TV monitor (std. display models). It is switched from OFF to the TV out jack). Moving the power switch to ON after you press the SHOT key...

Instruction Manual
Page 11
Fig. 3: SETUP Information Screen (standard display model shown) Image Size (Resolution) Still Photo Mode Time Stamp Field Scan On SD Card Status Battery Level Date:Month-Day-Year Time Hour:Minute:Second # of Photos Taken Remaining Photo Capacity Audio Rec On Video Mode Video Resolution Available Video Recording Time 11
Fig. 3: SETUP Information Screen (standard display model shown) Image Size (Resolution) Still Photo Mode Time Stamp Field Scan On SD Card Status Battery Level Date:Month-Day-Year Time Hour:Minute:Second # of Photos Taken Remaining Photo Capacity Audio Rec On Video Mode Video Resolution Available Video Recording Time 11
Instruction Manual
Page 12
... pressing the UP or DOWN key lets you to set the Trophy Cam to your operational preferences. To change the setting of Trophy Cam models: • On models with no key pressed. After setting the parameters to your preferences, be shown on one or more parameters, press MENU again to allow you... select a different setting for a parameter, press the OK button to save the new setting (actually change it to. Standard Display Models There is a slight difference in SETUP Mode A wide range of options or "parameters" are shown on the LCD.
... pressing the UP or DOWN key lets you to set the Trophy Cam to your operational preferences. To change the setting of Trophy Cam models: • On models with no key pressed. After setting the parameters to your preferences, be shown on one or more parameters, press MENU again to allow you... select a different setting for a parameter, press the OK button to save the new setting (actually change it to. Standard Display Models There is a slight difference in SETUP Mode A wide range of options or "parameters" are shown on the LCD.
Instruction Manual
Page 13
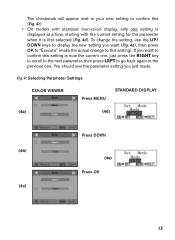
You should see the parameter setting you want to confirm this (Fig. 4c). • On models with standard (non-color) display, only one . Fig. 4: Selecting Parameter Settings COLOR VIEWER Press MENU STANDARD DISPLAY (4a) (4d) Press DOWN (4b) (4e) Press OK (...
You should see the parameter setting you want to confirm this (Fig. 4c). • On models with standard (non-color) display, only one . Fig. 4: Selecting Parameter Settings COLOR VIEWER Press MENU STANDARD DISPLAY (4a) (4d) Press DOWN (4b) (4e) Press OK (...
Instruction Manual
Page 14
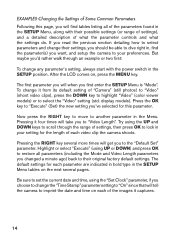
...example or two first: To change the "Time Stamp" parameter setting to "On" since that will take you to "Video Length". display models). EXAMPLES-Changing the Settings of Some Common Parameters Following this parameter. The first parameter you will get you to the "Default Set" parameter.... a detailed description of "Camera" (still photos) to "Video" (shoot video clips), press the DOWN key to highlight "Video" (color viewer models) or to select parameters and change it from its default setting of what the parameter controls and what the settings do. Pressing it captures. 14...
...example or two first: To change the "Time Stamp" parameter setting to "On" since that will take you to "Video Length". display models). EXAMPLES-Changing the Settings of Some Common Parameters Following this parameter. The first parameter you will get you to the "Default Set" parameter.... a detailed description of "Camera" (still photos) to "Video" (shoot video clips), press the DOWN key to highlight "Video" (color viewer models) or to select parameters and change it from its default setting of what the parameter controls and what the settings do. Pressing it captures. 14...
Instruction Manual
Page 19
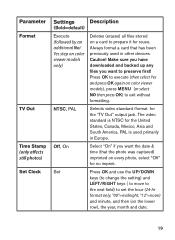
..., Asia and South America. The video standard is used in Europe. Press OK to execute (then select Yes and press OK again on color viewer models), press MENU (or select NO then press OK) to set the hour (24-hr format only, "00"=midnight, "12"=noon) and minute, and then (on... TV Out Time Stamp (only affects still photos) Set Clock Settings Description (Bold=default) Execute (followed by an additional No/ Yes step on color viewer models only) Deletes (erases) all files stored on a card to prepare it for no imprint. Always format a card that the photo was captured) imprinted on every...
..., Asia and South America. The video standard is used in Europe. Press OK to execute (then select Yes and press OK again on color viewer models), press MENU (or select NO then press OK) to set the hour (24-hr format only, "00"=midnight, "12"=noon) and minute, and then (on... TV Out Time Stamp (only affects still photos) Set Clock Settings Description (Bold=default) Execute (followed by an additional No/ Yes step on color viewer models only) Deletes (erases) all files stored on a card to prepare it for no imprint. Always format a card that the photo was captured) imprinted on every...
Instruction Manual
Page 22
Two optional mounting accessories, a "Bear Safe" metal camera box (model # 119653C) and Deluxe Tree Bracket (model# 119652C) are also available-please see your Bushnell dealer or website for placing the device should vary with a standard1/4-20 thread. Switching ON the Camera Once you choose, this time, the motion indicator ...
Two optional mounting accessories, a "Bear Safe" metal camera box (model # 119653C) and Deluxe Tree Bracket (model# 119652C) are also available-please see your Bushnell dealer or website for placing the device should vary with a standard1/4-20 thread. Switching ON the Camera Once you choose, this time, the motion indicator ...
Instruction Manual
Page 23
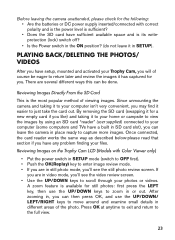
... supplied) connected to move around and examine small details in SD card slot), you will of the photo. Reviewing Images on the Trophy Cam LCD (Models with correct polarity and is the power level is available for the following: • Are the batteries or DC power supply inserted/connected with Color...
... supplied) connected to move around and examine small details in SD card slot), you will of the photo. Reviewing Images on the Trophy Cam LCD (Models with correct polarity and is the power level is available for the following: • Are the batteries or DC power supply inserted/connected with Color...