
Users Manual - English
Page 2
... always be followed, including the following: "Read all moving parts. turer as described in this instruction manual. 16. Never operate the sewing machine with same type rated 15 watts. Special care is not working properly, if it has been dropped or damaged, or dropped into ...any openings. 6. Always use a bent needle. 13. Switch the sewing machine to the symbol "O" position which represents off , symbol "O" position when making any of burns, fire, electric shock, or injury to ensure that they ...
... always be followed, including the following: "Read all moving parts. turer as described in this instruction manual. 16. Never operate the sewing machine with same type rated 15 watts. Special care is not working properly, if it has been dropped or damaged, or dropped into ...any openings. 6. Always use a bent needle. 13. Switch the sewing machine to the symbol "O" position which represents off , symbol "O" position when making any of burns, fire, electric shock, or injury to ensure that they ...

Users Manual - English
Page 6
... KNOWING YOUR SEWING MACHINE PRINCIPAL PARTS 1 ACCESSORIES 3 OPERATING YOUR SEWING MACHINE 5 Connecting Plugs 5 Main Power and Sewing Light Switches 6 Foot Controller 6 Inserting the Needle 7 Checking the Needle 7 Changing the Presser Foot 8 Converting to Free-Arm Style 9 Steadying the Machine 9 VARIOUS ... Stitching 37 Scallop Stitching 38 Universal Stitching 38 Overedge Stitching 39 Feather Stitching 40 Triple Zigzag Stretch Stitching 41 Decorative Stitching 41 BUTTONHOLE AND BUTTON SEWING Making a Buttonhole (1 Step Automatic Buttonhole 42 Making a Buttonhole (4 Step ...
... KNOWING YOUR SEWING MACHINE PRINCIPAL PARTS 1 ACCESSORIES 3 OPERATING YOUR SEWING MACHINE 5 Connecting Plugs 5 Main Power and Sewing Light Switches 6 Foot Controller 6 Inserting the Needle 7 Checking the Needle 7 Changing the Presser Foot 8 Converting to Free-Arm Style 9 Steadying the Machine 9 VARIOUS ... Stitching 37 Scallop Stitching 38 Universal Stitching 38 Overedge Stitching 39 Feather Stitching 40 Triple Zigzag Stretch Stitching 41 Decorative Stitching 41 BUTTONHOLE AND BUTTON SEWING Making a Buttonhole (1 Step Automatic Buttonhole 42 Making a Buttonhole (4 Step ...

Users Manual - English
Page 9
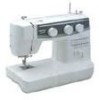
... 7 6 Upper tension control dial Controls the tension of the stitches. 0 Reverse sewing lever Push for operation. E Main power/sewing light switch Turns the main power and sewing light on and off. H Foot controller Used to raise and lower the needle....Turn toward you (counterclockwise) to control sewing speed start and stop. D C E G F H BUTTONHOLE AND BUTTON SEWING USING ATTACHMENTS AND APPLICATIONS MAINTENANCE INDEX 1 CONTENTS KNOWING YOUR SEWING MACHINE STRAIGHT AND ZIGZAG STITCHING BUILT-IN STITCHES PRINCIPAL PARTS 34 62 1 1 Bobbin winding assembly ...
... 7 6 Upper tension control dial Controls the tension of the stitches. 0 Reverse sewing lever Push for operation. E Main power/sewing light switch Turns the main power and sewing light on and off. H Foot controller Used to raise and lower the needle....Turn toward you (counterclockwise) to control sewing speed start and stop. D C E G F H BUTTONHOLE AND BUTTON SEWING USING ATTACHMENTS AND APPLICATIONS MAINTENANCE INDEX 1 CONTENTS KNOWING YOUR SEWING MACHINE STRAIGHT AND ZIGZAG STITCHING BUILT-IN STITCHES PRINCIPAL PARTS 34 62 1 1 Bobbin winding assembly ...

Users Manual - English
Page 33
...el hilo inferior saldrá de la canilla en un amplio enlace. 4. Tire unos 15 cm (6") de ambos hilos y colóquelos hacia la parte posterior de la máquina, justo detrás del prensatelas. Avec la main droite, tourner le volant vers soi (dans le sens contraire aux ...moves down and back up from the bobbin in a loop. El hilo superior debe haber enganchado el hilo inferior en un lanzo. CONTENTS KNOWING YOUR SEWING MACHINE STRAIGHT AND ZIGZAG STITCHING BUILT-IN STITCHES 1 2 Drawing Up Lower Thread 1. With your right hand, turn the balance wheel toward you and the...
...el hilo inferior saldrá de la canilla en un amplio enlace. 4. Tire unos 15 cm (6") de ambos hilos y colóquelos hacia la parte posterior de la máquina, justo detrás del prensatelas. Avec la main droite, tourner le volant vers soi (dans le sens contraire aux ...moves down and back up from the bobbin in a loop. El hilo superior debe haber enganchado el hilo inferior en un lanzo. CONTENTS KNOWING YOUR SEWING MACHINE STRAIGHT AND ZIGZAG STITCHING BUILT-IN STITCHES 1 2 Drawing Up Lower Thread 1. With your right hand, turn the balance wheel toward you and the...

Users Manual - English
Page 75
CONTENTS KNOWING YOUR SEWING MACHINE STRAIGHT AND ZIGZAG STITCHING BUILT-IN STITCHES Page A Accessories 3 Appliques 54 B Blindhem Stitching 35 Bobbin Threading 19, 24 Winding 18 Bridging Stitch 11 Buttonhole Sewing 42, 44 Buttonhole Fine Adjustment 47 Button Sewing 49 C Chart of Sewing Fabrics, Needles...Widths 11 Performance Checklist 60-61 Presser Foot Replacement 8 Principal Parts 1 Q Quick Thread-setting System 24 R Repacking 66 Reverse Sewing Lever 17 S Scallop Stitching 38 Sewing Direction 32 Sewing Light Bulb Replacement 57 Switch 6 Shell Tuck Stitching 36 ...
CONTENTS KNOWING YOUR SEWING MACHINE STRAIGHT AND ZIGZAG STITCHING BUILT-IN STITCHES Page A Accessories 3 Appliques 54 B Blindhem Stitching 35 Bobbin Threading 19, 24 Winding 18 Bridging Stitch 11 Buttonhole Sewing 42, 44 Buttonhole Fine Adjustment 47 Button Sewing 49 C Chart of Sewing Fabrics, Needles...Widths 11 Performance Checklist 60-61 Presser Foot Replacement 8 Principal Parts 1 Q Quick Thread-setting System 24 R Repacking 66 Reverse Sewing Lever 17 S Scallop Stitching 38 Sewing Direction 32 Sewing Light Bulb Replacement 57 Switch 6 Shell Tuck Stitching 36 ...


