Brother International ST4031HDH Support and Manuals
Get Help and Manuals for this Brother International item
View All Support Options Below
Free Brother International ST4031HDH manuals!
Problems with Brother International ST4031HDH?
Ask a Question
Free Brother International ST4031HDH manuals!
Problems with Brother International ST4031HDH?
Ask a Question
Popular Brother International ST4031HDH Manual Pages
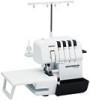
Operation Manual - Page 2
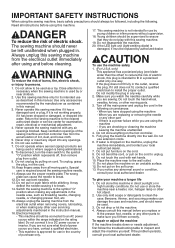
...install ...repair or adjust the machine
If the machine breaks down or needs adjustment, first follow the troubleshooting...part - Turn off , then remove plug from the electrical outlet immediately after using the machine - If there is
damaged, it must be replaced...manual.
3. It may deflect the needle causing it still does not fit, contact a qualified electrician to fit in the instruction manual...
Operation Manual - Page 3
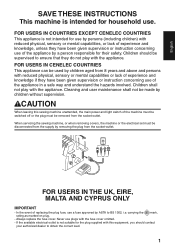
.... When servicing the sewing machine, or when removing covers, the machine or the electrical set must be supervised to ensure that they have been given supervision or instruction concerning use...CYPRUS ONLY
IMPORTANT
- In the event of replacing the plug fuse, use of experience and knowledge, unless they have been given supervision or instruction concerning use a fuse approved by removing the...
Operation Manual - Page 4
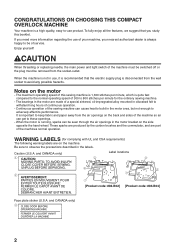
... is disconnected from the wall socket to avoid any possible hazards. CAUTION
When threading or replacing needle, the main power and light switch of the machine must be switched off or the plug must be of service. Notes on the side opposite the hand wheel. It is important to keep fabric and...
Operation Manual - Page 5

...Names of parts and ..., One needle (Three thread 12 Needle...13 Removing/ Installing the needle 13
Chapter 2 : Preparation before threading 14...Troubleshooting...26
Chapter 7: Maintenance...27 Cleaning...27 Oiling ...27
Chapter 8: Introduction of optional feet 28 Blind stitch foot...28 Taping foot...30 Pearl sequence foot...31 Piping foot...32 Gatheing foot...33
Specifications...34
Setting...
Operation Manual - Page 6

... length adjustment dial
4
* The product code is shown on the side and back) Chapter 1 Names of parts and their functions
Inside of the front cover L Thread guide M Lower looper threading lever N Thread take.... : Needle set, : Stitch finger (when removed, see CHAPTER 5 "Narrow overlock/ Rolled hemming stitch"), : Tweezers, : Hexagonal driver
* Air openings (on the machine rating plate.
Operation Manual - Page 7

...Hexagonal driver: XB0393001 8 Needle set (130...Instruction DVD: XB2791001 (NTSC) XB2776001 (PAL)
1
6
7 8 2
LG
Optional accessory
For further information about the following items, see CHAPTER 8.
Contact your authorized Brother dealer.
* The product code is shown on the machine model...code 884-B02
Trim trap: XB2793 for product code 884-B03
LP
LS
9 3
4
0 5
* The part code differs depending on the ...
Operation Manual - Page 12
....
10
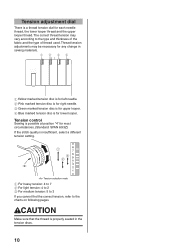
Tension adjustment dial
There is a thread tension dial for most circumstances. (Standard: SPAN 60/3Z) If the stitch quality is insufficient, select a different tension setting.
5
4
3
Tension selection mark
1 For heavy tension: 4 to 7 2 For light tension: 4 to 2 3 For medium tension: 5 to 3
If you cannot find the correct tension, refer to the...
Operation Manual - Page 23

... a low speed to obtain chaining-off is set to sew. Slowly sew a few times toward you, and check to create an even chain. (See CHAPTER 1 "Tension adjustment dial".)
To start sewing
1. If feeding for consistent cutting of the fabric seams. The scale of Seam Allowance Guide shows 9.5, 12.7, 15.9, and 25.4 mm...
Operation Manual - Page 26
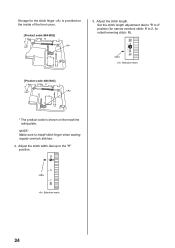
... stitch width dial up to install stitch finger when sewing regular overlock stitches.
4.
Storage for rolled hemming stitch: R).
3
Selection mark
[Product code: 884-B03]
* The product code is provided on the machine rating plate. Selection mark
24 Adjust the stitch length.
NOTE: Make sure to the "R" position. Set the stitch length adjustment dial to...
Operation Manual - Page 28

... 6. Trouble 1. Threads break
4. Needles incorrectly installed
Install needles correctly. (See page 13.)
3. Needle incorrectly installed
Install needle correctly. (See page 13.)
3. Improper threading
Thread correctly. (See pages 15-18.)
5. Does not feed 2. Needles incorrectly installed
Install needles correctly. (See page 13.)
5. Needle bent, or needle tip blunt Replace with...
Operation Manual - Page 30

...once and then back to the left position.
Recommended settings - Needle Thread Tension: 0-3 - Lower Looper Thread Tension: 6-9 The stitch guide on the hand wheel is primarily used for 3 ... off the machine while replacing the presser foot.
5. Upper Looper Thread Tension: 2-5 - Lower the presser foot lever, adjust the fabric guide toward you) the fabric guide will be easier if ...
Operation Manual - Page 31

....
6. When stiching is aligned to any sewing project. Procedure 1. Set up the machine for narrow overlock
stitching. (Refer to choose a ...guide, a piece of the same fabric can be used to the line on the right side of the fabric. For thin fabrics, it's a good idea to CHAPTER 5 "Narrow overlock/ Rolled hemming stitch".) 3. Turn the hand wheel so that some of hand wheel").
5. Set...
Operation Manual - Page 32

... suitable for reinforcement on the machine (see CHAPTER 1 "Attaching/ Removing presser foot"). 2. Usage of the elastic Usage of tapes / elastics. Flip open the tape guide 1, then set along the guide 4. 7. Insert the materials, till the edge of hand wheel"). 4. 7. Align the fold with the line on .
Lift the presser foot lever. 3. Align the...
Operation Manual - Page 33

... decrease Over looper thread: slightly decrease Under looper thread: slightly increase
How to set fabric and pearl
Surface Tape Surface Elastic
NOTE: Thread tensions are alike to have... guiding the pearl and fabric by hand until the pearl comes through the guide just front of curtain, table cloth, dress, etc. Retract the knife (see CHAPTER 1 "Attaching/ Removing presser foot").
3. Set...
Operation Manual - Page 34

... of fabric should
be inside.)
2.
Place fabric with cutting the excess part.
5 ~ 6mm 5 ~ 6mm
32
Carefully guide the fabric and piping tape by hands during sewing.
2. Piping sewing... to decorate on edge of wares (pajamas, sports ware), cover for furniture, cushion, bag, etc. Set stitch width at 3mm. (standard position)
2. Keep 3cm piping tape over the edge of fabric
for ordinary...
Brother International ST4031HDH Reviews
We have not received any reviews for Brother International yet.