
Users Manual - English and Spanish
Page 2
...reasonable protection against harmful interference in order to use, we suggest that the product Product Name : Brother Label Printer P-touch 9600/3600 Model Number : PT-9600/3600 complies with the instructions, may cause undesired operation. Reorient or relocate the receiving antenna -...) file folder labels). In addition, the many pre-formatted templates available make it is subject to Part 15 of Conformity (For USA Only) Responsible Party : Brother International Corporation 100 Somerset Corporate Boulevard Bridgewater, NJ 08807-0911 USA TEL : (908) 704-1700 declares ...
...reasonable protection against harmful interference in order to use, we suggest that the product Product Name : Brother Label Printer P-touch 9600/3600 Model Number : PT-9600/3600 complies with the instructions, may cause undesired operation. Reorient or relocate the receiving antenna -...) file folder labels). In addition, the many pre-formatted templates available make it is subject to Part 15 of Conformity (For USA Only) Responsible Party : Brother International Corporation 100 Somerset Corporate Boulevard Bridgewater, NJ 08807-0911 USA TEL : (908) 704-1700 declares ...

Users Manual - English and Spanish
Page 9
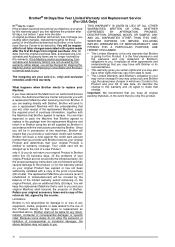
... caused by this Product (including but not limited to transporting this Product without authorization from use refurbished parts provided such replacement products conform to the manufacturer's specifications for the cost of non Brother®-brand parts and Consumable and Accessory Items); (4) Consumable and Accessory Items that this warranty and if you think your...
... caused by this Product (including but not limited to transporting this Product without authorization from use refurbished parts provided such replacement products conform to the manufacturer's specifications for the cost of non Brother®-brand parts and Consumable and Accessory Items); (4) Consumable and Accessory Items that this warranty and if you think your...
Users Manual - English and Spanish
Page 10
...understanding that you will, after receipt of the replacement Machine, supply the required proof of purchase information, together with the Machine that Brother agreed to replace in the package from the replacement Machine and return it to you. EXPRESSED BY AFFIRMATION, PROMISE, DESCRIPTION, DRAWING,... after 90 days, but before 1 year from the date of original purchase, Brother will furnish, free of charge (excluding labor charges), replacement part(s) for those part(s) of the Machine determined by Brother or its representatives. • This warranty gives you certain rights and you may...
...understanding that you will, after receipt of the replacement Machine, supply the required proof of purchase information, together with the Machine that Brother agreed to replace in the package from the replacement Machine and return it to you. EXPRESSED BY AFFIRMATION, PROMISE, DESCRIPTION, DRAWING,... after 90 days, but before 1 year from the date of original purchase, Brother will furnish, free of charge (excluding labor charges), replacement part(s) for those part(s) of the Machine determined by Brother or its representatives. • This warranty gives you certain rights and you may...

Users Manual - English and Spanish
Page 18
... of time, disconnect the AC adaptor, and (for the PT-9600 only) remove the rechargeable battery to prevent it on the dashboard or in part on the tape being fed from leaking and damaging the machine...Macintosh is a registered trademark of AVERY DENNISON CORPORATION. ● IBM® and PC-DOS® are trademarks of International Business Machines, Inc. ● Microsoft® and Windows® are based in the back of the Independent JPEG...Started Ch. 2 Getting Started PRECAUTIONS ● Use only Brother TZ tapes or Brother/Avery AV labels with alcohol or other organic solvents.
... of time, disconnect the AC adaptor, and (for the PT-9600 only) remove the rechargeable battery to prevent it on the dashboard or in part on the tape being fed from leaking and damaging the machine...Macintosh is a registered trademark of AVERY DENNISON CORPORATION. ● IBM® and PC-DOS® are trademarks of International Business Machines, Inc. ● Microsoft® and Windows® are based in the back of the Independent JPEG...Started Ch. 2 Getting Started PRECAUTIONS ● Use only Brother TZ tapes or Brother/Avery AV labels with alcohol or other organic solvents.

Users Manual - English and Spanish
Page 56
... move the cursor one character to the end of the current line of text: ● Hold down d and press m. 44 however, the text that different parts of the text are necessary for using the four arrow keys (j, k, m and g) to the beginning of the next line. To move the cursor one character...
... move the cursor one character to the end of the current line of text: ● Hold down d and press m. 44 however, the text that different parts of the text are necessary for using the four arrow keys (j, k, m and g) to the beginning of the next line. To move the cursor one character...

Users Manual - English and Spanish
Page 61
... add an accented character to the text at least SMALL, otherwise barcodes may be difficult to read the labels. ☞ Barcodes should be printed as part of labels, is added to select the desired letter in the accented character, and then press j or k until the desired accented character is not intended...
... add an accented character to the text at least SMALL, otherwise barcodes may be difficult to read the labels. ☞ Barcodes should be printed as part of labels, is added to select the desired letter in the accented character, and then press j or k until the desired accented character is not intended...

Users Manual - English and Spanish
Page 66
...-right corner of the display and with the width of the available Size settings, refer to page 99. NOTE ☞ If "*****" appears as opposed to part of the current text (either a line in the current block if the Block Format or the Global Format function is displayed. NOTE To apply several...
...-right corner of the display and with the width of the available Size settings, refer to page 99. NOTE ☞ If "*****" appears as opposed to part of the current text (either a line in the current block if the Block Format or the Global Format function is displayed. NOTE To apply several...

Users Manual - English and Spanish
Page 70
... other than OFF is displayed. To change the setting for the Style2 function: 1 Hold down d and press 1, 2 or 3). 4 Press n to underline or strike out certain parts of the label. Press n only after the necessary functions have been set ). Functions Ch. 3 Functions Style2 function (STYLE2) Two more text styles are being applied...
... other than OFF is displayed. To change the setting for the Style2 function: 1 Hold down d and press 1, 2 or 3). 4 Press n to underline or strike out certain parts of the label. Press n only after the necessary functions have been set ). Functions Ch. 3 Functions Style2 function (STYLE2) Two more text styles are being applied...

Users Manual - English and Spanish
Page 71
The lines on the right side of the indicator, starting from a variety of frames and highlights for emphasizing certain parts or all of the text in the current text (if the Global Format function is being applied at the cursor's current position is shown on ...
The lines on the right side of the indicator, starting from a variety of frames and highlights for emphasizing certain parts or all of the text in the current text (if the Global Format function is being applied at the cursor's current position is shown on ...

Users Manual - English and Spanish
Page 86
... selected file number. NOTE To quit the Memory Clear function without erasing any text, press e (OR hold down d and press 8). NOTE ☞ To see other parts of the selected text file, press j or k. ☞ Auto Format template files of the display.
... selected file number. NOTE To quit the Memory Clear function without erasing any text, press e (OR hold down d and press 8). NOTE ☞ To see other parts of the selected text file, press j or k. ☞ Auto Format template files of the display.

Users Manual - English and Spanish
Page 87
NOTE ☞ To see other parts of the selected text file, press j or k. ☞ Auto Format template files of the same tape width are displayed grouped together. 5 Press the space bar ...
NOTE ☞ To see other parts of the selected text file, press j or k. ☞ Auto Format template files of the same tape width are displayed grouped together. 5 Press the space bar ...

Users Manual - English and Spanish
Page 88
... Margin Font Width Size 6 Repeat steps 4 and 5 until the file number containing the text that you wish to mark them with 9. NOTE To see other parts of the selected text file, press j or k. 5 Press the space bar so that are to the right of the file name. NOTE ☞ If multiple...
... Margin Font Width Size 6 Repeat steps 4 and 5 until the file number containing the text that you wish to mark them with 9. NOTE To see other parts of the selected text file, press j or k. 5 Press the space bar so that are to the right of the file name. NOTE ☞ If multiple...

Users Manual - English and Spanish
Page 89
... printed. If only one file is displayed. The text stored under the selected file number is displayed. Files marked with 9. NOTE ☞ To see other parts of the selected text file, press j or k. ☞ Auto Format template files of the same tape width are displayed grouped together. 6 Press the space bar...
... printed. If only one file is displayed. The text stored under the selected file number is displayed. Files marked with 9. NOTE ☞ To see other parts of the selected text file, press j or k. ☞ Auto Format template files of the same tape width are displayed grouped together. 6 Press the space bar...

Users Manual - English and Spanish
Page 90
... MENU screen appears in the display. To finish using the Auto Format function: K Press m or g until 9 moves beside PRINT MORE. NOTE ☞ To see other parts of the selected text file, press j or k. ☞ Auto Format template files of the same tape width are to be printed, steps G and H can be...
... MENU screen appears in the display. To finish using the Auto Format function: K Press m or g until 9 moves beside PRINT MORE. NOTE ☞ To see other parts of the selected text file, press j or k. ☞ Auto Format template files of the same tape width are to be printed, steps G and H can be...

Software Users Manual - English and Spanish
Page 12
Any part of the image that extends out of this size will not ... F K QQQQQQQQQQQQ RJ AUTO 0.4 HELSINKI A AUTO Length Margin Font Width Size While data is being sent from the PT-9600 to the computer, the following screen appears. will have the size of a user-defined character image that character can be... be added to any other character and formatted using almost all text format functions. While data is being sent from the computer to the PT-9600, the following screen appears. R1 2 RRRG H RI NOLM 3 4 5 6789 AB SENDING C D E F K QQQQQQQQQQQQ RJ AUTO...
Any part of the image that extends out of this size will not ... F K QQQQQQQQQQQQ RJ AUTO 0.4 HELSINKI A AUTO Length Margin Font Width Size While data is being sent from the PT-9600 to the computer, the following screen appears. will have the size of a user-defined character image that character can be... be added to any other character and formatted using almost all text format functions. While data is being sent from the computer to the PT-9600, the following screen appears. R1 2 RRRG H RI NOLM 3 4 5 6789 AB SENDING C D E F K QQQQQQQQQQQQ RJ AUTO...

Service Manual
Page 3
... and apply this publication may be reproduced in writing from the publisher. It is intended for our PT-9600/3600. This manual is made up of the Brother PT9600/3600. LCD PCB CIRCUIT DIAGRAMS © Copyright Brother 2002 All rights reserved. PREFACE This publication is a service manual covering the specifications, theory of operation, disassembly... by any means without notice. CHAPTER I CHAPTER II CHAPTER III CHAPTER IV APPENDICES SPECIFICATIONS THEORY OF OPERATION DISASSEMBLY AND REASSEMBLY TROUBLESHOOTING AND ERROR MESSAGE 1. No part of this manual.
... and apply this publication may be reproduced in writing from the publisher. It is intended for our PT-9600/3600. This manual is made up of the Brother PT9600/3600. LCD PCB CIRCUIT DIAGRAMS © Copyright Brother 2002 All rights reserved. PREFACE This publication is a service manual covering the specifications, theory of operation, disassembly... by any means without notice. CHAPTER I CHAPTER II CHAPTER III CHAPTER IV APPENDICES SPECIFICATIONS THEORY OF OPERATION DISASSEMBLY AND REASSEMBLY TROUBLESHOOTING AND ERROR MESSAGE 1. No part of this manual.

Service Manual
Page 35
Otherwise, the LSIs and electronic parts may be damaged due to the torque values listed below. Tightening Torque List Location ..., pan M1.7x3 Taptite, bind B M2.6x8 Taptite, bind B M2.6x8 Screw, pan M1.7x3 Taptite, bind B M2x4 *1 : Only for parts replacement. (5) Tighten screws to the electricity charged in your body. (2) When transporting PCBs, be carried out on a grounded antistatic sheet. Q'ty Tightening...When using soldering irons and other heat-generating tools, take care not to damage the resin parts such as wires, PCBs, and covers. (4) Be careful not to lose screws,washers, or other...
Otherwise, the LSIs and electronic parts may be damaged due to the torque values listed below. Tightening Torque List Location ..., pan M1.7x3 Taptite, bind B M2.6x8 Taptite, bind B M2.6x8 Screw, pan M1.7x3 Taptite, bind B M2x4 *1 : Only for parts replacement. (5) Tighten screws to the electricity charged in your body. (2) When transporting PCBs, be carried out on a grounded antistatic sheet. Q'ty Tightening...When using soldering irons and other heat-generating tools, take care not to damage the resin parts such as wires, PCBs, and covers. (4) Be careful not to lose screws,washers, or other...

Service Manual
Page 93
...key ). Solder Point Check This mode checks the solder points. Note 3: The following modes are used only at the replacement of main PCB and the parts of repairs. Note: First, release the "ON/OFF" key and then release the "Code" and "K" keys. 1.1. Inspection Mode Starting Procedure The ...Inspection Mode is initiated by holding down the "Code", "K" and "ON/OFF" keys simultaneously when the internal RAM is cleared while electrical power is ON. 2. Note 1: Depression of the mode selection key allows shifting to the modes listed below shows...
...key ). Solder Point Check This mode checks the solder points. Note 3: The following modes are used only at the replacement of main PCB and the parts of repairs. Note: First, release the "ON/OFF" key and then release the "Code" and "K" keys. 1.1. Inspection Mode Starting Procedure The ...Inspection Mode is initiated by holding down the "Code", "K" and "ON/OFF" keys simultaneously when the internal RAM is cleared while electrical power is ON. 2. Note 1: Depression of the mode selection key allows shifting to the modes listed below shows...

Service Manual
Page 98
... must enter the Full Cutter Adjustment Mode and the Tape Control Motor Excitation-Phase Check Mode after the replacement of the main PCB or the parts of half cut operation are executed forward and backward according to the specified step length as shown in Fig.17. The machine starts the sample...
... must enter the Full Cutter Adjustment Mode and the Tape Control Motor Excitation-Phase Check Mode after the replacement of the main PCB or the parts of half cut operation are executed forward and backward according to the specified step length as shown in Fig.17. The machine starts the sample...

