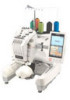

Installation Guide for KIT CW PRCW1
Page 6
Usage Precautions z Be sure to "Maintenance" in the machine's Operation Manual. Preparation 1 • Videos of the preparation procedure can be viewed by clicking "Preparation" in the chapter index of the supplied ...
Usage Precautions z Be sure to "Maintenance" in the machine's Operation Manual. Preparation 1 • Videos of the preparation procedure can be viewed by clicking "Preparation" in the chapter index of the supplied ...
Installation Guide for KIT CW PRCW1
Page 8
... is required for use in the manuals are combined into a single manual file. Note • Adobe® Reader® is used on the care and maintenance of functions other than the cutwork functions, start the PE-DESIGN NEXT application, and then click shown in the Operation Manual. The appearance of the...
... is required for use in the manuals are combined into a single manual file. Note • Adobe® Reader® is used on the care and maintenance of functions other than the cutwork functions, start the PE-DESIGN NEXT application, and then click shown in the Operation Manual. The appearance of the...

Upgrade KIT CW Operation Manual PRCW1
Page 18
b Soak the fabric in warm water to "Maintenance" in chapter 7 of the embroidery pattern. b Remove the needle plate and then use the brush to remove any fabric scraps and lint. Note • When ...
b Soak the fabric in warm water to "Maintenance" in chapter 7 of the embroidery pattern. b Remove the needle plate and then use the brush to remove any fabric scraps and lint. Note • When ...

Operation Manual
Page 14
... that appear in the main LCD screens are provided in order-from turning on the machine and sewing a pattern to the list of titles on maintenance procedures and corrective measures that should be provided. Searching for information ■ Searching the manual By title Check the descriptions at the end of this...
... that appear in the main LCD screens are provided in order-from turning on the machine and sewing a pattern to the list of titles on maintenance procedures and corrective measures that should be provided. Searching for information ■ Searching the manual By title Check the descriptions at the end of this...
Operation Manual
Page 18
... Precautions ...240 Optional bobbin winder and its accessories 240 Setting up the optional bobbin winder ...241 Connecting the AC adapter ...241 Winding the bobbin ...242 Maintenance...245 Cleaning the LCD...245 16
... Precautions ...240 Optional bobbin winder and its accessories 240 Setting up the optional bobbin winder ...241 Connecting the AC adapter ...241 Winding the bobbin ...242 Maintenance...245 Cleaning the LCD...245 16

Operation Manual
Page 19
... around the needle plate ...246 Cleaning the bobbin case ...247 Cleaning the thread paths of the upper threads 248 Oiling the machine ...250 About the maintenance message...251 Troubleshooting ...252 On-screen troubleshooting ...252 Troubleshooting...253 Error messages ...261 If the machine does not respond when a key is pressed 269 Specifications...
... around the needle plate ...246 Cleaning the bobbin case ...247 Cleaning the thread paths of the upper threads 248 Oiling the machine ...250 About the maintenance message...251 Troubleshooting ...252 On-screen troubleshooting ...252 Troubleshooting...253 Error messages ...261 If the machine does not respond when a key is pressed 269 Specifications...

Operation Manual
Page 197
... Set "Thread Sensor" to either displayed ("ON") or not displayed ("OFF") when the machine is used since the machine's last maintenance. The keys and messages appear in the selected language. (Refer to a specific needle bar. The specified color remains assigned to the...to page 271.) 6 Note ● Check with your local authorized Brother dealer or at "http://solutions.brother.com" for details on available updates. Use counters K and L as a standard for performing periodic maintenance and for receiving maintenance for the embroidery machine. N Version Shows the version of the ...
... Set "Thread Sensor" to either displayed ("ON") or not displayed ("OFF") when the machine is used since the machine's last maintenance. The keys and messages appear in the selected language. (Refer to a specific needle bar. The specified color remains assigned to the...to page 271.) 6 Note ● Check with your local authorized Brother dealer or at "http://solutions.brother.com" for details on available updates. Use counters K and L as a standard for performing periodic maintenance and for receiving maintenance for the embroidery machine. N Version Shows the version of the ...

Operation Manual
Page 208
Basic Operation Illustrates basic threading and hooping instruction. Maintenance Instruction for problems solving. Troubleshooting Basic guide for maintaining your machine. 206 Touch (machine operations guide key), and then select from the four topics that ...
Basic Operation Illustrates basic threading and hooping instruction. Maintenance Instruction for problems solving. Troubleshooting Basic guide for maintaining your machine. 206 Touch (machine operations guide key), and then select from the four topics that ...

Operation Manual
Page 211
...bobbin winder and its accessories 240 Setting up the optional bobbin winder 241 Connecting the AC adapter ...........241 Winding the bobbin 242 Maintenance 245 Cleaning the LCD 245 Cleaning the machine surface .......245 Cleaning the hook 245 Cleaning around the needle plate .....246 Cleaning ..., and details on the fabric 218 Color thread table 220 Colors of the upper threads 248 Oiling the machine 250 About the maintenance message...251 Troubleshooting 252 On-screen troubleshooting ...........252 Troubleshooting 253 Error messages 261 If the machine does not respond when a key ...
...bobbin winder and its accessories 240 Setting up the optional bobbin winder 241 Connecting the AC adapter ...........241 Winding the bobbin 242 Maintenance 245 Cleaning the LCD 245 Cleaning the machine surface .......245 Cleaning the hook 245 Cleaning around the needle plate .....246 Cleaning ..., and details on the fabric 218 Color thread table 220 Colors of the upper threads 248 Oiling the machine 250 About the maintenance message...251 Troubleshooting 252 On-screen troubleshooting ...........252 Troubleshooting 253 Error messages 261 If the machine does not respond when a key ...

Operation Manual
Page 247
...cloth, wipe it with a dry cloth. Cleaning the hook Periodically remove lint and dust for better performance from Hook race area. Maintenance Simple embroidery machine maintenance operations are described below. Cleaning the LCD If the surface of the machine. Open the hook cover, and remove the 2 bobbin... case. (Refer to page 36.) 7 Maintenance 245 Use the included cleaning brush. Always keep the machine clean, otherwise malfunctions may occur. Note ● Do not use organic cleansers ...
...cloth, wipe it with a dry cloth. Cleaning the hook Periodically remove lint and dust for better performance from Hook race area. Maintenance Simple embroidery machine maintenance operations are described below. Cleaning the LCD If the surface of the machine. Open the hook cover, and remove the 2 bobbin... case. (Refer to page 36.) 7 Maintenance 245 Use the included cleaning brush. Always keep the machine clean, otherwise malfunctions may occur. Note ● Do not use organic cleansers ...

Operation Manual
Page 249
Cleaning the bobbin case Thread wax and dust easily collect around the hole. 1 Needle plate 7 1 Tension-adjusting spring 2 Hole 3 Paper Maintenance 247 Use a corner of a business card. Use a piece of paper with the thickness of the paper to remove any dust. Open the hook cover, remove ...
Cleaning the bobbin case Thread wax and dust easily collect around the hole. 1 Needle plate 7 1 Tension-adjusting spring 2 Hole 3 Paper Maintenance 247 Use a corner of a business card. Use a piece of paper with the thickness of the paper to remove any dust. Open the hook cover, remove ...

Operation Manual
Page 251
... sure not to lose any parts or install any lint and dust from the two pieces of felt washers (top, bottom) inside the tension dial. Maintenance 249 Reassembling the tension unit. 3 Note ● When reassembling the tension unit, be careful not to install the tension disc upsidedown. ■ Disassembling and cleaning...
... sure not to lose any parts or install any lint and dust from the two pieces of felt washers (top, bottom) inside the tension dial. Maintenance 249 Reassembling the tension unit. 3 Note ● When reassembling the tension unit, be careful not to install the tension disc upsidedown. ■ Disassembling and cleaning...

Operation Manual
Page 253
... Such steps will help to page 97). Although this message will disappear and the machine will display several more times until the appropriate maintenance is performed. Maintenance 251 About the maintenance message 1 Apply oil here. • Too much oil. Note ● Put a drop of oil onto the hook once a...If too much oil is recommended to take the time to function once you receive continued, uninterrupted hours of machine operation for a regular maintenance check. Put one drop of oil on the lower needle bar felt washer every 40 - 50 hours of the hook becomes loud,...
... Such steps will help to page 97). Although this message will disappear and the machine will display several more times until the appropriate maintenance is performed. Maintenance 251 About the maintenance message 1 Apply oil here. • Too much oil. Note ● Put a drop of oil onto the hook once a...If too much oil is recommended to take the time to function once you receive continued, uninterrupted hours of machine operation for a regular maintenance check. Put one drop of oil on the lower needle bar felt washer every 40 - 50 hours of the hook becomes loud,...

Operation Manual
Page 266
... the race, and then oil it. (Refer to page 251.) The machine is too large for other reasons Cancel the write protection. The machine needs maintenance. (Refer to page 247 and 251.) 264 The combined character pattern is write-protected. related to The USB media is The motor has locked up...
... the race, and then oil it. (Refer to page 251.) The machine is too large for other reasons Cancel the write protection. The machine needs maintenance. (Refer to page 247 and 251.) 264 The combined character pattern is write-protected. related to The USB media is The motor has locked up...

Operation Manual
Page 275
... image 46 thread spool changes 101 thread tension 67 Cleaning around the needle plate 246 bobbin case 247 hook 245 LCD 245 machine surface 245 maintenance message 251 oiling machine 250 thread paths 248 Color information 197 Color thread table 220 Combining patterns 162 Common screen 70 Computer port 81 USB...
... image 46 thread spool changes 101 thread tension 67 Cleaning around the needle plate 246 bobbin case 247 hook 245 LCD 245 machine surface 245 maintenance message 251 oiling machine 250 thread paths 248 Color information 197 Color thread table 220 Combining patterns 162 Common screen 70 Computer port 81 USB...

Operation Manual
Page 276
... Locking the needle bar 97 Low Profile (Low fitting 226 Lower thread guide 20 M Machine operations guide key 206 Main power switch 21, 38, 69 Maintenance 206, 245 Manual needle bar settings 132 Maximum sewing speed key 78 Middle thread guide 20 Monogram and frame designs 142 Mounting jig cap frame...
... Locking the needle bar 97 Low Profile (Low fitting 226 Lower thread guide 20 M Machine operations guide key 206 Main power switch 21, 38, 69 Maintenance 206, 245 Manual needle bar settings 132 Maximum sewing speed key 78 Middle thread guide 20 Monogram and frame designs 142 Mounting jig cap frame...


