Software Users Manual - English
Page 2
...Brother printer driver...2 Printing a document...3 Duplex (two-sided) printing ...4 Guidelines for printing on both sides of the paper 4 Manual duplex (two-sided) printing...4 Automatic duplex (two-sided) printing (For models that support automatic duplex printing 5 Simultaneous scanning, printing and faxing 5 Printer operation key...6 Job Cancel...6 Secure Key ...6 Printer Emulation Support ...7 Printing the Internal...two-sided) (For MFC-8660DN, MFC-8860DN, MFC-8870DW and DCP-8065DN 18 Duplex (For MFC-8460N and DCP-8060 19 Watermark ...21 Page Setting ...23 Device Options ...24 Support tab...
...Brother printer driver...2 Printing a document...3 Duplex (two-sided) printing ...4 Guidelines for printing on both sides of the paper 4 Manual duplex (two-sided) printing...4 Automatic duplex (two-sided) printing (For models that support automatic duplex printing 5 Simultaneous scanning, printing and faxing 5 Printer operation key...6 Job Cancel...6 Secure Key ...6 Printer Emulation Support ...7 Printing the Internal...two-sided) (For MFC-8660DN, MFC-8860DN, MFC-8870DW and DCP-8065DN 18 Duplex (For MFC-8460N and DCP-8060 19 Watermark ...21 Page Setting ...23 Device Options ...24 Support tab...
Software Users Manual - English
Page 3
...; SE with OCR 56 3 ControlCenter2 Using ControlCenter2 ...57 Turning the AutoLoad feature off...58 SCAN...59 CUSTOM SCAN ...59 COPY ...59 PC-FAX (Not available for DCP models 60 DEVICE SETTINGS ...60 SCAN...61 Image (example: Microsoft Paint)...61 OCR (word processing application 63 E-mail ...64 Supported... file types...65 File ...65 CUSTOM SCAN ...66 Customizing a user-defined button...67 COPY ...71 PC-FAX (Not available for DCP models 73 Send ...73 Receive/View Received...73 Address Book ...74 Setup ...74 DEVICE SETTINGS ......
...; SE with OCR 56 3 ControlCenter2 Using ControlCenter2 ...57 Turning the AutoLoad feature off...58 SCAN...59 CUSTOM SCAN ...59 COPY ...59 PC-FAX (Not available for DCP models 60 DEVICE SETTINGS ...60 SCAN...61 Image (example: Microsoft Paint)...61 OCR (word processing application 63 E-mail ...64 Supported... file types...65 File ...65 CUSTOM SCAN ...66 Customizing a user-defined button...67 COPY ...71 PC-FAX (Not available for DCP models 73 Send ...73 Receive/View Received...73 Address Book ...74 Setup ...74 DEVICE SETTINGS ......
Software Users Manual - English
Page 4
... (E-mail Server) (For MFC-8860DN and MFC-8870DW 81 Scan to Image ...82 Scan to OCR ...83 Scan to File...84 Scan to FTP...85 Scan to FTP Manual Method...87 5 Remote Setup (Not available for DCP models) Remote Setup...89 6 Brother PC-FAX Software (Not available for DCP models) PC-FAX sending ...91 Setting up user information...
... (E-mail Server) (For MFC-8860DN and MFC-8870DW 81 Scan to Image ...82 Scan to OCR ...83 Scan to File...84 Scan to FTP...85 Scan to FTP Manual Method...87 5 Remote Setup (Not available for DCP models) Remote Setup...89 6 Brother PC-FAX Software (Not available for DCP models) PC-FAX sending ...91 Setting up user information...
Software Users Manual - English
Page 5
... ...111 Job Cancel...111 Secure Key ...111 Printer Emulation Support ...112 Printing the Internal Font List...113 Printing the Print Configuration List 113 Restoring default printer settings...113 Status...114 Web Based Management (Network models Only 114 Using the Brother Laser driver for Macintosh® (Mac OS® X 115 Choosing page setup options ...Not available for DCP models 128 For Mac OS® X...128 For Mac OS® 9.1 - 9.2 ...131 8 Scanning Scanning from a Macintosh® ...133 Accessing the scanner ...133 Scanning an image into your Macintosh 134 Pre-Scanning an image ......
... ...111 Job Cancel...111 Secure Key ...111 Printer Emulation Support ...112 Printing the Internal Font List...113 Printing the Print Configuration List 113 Restoring default printer settings...113 Status...114 Web Based Management (Network models Only 114 Using the Brother Laser driver for Macintosh® (Mac OS® X 115 Choosing page setup options ...Not available for DCP models 128 For Mac OS® X...128 For Mac OS® 9.1 - 9.2 ...131 8 Scanning Scanning from a Macintosh® ...133 Accessing the scanner ...133 Scanning an image into your Macintosh 134 Pre-Scanning an image ......
Software Users Manual - English
Page 6
... Monitor ...162 10 Network Scanning (Not available for DCP-8060) Before using Network Scanning ...163 Configuring network scanning ...163 Using the Scan key...165 Scan to E-mail (PC)...165 Scan to E-mail (E-mail server) (For MFC-8860DN and MFC-8870DW 166 Scan to Image ...168 Scan to OCR ...169 Scan to File...170 Scan to FTP...171 Scan to FTP Manual Method...173...
... Monitor ...162 10 Network Scanning (Not available for DCP-8060) Before using Network Scanning ...163 Configuring network scanning ...163 Using the Scan key...165 Scan to E-mail (PC)...165 Scan to E-mail (E-mail server) (For MFC-8860DN and MFC-8870DW 166 Scan to Image ...168 Scan to OCR ...169 Scan to File...170 Scan to FTP...171 Scan to FTP Manual Method...173...
Software Users Manual - English
Page 7
Section I Windows® I Printing 2 Scanning 34 ControlCenter2 57 Network Scanning (For models with built-in network support) 77 Remote Setup (Not available for DCP models) 89 Brother PC-FAX Software (Not available for DCP models) 91
Section I Windows® I Printing 2 Scanning 34 ControlCenter2 57 Network Scanning (For models with built-in network support) 77 Remote Setup (Not available for DCP models) 89 Brother PC-FAX Software (Not available for DCP models) 91

Software Users Manual - English
Page 11
b For the Windows printer driver 1 Open the Properties dialog box in memory, or while scanning a document into the computer. Fax sending will print on both sides of the paper automatically. For the BR-Script printer driver 1 Open the Properties dialog .... 3 From the Layout tab, choose Orientation, Print on paper, it back in the paper tray. • You should use bond paper or thin paper. Simultaneous scanning, printing and faxing 1 Your machine can print from your computer while sending or receiving a fax in the printer driver. 2 From the General tab, click the...
b For the Windows printer driver 1 Open the Properties dialog box in memory, or while scanning a document into the computer. Fax sending will print on both sides of the paper automatically. For the BR-Script printer driver 1 Open the Properties dialog .... 3 From the Layout tab, choose Orientation, Print on paper, it back in the paper tray. • You should use bond paper or thin paper. Simultaneous scanning, printing and faxing 1 Your machine can print from your computer while sending or receiving a fax in the printer driver. 2 From the General tab, click the...
Software Users Manual - English
Page 40
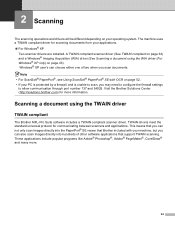
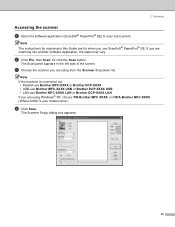
... different depending on page 34) and a Windows® Imaging Acquisition (WIA) driver (See Scanning a document using the TWAIN driver 2 TWAIN compliant 2 The Brother MFL-Pro Suite software includes a TWAIN compliant scanner driver. Visit the Brother Solutions Center (http://solutions.brother.com) for more . 34 A TWAIN compliant scanner driver (See TWAIN compliant on your machine...
... different depending on page 34) and a Windows® Imaging Acquisition (WIA) driver (See Scanning a document using the TWAIN driver 2 TWAIN compliant 2 The Brother MFL-Pro Suite software includes a TWAIN compliant scanner driver. Visit the Brother Solutions Center (http://solutions.brother.com) for more . 34 A TWAIN compliant scanner driver (See TWAIN compliant on your machine...
Software Users Manual - English
Page 41
... If the machine is your model name.) d Click Scan. If you are using Windows® XP, choose TW-Brother MFC XXXX, not WIA-Brother MFC-XXXX. (Where XXXX is connected via: • Parallel-use Brother MFC-XXXX or Brother DCP-XXXX • USB-use Brother MFC-XXXX USB or Brother DCP-XXXX USB • LAN-use ScanSoft® PaperPort...
... If the machine is your model name.) d Click Scan. If you are using Windows® XP, choose TW-Brother MFC XXXX, not WIA-Brother MFC-XXXX. (Where XXXX is connected via: • Parallel-use Brother MFC-XXXX or Brother DCP-XXXX • USB-use Brother MFC-XXXX USB or Brother DCP-XXXX USB • LAN-use ScanSoft® PaperPort...

Software Users Manual - English
Page 42
... document face up in the Scanner Setup dialog box: „ Scan (Image Type) (1) „ Resolution (2) „ Scan Type (3) „ Brightness (4) „ Contrast (5) „ Document Size (6) 1 2 3 4 5 6 c Click Start. When scanning is required when you can scan a whole page, or scan a portion of the page after pre-scanning the document. 2. Scanning Scanning a document into the PC 2 You can adjust the...
... document face up in the Scanner Setup dialog box: „ Scan (Image Type) (1) „ Resolution (2) „ Scan Type (3) „ Brightness (4) „ Contrast (5) „ Document Size (6) 1 2 3 4 5 6 c Click Start. When scanning is required when you can scan a whole page, or scan a portion of the page after pre-scanning the document. 2. Scanning Scanning a document into the PC 2 You can adjust the...

Software Users Manual - English
Page 43
...; You can not use the PreScan button to preview an image. 37 Scanning Scanning a duplex document (For models that support duplex scanning) 2 a Put the document face up in the Scanner Setup dialog box: „ Scan (Image Type) „ Resolution „ Scan Type „ Brightness „ Contrast „ Document Size d Click Start. 2. b Check Duplex (Two-sided...
...; You can not use the PreScan button to preview an image. 37 Scanning Scanning a duplex document (For models that support duplex scanning) 2 a Put the document face up in the Scanner Setup dialog box: „ Scan (Image Type) „ Resolution „ Scan Type „ Brightness „ Contrast „ Document Size d Click Start. 2. b Check Duplex (Two-sided...

Software Users Manual - English
Page 44
c Click PreScan. The whole image is used to scan the image. d Press and hold down on the scanner glass. 1 1 Scanning area b Choose the settings for cropping any unwanted areas from the image. Scanning Pre-Scanning to crop a portion you want to scan. 1 Scanning area 1 38 a Put the document face up in the ADF,...it over the portion you are satisfied with the preview, click the Start button in the Scanning Area of the Scanner Setup dialog box. When you want to scan 2 The PreScan button is scanned into the PC and appears in the Scanner Setup dialog box to preview an image for...
c Click PreScan. The whole image is used to scan the image. d Press and hold down on the scanner glass. 1 1 Scanning area b Choose the settings for cropping any unwanted areas from the image. Scanning Pre-Scanning to crop a portion you want to scan. 1 Scanning area 1 38 a Put the document face up in the ADF,...it over the portion you are satisfied with the preview, click the Start button in the Scanning Area of the Scanner Setup dialog box. When you want to scan 2 The PreScan button is scanned into the PC and appears in the Scanner Setup dialog box to preview an image for...

Software Users Manual - English
Page 45
2. Scanning Note You can enlarge the image using the original size. icon, and then use the options available to its e Load your application window). This time only the chosen area of the document appears in a. g In the PaperPort® SE window, use the icon to restore the image to refine the image. 39 f Click Start. Note Skip this step if you loaded the document on the scanner glass in the PaperPort® SE window (or your document again.
2. Scanning Note You can enlarge the image using the original size. icon, and then use the options available to its e Load your application window). This time only the chosen area of the document appears in a. g In the PaperPort® SE window, use the icon to restore the image to refine the image. 39 f Click Start. Note Skip this step if you loaded the document on the scanner glass in the PaperPort® SE window (or your document again.

Software Users Manual - English
Page 46
... from the Resolution drop-down list. Higher resolutions take more exact because it uses up to 256 shades of gray.) „ True Gray Use for scanning text documents. 200 × 200 dpi Scan Type 24-bit color 24-bit color Black & White Resolution 2 You can choose and the available colors... Yes Yes Yes Yes No No No No No True Gray/24 bit color Yes Yes Yes Yes Yes Yes Yes Yes Yes Yes Yes Scan Type 2 „ Black & White Use for text or line art. „ Gray (Error Diffusion) Use for photographic images or graphics. (Error Diffusion is more memory...
... from the Resolution drop-down list. Higher resolutions take more exact because it uses up to 256 shades of gray.) „ True Gray Use for scanning text documents. 200 × 200 dpi Scan Type 24-bit color 24-bit color Black & White Resolution 2 You can choose and the available colors... Yes Yes Yes Yes No No No No No True Gray/24 bit color Yes Yes Yes Yes Yes Yes Yes Yes Yes Yes Yes Scan Type 2 „ Black & White Use for text or line art. „ Gray (Error Diffusion) Use for photographic images or graphics. (Error Diffusion is more memory...

Software Users Manual - English
Page 47
...Color (Fast) Select for color documents that contain photographic images or graphics. If the image is too light, set a higher Brightness level and scan the document again. Note The Contrast setting is only available when Gray or True Gray is chosen. Brightness 2 Adjust the setting (-50 to...× 11 in „ Legal 8 1/2 × 14 in „ A5 148 × 210 mm „ Executive 7 1/4 × 10 1/2 in „ Business Card To scan business cards, choose the Business Card size, and then put the business card face down at the center of the image, while a decrease reveals more...
...Color (Fast) Select for color documents that contain photographic images or graphics. If the image is too light, set a higher Brightness level and scan the document again. Note The Contrast setting is only available when Gray or True Gray is chosen. Brightness 2 Adjust the setting (-50 to...× 11 in „ Legal 8 1/2 × 14 in „ A5 148 × 210 mm „ Executive 7 1/4 × 10 1/2 in „ Business Card To scan business cards, choose the Business Card size, and then put the business card face down at the center of the image, while a decrease reveals more...

Software Users Manual - English
Page 48
... × 8.9 mm to 215.9 × 355.6 mm) If you chose on the screen. • Width: shows the width of scanning area • Height: shows the height of scanning area • Data Size: shows the rough data size in a word processor or other graphics application, try different settings for the document.... Scanning When scanning photographs or other file formats such as the size, the Custom Document Size dialog box appears. Note You can choose 'mm' or '...
... × 8.9 mm to 215.9 × 355.6 mm) If you chose on the screen. • Width: shows the width of scanning area • Height: shows the height of scanning area • Data Size: shows the rough data size in a word processor or other graphics application, try different settings for the document.... Scanning When scanning photographs or other file formats such as the size, the Custom Document Size dialog box appears. Note You can choose 'mm' or '...
Software Users Manual - English
Page 49
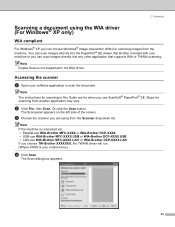
...choose Windows® Image Acquisition (WIA) for when you use WIA-Brother MFC-XXXX LAN or WIA-Brother DCP-XXXX LAN If you can scan images directly into any other application that Brother included with your software application to scan the document. Note If the machine is connected via: • ...Parallel-use WIA-Brother MFC-XXXX or WIA-Brother DCP-XXXX • USB-use WIA-Brother MFC-XXXX USB or WIA-Brother DCP-XXXX USB • LAN-use ScanSoft® PaperPort® SE. b Click File, then Scan. Or click the Scan button. The Scan panel appears on the left side of...
...choose Windows® Image Acquisition (WIA) for when you use WIA-Brother MFC-XXXX LAN or WIA-Brother DCP-XXXX LAN If you can scan images directly into any other application that Brother included with your software application to scan the document. Note If the machine is connected via: • ...Parallel-use WIA-Brother MFC-XXXX or WIA-Brother DCP-XXXX • USB-use WIA-Brother MFC-XXXX USB or WIA-Brother DCP-XXXX USB • LAN-use ScanSoft® PaperPort® SE. b Click File, then Scan. Or click the Scan button. The Scan panel appears on the left side of...

Software Users Manual - English
Page 50
...size from the Paper source drop-down list (4). 44 You can scan a whole page. Scanning Scanning a document into the PC 2 There are two ways in the ADF. 1 2 3 4 1 Paper source 2 Picture type 3 Adjust the quality of a page after pre-scanning the document, you need to use the scanner glass. (See ...Pre-Scanning to crop a portion you want to scan on page 38.) Scanning a document using the ADF 2 a Put the document face up in which you can either ...
...size from the Paper source drop-down list (4). 44 You can scan a whole page. Scanning Scanning a document into the PC 2 There are two ways in the ADF. 1 2 3 4 1 Paper source 2 Picture type 3 Adjust the quality of a page after pre-scanning the document, you need to use the scanner glass. (See ...Pre-Scanning to crop a portion you want to scan on page 38.) Scanning a document using the ADF 2 a Put the document face up in which you can either ...

Software Users Manual - English
Page 51
Note The scanner resolution can choose Brightness, Contrast, Resolution and Picture type from Advanced Properties. You can be set as high as 1200 dpi. For resolutions greater than 1200 dpi, use the Brother Scanner Utility. (See Brother Scanner Utility on page 47.) f Click the Scan button in the Scan dialog box. The machine starts scanning the document. 45 Click OK after you need advanced settings, click Adjust the quality of the scanned picture (3). 2. Scanning e If you choose a setting.
Note The scanner resolution can choose Brightness, Contrast, Resolution and Picture type from Advanced Properties. You can be set as high as 1200 dpi. For resolutions greater than 1200 dpi, use the Brother Scanner Utility. (See Brother Scanner Utility on page 47.) f Click the Scan button in the Scan dialog box. The machine starts scanning the document. 45 Click OK after you need advanced settings, click Adjust the quality of the scanned picture (3). 2. Scanning e If you choose a setting.

Software Users Manual - English
Page 52
...document face down list (1). 1 4 2 3 1 Paper source 2 Picture type 3 Adjust the quality of the scanned picture 4 Scanning area c Choose the picture type (2). 2. Scanning Pre-Scanning to crop a portion you want to scan the image. b Choose Flatbed in the Paper source drop-down on the scanner glass. e Press and hold ... with the preview, click the Scan button in the scanning area (4). d Click Preview. The whole image is used to scan using the scanner glass 2 The Preview button is scanned into the PC and appears in the Scan dialog box to scan. 46 When you want to ...
...document face down list (1). 1 4 2 3 1 Paper source 2 Picture type 3 Adjust the quality of the scanned picture 4 Scanning area c Choose the picture type (2). 2. Scanning Pre-Scanning to crop a portion you want to scan the image. b Choose Flatbed in the Paper source drop-down on the scanner glass. e Press and hold ... with the preview, click the Scan button in the scanning area (4). d Click Preview. The whole image is used to scan using the scanner glass 2 The Preview button is scanned into the PC and appears in the Scan dialog box to scan. 46 When you want to ...


