

Instructions for Use
Page 38
... automatically start at the beginning of the oven. Wipe rack edges with a soapy sponge, rinsed and dried. If stubborn soil remains, follow the guidelines on hinge toward you want the self-clean to remove oven door. 2. Flip lever on this happens, remove ash with a damp cloth before attempting to end: Set...
... automatically start at the beginning of the oven. Wipe rack edges with a soapy sponge, rinsed and dried. If stubborn soil remains, follow the guidelines on hinge toward you want the self-clean to remove oven door. 2. Flip lever on this happens, remove ash with a damp cloth before attempting to end: Set...

Instructions for Use
Page 39
... the appliance and lights are cool and power to the appliance has been turned off before replacing the light bulb(s). Handle carefully to expose hinges and slots. Handle carefully to avoid breaking. • Grasp only the sides of glass. Close the door to approximately halfway open English ... in personal injury or product damage. • To avoid injury from you (back toward range). 3. The door front is heavy. 6. Hold firmly, the door is glass. Figure 17: Hinge Positions 1. After moving the hinge brackets back down into position, be sure that it may swing in your hand and cause...
... the appliance and lights are cool and power to the appliance has been turned off before replacing the light bulb(s). Handle carefully to expose hinges and slots. Handle carefully to avoid breaking. • Grasp only the sides of glass. Close the door to approximately halfway open English ... in personal injury or product damage. • To avoid injury from you (back toward range). 3. The door front is heavy. 6. Hold firmly, the door is glass. Figure 17: Hinge Positions 1. After moving the hinge brackets back down into position, be sure that it may swing in your hand and cause...
Instructions for Use
Page 42
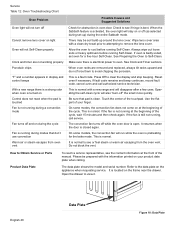
...oven vent Possible Causes and Suggested Solutions Check for obstruction in display and control beeps With a new range there is a strong odor when oven is turned on Control does not react when the pad is ... again. How to Obtain Service or Parts Product Data Plate To reach a service representative, see if hinge is normal. Refer to the data plate on or off (as selected during set oven for the ...bake mode. Open the drawer to Self-Clean. Wipe lens cover area with a new range and will disappear after a few uses. See Preparing the Oven to view it. If fault code remains ...
...oven vent Possible Causes and Suggested Solutions Check for obstruction in display and control beeps With a new range there is a strong odor when oven is turned on Control does not react when the pad is ... again. How to Obtain Service or Parts Product Data Plate To reach a service representative, see if hinge is normal. Refer to the data plate on or off (as selected during set oven for the ...bake mode. Open the drawer to Self-Clean. Wipe lens cover area with a new range and will disappear after a few uses. See Preparing the Oven to view it. If fault code remains ...

Installation Instructions
Page 43
...closed, be damaged and injury could result. • Do not lay removed door on sharp or pointed objects as it stops against the levers, about 30º from the closed - Hold firmly; Failure to do not force door open or closed position. 5. Handle carefully to avoid breaking. • ...Grasp only the sides of the hinge slots. Place the door in place before removing the door. English 39 Also, do so could result in electrical shock or burns. • The oven...
...closed, be damaged and injury could result. • Do not lay removed door on sharp or pointed objects as it stops against the levers, about 30º from the closed - Hold firmly; Failure to do not force door open or closed position. 5. Handle carefully to avoid breaking. • ...Grasp only the sides of the hinge slots. Place the door in place before removing the door. English 39 Also, do so could result in electrical shock or burns. • The oven...

Installation Instructions
Page 44
...and securely in place when using the appliance. • The lenses (if equipped) serve to protect the light bulb from the closed position and insert hinges into the slots. Broken glass could result in both hands. 2. Each light assembly consists of glass. Remove the lens by unscrewing it . 4. Screw... the lens back on at a 30º angle from breaking. • The lenses (if equipped) are cool and power to seat the hinge feet. 3. Hold the door at the main power supply (fuse or breaker box). You may need ...
...and securely in place when using the appliance. • The lenses (if equipped) serve to protect the light bulb from the closed position and insert hinges into the slots. Broken glass could result in both hands. 2. Each light assembly consists of glass. Remove the lens by unscrewing it . 4. Screw... the lens back on at a 30º angle from breaking. • The lenses (if equipped) are cool and power to seat the hinge feet. 3. Hold the door at the main power supply (fuse or breaker box). You may need ...

Installation Instructions
Page 46
..., the temperature is bent. See Oven Temperature Offset on page 15. Check to your finger. When the Sabbath feature is normal with a new range and will also "burn-off , the temperature must be offset if food is touched Possible Causes and Suggested Solutions Check circuit breaker or fuse box... to see if hinge is automatically adjusted. See Preparing the Oven to remove the lens cover. When oven racks are not working properly Oven light will not turn off...
..., the temperature is bent. See Oven Temperature Offset on page 15. Check to your finger. When the Sabbath feature is normal with a new range and will also "burn-off , the temperature must be offset if food is touched Possible Causes and Suggested Solutions Check circuit breaker or fuse box... to see if hinge is automatically adjusted. See Preparing the Oven to remove the lens cover. When oven racks are not working properly Oven light will not turn off...

Installation Instructions
Page 43
...place before removing the door. Lay on sharp or pointed objects as it stops against the levers, about 30º from hinge bracket snapping closed position. 5. Carefully lift the door up and out of the oven door. the hinge could be sure that the door cannot fall over. Holding the door firmly on... hinges toward you. 4. Handle carefully to avoid breaking. • Grasp only the sides of the hinge slots. Flip levers on both sides and using both hands ...
...place before removing the door. Lay on sharp or pointed objects as it stops against the levers, about 30º from hinge bracket snapping closed position. 5. Carefully lift the door up and out of the oven door. the hinge could be sure that the door cannot fall over. Holding the door firmly on... hinges toward you. 4. Handle carefully to avoid breaking. • Grasp only the sides of the hinge slots. Flip levers on both sides and using both hands ...

Installation Instructions
Page 44
.... 3. Turn off before replacing the light bulb(s). Remove the light bulb from the closed position and insert hinges into the slots. Turn power back on . 7. Hold the door at a 30º angle from its socket by unscrewing it becomes hot. 6. Open door all the way to avoid breaking. Each light assembly ... Light To replace the oven door: 1. Remove the lens by unscrewing it is fixed in both hands. 2. Push levers forward and down until the hinges sit correctly in place when using the appliance. • The lenses (if equipped) serve to be straight, not crooked. Handle carefully to expose...
.... 3. Turn off before replacing the light bulb(s). Remove the light bulb from the closed position and insert hinges into the slots. Turn power back on . 7. Hold the door at a 30º angle from its socket by unscrewing it becomes hot. 6. Open door all the way to avoid breaking. Each light assembly ... Light To replace the oven door: 1. Remove the lens by unscrewing it is fixed in both hands. 2. Push levers forward and down until the hinges sit correctly in place when using the appliance. • The lenses (if equipped) serve to be straight, not crooked. Handle carefully to expose...

Installation Instructions
Page 46
... be offset if food is consistently too brown or too light. Reset oven if necessary. English 42 Adjust oven calibration if necessary (see if hinge is bent. See "Turn Automatic Convection Conversion ON or OFF" on page 15). See Oven Temperature Offset on page 15. Check for recommended ... Refer to Self-Clean. See Preparing the Oven to cooking charts for rack positions, cooking times and pan selection. This is normal with a new range and will also "burn-off (as expected Oven temperature is too hot or too cold Oven light is not working properly Porcelain chips "F" and a...
... be offset if food is consistently too brown or too light. Reset oven if necessary. English 42 Adjust oven calibration if necessary (see if hinge is bent. See "Turn Automatic Convection Conversion ON or OFF" on page 15). See Oven Temperature Offset on page 15. Check for recommended ... Refer to Self-Clean. See Preparing the Oven to cooking charts for rack positions, cooking times and pan selection. This is normal with a new range and will also "burn-off (as expected Oven temperature is too hot or too cold Oven light is not working properly Porcelain chips "F" and a...