Bosch HDS7052U - 30 Inch Dual-Fuel Range Support and Manuals
Get Help and Manuals for this Bosch item
View All Support Options Below
Free Bosch HDS7052U manuals!
Problems with Bosch HDS7052U?
Ask a Question
Free Bosch HDS7052U manuals!
Problems with Bosch HDS7052U?
Ask a Question
Most Recent Bosch HDS7052U Questions

Hds70552u
Put a second control panel in unit, becuase original problem was " off " bottom didn't work. After n...
Put a second control panel in unit, becuase original problem was " off " bottom didn't work. After n...
(Posted by jleigh1 10 years ago)
Popular Bosch HDS7052U Manual Pages
Installation Instructions - Page 2
...
Safety 1
Important Safety Instructions 1
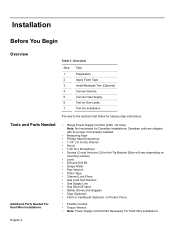
Installation 4
Before You Begin 4
Overview 4 Tools and Parts Needed 4 Parts Included 5 General Information 5 Preparation 5
Installation Procedure 11
Apply Foam Tape 11 Install Backwall Trim 11 Connect Electric 12 Connect Gas Supply 16 Test for Gas Leaks 21 Test the Installation 22
Service 24
Before Calling Service 24
Product Data Plate...
Installation Instructions - Page 3
...
English 1 Use caution when reaching behind
or under appliance.
• This appliance complies with range. Safety
IMPORTANT SAFETY INSTRUCTIONS
READ AND SAVE THESE INSTRUCTIONS
Important Safety Instructions
Related Equipment Safety
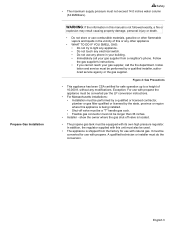
WARNING:
Do not repair or replace any part of burns or fire by a qualified technician. Injury to play with packaging material.
• Never modify or alter...
Installation Instructions - Page 4
... apply to specific installations. • Installation must conform with local codes or, in the absence of local codes, with the National Fuel Gas Code, ANSI Z223.1/NFPA 54. • The appliance must be electrically grounded in accordance with local codes or, in the absence of local codes, with the National Electrical Code ANSI/ NFPA 70, latest edition. (In Canada, installation must be...
Installation Instructions - Page 5
... installer, authorized service agency or the gas supplier. Installation and service must be longer than 36 inches.
• Installer ...instructions. • If you cannot reach your gas supplier from the factory for safe operation up to a height of this manual...be converted per the LP conversion instructions.
• For Massachusetts installations: • Installation must be used.
•...
Installation Instructions - Page 6
...8226; Screws (2) and Anchors (2) for Canadian installations; Connect Electric
5. Tools and Parts Needed
Additional Parts Needed For Hard Wire Installations
• Range Power Supply Cord Kit (240V -30 Amp)...; Cloth or Cardboard (Optional -
Install Backwall Trim (Optional)
4.
Apply Foam Tape
3. Test for step-by-step instructions. Test the Installation
Proceed to Protect Floor)
•...
Installation Instructions - Page 7
... out. 2.
Pull the drawer out until clip locks into
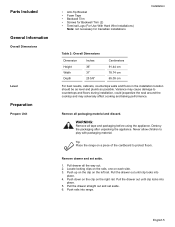
place. 4. English 5 Parts Included
General Information
Overall Dimensions
Level
Preparation
Prepare Unit
• Anti-Tip Bracket • Foam Tape • ...installation location should be as level and plumb as possible. Pull drawer all packaging material and discard. Pull the drawer straight out and set aside.
1.
Tip: Place the range...
Installation Instructions - Page 8
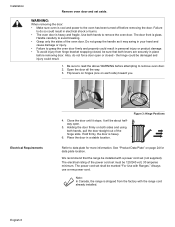
... data plate location. Open the door all the way. 3. Figure 3: Hinge Positions
Refer to remove oven door. 2. The power cord set shall be installed with a power cord set (not supplied). Note: In Canada, the range is shipped from hinge bracket snapping closed -
Also, do so could result.
1.
Place the door in electrical shock or burns...
Installation Instructions - Page 9
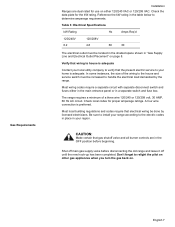
... your local utility company to verify that the present electric service to determine amperage requirements.
Be sure to install your range according to relight the pilot on other gas appliances when ...codes require that gas shutoff valve and all burner controls are dual rated for use on .
Don't forget to the electric codes in place in the OFF position before disconnecting the old range...
Installation Instructions - Page 11
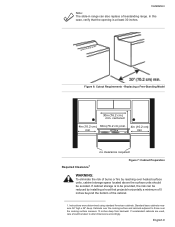
... storage is at least 30 inches. Replacing a Free-Standing Model
30in (76.2 cm ) min. In this case, verify that projects horizontally a minimum of 5 inches beyond the bottom of burns or fire by installing a hood that the opening is to alter dimensions accordingly.
Figure 6: Cutout Requirements - Installation
Note: The slide-in range can be avoided. centered
4in...
Installation Instructions - Page 14
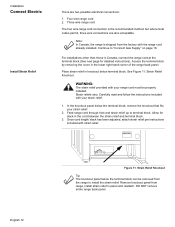
...: In Canada, the range is the recommended method, but where local codes permit, three wire connections are two possible electrical connections:
1. Place strain relief in the lower right hand corner of the range back panel.
Allow for detailed instructions). Once cord length/ slack has been adjusted, attach strain relief per instructions included with the range cord already installed...
Installation Instructions - Page 19
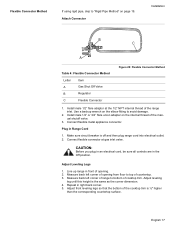
... Method" on the internal thread of the manual shutoff valve.
3. Install male 1/2" flare adaptor at gas inlet valve. Plug in right back corner. 5. Make sure circuit breaker is the same as the corner dimension. 4. Install male 1/2" or 3/4" flare union adapter on page 19. English 17 Repeat in Range Cord
1.
Use a backup wrench on the elbow...
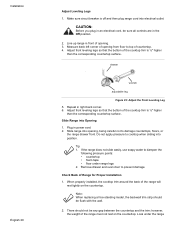
Installation Instructions - Page 20
... .
3. Do not apply pressure to crimp flexible connector. Check Back of the range must not rest on the floor or the left range leg is under the anti-tip bracket. however, the weight of Range for Proper Installation
1. Note: When replacing a free-standing model, the backwall trim strip should not be flush with the wall.
2. There...
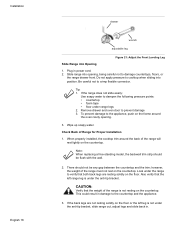
Installation Instructions - Page 22
... Leg
5. Plug in right back corner. 6. Tip: 1.
however, the weight of the range will rest lightly on the countertop.
When properly installed, the cooktop trim around the back of the range must not rest on the countertop.
Note: When replacing a free-standing model, the backwall trim strip should not be sure all controls are in...
Installation Instructions - Page 24
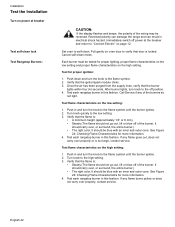
...setting and proper flame characteristics on the high setting. Push in this fashion. English 22 Reversed polarity can damage the range...service. If any flame burns yellow or does not carry over , or surround, the entire burner.)
• The right color.
Installation
Test the Installation
Turn on power at the breaker and return to "Connect Electric" on page 12. Set oven to the high setting...
Installation Instructions - Page 26
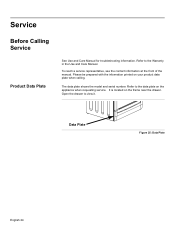
... product data plate when calling.
It is located on the frame near the drawer. Open the drawer to the Warranty in the Use and Care Manual. Service
Before Calling Service
Product Data Plate
See Use and Care Manual for troubleshooting information. The data plate shows the model and serial number.
Refer to view it.
Bosch HDS7052U Reviews
We have not received any reviews for Bosch yet.