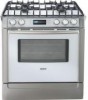
Bosch HDI7032U - 30" Slide-In Dual-Fuel Range Support and Manuals
Get Help and Manuals for this Bosch item
View All Support Options Below
Free Bosch HDI7032U manuals!
Problems with Bosch HDI7032U?
Ask a Question
Free Bosch HDI7032U manuals!
Problems with Bosch HDI7032U?
Ask a Question
Popular Bosch HDI7032U Manual Pages
Installation Instructions - Page 2
...
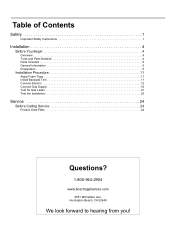
Safety 1
Important Safety Instructions 1
Installation 4
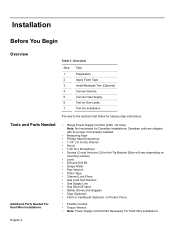
Before You Begin 4
Overview 4 Tools and Parts Needed 4 Parts Included 5 General Information 5 Preparation 5
Installation Procedure 11
Apply Foam Tape 11 Install Backwall Trim 11 Connect Electric 12 Connect Gas Supply 16 Test for Gas Leaks 21 Test the Installation 22
Service 24
Before Calling Service 24
Product Data Plate...
Installation Instructions - Page 3
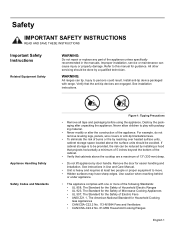
... the packaging after unpacking the appliance. Safety
IMPORTANT SAFETY INSTRUCTIONS
READ AND SAVE THESE INSTRUCTIONS
Important Safety Instructions
Related Equipment Safety
WARNING:
Do not repair or replace any part of the appliance unless specifically recommended in Use and Care Manual.
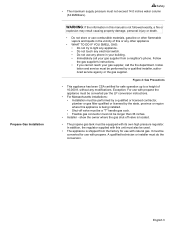
• Unit is to be provided, the risk can be done by installing a hood that projects horizontally...
Installation Instructions - Page 4
... Appliances and/ or local codes).
• Before you plug in an electrical cord, be sure all applicable codes.
• Install a gas shutoff valve near the appliance. Save these instructions for the local electrical inspector's use with ranges" shall be used.
• Installer - It must be isolated from the gas supply piping system during any pressure testing at the service...
Installation Instructions - Page 5
... has been CSA certified for use with propane the appliance must be converted per the LP conversion instructions.
• For Massachusetts installations: • Installation must be performed by a qualified or licensed contractor, plumber or gas fitter qualified or licensed by a qualified installer, authorized service agency or the gas supplier. It must be converted for safe operation...
Installation Instructions - Page 6
...
English 4
to the sections that follow for Gas Leaks
7.
Connect Electric
5. Connect Gas Supply
6. Install Backwall Trim (Optional)
4.
Tools and Parts Needed
Additional Parts Needed For Hard Wire Installations
• Range Power Supply Cord Kit (240V -30 Amp) Note: Not necessary for Anti-Tip Bracket (Style will vary depending on
mounting surface) • Level...
Installation Instructions - Page 8
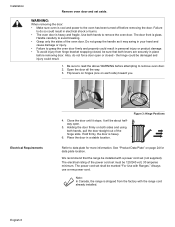
... or closed , be sure that the range be installed with a power cord set must be 120/240 volt, 30 amperes minimum. Be sure to read the...power cord. Installation
Remove oven door and set shall be marked "For Use with Ranges." It will be damaged and injury could result in a stable location. Hold firmly, the door is cool and power to remove oven door. 2. Use both levers are securely...
Installation Instructions - Page 9
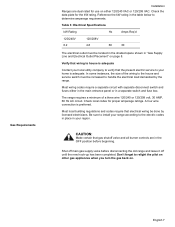
... beginning. CAUTION:
Make certain that the present electric service to your range according to handle the electrical load demanded by licensed electricians. Table 3: Electrical Specifications
kW Rating
Hz
Amps Req'd
120/240V 6.2
120/208V 4.8
60
30
The electrical outlet must be done by the range. Most wiring codes require a separate circuit with separate disconnect switch and...
Installation Instructions - Page 11
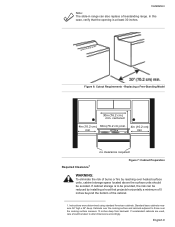
Instructions were determined using standard American cabinets.
Cabinets over the cooking surface and cabinets adjacent to alter dimensions accordingly.
Replacing a Free-Standing Model
30in (76.2 cm ) min. Standard base...of the cabinet.
1. If cabinet storage is at least 30 inches. Installation
Note: The slide-in range can be reduced by reaching over the cooking surface measure ...
Installation Instructions - Page 15
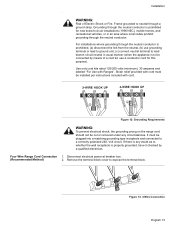
... (when the appliance is properly grounded, have it checked by means of Electric Shock or Fire.
Disconnect electrical power at breaker box.
(Recommended Method)
2. If there is prohibited for this purpose).
Figure 12: Grounding Requirements
WARNING:
To prevent electrical shock, the grounding prong on the range cord should not be installed per instructions included with...
Installation Instructions - Page 18
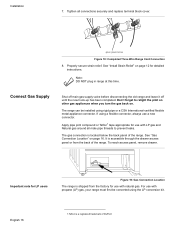
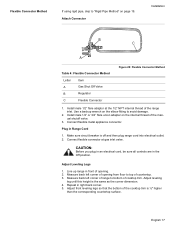
... LP gas and Natural gas around all connections securely and replace terminal block cover. Important note for use with propane (LP) gas, your range must first be installed using a flexible connector, always use with natural gas.
If using rigid pipe or a CSA International-certified flexible metal appliance connector. The gas connection is a registered trademark of...
Installation Instructions - Page 19
... corner of range to top of the manual shutoff valve....
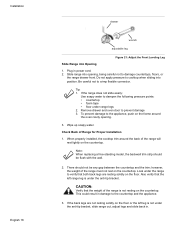
3. Adjust leveling
leg until this height is the same as the corner dimension. 4. CAUTION:
Before you plug in an electrical cord, be sure all controls are in right back corner. 5.
Measure back left corner of cooktop trim. Install male 1/2" flare adaptor at gas inlet valve. Connect flexible metal appliance...
Installation Instructions - Page 20
... to damage countertops, floors, or
the range drawer front. Slide range into position. Check Back of the range will rest lightly on the floor. When properly installed, the cooktop trim around the oven cavity opening , being careful not to the countertop and the appliance.
3. Note: When replacing a free-standing model, the backwall trim strip should not be...
Installation Instructions - Page 22
..., being careful not to damage countertops, floors, or
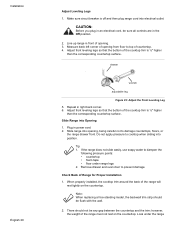
the range drawer front. Note: When replacing a free-standing model, the backwall trim strip should not be flush with the wall...the corresponding countertop surface. however, the weight of Range for Proper Installation
1. Installation English 20
Adjust Leveling Legs
1. Line up range in power cord. 2. Remove drawer and oven door to...
Installation Instructions - Page 24
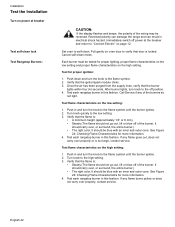
... on the high setting. Turn knob quickly to the high setting. 3. Turn knob to the low setting. 3. Reversed polarity can damage the range and can result in and turn knob to verify that door is too large, contact service. Push down and turn the knob to self-clean. Test flame characteristics on power at the breaker...
Installation Instructions - Page 26
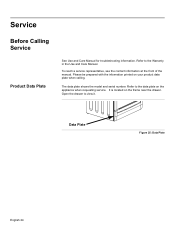
....
Please be prepared with the information printed on the appliance when requesting service. It is located on the frame near the drawer. Data Plate
Figure 25: Data Plate
English 24 Service
Before Calling Service
Product Data Plate
See Use and Care Manual for troubleshooting information. To reach a service representative, see the contact information at the front of...
Bosch HDI7032U Reviews
We have not received any reviews for Bosch yet.