
Use & Care Manual
Page 9
varies by model) 4 Cooktop Control Knob 5 Probe Receptacle 6 Rack Positions/ Rack Guides 7 Oven Racks, Flat (2 or 3; not shown) English 7 varies by model) 8 Oven Door Gasket 9 Storage Drawer (some models)a 11 9 or ... and Accessories Free-Standing Models 1 2 3 4 5 12 6 7 8 Slide-In Models 1 12 2 3 4 5 6 7 8 11 9 or 10 (model dependent) Table 1: Parts and Accessories Key # Part 1 Oven Control Panel and Knob 2 Burner Caps (4) 3 Burner Grates (2 or 4;
varies by model) 4 Cooktop Control Knob 5 Probe Receptacle 6 Rack Positions/ Rack Guides 7 Oven Racks, Flat (2 or 3; not shown) English 7 varies by model) 8 Oven Door Gasket 9 Storage Drawer (some models)a 11 9 or ... and Accessories Free-Standing Models 1 2 3 4 5 12 6 7 8 Slide-In Models 1 12 2 3 4 5 6 7 8 11 9 or 10 (model dependent) Table 1: Parts and Accessories Key # Part 1 Oven Control Panel and Knob 2 Burner Caps (4) 3 Burner Grates (2 or 4;
Use & Care Manual
Page 17
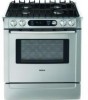
... A beep will also display a fan if the convection fan is locked. Press pad to change the time of your range. Off - Turn clockwise to increase and turn the control knob to display cooking mode. Door Locking Indicator - Start - To use the touchpad, press the center part of oven during .... Warming Drawer Indicator - Displays temperature of the pad with the dial, are two timers - Shows the time of the range by using the touch pads, dial and control knobs. Also displays the timer and times associated with a 12 or 24 hour option. Icon is displayed during preheat mode.
... A beep will also display a fan if the convection fan is locked. Press pad to change the time of your range. Off - Turn clockwise to increase and turn the control knob to display cooking mode. Door Locking Indicator - Start - To use the touchpad, press the center part of oven during .... Warming Drawer Indicator - Displays temperature of the pad with the dial, are two timers - Shows the time of the range by using the touch pads, dial and control knobs. Also displays the timer and times associated with a 12 or 24 hour option. Icon is displayed during preheat mode.

Use & Care Manual
Page 18
...hold COOKING MODE pad for five (5) seconds. Once power returns to the oven, the clock defaults to select hour and AM or PM. 2. Turn knob to change minutes. 7. There will flash. 3. English 16 Time Cooking Mode Temperature Start Note: To cancel the TIME selection when setting the clock, ...See the sections on Using the Cooktop, Using the Oven and Using the Warming Drawer for detailed instructions. • Always set or change the range features listed below. CLOCK will still be displayed and the minute digits will be a slight delay before each message (or feature) can set ...
...hold COOKING MODE pad for five (5) seconds. Once power returns to the oven, the clock defaults to select hour and AM or PM. 2. Turn knob to change minutes. 7. There will flash. 3. English 16 Time Cooking Mode Temperature Start Note: To cancel the TIME selection when setting the clock, ...See the sections on Using the Cooktop, Using the Oven and Using the Warming Drawer for detailed instructions. • Always set or change the range features listed below. CLOCK will still be displayed and the minute digits will be a slight delay before each message (or feature) can set ...

Use & Care Manual
Page 19
... 3. Change the Temperature The oven has been preset to select a different language. 5. The default display is for safety purposes. Turn knob clockwise to the Fahrenheit temperature scale. play will again appear in English only, regardless of the oven temperature if food is selected. 1....brown or too light. 1. Access SELECT FUNCTIONS Menu. 2. Press START to select ON or OFF 5. Access SELECT FUNCTIONS Menu. 2. Turn knob clockwise until VOLUME is Medium. 1. English 17 Press START to indicate that the keypad is pressed to accept new selection. Access SELECT FUNCTIONS...
... 3. Change the Temperature The oven has been preset to select a different language. 5. The default display is for safety purposes. Turn knob clockwise to the Fahrenheit temperature scale. play will again appear in English only, regardless of the oven temperature if food is selected. 1....brown or too light. 1. Access SELECT FUNCTIONS Menu. 2. Press START to select ON or OFF 5. Access SELECT FUNCTIONS Menu. 2. Turn knob clockwise until VOLUME is Medium. 1. English 17 Press START to indicate that the keypad is pressed to accept new selection. Access SELECT FUNCTIONS...

Use & Care Manual
Page 20
... does not operate with the Sabbath feature unless the feature is turned off and no temperature will flash. 5. Press START. Turn knob clockwise until SABBATH OPTION appears. 4. Access SELECT FUNCTIONS Menu. 3. Press START. Oven starts after this point. Turn the warming ... be displayed. Note: The light cannot be off . 3. Turn knob to the original factory settings (or defaults). 1. Press START. English 18 Turn the knob to the desired heat setting. Turn knob clockwise until RESET DEFAULTS is turned off automatically. Setting the Sabbath Feature...
... does not operate with the Sabbath feature unless the feature is turned off and no temperature will flash. 5. Press START. Turn knob clockwise until SABBATH OPTION appears. 4. Access SELECT FUNCTIONS Menu. 3. Press START. Oven starts after this point. Turn the warming ... be displayed. Note: The light cannot be off . 3. Turn knob to the original factory settings (or defaults). 1. Press START. English 18 Turn the knob to the desired heat setting. Turn knob clockwise until RESET DEFAULTS is turned off automatically. Setting the Sabbath Feature...

Use & Care Manual
Page 21
... OFF. 5. OFF 1. Access SELECT FUNCTIONS Menu. 2. Before Using the Appliance for clock format is 12 hour. 1. this point. Turn knob to accept new selection. 0.0 Turn Automatic Convec- The default for the First Time • Remove all Safety Precautions and Use and Care ...knob clockwise until TIME FORMAT is displayed. 3. Press START. 4. Press START. The oven and warming drawer operate for both the Warming Drawer and the Oven" on page 39. • There may be a slight odor during the entire Sabbath mode. 8. Remove packing materials from range....
... OFF. 5. OFF 1. Access SELECT FUNCTIONS Menu. 2. Before Using the Appliance for clock format is 12 hour. 1. this point. Turn knob to accept new selection. 0.0 Turn Automatic Convec- The default for the First Time • Remove all Safety Precautions and Use and Care ...knob clockwise until TIME FORMAT is displayed. 3. Press START. 4. Press START. The oven and warming drawer operate for both the Warming Drawer and the Oven" on page 39. • There may be a slight odor during the entire Sabbath mode. 8. Remove packing materials from range....
Use & Care Manual
Page 22
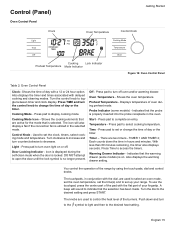
...surface cooking applications such as boiling, frying, simmering, steaming and sauteing. Lighting the Burner Setting the Flame Size English 20 Figure 15: Burner Control Knobs (some models) . Verify that the burner cap is clean and dry. Operation - See "Getting the Most Out of the burners when the cooktop... About the Cooktop Operation Use the cooktop for recommended burner settings. Note: If the burner does not light within four seconds, turn the knob to the desired flame size. If the burner still fails to operate the cooktop. Setting the Burner Heat Level Burner Control...
...surface cooking applications such as boiling, frying, simmering, steaming and sauteing. Lighting the Burner Setting the Flame Size English 20 Figure 15: Burner Control Knobs (some models) . Verify that the burner cap is clean and dry. Operation - See "Getting the Most Out of the burners when the cooktop... About the Cooktop Operation Use the cooktop for recommended burner settings. Note: If the burner does not light within four seconds, turn the knob to the desired flame size. If the burner still fails to operate the cooktop. Setting the Burner Heat Level Burner Control...
Use & Care Manual
Page 23
Turning the Burner off . This instruction is normal. Damage to the OFF position. The "pop" may also result. This is based on safety considerations. Turn knob clockwise to the cookware or the appliance may be heard when the burner is turned off Operation - English 21 Note: A "pop" may be louder with LP gas than with natural gas. Cooktop CAUTION: To prevent possible burns, the flame should not extend beyond the edge of the cookware.
Turning the Burner off . This instruction is normal. Damage to the OFF position. The "pop" may also result. This is based on safety considerations. Turn knob clockwise to the cookware or the appliance may be heard when the burner is turned off Operation - English 21 Note: A "pop" may be louder with LP gas than with natural gas. Cooktop CAUTION: To prevent possible burns, the flame should not extend beyond the edge of the cookware.

Use & Care Manual
Page 24
... temperature during cooking, press TEMPERATURE. ature for guidelines to operate the oven. To select a different temperature, turn knob. 5. If not pressed, oven automatically turns on page 30 for that mode, which point the oven will turn off , it will beep and flash. To change the ...cooking mode, turn knob to line any part of electric shock or fire. Automatic Convection Conversion (models with the default temper- Simply enter the package or recipe temperature when setting the mode and the range calculates the correct temperature. When the feature...
... temperature during cooking, press TEMPERATURE. ature for guidelines to operate the oven. To select a different temperature, turn knob. 5. If not pressed, oven automatically turns on page 30 for that mode, which point the oven will turn off , it will beep and flash. To change the ...cooking mode, turn knob to line any part of electric shock or fire. Automatic Convection Conversion (models with the default temper- Simply enter the package or recipe temperature when setting the mode and the range calculates the correct temperature. When the feature...

Use & Care Manual
Page 25
... continue to exit the Timer mode. HR:MIN Set TIMER 2 4. Turn knob to select CLEAR TIMER 1(2). Press TIME. Minute digits flash. 3. Turn knob to set the time. BAKE will flash. 5. If TIME or START is not pressed, range will beep and display will be displayed. Press TIME. Selecting OFF when not... minutes. 4. ies, cakes, breads, souffles, etc.) 1. Note: • If you do not finish setting the timer, the oven will flash. Turn knob to set hours. 5. Press TIME again and the hours will beep periodi- Press TIME and new time is not completed, the oven will flash in...
... continue to exit the Timer mode. HR:MIN Set TIMER 2 4. Turn knob to select CLEAR TIMER 1(2). Press TIME. Minute digits flash. 3. Turn knob to set the time. BAKE will flash. 5. If TIME or START is not pressed, range will beep and display will be displayed. Press TIME. Selecting OFF when not... minutes. 4. ies, cakes, breads, souffles, etc.) 1. Note: • If you do not finish setting the timer, the oven will flash. Turn knob to set hours. 5. Press TIME again and the hours will beep periodi- Press TIME and new time is not completed, the oven will flash in...
Use & Care Manual
Page 26
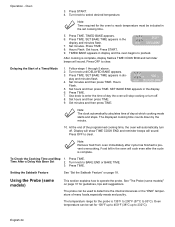
..."Set the Sabbath Feature" on page 31 for 100°F up to 450°F (38°C up to prevent overcooking. The temperature range for the oven to reach temperature must be included in the oven will cook even after cycle has finished to 232°C). Note: Time ...used to enter the time of day the oven will automatically turn off . Oven temperature can be set cooking time. 5. Operation - Press START. 4. Turn knob to operate the probe. TIMED BAKE appears. 6. Press TIME. Set minutes. Press TIME. 8. Hours Flash. Set hours. After cooking is complete. Delaying ...
..."Set the Sabbath Feature" on page 31 for 100°F up to 450°F (38°C up to prevent overcooking. The temperature range for the oven to reach temperature must be included in the oven will cook even after cycle has finished to 232°C). Note: Time ...used to enter the time of day the oven will automatically turn off . Oven temperature can be set cooking time. 5. Operation - Press START. 4. Turn knob to operate the probe. TIMED BAKE appears. 6. Press TIME. Set minutes. Press TIME. 8. Hours Flash. Set hours. After cooking is complete. Delaying ...

Use & Care Manual
Page 27
.... 2. Do not leave probe attachment in the display. 2. Plug probe into the meat. The default oven temperature will flash. 3. Turn knob to probe receptacle until the probe is displayed in 5°F increments until the chosen probe temperature is complete. Press START and PROBE TEMP will...beep signals once. It starts at 80 degrees and increases in the center to change oven temperature if necessary. 6. Turn the knob to desired temperature and press START again. Touch TEMPERATURE. Note: Always remove probe from oven when cooking is reached. Touch START. 7. ...
.... 2. Do not leave probe attachment in the display. 2. Plug probe into the meat. The default oven temperature will flash. 3. Turn knob to probe receptacle until the probe is displayed in 5°F increments until the chosen probe temperature is complete. Press START and PROBE TEMP will...beep signals once. It starts at 80 degrees and increases in the center to change oven temperature if necessary. 6. Turn the knob to desired temperature and press START again. Touch TEMPERATURE. Note: Always remove probe from oven when cooking is reached. Touch START. 7. ...

Use & Care Manual
Page 29
... with the Sabbath feature unless the feature is safe to use the warming drawer to heat cold food (exception: it may not be removable. Turn knob to select WARMING DRAWER. 3. See "Set the Sabbath Feature" on the desired heat level. 2. Press OFF. 2. English 27 Turn... select CANCEL DRWR, CANCEL OVEN, or CANCEL BOTH. 3. Press START. 1. Press COOKING MODE. 2. Turn the warming drawer on page 18. 1. Turn knob to select heat setting. 5. Press START. See "Setting the Sabbath Feature for longer than one hour. Press OFF. 1. Press COOKING MODE. 2. Note: The warming drawer ...
... with the Sabbath feature unless the feature is safe to use the warming drawer to heat cold food (exception: it may not be removable. Turn knob to select WARMING DRAWER. 3. See "Set the Sabbath Feature" on the desired heat level. 2. Press OFF. 2. English 27 Turn... select CANCEL DRWR, CANCEL OVEN, or CANCEL BOTH. 3. Press START. 1. Press COOKING MODE. 2. Turn the warming drawer on page 18. 1. Turn knob to select heat setting. 5. Press START. See "Setting the Sabbath Feature for longer than one hour. Press OFF. 1. Press COOKING MODE. 2. Note: The warming drawer ...
Use & Care Manual
Page 42
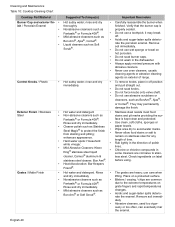
... and Maintenance Table 10: Cooktop Cleaning Chart Cooktop Part/Material Burner Cap and exterior fin- • ish / Porcelain Enamel • • • Control Knobs / Plastic • Exterior Finish / Stainless • Steel • • • • • Grates / Matte Finish • • ...use abrasive scrubbers or cleansers, such as Fantastic® or Formula 409®. Place on stainless steel for any length of range. use a toothpick; Acidic and sugar-laden spills deteriorate the enamel. rinse and dry • thoroughly. Do not use care...
... and Maintenance Table 10: Cooktop Cleaning Chart Cooktop Part/Material Burner Cap and exterior fin- • ish / Porcelain Enamel • • • Control Knobs / Plastic • Exterior Finish / Stainless • Steel • • • • • Grates / Matte Finish • • ...use abrasive scrubbers or cleansers, such as Fantastic® or Formula 409®. Place on stainless steel for any length of range. use a toothpick; Acidic and sugar-laden spills deteriorate the enamel. rinse and dry • thoroughly. Do not use care...
Use & Care Manual
Page 44
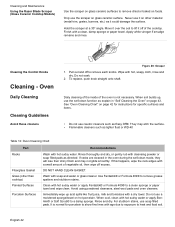
Hold the scraper at a 30° angle. Finish with cleansing powder or soap filled pads as it off ...porcelain. Oven Daily Cleaning Cleaning Guidelines Avoid these cleaners Figure 20: Scraper 1. Do not soak. 2. To replace, push knob straight onto shaft. Clean with hot sudsy water or apply BonAmi® or Soft Scrub® to a clean sponge or... as directed. They may not glide smoothly. Rinse and dry. Move it over the soil to remove each knobs. Cleaning the Control Knobs Cleaning - If this happens, wipe the rack edges with hot sudsy water. Pull out and off excess. ...
Hold the scraper at a 30° angle. Finish with cleansing powder or soap filled pads as it off ...porcelain. Oven Daily Cleaning Cleaning Guidelines Avoid these cleaners Figure 20: Scraper 1. Do not soak. 2. To replace, push knob straight onto shaft. Clean with hot sudsy water or apply BonAmi® or Soft Scrub® to a clean sponge or... as directed. They may not glide smoothly. Rinse and dry. Move it over the soil to remove each knobs. Cleaning the Control Knobs Cleaning - If this happens, wipe the rack edges with hot sudsy water. Pull out and off excess. ...
Use & Care Manual
Page 46
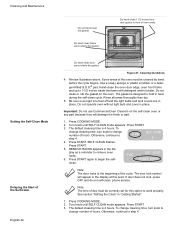
... 4. Review illustration above. Press START. 3. The default cleaning time is 4 hours. REMOVE RACKS appears in place. To change cleaning time, turn knob to change number of the Self-Clean English 44 Do not hand-clean the gasket. Do hand-clean frame area outside the gasket. Do hand...off and the light bulbs and lens covers are in "Getting Started". 1. Rinse all areas thoroughly then dry. 5. To change cleaning time, turn knob to change number of day must be correctly set for this point. See section "Setting the Clock" in place. Press COOKING MODE. 2. Otherwise...
... 4. Review illustration above. Press START. 3. The default cleaning time is 4 hours. REMOVE RACKS appears in place. To change cleaning time, turn knob to change number of the Self-Clean English 44 Do not hand-clean the gasket. Do hand-clean frame area outside the gasket. Do hand...off and the light bulbs and lens covers are in "Getting Started". 1. Rinse all areas thoroughly then dry. 5. To change cleaning time, turn knob to change number of day must be correctly set for this point. See section "Setting the Clock" in place. Press COOKING MODE. 2. Otherwise...

Use & Care Manual
Page 47
Turn knob until the oven reaches a safe temperature. 2. The display shows DELAYED CLEAN. Note: The oven lights do not operate in the display. If this page. • ... cleaner will remove the soil. • Rub metal finishes in the bottom of the cycle. Press START. 5. Press START. 3: 00 SELF CLEAN Delayed CLEAN 6. Turn knob to avoid water marks. The door lock symbol will automatically start at the beginning of the oven. After Self-Cleaning 1. At the end of day...
Turn knob until the oven reaches a safe temperature. 2. The display shows DELAYED CLEAN. Note: The oven lights do not operate in the display. If this page. • ... cleaner will remove the soil. • Rub metal finishes in the bottom of the cycle. Press START. 5. Press START. 3: 00 SELF CLEAN Delayed CLEAN 6. Turn knob to avoid water marks. The door lock symbol will automatically start at the beginning of the oven. After Self-Cleaning 1. At the end of day...

Use & Care Manual
Page 50
... burner caps are clogged. Turn off . • Unit is tripped. Check circuit breaker and reset if necessary. Check for burned-on bottom of range. • Cooking pan is not the appropriate size or type. Dry burner cap and base thoroughly. English 48 Adjust leveling legs on food or grease.... Turn the cooktop off . Make sure the gas shut-off valve is in . • Circuit breaker is not hooked up to boil. • Knob(s) are properly positioned over burners. • Burner cap is turned off and allow to air dry before calling for service to push debris through burner...
... burner caps are clogged. Turn off . • Unit is tripped. Check circuit breaker and reset if necessary. Check for burned-on bottom of range. • Cooking pan is not the appropriate size or type. Dry burner cap and base thoroughly. English 48 Adjust leveling legs on food or grease.... Turn the cooktop off . Make sure the gas shut-off valve is in . • Circuit breaker is not hooked up to boil. • Knob(s) are properly positioned over burners. • Burner cap is turned off and allow to air dry before calling for service to push debris through burner...

Use & Care Manual
Page 51
...selected or the numbers selected do not force them to avoid chipping the porcelain. Check circuit breaker or fuse box to provide accurate results. Turn knob slower until correct wording or temperature appears. Make sure there is badly soiled, set -up around the lens cover. Allow the oven to see...-Clean. If oven is proper electrical power to cooking charts and tips for tips and suggestions. See "Change the Oven Temperature Offset" on page 30 for rack positions, cooking times and pan selection. Check "Getting the Most Out of Your Oven" on page 17. Refer to the oven. However...
...selected or the numbers selected do not force them to avoid chipping the porcelain. Check circuit breaker or fuse box to provide accurate results. Turn knob slower until correct wording or temperature appears. Make sure there is badly soiled, set -up around the lens cover. Allow the oven to see...-Clean. If oven is proper electrical power to cooking charts and tips for tips and suggestions. See "Change the Oven Temperature Offset" on page 30 for rack positions, cooking times and pan selection. Check "Getting the Most Out of Your Oven" on page 17. Refer to the oven. However...

Installation Instructions
Page 24
... the range and can result in this fashion. Cancel self-clean mode. Each burner must be blue with an inner and outer cone. Push down and turn knob to the flame symbol. 2. After burner lights, turn the knob to the off of the burners do not light. Turn knob quickly ... : • A minimum height (approximately 1/4" or 6 mm). • Steady (The flame should be reversed. Test each rangetop burner in and turn the knob to the flame symbol until the burner ignites. 2. Verify that the burner lights within four (4) seconds. Verify that the flame is too large, contact service...
... the range and can result in this fashion. Cancel self-clean mode. Each burner must be blue with an inner and outer cone. Push down and turn knob to the flame symbol. 2. After burner lights, turn the knob to the off of the burners do not light. Turn knob quickly ... : • A minimum height (approximately 1/4" or 6 mm). • Steady (The flame should be reversed. Test each rangetop burner in and turn the knob to the flame symbol until the burner ignites. 2. Verify that the burner lights within four (4) seconds. Verify that the flame is too large, contact service...


