Bosch B24IR70NSP Support and Manuals
Get Help and Manuals for this Bosch item

View All Support Options Below
Free Bosch B24IR70NSP manuals!
Problems with Bosch B24IR70NSP?
Ask a Question
Free Bosch B24IR70NSP manuals!
Problems with Bosch B24IR70NSP?
Ask a Question
Popular Bosch B24IR70NSP Manual Pages
Installation Instructions - Page 5
... intended purpose. It contains important details which the fitter must comply with the National Electric Code, ANSI/NFPA70 - e IMPORTANT
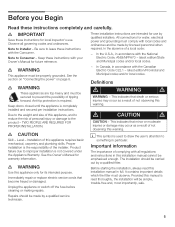
Save these instructions completely and carefully.
Immediately repair or replace electric service cords that become frayed or damaged.
The installation should be secured to
something in full. Provided this warning. Before you Begin
Read these...
Installation Instructions - Page 7

... 780 lbs / 350 kg* approx. 950 lbs / 425 kg*
Wine unit 18" Wine unit 24"
approx. 550 lbs / 245 kg approx. 694 lbs / 310 kg
(* without Water Dispenser)...furniture front. The base must be exposed to observe the specified dimensions of the installation cavity for a troubleĆfree installation of a hard, rigid material. The installation location should not drop below 55 °F (13 °C)...
Installation Instructions - Page 8
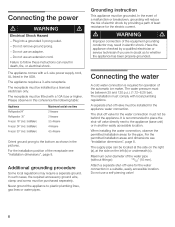
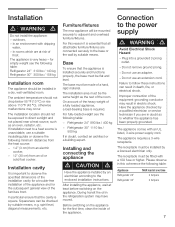
... wire, clamp and screw must be installed by a qualified electrician or service technician if you are in doubt as shown in another easily accessible location.
Have the appliance checked by a licensed electrician only.
The shutĆoff valve must be grounded. For the permitted installation areas and dimensions see "Installation dimensions", page 8.
Connecting the power2...
Installation Instructions - Page 18
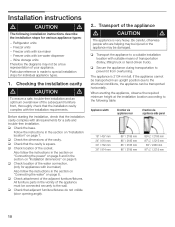
... Therefore the diagrams may be damaged. q Check the base. Also follow the instructions in the section on Connecting the water" on page 9. q Check location of the water connection. (only for individual appliance types.
1. All furniture parts in the section on Installation dimensions" on page 8. Be careful, otherwise people who are helping may be injured...
Installation Instructions - Page 22
...
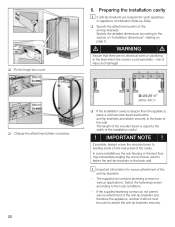
Assure that there are required for various applications.
The supplied set contains fastening screws for each appliance
or appliance combination (SideĆ...wires or plumbing in the area which the screws could penetrate - Specify the detailed dimensions according to the section on Installation dimensions" starting on the rear panel of injury and damage!
i Important information for secure ...
Installation Instructions - Page 32

...of
adjusting the furniture front. i If only one large door. i Using the positioning aid, set both longitudinal sides
of a 30" or 36" wide appliance, attach the supplied sandwich plate to...:
18" Appliance 22 lbs / 10 kg
24" Appliance 33 lbs / 15 kg
30" Appliance 44 lbs / 20 kg
q Unscrew the installation support part from customer service as possible.
When attaching the metal strip to...
Use & Care Manual - Page 3
... 5 Your new appliance 6 Installation 7 Installing and connecting the appliance 7 Connection to the power supply 7 Additional grounding procedure 8 Grounding instruction 8 Switching on the appliance 8 Switching off and disconnecting the appliance 8 Functions 8 Variable interior design 9 Control panel 10 Setting the temperature 11 Super function 11 Setup mode 11 Settings which can be...
Use & Care Manual - Page 4
...Manual.
2. Use this or any servicing be performed by a qualified electrician or service ...parts of the equipment grounding conductor may result in doubt as described in accordance with the Installation Instructions before cleaning and making repairs...replaced. Before replacing a burnedĆout light bulb, set the on the bottom of electric shock by a licensed electrician only. NOTE: Setting...
Use & Care Manual - Page 5

...energy consumption. Note to Consumer ć Keep these instructions with the Consumer.
Your refrigerator is distinguished by a qualified servicer. Each appliance which leaves our factory is designed ...result of your Owner's Manual for the next owner. This indicates that minor or moderate injuries may occur as the installation instructions and all governing codes and ordinances.
Retain ...
Use & Care Manual - Page 7
... the specified dimensions of the installation cavity for a troubleĆfree installation of the appliance and for the subsequent general view of the appliance. If installation next to ...will be installed by a qualified electrician or service technician if you are at least before switching on the appliance for empty weight see the following table:
Appliance Refrigerator 24" Refrigerator ...
Use & Care Manual - Page 10

... that you familiarize yourself thoroughly with the
< > buttons.
H vacation button Switches Vacation mode on /off the alarm.
Setting options in setup mode. F + ć buttons Select the available parameters of the appliance is activated in setup mode, TONE menu. Activated special functions are indicated on the display. The displayed temperature of the menu. When...
Use & Care Manual - Page 11
... function is ended: - by activating the Vacation mode - These adjustments can be adjusted in Setup mode.
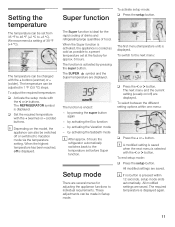
The required temperature is displayed. Setting the temperature
The temperature can be set before Super function.
The next menu and the current setting (usually on the model, the appliance can also be made in 1 °F (0.5 °C) steps. All modified...
Use & Care Manual - Page 16
... displayed. The fuse must be moved.
an appliance which is on ,
-
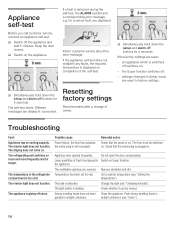
Troubleshooting
Fault Appliance has no cooling capacity. the appliance. Inform customer service about the error message. q Simultaneously hold down the setup and alarm off odors. Set a warmer temperature (see Setting the temperature").
Keep the door closed.
Appliance selfĆtest
Before you...
Use & Care Manual - Page 19

...: Type:
19
If you ever need it. Write down the following information about your refrigerator to know your designated Bosch Canada service company or call 1-800-944-2904 . Service
You will need service, first see the "Troubleshooting" section of this information on the model and serial number label located on the inside wall of the refrigerator compartment.
Use & Care Manual - Page 20

...date of purchase, when this refrigerator is operated and maintained according to instructions attached to or furnished with the product, Bosch will pay for factory specified replacement parts and repair labor costs to product failure.
6. Labor or parts installed by a Bosch designated service company.
In Canada, contact your sales slip together for :
1. You must provide proof of purchase...
Bosch B24IR70NSP Reviews
We have not received any reviews for Bosch yet.