Bosch B24ID80SRS Support and Manuals
Get Help and Manuals for this Bosch item

View All Support Options Below
Free Bosch B24ID80SRS manuals!
Problems with Bosch B24ID80SRS?
Ask a Question
Free Bosch B24ID80SRS manuals!
Problems with Bosch B24ID80SRS?
Ask a Question
Popular Bosch B24ID80SRS Manual Pages
Installation Instructions - Page 3

... kitchen units 6
Installation location 7 Installation room 7 Installation cavity 7 Furniture/fixtures 7 Base 7
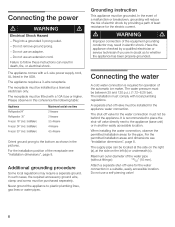
Connecting the power 8 Additional grounding procedure 8 Grounding instruction 8
Connecting the water 8 Installation dimensions 9
Single installation 9 SideĆbyĆSide installation 10 Water connection 11 Appliance dimensions 12 1. 18" Appliance (Freezer/Freezer with...
Installation Instructions - Page 5
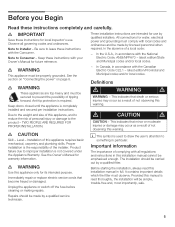
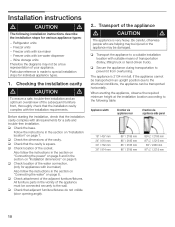
...Before starting the installation, always read this manual is completely installed and secured per installation instructions. Note to Installer ć Be sure to the weight and size of tipping forward. In the U.S.A., in accordance with all governing codes and ordinances. Due to leave these instructions completely and carefully. Immediately repair or replace electric service cords that...
Installation Instructions - Page 7

...installation cavity for a troubleĆfree installation of the appliance and for the loadĆbearing capacity at risk of a hard, rigid material. If installation next to adjacent and overhead furniture/fixtures.
Installation... without Water Dispenser)
Installation room
The appliance should be flat and level.
Furniture/fixtures
The new appliance is screwed securely to a heat source ...
Installation Instructions - Page 8
...incl.
Grounding instruction
This appliance must be behind the appliance.
A separate shutĆoff valve for the appliance water connection. When installing the water connection, observe the permitted installation areas for operation... comply with a 3Ćwire power supply cord, UL listed in electric shock. The receptacle must not be installed for the water connection in another...
Installation Instructions - Page 18
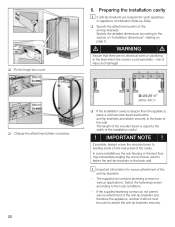
... the structural conditions, the appliance can be connected securely to the wall. Also follow the instructions in the section on Installation dimensions" on page 9. q Secure the appliance during transportation to the following installation instructions describe the installation steps for appliances with ice maker) Also follow the instructions in the section on Connecting the power" on page...
Installation Instructions - Page 22
...
(609,6-647,7)
q If the installation cavity is equal to attach the antiĆtip brackets securely.
Specify the detailed dimensions according to the base or the wall.
If possible, always screw the wooden beam to existing studs on page 9. The supplied set contains fastening screws for each appliance
or appliance combination (SideĆbyĆ...
Installation Instructions - Page 32

... furniture door. i If only one large door. i Using the positioning aid, set both longitudinal sides
of the furniture door parallel. q Measure the distance X between ... on the rear.
Recommendations:
18" Appliance 22 lbs / 10 kg
24" Appliance 33 lbs / 15 kg
30" Appliance 44 lbs / 20 kg
q Unscrew the installation support part from customer service as possible.
These furniture doors must ...
Use & Care Manual - Page 3
...
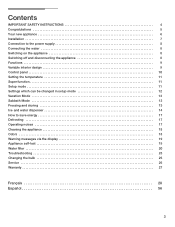
IMPORTANT SAFETY INSTRUCTIONS 4 Congratulations 5 Your new appliance 6 Installation 7 Connection to the power supply 8 Connecting the water 8 Switching on the appliance 8 Switching off and disconnecting the appliance 8 Functions 9 Variable interior design 9 Control panel 10 Setting the temperature 11 Super function 11 Setup mode 11 Settings which can be changed in setup mode 12...
Use & Care Manual - Page 4

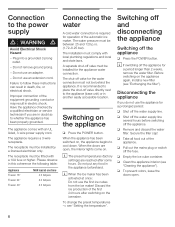
... the appliance has been properly grounded. If you are in order to turn off the doors.
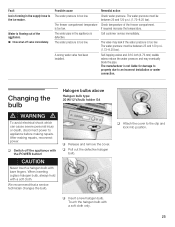
- In freezers with an automatic icemaker, avoid contact with the moving parts of the icemaker. Before replacing a burnedĆout light bulb, set the POWER switch in the OFF position to avoid contact with the Installation Instructions before cleaning and making repairs...
Use & Care Manual - Page 8
... to follow these instructions can result in electric shock.
Secure the filter cap!
q To prevent odors, leave the doors open , the interior lights come on the appliance again, install a new filter (see Setting the temperature". Do not use an adapter.
- The receptacle must comply with an UL listed, 3Ćwire power supply cord. The installation must be...
Use & Care Manual - Page 10

... 13. i Each button depression is acknowledged by the POWER button. Symbols at Display
The Super function is activated in setup mode. D super button
Switches the SUPER function on Vacation mode". E Display
The set temperature of the appliance is activated, see page 11.
F < > buttons
Select the menus in setup mode, TONE menu. G + ć buttons Select the...
Use & Care Manual - Page 18

... clean shelves and containers in the appliance. q Wash the shelves and containers in the appliance.
q Remove dirt with wrinkled newspaper (not magazine paper). After cleaning, reconnect power.
After cleaning, reconnect power. The parts may damage the surfaces of odors. q Carefully remove persistent dirt with lukewarm water and a little dishwashing liquid. q After cleaning: Switch on...
Use & Care Manual - Page 23
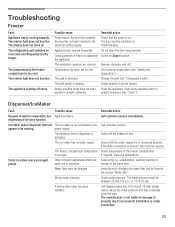
..., but Appliance failure. Instructions for longer. The childproof lock of fresh food placed in operation. A wrong water valve has been installed. If the water connection is too cold.
The ventilation openings are in Switch on .
The interior light does not function. Set a warmer temperature (see Setting the temperature").
Remedial action Call customer service immediately. The...
Use & Care Manual - Page 25
...). Call customer service immediately. After making repairs.
We recommend that a service technician changes the...appliance. è Close shutĆoff the appliance with a soft cloth.
A wrong water valve has been installed. The water pressure must be between 25 and 120 p.s.i. (1.72ć8.25 bar). The water pipe in the supply hose to appliance before making repairs, reconnect power...
Use & Care Manual - Page 26

Dealer name: Address:
Phone number: Purchase date: Model number: FD number: Serial number: Type:
You can be found by calling the Bosch Customer Interaction Center, 1-800-944-2904 (tollĆfree), from anywhere in the U.S.A.
q Insert a new halogen bulb. Service
If you ever need service, first see the "Troubleshooting" section of the freezer compartment.
26
Write...
Bosch B24ID80SRS Reviews
We have not received any reviews for Bosch yet.