
Setup Manual
Page 2
Table of Contents Chapter 1: Introduction 3 1.1 Before You Start 3 1.2 Package Checklist 3 1.3 Motherboard Features 4 1.4 Rear Panel Connectors 6 1.5 Motherboard Layout 7 Chapter 2: Hardware Installation 8 2.1 Installing Central Processing Unit (CPU 8 2.2 FAN Headers 10 2.3 Installing System Memory 11 2.4 Connectors and Slots 13 Chapter 3: Headers & Jumpers Setup 15 3.1 ...
Table of Contents Chapter 1: Introduction 3 1.1 Before You Start 3 1.2 Package Checklist 3 1.3 Motherboard Features 4 1.4 Rear Panel Connectors 6 1.5 Motherboard Layout 7 Chapter 2: Hardware Installation 8 2.1 Installing Central Processing Unit (CPU 8 2.2 FAN Headers 10 2.3 Installing System Memory 11 2.4 Connectors and Slots 13 Chapter 3: Headers & Jumpers Setup 15 3.1 ...

Setup Manual
Page 4
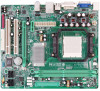
... 7025/NF 630a GeForce 7025/NF 630a ITE 8716F ITE 8716F Provides the most commonly usedlegacy Super Provides the most commonly used legacy Super I /O functionality. Motherboard Manual 1.3 MOT HERBOARD FEAT URES Ver 5.x Ver 6.x CPU FSB Socket AM2 Socket AM2 AMDAthlon 64 / Athlon 64 FX / Athlon 64 x2 / AMDAthlon 64 / Athlon 64...
... 7025/NF 630a GeForce 7025/NF 630a ITE 8716F ITE 8716F Provides the most commonly usedlegacy Super Provides the most commonly used legacy Super I /O functionality. Motherboard Manual 1.3 MOT HERBOARD FEAT URES Ver 5.x Ver 6.x CPU FSB Socket AM2 Socket AM2 AMDAthlon 64 / Athlon 64 FX / Athlon 64 x2 / AMDAthlon 64 / Athlon 64...

Setup Manual
Page 6
... signals trans mission onl y. [ D-Sub VGA Port Transmit anal og vi deo signals to digital display devices s uch as flat panel LCDs or digital projectors. Motherboard Manual 1.4 REAR PANEL CONNECT ORS X PS/2 Mouse Port Y PS/2 Keyboard Port Z DVI-D VGA Port The Digital Visual Interface (DVI) is a video i nterface trans mitting digital...
... signals trans mission onl y. [ D-Sub VGA Port Transmit anal og vi deo signals to digital display devices s uch as flat panel LCDs or digital projectors. Motherboard Manual 1.4 REAR PANEL CONNECT ORS X PS/2 Mouse Port Y PS/2 Keyboard Port Z DVI-D VGA Port The Digital Visual Interface (DVI) is a video i nterface trans mitting digital...

Setup Manual
Page 8
Step 2: Pull the lever toward direction A from the socket and then raise the lever up to a 90-degree angle. Step 3: Look for the white triangle on socket, and the gold triangle on CPU should point towards this white triangle. The CPU will fit only in the correct orientation. 8 Motherboard Manual CHAPTER 2: HARDWARE INSTALLATION 2.1 INST ALLING CENT RAL PROCESSING UNIT (CPU) Step 1: Remove the socket protection cap.
Step 2: Pull the lever toward direction A from the socket and then raise the lever up to a 90-degree angle. Step 3: Look for the white triangle on socket, and the gold triangle on CPU should point towards this white triangle. The CPU will fit only in the correct orientation. 8 Motherboard Manual CHAPTER 2: HARDWARE INSTALLATION 2.1 INST ALLING CENT RAL PROCESSING UNIT (CPU) Step 1: Remove the socket protection cap.

Setup Manual
Page 10
... cable and connector may be connected to GND. 10 Connect the fan cable to the connector while matching the black wire to the fan manufacturer. Motherboard Manual 2.2 FAN HEADERS These fan headers support cooling-fans built in the computer. The J SFAN1 and JNFAN1 s upport 3-pin head connectors. When connecting with wires...
... cable and connector may be connected to GND. 10 Connect the fan cable to the connector while matching the black wire to the fan manufacturer. Motherboard Manual 2.2 FAN HEADERS These fan headers support cooling-fans built in the computer. The J SFAN1 and JNFAN1 s upport 3-pin head connectors. When connecting with wires...

Setup Manual
Page 12
... bus width of the same density in pair, shown in the f ollowing table. Dual Channel Memory installation To trigger the Dual Channel f unction of the motherboard, the memory module must meet the following requirements: Install memory module of the memory module must be the same (x8 or x16) 12...
... bus width of the same density in pair, shown in the f ollowing table. Dual Channel Memory installation To trigger the Dual Channel f unction of the motherboard, the memory module must meet the following requirements: Install memory module of the memory module must be the same (x8 or x16) 12...

Setup Manual
Page 13
GF7025-M2 2.4 CONNECT ORS AND SLOT S FDD1: Floppy Disk Conne ctor The motherboard prov ides a standard floppy disk connector that prov ides PIO Mode 0~4, Bus Master, and Ultra DMA 33/66/100/133 f unctionality. This connector supports the prov ided f loppy drive ribbon cables. 2 34 1 33 IDE1: Hard Disk Conne ctor The motherboard has a 32-bit Enhanced PCI IDE Controller that supports 360K, 720K, 1.2M, 1.44M and 2.88M floppy disk ty pes. The IDE connector can connect a master and a slave drive, so y ou can connect up to two hard disk driv es. 40 39 21 13
GF7025-M2 2.4 CONNECT ORS AND SLOT S FDD1: Floppy Disk Conne ctor The motherboard prov ides a standard floppy disk connector that prov ides PIO Mode 0~4, Bus Master, and Ultra DMA 33/66/100/133 f unctionality. This connector supports the prov ided f loppy drive ribbon cables. 2 34 1 33 IDE1: Hard Disk Conne ctor The motherboard has a 32-bit Enhanced PCI IDE Controller that supports 360K, 720K, 1.2M, 1.44M and 2.88M floppy disk ty pes. The IDE connector can connect a master and a slave drive, so y ou can connect up to two hard disk driv es. 40 39 21 13

Setup Manual
Page 14
Motherboard Manual PCI-EX16: PCI-Express x16 Slot - PCI-Express 1.0a compliant. - PCI stands f or Peripheral Component Interconnect, and it is equipped with 2 standard PCI slots. ... supports a raw bit-rate of 8GB/s totally. PCI-Express 1.0a compliant. - PCI-EX1_1 PCI-EX16 PCI1~PCI2: Pe riphe ral Component Interconne ct Slots This motherboard is a bus standard for expansion cards. This PCI slot is designated as 32 bits. PCI1 PCI2 14 Maximum theoretical realized bandwidth of 4GB/s simultaneously per...
Motherboard Manual PCI-EX16: PCI-Express x16 Slot - PCI-Express 1.0a compliant. - PCI stands f or Peripheral Component Interconnect, and it is equipped with 2 standard PCI slots. ... supports a raw bit-rate of 8GB/s totally. PCI-Express 1.0a compliant. - PCI-EX1_1 PCI-EX16 PCI1~PCI2: Pe riphe ral Component Interconne ct Slots This motherboard is a bus standard for expansion cards. This PCI slot is designated as 32 bits. PCI1 PCI2 14 Maximum theoretical realized bandwidth of 4GB/s simultaneously per...

Setup Manual
Page 16
Motherboard Manual JATXPWR1: ATX Powe r Source C onne ctor This connector allows user to connect 24-pin power connector on the ATX power supply. 12 24 Pin ...
Motherboard Manual JATXPWR1: ATX Powe r Source C onne ctor This connector allows user to connect 24-pin power connector on the ATX power supply. 12 24 Pin ...

Setup Manual
Page 17
J USB3 JU SB2 JUSB4 12 9 10 Pin Assignment 1 +5V (fused) 2 +5V (fused) 3 USB4 USB5 USB+ 6 USB+ 7 Ground 8 Ground 9 Key 10 NC SATA1~SATA4: Se rial ATA Connectors The motherboard has a PCI to connect additional USB cable on the PC f ront panel, and also can be connected with 4 channels SATA interf ace. GF7025-M2 JUSB2/JUSB3/JUSB4: He ade rs for USB 2.0 Ports at Front Panel This header allows user to SATA Controller with internal USB devices, like USB card reader. SATA2 SATA4 SATA1 SATA3 14 7 Pin Assignment 1 Ground 2 TX+ 3 TX4 Ground 5 RX6 RX+ 7 Ground 17
J USB3 JU SB2 JUSB4 12 9 10 Pin Assignment 1 +5V (fused) 2 +5V (fused) 3 USB4 USB5 USB+ 6 USB+ 7 Ground 8 Ground 9 Key 10 NC SATA1~SATA4: Se rial ATA Connectors The motherboard has a PCI to connect additional USB cable on the PC f ront panel, and also can be connected with 4 channels SATA interf ace. GF7025-M2 JUSB2/JUSB3/JUSB4: He ade rs for USB 2.0 Ports at Front Panel This header allows user to SATA Controller with internal USB devices, like USB card reader. SATA2 SATA4 SATA1 SATA3 14 7 Pin Assignment 1 Ground 2 TX+ 3 TX4 Ground 5 RX6 RX+ 7 Ground 17

Setup Manual
Page 18
... 10 Jack Sense JCDIN1: CD-RO M Audio-in Connector This connector allows user to connect the front audio output cable with the PC f ront panel. Motherboard Manual JAUDIO F1: Front Panel Audio Heade r This header allows user to connect the audio source f rom the v ariaty dev ices, like CD-ROM, DVD...
... 10 Jack Sense JCDIN1: CD-RO M Audio-in Connector This connector allows user to connect the front audio output cable with the PC f ront panel. Motherboard Manual JAUDIO F1: Front Panel Audio Heade r This header allows user to connect the audio source f rom the v ariaty dev ices, like CD-ROM, DVD...

Setup Manual
Page 19
... the BIOS saf e setting and the CMOS data, please carefully f ollow the procedures to avoid damaging the motherboard. 3 1 3 1 Pin 1-2 Close: Normal Operation (default). 3 1 Pin 2-3 Close: Clear CMOS data. ※ Clear CMOS Proce dures: 1. GF7025-M2 JSPDIF_O UT1: Digital Audio-out Conne ctor This connector allows user to connect the PCI bracket SPDIF output...
... the BIOS saf e setting and the CMOS data, please carefully f ollow the procedures to avoid damaging the motherboard. 3 1 3 1 Pin 1-2 Close: Normal Operation (default). 3 1 Pin 2-3 Close: Clear CMOS data. ※ Clear CMOS Proce dures: 1. GF7025-M2 JSPDIF_O UT1: Digital Audio-out Conne ctor This connector allows user to connect the PCI bracket SPDIF output...

Setup Manual
Page 20
Motherboard Manual JPRNT1: Printe r Port Connector This header allows you to connector printer on the PC. 2 1 25 Pin Assignment 1 -Strobe 2 -ALF 3 Data 0 4 -Error 5 Data 1 6 -Init 7 Data 2 8 -... Ground 19 -ACK 20 Ground 21 Busy 22 Ground 23 PE 24 Ground 25 SCLT 26 Key JCO M1: Se rial port Conne ctor The motherboard has a Serial Port Connector for connecting RS-232 Port. 2 10 1 9 Pin Assignment 1 Carrier detect 2 Received data 3 T ransmitted data 4 Data terminal ready 5 Signal ground 6 Data set...
Motherboard Manual JPRNT1: Printe r Port Connector This header allows you to connector printer on the PC. 2 1 25 Pin Assignment 1 -Strobe 2 -ALF 3 Data 0 4 -Error 5 Data 1 6 -Init 7 Data 2 8 -... Ground 19 -ACK 20 Ground 21 Busy 22 Ground 23 PE 24 Ground 25 SCLT 26 Key JCO M1: Se rial port Conne ctor The motherboard has a Serial Port Connector for connecting RS-232 Port. 2 10 1 9 Pin Assignment 1 Carrier detect 2 Received data 3 T ransmitted data 4 Data terminal ready 5 Signal ground 6 Data set...

Setup Manual
Page 22
... data can be applied for the storage space of automatic backup that requires f ault tolerance and minimal capacity. Benefits: Prov ides 100% data redundancy. Motherboard Manual RAID 1: Every read and write is actually carried out in parallel across 2 disk drives in the array.
... data can be applied for the storage space of automatic backup that requires f ault tolerance and minimal capacity. Benefits: Prov ides 100% data redundancy. Motherboard Manual RAID 1: Every read and write is actually carried out in parallel across 2 disk drives in the array.

Setup Manual
Page 24
... combination of good perf ormance, good f ault tolerance, and high capacity and storage efficiency. Drawbacks: Individual block data transfer rate same as a single disk. Motherboard Manual RAID 5: RAID 5 stripes both data and parity information across all the drives in the array.
... combination of good perf ormance, good f ault tolerance, and high capacity and storage efficiency. Drawbacks: Individual block data transfer rate same as a single disk. Motherboard Manual RAID 5: RAID 5 stripes both data and parity information across all the drives in the array.

Setup Manual
Page 25
...installation program. B. Manual Aside from http://www.adobe.com/products/acrobat/readstep 2.html 25 Note: You will list the compatible driver for your motherboard and operating system. Note: If this window didn't show up after you insert the CD T he setup guide will list the software .... Software Installation To install the software, please click on the Driver icon. GF7025-M2 CHAPTER 5: USEFUL HELP 5.1 DRIVER INST ALLAT ION NOT E After you ins ert the Driver CD, please use file brows er to locate and execute the file SETUP.EXE under your motherboard and operating system.
...installation program. B. Manual Aside from http://www.adobe.com/products/acrobat/readstep 2.html 25 Note: You will list the compatible driver for your motherboard and operating system. Note: If this window didn't show up after you insert the CD T he setup guide will list the software .... Software Installation To install the software, please click on the Driver icon. GF7025-M2 CHAPTER 5: USEFUL HELP 5.1 DRIVER INST ALLAT ION NOT E After you ins ert the Driver CD, please use file brows er to locate and execute the file SETUP.EXE under your motherboard and operating system.

Setup Manual
Page 26
..., please follow steps below to avoid a damage of the CPU, and the system may not power on again. Wait for seconds. 3. Wait for seconds. 3. Motherboard Manual 5.2 AWARD BIOS BEEP CODE Beep Sound One long beep followed by two short beeps Meaning Video card not found during POST Long beeps every... 5.3 EXT RA INFORMAT ION CPU Overheated If the system shutdown automatically after power on the system again. 26 CPU fan is over heated, the motherboard will shut down automatically One Short beep when system boot-up the system. Plug in the power cord and boot up No error found or...
..., please follow steps below to avoid a damage of the CPU, and the system may not power on again. Wait for seconds. 3. Wait for seconds. 3. Motherboard Manual 5.2 AWARD BIOS BEEP CODE Beep Sound One long beep followed by two short beeps Meaning Video card not found during POST Long beeps every... 5.3 EXT RA INFORMAT ION CPU Overheated If the system shutdown automatically after power on the system again. 26 CPU fan is over heated, the motherboard will shut down automatically One Short beep when system boot-up the system. Plug in the power cord and boot up No error found or...

Setup Manual
Page 28
... CPU core voltage and Memory voltage. The cool Hardware Monitor smartly indicates the temperatures, voltage and CPU fan speed as well as the chipset information. Motherboard Manual CHAPTER 6: WARPSPEEDER™ III 6.1 INT RODUCT ION [WarpSpeeder™ III], a new powerful control utility, features three user-friendly functions including Overclock Manager, Overvoltage Manager...
... CPU core voltage and Memory voltage. The cool Hardware Monitor smartly indicates the temperatures, voltage and CPU fan speed as well as the chipset information. Motherboard Manual CHAPTER 6: WARPSPEEDER™ III 6.1 INT RODUCT ION [WarpSpeeder™ III], a new powerful control utility, features three user-friendly functions including Overclock Manager, Overvoltage Manager...

Setup Manual
Page 29
When you see the following dialog will change according to i n stall . 2. Click "Finish" button. Execute the setup execution file, and then the following dialog in this user manual will pop up. Usage : The following figures are only for reference, the screen printed in setup procedure, it means setup is completed. Please click "Next" button and follow the default procedure to your motherboard on hand. 29 GF7025-M2 6.3 INST ALLAT ION 1.
When you see the following dialog will change according to i n stall . 2. Click "Finish" button. Execute the setup execution file, and then the following dialog in this user manual will pop up. Usage : The following figures are only for reference, the screen printed in setup procedure, it means setup is completed. Please click "Next" button and follow the default procedure to your motherboard on hand. 29 GF7025-M2 6.3 INST ALLAT ION 1.

Setup Manual
Page 30
Main Panel If you can launch the [WarpSpeeder™ III] utility simply by double-clicking the desktop icon. 2. Main Panel contains fe ature s as follows: a. Motherboard Manual 6.4 WARPSPEEDER™ III 1. Please refer to the following figure; b. Contains About, Voltage/Overclock, and Hardware Monitor Buttons for closing the program. 30 T he On/...
Main Panel If you can launch the [WarpSpeeder™ III] utility simply by double-clicking the desktop icon. 2. Main Panel contains fe ature s as follows: a. Motherboard Manual 6.4 WARPSPEEDER™ III 1. Please refer to the following figure; b. Contains About, Voltage/Overclock, and Hardware Monitor Buttons for closing the program. 30 T he On/...


