
GeForce 6100-M7 user's manual
Page 2
Table of Contents Chapter 1: Introduction 1 1.1 Motherboard Features 1 1.2 Layout and Components 4 Chapter 2: Hardware Installation 5 2.1 Installing Central Processing Unit (CPU 5 2.2 FAN Headers 6 2.3 Installing System Memory 7 2.4 Connectors and Slots 8 Chapter 3: Headers & Jumpers Setup 10 3.1 How to Setup Jumpers 10 3.2 Detail Settings 10 Chapter 4: Useful Help 16 4.1 Award BIOS Beep Code 16 4.2 ...
Table of Contents Chapter 1: Introduction 1 1.1 Motherboard Features 1 1.2 Layout and Components 4 Chapter 2: Hardware Installation 5 2.1 Installing Central Processing Unit (CPU 5 2.2 FAN Headers 6 2.3 Installing System Memory 7 2.4 Connectors and Slots 8 Chapter 3: Headers & Jumpers Setup 10 3.1 How to Setup Jumpers 10 3.2 Detail Settings 10 Chapter 4: Useful Help 16 4.1 Award BIOS Beep Code 16 4.2 ...
GeForce 6100-M7 user's manual
Page 4
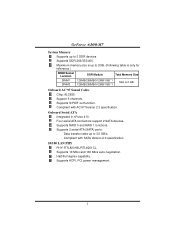
... Serial ATA Integrated in nForce 410. Supports 2 serial ATA (SATA) ports. - Maximum memory size is up to 2 DDR devices. Half/Full duplex capability. Supports S/PDIF out function. Compliant with AC'97 Version 2.3 specification. Supports ACPI, PCI power management. 2 GeForce 6100-M7 System Memory Supports up to 3.0 GB/s. - Supports DDR-266/333/400. Compliant with SATA...
... Serial ATA Integrated in nForce 410. Supports 2 serial ATA (SATA) ports. - Maximum memory size is up to 2 DDR devices. Half/Full duplex capability. Supports S/PDIF out function. Compliant with AC'97 Version 2.3 specification. Supports ACPI, PCI power management. 2 GeForce 6100-M7 System Memory Supports up to 3.0 GB/s. - Supports DDR-266/333/400. Compliant with SATA...

GeForce 6100-M7 user's manual
Page 9
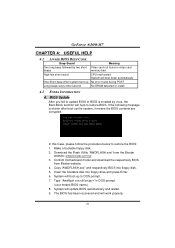
Insert the DIMM vertically and firmly into the slot until the retaining chip snap back in place and the DIMM is properly seated. Note: To remove the DDR modules, push the ejector tabs at both sides of the slot outward at the same time, and pull the modules out vertically. 7 Unlock a DIMM slot by pressing the retaining clips outward. DIMM1 DIMM2 GeForce 6100-M7 2.3 INSTALLING SYSTEM MEMORY 1. Align a DIMM on the slot such that the notch on the DIMM matches the break on the Slot. 2.
Insert the DIMM vertically and firmly into the slot until the retaining chip snap back in place and the DIMM is properly seated. Note: To remove the DDR modules, push the ejector tabs at both sides of the slot outward at the same time, and pull the modules out vertically. 7 Unlock a DIMM slot by pressing the retaining clips outward. DIMM1 DIMM2 GeForce 6100-M7 2.3 INSTALLING SYSTEM MEMORY 1. Align a DIMM on the slot such that the notch on the DIMM matches the break on the Slot. 2.
GeForce 6100-M7 user's manual
Page 18
... In this Case, please follow the procedure below to restore BIOS. Confirm motherboard model and download the respectively BIOS from the Biostar website: www.biostar.com.tw 3. If the following message is invaded by two short beeps High-low siren sound One Short beep when system ... A. Insert the bootable disk into floppy disk. 5. GeForce 6100-M7 CHAPTER 4: USEFUL HELP 4.1 AWARD BIOS BEEP CODE Beep Sound One long beep followed by virus, the Boot-Block function will shut down automatically No error found or video card memory bad CPU overheated System will help to restore the BIOS...
... In this Case, please follow the procedure below to restore BIOS. Confirm motherboard model and download the respectively BIOS from the Biostar website: www.biostar.com.tw 3. If the following message is invaded by two short beeps High-low siren sound One Short beep when system ... A. Insert the bootable disk into floppy disk. 5. GeForce 6100-M7 CHAPTER 4: USEFUL HELP 4.1 AWARD BIOS BEEP CODE Beep Sound One long beep followed by virus, the Boot-Block function will shut down automatically No error found or video card memory bad CPU overheated System will help to restore the BIOS...
GeForce 6100-M7 user's manual
Page 21
... restart to a speed that is either the original system speed or a suitable one click. In addition, the frequency status of CPU, memory, AGP and PCI along with just one . 5.2 SYSTEM REQUIREMENT OS Support: Windows 98 SE, Windows Me, Windows 2000, Windows XP ...smartly indicates the temperatures, voltage and CPU fan speed as well as the chipset information. The Overvoltage Manager, on our main panel. GeForce 6100-M7 CHAPTER 5: WARPSPEEDER™ 5.1 INTRODUCTION [WarpSpeeder™], a new powerful control utility, features three user-friendly functions including Overclock Manager, Overvoltage...
... restart to a speed that is either the original system speed or a suitable one click. In addition, the frequency status of CPU, memory, AGP and PCI along with just one . 5.2 SYSTEM REQUIREMENT OS Support: Windows 98 SE, Windows Me, Windows 2000, Windows XP ...smartly indicates the temperatures, voltage and CPU fan speed as well as the chipset information. The Overvoltage Manager, on our main panel. GeForce 6100-M7 CHAPTER 5: WARPSPEEDER™ 5.1 INTRODUCTION [WarpSpeeder™], a new powerful control utility, features three user-friendly functions including Overclock Manager, Overvoltage...

GeForce 6100-M7 user's manual
Page 24
Display the CPU Speed, CPU external clock, Memory clock, AGP clock, and PCI clock information. b. With a user-friendly Status Animation, it can represent 3 overclock percentage stages: Man walking→overclock percentage from 100% ~ ... as follows: a. the utility's first window you click the tray icon, [WarpSpeeder™] utility will see is Main Panel. Please refer to the following figure; c. GeForce 6100-M7 2. Main Panel If you will be invoked.
Display the CPU Speed, CPU external clock, Memory clock, AGP clock, and PCI clock information. b. With a user-friendly Status Animation, it can represent 3 overclock percentage stages: Man walking→overclock percentage from 100% ~ ... as follows: a. the utility's first window you click the tray icon, [WarpSpeeder™] utility will see is Main Panel. Please refer to the following figure; c. GeForce 6100-M7 2. Main Panel If you will be invoked.

GeForce 6100-M7 user's manual
Page 25
Voltage Panel Click the Voltage button in Main Panel, the button will be highlighted and the Voltage Panel will slide out to get the best performance of overclocking, we recommend you click the option "Yes". 23 The default setting is "No". If you can decide to increase CPU core voltage and Memory voltage or not. In this panel, you want to up as the following figure. GeForce 6100-M7 3.
Voltage Panel Click the Voltage button in Main Panel, the button will be highlighted and the Voltage Panel will slide out to get the best performance of overclocking, we recommend you click the option "Yes". 23 The default setting is "No". If you can decide to increase CPU core voltage and Memory voltage or not. In this panel, you want to up as the following figure. GeForce 6100-M7 3.


