
User Manual
Page 1
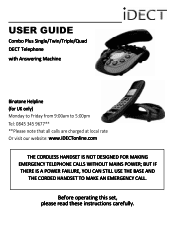
USER GUIDE Combo Plus Single/Twin/Triple/Quad DECT Telephone with Answering Machine Binatone Helpline (for UK only) Monday to Friday from 9:00am to 5:00pm Tel: 0845 345 9677** **Please note that all calls are charged at local rate Or visit our website: www.iDECTonline.com THE CORDLESS HANDSET IS NOT DESIGNED FOR MAKING EMERGENCY TELEPHONE CALLS WITHOUT MAINS POWER; Before operating this set, please read these instructions carefully. BUT IF THERE IS A POWER FAILURE, YOU CAN STILL USE THE BASE AND THE CORDED HANDSET TO MAKE AN EMERGENCY CALL.
USER GUIDE Combo Plus Single/Twin/Triple/Quad DECT Telephone with Answering Machine Binatone Helpline (for UK only) Monday to Friday from 9:00am to 5:00pm Tel: 0845 345 9677** **Please note that all calls are charged at local rate Or visit our website: www.iDECTonline.com THE CORDLESS HANDSET IS NOT DESIGNED FOR MAKING EMERGENCY TELEPHONE CALLS WITHOUT MAINS POWER; Before operating this set, please read these instructions carefully. BUT IF THERE IS A POWER FAILURE, YOU CAN STILL USE THE BASE AND THE CORDED HANDSET TO MAKE AN EMERGENCY CALL.
User Manual
Page 2
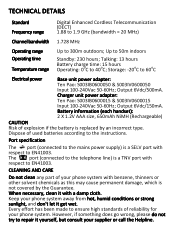
... (Rechargeable) CAUTION Risk of your phone system. Port specification The port (connected to the telephone line) is not covered by an incorrect type. CLEANING AND CARE Do not clean any part of explosion if the battery is replaced by the Guarantee. TECHNICAL DETAILS Standard Frequency range Digital Enhanced Cordless Telecommunication (DECT) 1.88 to 1.9 GHz (bandwidth = 20 MHz) Channel bandwidth 1.728 MHz Operating range Operating time Temperature range Up to 50m indoors Standby...
... (Rechargeable) CAUTION Risk of your phone system. Port specification The port (connected to the telephone line) is not covered by an incorrect type. CLEANING AND CARE Do not clean any part of explosion if the battery is replaced by the Guarantee. TECHNICAL DETAILS Standard Frequency range Digital Enhanced Cordless Telecommunication (DECT) 1.88 to 1.9 GHz (bandwidth = 20 MHz) Channel bandwidth 1.728 MHz Operating range Operating time Temperature range Up to 50m indoors Standby...
User Manual
Page 3
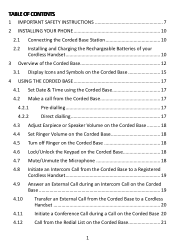
... 2.1 Connecting the Corded Base Station 10 2.2 Installing and Charging the Rechargeable Batteries of your Cordless Handset 10 3 Overview of the Corded Base 12 3.1 Display Icons and Symbols on the Corded Base 15 4 USING THE CORDED BASE 17 4.1 Set Date & Time using the Corded Base 17 4.2 Make a call from the Corded Base 17 4.2.1 Pre-dialling 17 4.2.2 Direct dialling 17 4.3 Adjust Earpiece or Speaker Volume on the Corded Base .......... 18 4.4 Set Ringer Volume on the Corded Base 18 4.5 Turn off Ringer on the Corded Base 18 4.6 Lock/Unlock the Keypad on the Corded Base 18 4.7 Mute...
... 2.1 Connecting the Corded Base Station 10 2.2 Installing and Charging the Rechargeable Batteries of your Cordless Handset 10 3 Overview of the Corded Base 12 3.1 Display Icons and Symbols on the Corded Base 15 4 USING THE CORDED BASE 17 4.1 Set Date & Time using the Corded Base 17 4.2 Make a call from the Corded Base 17 4.2.1 Pre-dialling 17 4.2.2 Direct dialling 17 4.3 Adjust Earpiece or Speaker Volume on the Corded Base .......... 18 4.4 Set Ringer Volume on the Corded Base 18 4.5 Turn off Ringer on the Corded Base 18 4.6 Lock/Unlock the Keypad on the Corded Base 18 4.7 Mute...
User Manual
Page 7
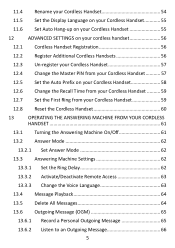
... your Cordless Handset 58 12.6 Change the Recall Time from your Cordless Handset .......... 59 12.7 Set the First Ring from your Cordless Handset 59 12.8 Reset the Cordless Handset 60 13 OPERATING THE ANSWERING MACHINE FROM YOUR CORDLESS HANDSET 61 13.1 Turning the Answering Machine On/Off 61 13.2 Answer Mode 62 13.2.1 Set Answer Mode 62 13.3 Answering Machine Settings 62 13.3.1 Set the Ring Delay 62 13.3.2 Activate/Deactivate Remote Access 63 13.3.3 Change the Voice Language 63 13.4 Message Playback 64 13.5 Delete All Messages 64...
... your Cordless Handset 58 12.6 Change the Recall Time from your Cordless Handset .......... 59 12.7 Set the First Ring from your Cordless Handset 59 12.8 Reset the Cordless Handset 60 13 OPERATING THE ANSWERING MACHINE FROM YOUR CORDLESS HANDSET 61 13.1 Turning the Answering Machine On/Off 61 13.2 Answer Mode 62 13.2.1 Set Answer Mode 62 13.3 Answering Machine Settings 62 13.3.1 Set the Ring Delay 62 13.3.2 Activate/Deactivate Remote Access 63 13.3.3 Change the Voice Language 63 13.4 Message Playback 64 13.5 Delete All Messages 64...
User Manual
Page 10
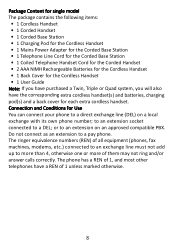
... ringer equivalence numbers (REN) of all equipment (phones, fax machines, modems, etc.) connected to an exchange line must not add up to a direct exchange line (DEL) on an approved compatible PBX. The phone has a REN of 1, and most other telephones have the corresponding extra cordless handset(s) and batteries, charging pod(s) and a back cover for each extra cordless handset. Package Content for single model The package contains the following items: • 1 Cordless Handset • 1 Corded Handset • 1 Corded Base Station...
... ringer equivalence numbers (REN) of all equipment (phones, fax machines, modems, etc.) connected to an exchange line must not add up to a direct exchange line (DEL) on an approved compatible PBX. The phone has a REN of 1, and most other telephones have the corresponding extra cordless handset(s) and batteries, charging pod(s) and a back cover for each extra cordless handset. Package Content for single model The package contains the following items: • 1 Cordless Handset • 1 Corded Handset • 1 Corded Base Station...
User Manual
Page 12
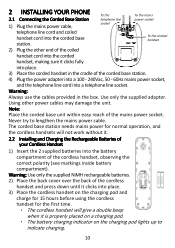
... corded base station. To the corded handset 2) Plug the other power cables may damage the unit. The corded base station needs mains power for the first time. • The cordless handset will not work without it is properly placed on a charging pod. • The battery charging indicator on the charging pod lights up to lengthen the mains power cable. 2 INSTALLING YOUR PHONE 2.1 Connecting the Corded Base Station 1) Plug the mains power cable, To the telephone line socket To the mains power socket telephone line cord...
... corded base station. To the corded handset 2) Plug the other power cables may damage the unit. The corded base station needs mains power for the first time. • The cordless handset will not work without it is properly placed on a charging pod. • The battery charging indicator on the charging pod lights up to lengthen the mains power cable. 2 INSTALLING YOUR PHONE 2.1 Connecting the Corded Base Station 1) Plug the mains power cable, To the telephone line socket To the mains power socket telephone line cord...

User Manual
Page 15
... the next message. ④ C In standby mode, press to access the call in speaker mode. Pressed down to end a call on a corded handset. In settings mode, press to confirm a setting. ⑤ R In standby mode, press to show the last dialled number. ⑥ # ⑦ * ⑧ S ⑨ P ⑩ F ⑪ LCD screen In standby mode, press and hold to add a dialling pause. When dialling, press and hold to turn the base ringer On...
... the next message. ④ C In standby mode, press to access the call in speaker mode. Pressed down to end a call on a corded handset. In settings mode, press to confirm a setting. ⑤ R In standby mode, press to show the last dialled number. ⑥ # ⑦ * ⑧ S ⑨ P ⑩ F ⑪ LCD screen In standby mode, press and hold to add a dialling pause. When dialling, press and hold to turn the base ringer On...
User Manual
Page 16
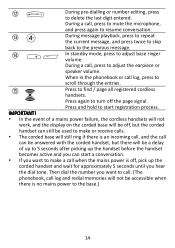
... power failure, the cordless handsets will not work, and the display on the corded base will be off, but the corded handset can still be used to make a call when the mains power is off the page signal. If you want to call. (The phonebook, call log and redial memories will still ring if there is no mains power to make or receive calls. Then dial the number you hear the dial tone. Press...
... power failure, the cordless handsets will not work, and the display on the corded base will be off, but the corded handset can still be used to make a call when the mains power is off the page signal. If you want to call. (The phonebook, call log and redial memories will still ring if there is no mains power to make or receive calls. Then dial the number you hear the dial tone. Press...
User Manual
Page 18
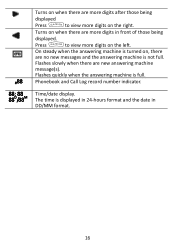
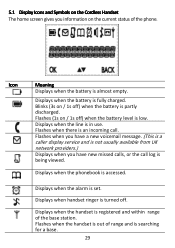
... full. Flashes quickly when the answering machine is displayed in 24-hours format and the date in front of those being displayed C Press to view more digits in DD/MM format. 16 Phonebook and Call Log record number indicator. The time is full. #88 88: 88 88D/88M Turns on when there are more digits after those being displayed. Time/date display. Turns on the right. Flashes slowly when there are new answering machine message(s).
... full. Flashes quickly when the answering machine is displayed in 24-hours format and the date in front of those being displayed C Press to view more digits in DD/MM format. 16 Phonebook and Call Log record number indicator. The time is full. #88 88: 88 88D/88M Turns on when there are more digits after those being displayed. Time/date display. Turns on the right. Flashes slowly when there are new answering machine message(s).
User Manual
Page 27
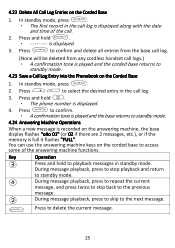
... to playback messages in standby mode. Press to select the desired entry in the call . Key Operation 3 Press and hold . is displayed along with the date and time of the answering machine functions. C 3. P 3. In standby mode, press . • The first record in the call logs.) • A confirmation tone is displayed. Press and hold . • The phone number is played and the corded base returns to standby mode. 4.23 Save a Call Log...
... to playback messages in standby mode. Press to select the desired entry in the call . Key Operation 3 Press and hold . is displayed along with the date and time of the answering machine functions. C 3. P 3. In standby mode, press . • The first record in the call logs.) • A confirmation tone is displayed. Press and hold . • The phone number is played and the corded base returns to standby mode. 4.23 Save a Call Log...
User Manual
Page 31
... is partly discharged. Displays when handset ringer is turned off ) when the battery level is being viewed. Blinks (3s on / 1s off . Displays when the line is registered and within range of the base station. Flashes when you have new missed calls, or the call . Displays when the handset is in use. Displays when the battery is not usually available from UK network providers.) Displays when you have a new voicemail message. (This is a caller display service and is fully charged.
... is partly discharged. Displays when handset ringer is turned off ) when the battery level is being viewed. Blinks (3s on / 1s off . Displays when the line is registered and within range of the base station. Flashes when you have new missed calls, or the call . Displays when the handset is in use. Displays when the battery is not usually available from UK network providers.) Displays when you have a new voicemail message. (This is a caller display service and is fully charged.
User Manual
Page 33
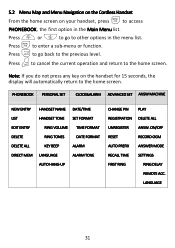
... ADVANCED SET ANSW MACHINE NEW ENTRY LIST EDIT ENTRY DELETE DELETE ALL DIRECT MEM HANDSET NAME DATE/TIME HANDSET TONE SET FORMAT RING VOLUME TIME FORMAT RING TONES DATE FORMAT KEY BEEP ALARM LANGUAGE ALARM TONE AUTO HANG-UP CHANGE PIN PLAY REGISTRATION DELETE ALL UNREGISTER ANSW. M Press to the home screen. Press + or - 5.2 Menu Map and Menu Navigation on the Cordless Handset M From the home screen on the handset for 15 seconds, the display will automatically return to the home screen. O Press to cancel the current operation...
... ADVANCED SET ANSW MACHINE NEW ENTRY LIST EDIT ENTRY DELETE DELETE ALL DIRECT MEM HANDSET NAME DATE/TIME HANDSET TONE SET FORMAT RING VOLUME TIME FORMAT RING TONES DATE FORMAT KEY BEEP ALARM LANGUAGE ALARM TONE AUTO HANG-UP CHANGE PIN PLAY REGISTRATION DELETE ALL UNREGISTER ANSW. M Press to the home screen. Press + or - 5.2 Menu Map and Menu Navigation on the Cordless Handset M From the home screen on the handset for 15 seconds, the display will automatically return to the home screen. O Press to cancel the current operation...
User Manual
Page 61
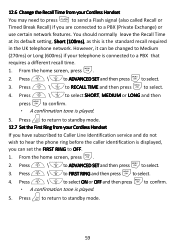
.... 4. 12.6 Change the Recall Time from your Cordless Handset If you have subscribed to Caller Line Identification service and do not wish to hear the phone ring before the caller identification is connected to a PBX that requires a different recall time. Press to return to standby mode. 12.7 Set the First Ring from your telephone is displayed, you are connected to OFF. M 1. From the home screen, press . O 5. From the home screen, press . Press...
.... 4. 12.6 Change the Recall Time from your Cordless Handset If you have subscribed to Caller Line Identification service and do not wish to hear the phone ring before the caller identification is connected to a PBX that requires a different recall time. Press to return to standby mode. 12.7 Set the First Ring from your telephone is displayed, you are connected to OFF. M 1. From the home screen, press . O 5. From the home screen, press . Press...
User Manual
Page 63
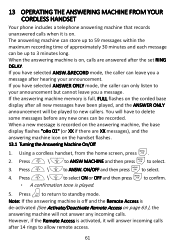
... answering machine is recorded on the handset flashes. 13.1 Turning the Answering Machine On/Off M 1. If you a message. Press to return to your announcement. When a new message is on, calls are XX messages), and the answering machine icon on the answering machine, the base display flashes "o#o 01" (or XX if there are answered after the set RING DELAY. However, if the Remote Access is activated, it is full, FULL flashes on . If the answering machine memory is on the corded base display...
... answering machine is recorded on the handset flashes. 13.1 Turning the Answering Machine On/Off M 1. If you a message. Press to return to your announcement. When a new message is on, calls are XX messages), and the answering machine icon on the answering machine, the base display flashes "o#o 01" (or XX if there are answered after the set RING DELAY. However, if the Remote Access is activated, it is full, FULL flashes on . If the answering machine memory is on the corded base display...

User Manual
Page 64
... the number of rings before the answering machine of your RING DELAY to 7 rings, or ECONOMY. otherwise the network service will answer all your network voice messaging system (e.g. Press + \-to SETTINGS and then press to select. 13.2 Answer Mode The phone comes with two pre-recorded outgoing messages (OGM) for the respective answer modes: ANSWER ONLY and ANSW. &RECORD. By default, the answer mode is enabled, you must set the delay from the home screen, press...
... the number of rings before the answering machine of your RING DELAY to 7 rings, or ECONOMY. otherwise the network service will answer all your network voice messaging system (e.g. Press + \-to SETTINGS and then press to select. 13.2 Answer Mode The phone comes with two pre-recorded outgoing messages (OGM) for the respective answer modes: ANSWER ONLY and ANSW. &RECORD. By default, the answer mode is enabled, you must set the delay from the home screen, press...
User Manual
Page 65
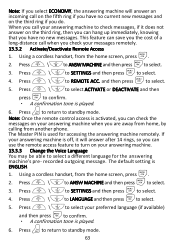
If your answering machine is used for the answering machine's pre- M 1. When you call your answering machine to check messages, if it will answer an incoming call when you do. M 2. Press + \-to ANSW MACHINE and then press to standby mode. Press to return to select. Press + \-to LANGUAGE and then press to select. O 6. Using a cordless handset, from the home screen, press . M 3. The Master PIN is off, it does not answer on the third ring, then...
If your answering machine is used for the answering machine's pre- M 1. When you call your answering machine to check messages, if it will answer an incoming call when you do. M 2. Press + \-to ANSW MACHINE and then press to standby mode. Press to return to select. Press + \-to LANGUAGE and then press to select. O 6. Using a cordless handset, from the home screen, press . M 3. The Master PIN is off, it does not answer on the third ring, then...
User Manual
Page 73
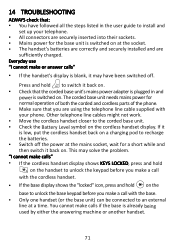
... before you make a call with your telephone. The handset's batteries are correctly and securely installed and are using the telephone line cable supplied with the base. Check the Battery Level symbol on . Make sure that : You have been switched off the power at the mains socket, wait for normal operation of both the corded and cordless parts of the phone. You cannot make or answer calls" If the handset's display is switched on the cordless handset display. All connectors...
... before you make a call with your telephone. The handset's batteries are correctly and securely installed and are using the telephone line cable supplied with the base. Check the Battery Level symbol on . Make sure that : You have been switched off the power at the mains socket, wait for normal operation of both the corded and cordless parts of the phone. You cannot make or answer calls" If the handset's display is switched on the cordless handset display. All connectors...
User Manual
Page 74
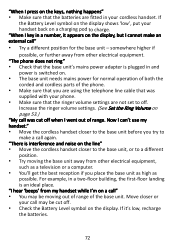
... the ringer volume settings. (See Set the Ring Volume on a call " Try a different position for normal operation of both the corded and cordless parts of the base unit. "When I key in a two-floor building, the first-floor landing is interference and noise on . Now I can't use my handset." Make sure that you are using the telephone line cable that the batteries are not set to off. "When I press on a charging pod to charge. The base unit...
... the ringer volume settings. (See Set the Ring Volume on a call " Try a different position for normal operation of both the corded and cordless parts of the base unit. "When I key in a two-floor building, the first-floor landing is interference and noise on . Now I can't use my handset." Make sure that you are using the telephone line cable that the batteries are not set to off. "When I press on a charging pod to charge. The base unit...

User Manual
Page 75
... in range of the base unit. Intercom and transfer "I hear busy tone" Because it is a multi-handset system, check whether another handset is already on a call " Make sure that you have withheld their number by dialling 141. if they may need to replace the batteries. they are low" You need to replace the batteries. Check the connection between the charging pod and the mains power socket. The caller may be calling...
... in range of the base unit. Intercom and transfer "I hear busy tone" Because it is a multi-handset system, check whether another handset is already on a call " Make sure that you have withheld their number by dialling 141. if they may need to replace the batteries. they are low" You need to replace the batteries. Check the connection between the charging pod and the mains power socket. The caller may be calling...
User Manual
Page 76
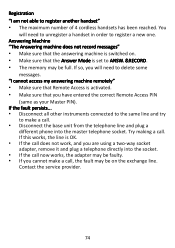
... . If the call does not work, and you will need to delete some messages. If you have entered the correct Remote Access PIN (same as your Master PIN). Disconnect the base unit from the telephone line and plug a different phone into the socket. Answering Machine "The Answering machine does not record messages" Make sure that the Answer Mode is switched on the exchange line. Make sure that Remote Access is OK. "I am not able to register a new one.
... . If the call does not work, and you will need to delete some messages. If you have entered the correct Remote Access PIN (same as your Master PIN). Disconnect the base unit from the telephone line and plug a different phone into the socket. Answering Machine "The Answering machine does not record messages" Make sure that the Answer Mode is switched on the exchange line. Make sure that Remote Access is OK. "I am not able to register a new one.


