
User Guide
Page 92
...;) • the alterations can be altered to suit your requirements: 1 Display (screen) Settings 2 Sewing Settings 3 Embroidery Settings 4 Display (screen) Calibration 5 Display Messages and Sounds 6 Information 7 Update the sewing computer 8 Reset to previous screen To Next Page • touch «To Next Page» • the next screen appears To Previous Page...
...;) • the alterations can be altered to suit your requirements: 1 Display (screen) Settings 2 Sewing Settings 3 Embroidery Settings 4 Display (screen) Calibration 5 Display Messages and Sounds 6 Information 7 Update the sewing computer 8 Reset to previous screen To Next Page • touch «To Next Page» • the next screen appears To Previous Page...
User Guide
Page 99
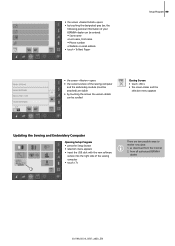
...the Internet 2. • the screen «Dealer Details» opens • by touching the designated gray bar, the following personal information of your BERNINA dealer can be entered: • Store name • Last name, First name • Phone number • Website or email address • ... the version details can be scrolled Closing Screen • touch «ESC» • the screen closes and the selection menu appears Updating the Sewing and Embroidery Computer Opening Setup Program • press the Setup button • selection menu appears • insert the USB stick ...
...the Internet 2. • the screen «Dealer Details» opens • by touching the designated gray bar, the following personal information of your BERNINA dealer can be entered: • Store name • Last name, First name • Phone number • Website or email address • ... the version details can be scrolled Closing Screen • touch «ESC» • the screen closes and the selection menu appears Updating the Sewing and Embroidery Computer Opening Setup Program • press the Setup button • selection menu appears • insert the USB stick ...

User Guide
Page 100
100 Setup-Program Reset to Factory 8 • the «update» screen appears • touch «update» • the updating process is started • checks are made whether: • a BERNINA USB stick is inserted • there is enough free memory available • the correct software version is... 106 sewing and embroidery computer is ready again for normal use with the new version Caution: Do not remove the BERNINA USB stick until the end of the update is displayed by a message. 107 Opening Setup Program • press the Setup button • selection menu appears...
100 Setup-Program Reset to Factory 8 • the «update» screen appears • touch «update» • the updating process is started • checks are made whether: • a BERNINA USB stick is inserted • there is enough free memory available • the correct software version is... 106 sewing and embroidery computer is ready again for normal use with the new version Caution: Do not remove the BERNINA USB stick until the end of the update is displayed by a message. 107 Opening Setup Program • press the Setup button • selection menu appears...
User Guide
Page 104
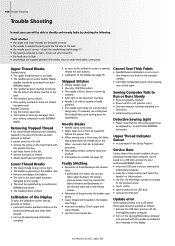
...in a cold room. • restart sewing computer Defective Sewing Light • Please note that the CFL-sewing light must be replaced by an authorized BERNINA technician. • The needle is blunt or bent. Possible Solutions: • Use the correct spool disc. • Stitch plate or hook tip ... cutting point for the inserted needle). • Use hight compensating tool, when sewing over a thick area, the fabric was pushed with the update as the calibration screen is opened, release the two buttons • Calibration of the Display see page 18 Faulty Stitching • Remnants of ...
...in a cold room. • restart sewing computer Defective Sewing Light • Please note that the CFL-sewing light must be replaced by an authorized BERNINA technician. • The needle is blunt or bent. Possible Solutions: • Use the correct spool disc. • Stitch plate or hook tip ... cutting point for the inserted needle). • Use hight compensating tool, when sewing over a thick area, the fabric was pushed with the update as the calibration screen is opened, release the two buttons • Calibration of the Display see page 18 Faulty Stitching • Remnants of ...

User Guide
Page 107
... data missing. Messages 107 There is completed. The update was cancelled. Please check whether you have inserted the correct BERNINA Memory Stick and restart the sewing computer. The automatic update was successful. Insert the BERNINA Memory Stick with the latest software version and ready ... not be provided with the update data into the sewing computer and restart the update. Insert the BERNINA Memory Stick with the latest software version. BERNINA Memory Stick not inserted. The software was found on the BERNINA Memory Stick. Check the update data on the sewing computer...
... data missing. Messages 107 There is completed. The update was cancelled. Please check whether you have inserted the correct BERNINA Memory Stick and restart the sewing computer. The automatic update was successful. Insert the BERNINA Memory Stick with the latest software version and ready ... not be provided with the update data into the sewing computer and restart the update. Insert the BERNINA Memory Stick with the latest software version. BERNINA Memory Stick not inserted. The software was found on the BERNINA Memory Stick. Check the update data on the sewing computer...
User Guide
Page 148
...; as soon as follows: • power switch to «0» (off) • remove the screw on the head frame with the update as follows: 1. See Cleaning and Lubricating on page 103) Embroidery Computer Fails to Run or Runs Slowly • plug not fully inserted •... off ) position • embroidery computer has been standing in a cold room Defective Sewing Light • take the embroidery computer to an authorized BERNINA dealer • reduce embroidery speed Skipped Stitches • incorrect needle used Needle Breaks • needle clamp screw is too loose • defective ...
...; as soon as follows: • power switch to «0» (off) • remove the screw on the head frame with the update as follows: 1. See Cleaning and Lubricating on page 103) Embroidery Computer Fails to Run or Runs Slowly • plug not fully inserted •... off ) position • embroidery computer has been standing in a cold room Defective Sewing Light • take the embroidery computer to an authorized BERNINA dealer • reduce embroidery speed Skipped Stitches • incorrect needle used Needle Breaks • needle clamp screw is too loose • defective ...
User Guide
Page 156
... factory settings to your personal requirements Software • generic term for learning about various embroidery computer features Update • latest version • updating the sewing and embroidery computer software: installing a newer or the latest version, or updating parts of stitches used • the stitch counter records the stitched length in the Setup Program...
... factory settings to your personal requirements Software • generic term for learning about various embroidery computer features Update • latest version • updating the sewing and embroidery computer software: installing a newer or the latest version, or updating parts of stitches used • the stitch counter records the stitched length in the Setup Program...
User Guide
Page 165
• Update 99-100 U • Version Information 99 Sewing Light-CFL 15 Upper Thread Tension 15 Sewing on Elastic, Shirring Elastic/Cord 52 Slide-on Bobbin Winder ...
• Update 99-100 U • Version Information 99 Sewing Light-CFL 15 Upper Thread Tension 15 Sewing on Elastic, Shirring Elastic/Cord 52 Slide-on Bobbin Winder ...
