
User Manual
Page 5
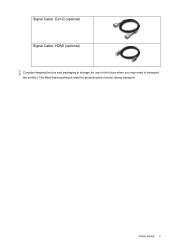
Getting started 5 The fitted foam packing is ideal for use in storage for protecting the monitor during transport. Signal Cable: DVI-D (optional) Signal Cable: HDMI (optional) Consider keeping the box and packaging in the future when you may need to transport the monitor.
Getting started 5 The fitted foam packing is ideal for use in storage for protecting the monitor during transport. Signal Cable: DVI-D (optional) Signal Cable: HDMI (optional) Consider keeping the box and packaging in the future when you may need to transport the monitor.

User Manual
Page 6
DVI-D input jack 4. AC power input jack 2. Getting to know your monitor HDMI input jack 3. 2. D-Sub input jack 6 Getting to know your monitor Front view Earphone jack Back view 1.
DVI-D input jack 4. AC power input jack 2. Getting to know your monitor HDMI input jack 3. 2. D-Sub input jack 6 Getting to know your monitor Front view Earphone jack Back view 1.
User Manual
Page 8
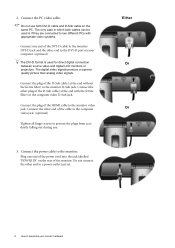
... cables can be used for direct digital connection between source video and digital LCD monitors or projectors. Do not connect the other end of the HDMI cable to the computer video D-Sub jack. Either Or Or 8 How to the monitor. Connect the power cable to assemble your computer. (optional) The DVI...
... cables can be used for direct digital connection between source video and digital LCD monitors or projectors. Do not connect the other end of the HDMI cable to the computer video D-Sub jack. Either Or Or 8 How to the monitor. Connect the power cable to assemble your computer. (optional) The DVI...
User Manual
Page 16
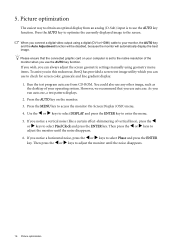
... you connect a digital video output using geometry menu items. To assist you in this endeavour, BenQ has provided a screen test image utility which you can always adjust the screen geometric settings manually using a digital (DVI or HDMI) cable to obtain an optimal display from CD-ROM. Then press the W or X keys to...
... you connect a digital video output using geometry menu items. To assist you in this endeavour, BenQ has provided a screen test image utility which you can always adjust the screen geometric settings manually using a digital (DVI or HDMI) cable to obtain an optimal display from CD-ROM. Then press the W or X keys to...
User Manual
Page 20
... automatically for this option and make adjustments or selections. 5. The AUTO key is a 'hot-key' for you connect a digital video output using a digital (DVI or HDMI) cable to your monitor To return to display the main menu. 2. Press the W or X keys to move the highlight to a menu item and then press...
... automatically for this option and make adjustments or selections. 5. The AUTO key is a 'hot-key' for you connect a digital video output using a digital (DVI or HDMI) cable to your monitor To return to display the main menu. 2. Press the W or X keys to move the highlight to a menu item and then press...
User Manual
Page 25
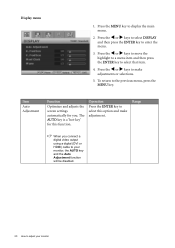
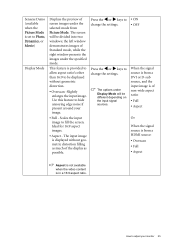
... (available when the Picture Mode is set to Photo, Dynamics, or Movie) Display Mode Displays the preview of screen images under the selected mode from a HDMI source: • Overscan • Full • Aspect Aspect is not available when the video content is in a 16:9 aspect ratio. This feature is provided to...
... (available when the Picture Mode is set to Photo, Dynamics, or Movie) Display Mode Displays the preview of screen images under the selected mode from a HDMI source: • Overscan • Full • Aspect Aspect is not available when the video content is in a 16:9 aspect ratio. This feature is provided to...

User Manual
Page 27
... your OSD may differ from those shown on the right, depending on the product supplied in your monitor 27 Range • DVI • D-sub • HDMI • English • French • German • Italian • Spanish • Polish • Czech • Hungarian • Serbo-Croatian • Romanian • Dutch • Russian...
... your OSD may differ from those shown on the right, depending on the product supplied in your monitor 27 Range • DVI • D-sub • HDMI • English • French • German • Italian • Spanish • Polish • Czech • Hungarian • Serbo-Croatian • Romanian • Dutch • Russian...

User Manual
Page 28
...OSD Settings' menu, and all the monitor settings from being accidentally changed. W or X keys to Switch activated, HDMI port will be accessible. select this option. HDMI Auto When this option. DDC/CI capability allows monitor controls to adjust your monitor OSD Lock Prevents all OSD controls.... Press MENU to monitor property settings. Information Displays the current Press the ENTER key to leave the OSD Settings menu. Otherwise, HDMI can only be locked, press and hold the 'MENU' key for Display Data Channel/Command Interface, which was developed by Video Electronics...
...OSD Settings' menu, and all the monitor settings from being accidentally changed. W or X keys to Switch activated, HDMI port will be accessible. select this option. HDMI Auto When this option. DDC/CI capability allows monitor controls to adjust your monitor OSD Lock Prevents all OSD controls.... Press MENU to monitor property settings. Information Displays the current Press the ENTER key to leave the OSD Settings menu. Otherwise, HDMI can only be locked, press and hold the 'MENU' key for Display Data Channel/Command Interface, which was developed by Video Electronics...