
User Manual
Page 2
... the DVD Player...12 Using a DVD Menu...12 Using the Menu Function...12 Playing Kodak Picture CDs and JPEG picture CDs 13 Playing a JPEG picture with MP3 music 14 Chapter 2. Setup 3-1 Language Setup 17 On Screen Display (OSD) Language Setting 17 MENU Language Setting...17 AUDIO Soundtrack Language Selection [DVD 18 SUBTITLE Language Selection [DVD 18 3-2 Screen Setup 19 SCREEN SAVER Setting...19 TV SYSTEM Setting...20 BRIGHTNESS Setting...21 COLOR Setting...21 3-3 Custom Setup 22 PARENTAL CONTROL Setting [DVD 22 CHANGE PASSWORD Setting [DVD 22 ANGLE MARK Setting [DVD]...23 DEFAULT...
... the DVD Player...12 Using a DVD Menu...12 Using the Menu Function...12 Playing Kodak Picture CDs and JPEG picture CDs 13 Playing a JPEG picture with MP3 music 14 Chapter 2. Setup 3-1 Language Setup 17 On Screen Display (OSD) Language Setting 17 MENU Language Setting...17 AUDIO Soundtrack Language Selection [DVD 18 SUBTITLE Language Selection [DVD 18 3-2 Screen Setup 19 SCREEN SAVER Setting...19 TV SYSTEM Setting...20 BRIGHTNESS Setting...21 COLOR Setting...21 3-3 Custom Setup 22 PARENTAL CONTROL Setting [DVD 22 CHANGE PASSWORD Setting [DVD 22 ANGLE MARK Setting [DVD]...23 DEFAULT...
User Manual
Page 3
... players have an optional region code. If this copyright protection technology must be played in a particular installation. If you load a disc of a different region code to service this device. Consult the dealer or an experienced radio/TV technician for home and other limited viewing uses only unless otherwise authorized by method claims of the FCC Rules. Since it is usual for a Class B digital device pursuant...
... players have an optional region code. If this copyright protection technology must be played in a particular installation. If you load a disc of a different region code to service this device. Consult the dealer or an experienced radio/TV technician for home and other limited viewing uses only unless otherwise authorized by method claims of the FCC Rules. Since it is usual for a Class B digital device pursuant...
User Manual
Page 4
... exposed to qualified service personnel. such as when the power-supply cord or plug is required when the unit has been damaged in accordance with liquids, such as radiators, heat registers, stoves, or other . Do not defeat the safety purpose of the ventilation openings. Keep these instructions. 2. A Class II APPARATUS shall be marked or the instruction manual packed with...
... exposed to qualified service personnel. such as when the power-supply cord or plug is required when the unit has been damaged in accordance with liquids, such as radiators, heat registers, stoves, or other . Do not defeat the safety purpose of the ventilation openings. Keep these instructions. 2. A Class II APPARATUS shall be marked or the instruction manual packed with...

User Manual
Page 5
... to repair the AC power cord in areas of time, the unit should be seriously damaged. !Storage When the unit is not being received Depending on the reception condition of the TV, interference may appear on the TV monitor while you watch a TV broadcast, turn off . In this unit, it off the unit. 5 " Hold the plug firmly when connecting...
... to repair the AC power cord in areas of time, the unit should be seriously damaged. !Storage When the unit is not being received Depending on the reception condition of the TV, interference may appear on the TV monitor while you watch a TV broadcast, turn off . In this unit, it off the unit. 5 " Hold the plug firmly when connecting...
User Manual
Page 9
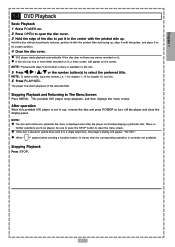
Stopping Playback and Returning to clear the menu screen. " When " " appears when pressing a function button, it means that the corresponding operation is not in use, remove the disc and press POWER to turn off the player and close the display panel. When no further selections are to be played, be sure to press the STOP button to The Menu Screen Press MENU. Hold the disc without touching its proper position. 4 Close the disc cover...
Stopping Playback and Returning to clear the menu screen. " When " " appears when pressing a function button, it means that the corresponding operation is not in use, remove the disc and press POWER to turn off the player and close the display panel. When no further selections are to be played, be sure to press the STOP button to The Menu Screen Press MENU. Hold the disc without touching its proper position. 4 Close the disc cover...

User Manual
Page 10
... remote control: Press F.BWD or F.FWD during playback. Skipping Back Press PREVIOUS during playback. x4, and etc.) changes for which the elapsed playing time appears on the screen.) NOTE: A-B repeat playback works only when starting point (A). Pressing the button twice or more will playback the the material between Point and Point B. To return to normal playback ("REPEAT Off" appears on the player's display during playback. "REP A" appears on the screen...
... remote control: Press F.BWD or F.FWD during playback. Skipping Back Press PREVIOUS during playback. x4, and etc.) changes for which the elapsed playing time appears on the screen.) NOTE: A-B repeat playback works only when starting point (A). Pressing the button twice or more will playback the the material between Point and Point B. To return to normal playback ("REPEAT Off" appears on the player's display during playback. "REP A" appears on the screen...
User Manual
Page 11
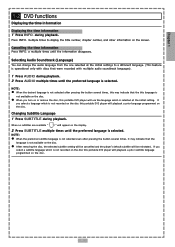
...the screen. When no subtitles are available " " will use the language which is selected at the initial settings to display the title number, chapter number, and other information on the disc. " After removing the disc, the selected subtitle setting will be cancelled and the player's default subtitle will playback a prior language programmed on the display. 2 Press SUBTITLE multiple times until the information disappears. during playback. Changing Subtitle Language 1 Press SUBTITLE during playback. Chapter 1 1-2 DVD functions Displaying the time information Displaying the...
...the screen. When no subtitles are available " " will use the language which is selected at the initial settings to display the title number, chapter number, and other information on the disc. " After removing the disc, the selected subtitle setting will be cancelled and the player's default subtitle will playback a prior language programmed on the display. 2 Press SUBTITLE multiple times until the information disappears. during playback. Changing Subtitle Language 1 Press SUBTITLE during playback. Chapter 1 1-2 DVD functions Displaying the time information Displaying the...
User Manual
Page 12
... audio and subtitle language. Using a DVD Menu Some DVD discs have been shot simultaneously from each of these discs, the same scenes can select one from disc to disc, the following explains basic operation when this portable DVD player is selected. To enter other menu screens, repeat steps 2 and 3. You may contain scenes which the discs were recorded. 12 NOTE: The menu contents details will only function on the disc programmed.) 1 Press ANGLE during playback...
... audio and subtitle language. Using a DVD Menu Some DVD discs have been shot simultaneously from each of these discs, the same scenes can select one from disc to disc, the following explains basic operation when this portable DVD player is selected. To enter other menu screens, repeat steps 2 and 3. You may contain scenes which the discs were recorded. 12 NOTE: The menu contents details will only function on the disc programmed.) 1 Press ANGLE during playback...

User Manual
Page 15
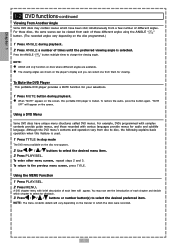
... playback, select a specified track to playback by pressing " Press PLAY/SEL. / buttons or the numbers. To connect the player to external equipment: " Apply power to AV OUT position. " Slide the AV OUT/IN SWITCH button to the TV set and select "Video" as the TV input. You may select a specific MP3 music files within the folder to the unit and connect the headphones. Chapter 2 2-1 Audio CD Playback Preparations Apply power...
... playback, select a specified track to playback by pressing " Press PLAY/SEL. / buttons or the numbers. To connect the player to external equipment: " Apply power to AV OUT position. " Slide the AV OUT/IN SWITCH button to the TV set and select "Video" as the TV input. You may select a specific MP3 music files within the folder to the unit and connect the headphones. Chapter 2 2-1 Audio CD Playback Preparations Apply power...
User Manual
Page 18
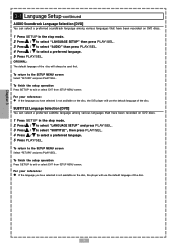
... from SETUP MENU screen. To finish the setup operation Press SETUP to exit or select EXIT from SETUP MENU screen. ORIGINAL: The default language of the disc. 18 To return to the SETUP MENU screen Select "RETURN" and press PLAY/SEL. For your reference: " If the language you have been recorded on DVD discs. 1 Press SETUP in the stop mode. 2 Press / to select "LANGUAGE SETUP" then press PLAY/SEL. 3 Press / to select "AUDIO" then press PLAY/SEL...
... from SETUP MENU screen. To finish the setup operation Press SETUP to exit or select EXIT from SETUP MENU screen. ORIGINAL: The default language of the disc. 18 To return to the SETUP MENU screen Select "RETURN" and press PLAY/SEL. For your reference: " If the language you have been recorded on DVD discs. 1 Press SETUP in the stop mode. 2 Press / to select "LANGUAGE SETUP" then press PLAY/SEL. 3 Press / to select "AUDIO" then press PLAY/SEL...

User Manual
Page 19
... select EXIT from SETUP MENU screen. 19 To finish the setup operation press SETUP to the SETUP MENU screen Select "RETURN" and press PLAY/SEL. The delay time of the screen saver function is in STOP mode . 2 Use / button to select "SCREEN SETUP" and press PLAY/SEL. 3 Use / button to select "SCREEN SAVER". 4 Use / button to 10 minutes. When the player is set to select "ON" or "OFF" and press PLAY/SEL. Chapter 3 3-2 Screen Setup SCREEN SAVER Setting To enable the...
... select EXIT from SETUP MENU screen. 19 To finish the setup operation press SETUP to the SETUP MENU screen Select "RETURN" and press PLAY/SEL. The delay time of the screen saver function is in STOP mode . 2 Use / button to select "SCREEN SETUP" and press PLAY/SEL. 3 Use / button to select "SCREEN SAVER". 4 Use / button to 10 minutes. When the player is set to select "ON" or "OFF" and press PLAY/SEL. Chapter 3 3-2 Screen Setup SCREEN SAVER Setting To enable the...

User Manual
Page 20
Video output changes according to exit or select EXIT from SETUP MENU screen. 20 Set "NTSC" from the on -screen display if connecting to NTSC TV system, set "PAL" if it is PAL TV, or set "AUTO" if it is compatible with your selection. To finish the setup operation Press SETUP to the playback disc's recorded fromat. When connecting this portable DVD player to your TV, set the "TV SYSTEM" from on -screen display to the format that matches your TV. 5 Press PLAY/SEL...
Video output changes according to exit or select EXIT from SETUP MENU screen. 20 Set "NTSC" from the on -screen display if connecting to NTSC TV system, set "PAL" if it is PAL TV, or set "AUTO" if it is compatible with your selection. To finish the setup operation Press SETUP to the playback disc's recorded fromat. When connecting this portable DVD player to your TV, set the "TV SYSTEM" from on -screen display to the format that matches your TV. 5 Press PLAY/SEL...

User Manual
Page 21
... the screen. Rotate the button in a clockwise direction to increase the color of the screen. 3. Using the BRIGHTNESS Adjustment button: 1. Rotate the button in a clockwise direction to increase the brightness of the screen. 3. COLOR Setting You can adjust the brightness of the video with this setting to provide a comfortable view. Using the COLOR Adjustment button: 1. Chapter 3 3-2 Screen Setup-continued BRIGHTNESS Setting You can adjust the color of video with this setting to provide a comfortable view. Gently press the BRIGHTNESS Adjustment button...
... the screen. Rotate the button in a clockwise direction to increase the color of the screen. 3. Using the BRIGHTNESS Adjustment button: 1. Rotate the button in a clockwise direction to increase the brightness of the screen. 3. COLOR Setting You can adjust the brightness of the video with this setting to provide a comfortable view. Using the COLOR Adjustment button: 1. Chapter 3 3-2 Screen Setup-continued BRIGHTNESS Setting You can adjust the color of video with this setting to provide a comfortable view. Gently press the BRIGHTNESS Adjustment button...
User Manual
Page 22
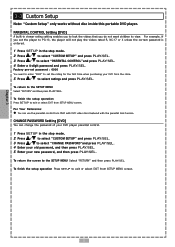
... play the videos rated R, NC-17 or X unless the correct password is entered. 1 Press SETUP in the stop mode. 2 Press / to select "CUSTOM SETUP" and press PLAY/SEL. 3 Press / to view. Chapter 3 3-3 Custom Setup Note: "Custom Setup" only works without disc inside this portable DVD player. PARENTAL CONTROL Setting [DVD] A built-in viewer rating setting enables you to lock the videos that you set the rating for the first time when purchasing your DVD from SETUP MENU screen...
... play the videos rated R, NC-17 or X unless the correct password is entered. 1 Press SETUP in the stop mode. 2 Press / to select "CUSTOM SETUP" and press PLAY/SEL. 3 Press / to view. Chapter 3 3-3 Custom Setup Note: "Custom Setup" only works without disc inside this portable DVD player. PARENTAL CONTROL Setting [DVD] A built-in viewer rating setting enables you to lock the videos that you set the rating for the first time when purchasing your DVD from SETUP MENU screen...
User Manual
Page 23
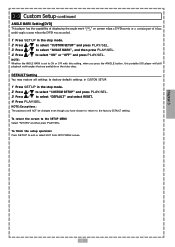
... SETUP" and press PLAY/SEL. To finish the setup operation Press SETUP to the SETUP MENU Select "RETURN" and then press PLAY/SEL. Chapter 3 23 " on the video discs. NOTE:Exceptions: The password will still playback multi-angles that are available on screen when a DVD movie or a certain part of displaying the angle mark " multi-angle scenes when the DVD was recorded. 3-3 Custom Setup-continued ANGLE MARK Setting[DVD] This player has...
... SETUP" and press PLAY/SEL. To finish the setup operation Press SETUP to the SETUP MENU Select "RETURN" and then press PLAY/SEL. Chapter 3 23 " on the video discs. NOTE:Exceptions: The password will still playback multi-angles that are available on screen when a DVD movie or a certain part of displaying the angle mark " multi-angle scenes when the DVD was recorded. 3-3 Custom Setup-continued ANGLE MARK Setting[DVD] This player has...
User Manual
Page 24
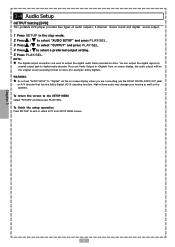
... setup operation Press SETUP to the SETUP MENU Select "RETURN" and then press PLAY/SEL. To return the screen to exit or select EXIT from on-screen display, the audio output will be the original sound recording format on discs (for example; You can output the digital signal via coaxial output jack to select a preferred output setting. 5 Press PLAY/SEL. Chapter 3 3-4 Audio Setup OUTPUT Setting [DVD] This portable DVD player provides two types of audio outputs; 2-channel stereo sound and digital sound output. 1 Press SETUP in the stop mode...
... setup operation Press SETUP to the SETUP MENU Select "RETURN" and then press PLAY/SEL. To return the screen to exit or select EXIT from on-screen display, the audio output will be the original sound recording format on discs (for example; You can output the digital signal via coaxial output jack to select a preferred output setting. 5 Press PLAY/SEL. Chapter 3 3-4 Audio Setup OUTPUT Setting [DVD] This portable DVD player provides two types of audio outputs; 2-channel stereo sound and digital sound output. 1 Press SETUP in the stop mode...
User Manual
Page 25
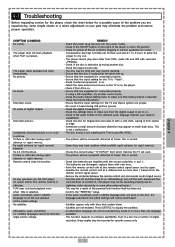
... set used (PAL/NTSC). · The picture will be somewhat distorted at times: this is distorted during rapid advance or rapid reverse. No picture. Distorted sound. Remote control does not function No key operation (by plugging in picture. Alternative audio soundtrack (or subtitle) languages cannot be a result of the parental lock function that contain them with the label side up. · Ensure that the equipment is connected properly. · Ensure that the input setting...
... set used (PAL/NTSC). · The picture will be somewhat distorted at times: this is distorted during rapid advance or rapid reverse. No picture. Distorted sound. Remote control does not function No key operation (by plugging in picture. Alternative audio soundtrack (or subtitle) languages cannot be a result of the parental lock function that contain them with the label side up. · Ensure that the equipment is connected properly. · Ensure that the input setting...

User Manual
Page 26
.... " Wipe this player " CD-ROM (Application Program) " CVD " CD-G " DVD with a Region Number other than 1 disc on the disc tray. " Do not use compressed air to close the disc cover when the disc is not installed properly. When wiping discs, always move the cloth from a cold to a warm environment, moisture may form on the disc Wipe moisture off and disconnect the AC power cord before using a circular motion...
.... " Wipe this player " CD-ROM (Application Program) " CVD " CD-G " DVD with a Region Number other than 1 disc on the disc tray. " Do not use compressed air to close the disc cover when the disc is not installed properly. When wiping discs, always move the cloth from a cold to a warm environment, moisture may form on the disc Wipe moisture off and disconnect the AC power cord before using a circular motion...
User Manual
Page 27
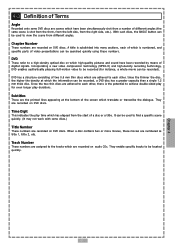
...-density recording technology, DVD enables aesthetically pleasing full-motion video to view the scene from different angles. They are the printed lines appearing at which have been recorded by means of digital signals. Subtitles These are recorded on DVD discs. Chapter 4 4-3 Definition of Terms Angle Recorded onto some discs.) Title Number These numbers are recorded on which high-quality pictures and sound have been simultaneously shot from a number of...
...-density recording technology, DVD enables aesthetically pleasing full-motion video to view the scene from different angles. They are the printed lines appearing at which have been recorded by means of digital signals. Subtitles These are recorded on DVD discs. Chapter 4 4-3 Definition of Terms Angle Recorded onto some discs.) Title Number These numbers are recorded on which high-quality pictures and sound have been simultaneously shot from a number of...

User Manual
Page 28
... assume for installation, removal or reinstallation of the product, or to damage to tapes, discs, speakers, accessories, or electrical systems. This Warranty does not apply to any product or part thereof which vary from the date of original purchase, such defect(s) will be delivered with reconditioned product (at the address shown below. 90 DAY LIMITED WARRANTY Applies to Audiovox Video Products AUDIOVOX ELECTRONICS...
... assume for installation, removal or reinstallation of the product, or to damage to tapes, discs, speakers, accessories, or electrical systems. This Warranty does not apply to any product or part thereof which vary from the date of original purchase, such defect(s) will be delivered with reconditioned product (at the address shown below. 90 DAY LIMITED WARRANTY Applies to Audiovox Video Products AUDIOVOX ELECTRONICS...


