
Owners Manual
Page 1
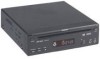
AVD400A SLOT-IN DVD PLAYER AVD400A DVDPLAYER DOLBY Owner's Manual
AVD400A SLOT-IN DVD PLAYER AVD400A DVDPLAYER DOLBY Owner's Manual
Owners Manual
Page 2
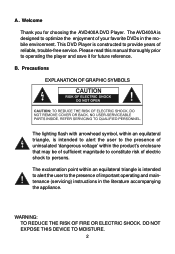
... triangle is intended to alert the user to the presence of your favorite DVDs in the literature accompanying the appliance. DO NOT EXPOSE THIS DEVICE TO MOISTURE. 2 This DVD Player is designed to operating the player and save it for choosing the AVD400A DVD Player. B. Welcome Thank you for future reference. The exclamation point within the product...
... triangle is intended to alert the user to the presence of your favorite DVDs in the literature accompanying the appliance. DO NOT EXPOSE THIS DEVICE TO MOISTURE. 2 This DVD Player is designed to operating the player and save it for choosing the AVD400A DVD Player. B. Welcome Thank you for future reference. The exclamation point within the product...

Owners Manual
Page 3
... children to unfasten seat-belts to change video media or make sure the system is visible, directly or indirectly, to wipe the unit. 3 Clean the DVD player using a lightly dampened lint free cloth to the driver while operating the vehicle.
... children to unfasten seat-belts to change video media or make sure the system is visible, directly or indirectly, to wipe the unit. 3 Clean the DVD player using a lightly dampened lint free cloth to the driver while operating the vehicle.

Owners Manual
Page 4
...indicated on the marking label. Handle the disc by its case after playing. Do not touch the surface of discs may condense inside the AVD400A and cause the DVD player to the unit when the ignition key is in its edges. Remove the disc from a very low temperature, moisture may be available. ...Powering the DVD Player This system MUST be applied to malfunction. Do not stick paper, tape or glue on for at least 30 minutes for the moisture to malfunction...
...indicated on the marking label. Handle the disc by its case after playing. Do not touch the surface of discs may condense inside the AVD400A and cause the DVD player to the unit when the ignition key is in its edges. Remove the disc from a very low temperature, moisture may be available. ...Powering the DVD Player This system MUST be applied to malfunction. Do not stick paper, tape or glue on for at least 30 minutes for the moisture to malfunction...

Owners Manual
Page 8
Connections AVD400A DVDPLAYER DOLBY Front Rear Yellow Video Input (to the vehicle ground. Powering your DVD Player ( Refer to Figure 3) Connect the black wire (-) to DVD Player) Red Audio In White Audio In Figure 3 1. Connect the red wire (+) to Figure 3) a. Connecting to a Monitor ( Refer to a switched (Accessory) ... Figure 3) To connect a video game or another audio/video source, plug the A/V cable into the A/V input jack on the back of the DVD Player A/V OUTPUT jacks: Yellow (video) to Yellow, White (left audio) to White, and Red (right audio) to the appropriate jacks on the front ...
Connections AVD400A DVDPLAYER DOLBY Front Rear Yellow Video Input (to the vehicle ground. Powering your DVD Player ( Refer to Figure 3) Connect the black wire (-) to DVD Player) Red Audio In White Audio In Figure 3 1. Connect the red wire (+) to Figure 3) a. Connecting to a Monitor ( Refer to a switched (Accessory) ... Figure 3) To connect a video game or another audio/video source, plug the A/V cable into the A/V input jack on the back of the DVD Player A/V OUTPUT jacks: Yellow (video) to Yellow, White (left audio) to White, and Red (right audio) to the appropriate jacks on the front ...

Owners Manual
Page 13
... change folders and songs. CD-R / RW discs that have been encoded in the order they were recorded onto the disc. 1. Insert an MP3 Disc, the DVD player will initialize the disc and the directory (folder) will be shown on the left side of audio quality. Press the or button to select the...
... change folders and songs. CD-R / RW discs that have been encoded in the order they were recorded onto the disc. 1. Insert an MP3 Disc, the DVD player will initialize the disc and the directory (folder) will be shown on the left side of audio quality. Press the or button to select the...

Owners Manual
Page 17
... UP/DOWN buttons, then press ENTER to confirm the setting. 'TV Shape' Display * 4:3/PS: When the player is connected to a normal TV, and a wide picture is shown on the full screen. * 4:3/LB: When the player is connected to a normal TV, and a wide picture is shown on the screen with a black strip at... both the top and bottom of the screen. * 16:9: When the player is connected to a wide screen TV, a wide picture is shown on the full screen. 17 Select the aspect ratio you desire using the LEFT/RIGHT...
... UP/DOWN buttons, then press ENTER to confirm the setting. 'TV Shape' Display * 4:3/PS: When the player is connected to a normal TV, and a wide picture is shown on the full screen. * 4:3/LB: When the player is connected to a normal TV, and a wide picture is shown on the screen with a black strip at... both the top and bottom of the screen. * 16:9: When the player is connected to a wide screen TV, a wide picture is shown on the full screen. 17 Select the aspect ratio you desire using the LEFT/RIGHT...


