Users Manual
Page 2
...DAMAGES ARISING FROM ANY DEFECT OR ERROR IN THIS MANUAL OR PRODUCT. SPECIFICATIONS AND INFORMATION CONTAINED IN THIS MANUAL ARE FURNISHED FOR INFORMATIONAL USE ONLY, AND ARE SUBJECT TO CHANGE AT ANY TIME WITHOUT NOTICE, AND SHOULD NOT BE CONSTRUED AS A COMMITMENT BY ASUS. Copyright © 2021 ASUSTeK ... damages or claims based in contract, tort or infringement under this Warranty Statement, up to the listed contract price of a default on which ASUS, its reseller. ASUS PROVIDES THIS MANUAL "AS IS"WITHOUT WARRANTY OF ANY KIND, EITHER EXPRESS OR IMPLIED, INCLUDING BUT NOT LIMITED TO...
...DAMAGES ARISING FROM ANY DEFECT OR ERROR IN THIS MANUAL OR PRODUCT. SPECIFICATIONS AND INFORMATION CONTAINED IN THIS MANUAL ARE FURNISHED FOR INFORMATIONAL USE ONLY, AND ARE SUBJECT TO CHANGE AT ANY TIME WITHOUT NOTICE, AND SHOULD NOT BE CONSTRUED AS A COMMITMENT BY ASUS. Copyright © 2021 ASUSTeK ... damages or claims based in contract, tort or infringement under this Warranty Statement, up to the listed contract price of a default on which ASUS, its reseller. ASUS PROVIDES THIS MANUAL "AS IS"WITHOUT WARRANTY OF ANY KIND, EITHER EXPRESS OR IMPLIED, INCLUDING BUT NOT LIMITED TO...
Users Manual
Page 3
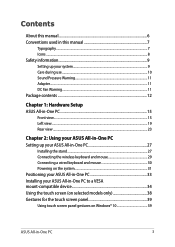
... during use...10 Sound Pressure Warning 11 Adapter...11 DC Fan Warning...11 Package contents...12 Chapter 1: Hardware Setup ASUS All-in-One PC...15 Front view...15 Left view...19 Rear view...23 Chapter 2: Using your ASUS All-in-One PC Setting up your ASUS All-in-One PC 27 Installing the stand...27 Connecting the wireless keyboard and mouse 29 Connecting a wired keyboard and mouse 30 Powering on...
... during use...10 Sound Pressure Warning 11 Adapter...11 DC Fan Warning...11 Package contents...12 Chapter 1: Hardware Setup ASUS All-in-One PC...15 Front view...15 Left view...19 Rear view...23 Chapter 2: Using your ASUS All-in-One PC Setting up your ASUS All-in-One PC 27 Installing the stand...27 Connecting the wireless keyboard and mouse 29 Connecting a wired keyboard and mouse 30 Powering on...

Users Manual
Page 4
... Center...53 Other keyboard shortcuts 54 Connecting to wireless networks 56 Wi-Fi...56 Bluetooth...57 Connecting to wired networks 58 Configuring a dynamic IP/PPPoE network connection 58 Configuring a static IP network connection 59 Turning your ASUS All-in-One PC off 60 Putting your ASUS All-in-One PC to sleep 61 Chapter 4: Recovering your system Entering the BIOS Setup 63 Quickly enter the BIOS 63 Recovering your system 64 Performing a recovery option 65 4 ASUS All-in...
... Center...53 Other keyboard shortcuts 54 Connecting to wireless networks 56 Wi-Fi...56 Bluetooth...57 Connecting to wired networks 58 Configuring a dynamic IP/PPPoE network connection 58 Configuring a static IP network connection 59 Turning your ASUS All-in-One PC off 60 Putting your ASUS All-in-One PC to sleep 61 Chapter 4: Recovering your system Entering the BIOS Setup 63 Quickly enter the BIOS 63 Recovering your system 64 Performing a recovery option 65 4 ASUS All-in...
Users Manual
Page 6
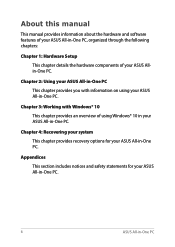
About this manual This manual provides information about the hardware and software features of your ASUS All-in-One PC, organized through the following chapters: Chapter 1: Hardware Setup This chapter details the hardware components of using your ASUS All-in-One PC. Chapter 4: Recovering your system This chapter provides recovery options for your ASUS All-in -One PC. Chapter 3: Working with information on using Windows® 10 in...
About this manual This manual provides information about the hardware and software features of your ASUS All-in-One PC, organized through the following chapters: Chapter 1: Hardware Setup This chapter details the hardware components of using your ASUS All-in-One PC. Chapter 4: Recovering your system This chapter provides recovery options for your ASUS All-in -One PC. Chapter 3: Working with information on using Windows® 10 in...
Users Manual
Page 8
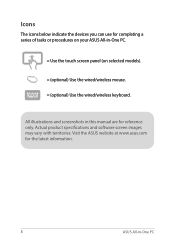
Actual product specifications and software screen images may vary with territories. Visit the ASUS website at www.asus.com for completing a series of tasks or procedures on your ASUS All-in-One PC. = Use the touch screen panel (on selected models). = (optional) Use the wired/wireless mouse. = (optional) Use the wired/wireless keyboard. Icons The icons below indicate the devices you can use for the latest information. 8 ASUS All-in-One PC All illustrations and screenshots in this manual are for reference only.
Actual product specifications and software screen images may vary with territories. Visit the ASUS website at www.asus.com for completing a series of tasks or procedures on your ASUS All-in-One PC. = Use the touch screen panel (on selected models). = (optional) Use the wired/wireless mouse. = (optional) Use the wired/wireless keyboard. Icons The icons below indicate the devices you can use for the latest information. 8 ASUS All-in-One PC All illustrations and screenshots in this manual are for reference only.

Users Manual
Page 9
.... Setting up the system on a stable surface. • Openings on the chassis are for ventilation. However, to ensure your system. • Do not use an extension cord, ensure that the total ampere rating of the devices plugged into the ventilation openings. • Use this...operate your safety, it is designed and tested to prevent injuries. • Set up your system • Read and follow all instructions in the documentation before you leave plenty of safety for information technology equipment. Safety information Your All-in-One ASUS All-in-One PC is important that you use...
.... Setting up the system on a stable surface. • Openings on the chassis are for ventilation. However, to ensure your system. • Do not use an extension cord, ensure that the total ampere rating of the devices plugged into the ventilation openings. • Use this...operate your safety, it is designed and tested to prevent injuries. • Set up your system • Read and follow all instructions in the documentation before you leave plenty of safety for information technology equipment. Safety information Your All-in-One ASUS All-in-One PC is important that you use...
Users Manual
Page 10
...when cleaning the screen. • If you follow the operating instructions. - The system performance changes. 10 ASUS All-in the product. Always unplug all power, modem, and network cables from the power outlets before cleaning the system. • Do not use • Do not walk on the power cord or ...on your retailer. - The system does not function properly even if you encounter the following technical problems with the product, unplug the power cord and contact a qualified service technician or your system. • When the system is turned off, a small amount of electrical current ...
...when cleaning the screen. • If you follow the operating instructions. - The system performance changes. 10 ASUS All-in the product. Always unplug all power, modem, and network cables from the power outlets before cleaning the system. • Do not use • Do not walk on the power cord or ...on your retailer. - The system does not function properly even if you encounter the following technical problems with the product, unplug the power cord and contact a qualified service technician or your system. • When the system is turned off, a small amount of electrical current ...

Users Manual
Page 21
NOTE: This function is only available when the HDMI input port is turned on. Display mode switch button (on selected models) This button allows you to switch between All-in -One PC is connected and the All-in -One PC mode and external display mode. ASUS All-in-One PC 21 USB 3.2 Gen 1 port This USB 3.2 Gen 1 (Universal Serial Bus) port provides a transfer rate of up to 5 Gbit/s. USB 3.2 Gen 1 Type-C® port The USB 3.2 (Universal Serial Bus 3.2) Gen 1 Type-C® port provides a transfer rate of up to 5 Gbit/s.
NOTE: This function is only available when the HDMI input port is turned on. Display mode switch button (on selected models) This button allows you to switch between All-in -One PC is connected and the All-in -One PC mode and external display mode. ASUS All-in-One PC 21 USB 3.2 Gen 1 port This USB 3.2 Gen 1 (Universal Serial Bus) port provides a transfer rate of up to 5 Gbit/s. USB 3.2 Gen 1 Type-C® port The USB 3.2 (Universal Serial Bus 3.2) Gen 1 Type-C® port provides a transfer rate of up to 5 Gbit/s.

Users Manual
Page 25
..., always use . HDMI output port This port allows you to another HDMI-compatible device for use with this jack supplies power to the ASUS All-in -One PC as an external display. Do not cover the adapter and keep it away from your body. LAN port This 8-pin RJ-45 LAN port supports a standard Ethernet cable for connection to DC power for file sharing or extending your display monitor. Power supplied through this jack. ASUS All-in...
..., always use . HDMI output port This port allows you to another HDMI-compatible device for use with this jack supplies power to the ASUS All-in -One PC as an external display. Do not cover the adapter and keep it away from your body. LAN port This 8-pin RJ-45 LAN port supports a standard Ethernet cable for connection to DC power for file sharing or extending your display monitor. Power supplied through this jack. ASUS All-in...

Users Manual
Page 33
ASUS All-in -One PC on a flat surface such as a table or desk. 2. Positioning your ASUS All-in-One PC. • Avoid adjusting the display to 20°. IMPORTANT! • Use both hands when setting up your ASUS All-in -One PC. Place your ASUS All-in -One PC 33 Tilt the display to an angle between -5° to an angle beyond the recommended values or you may risk damaging the ASUS All-in -One PC -5O 20O 1.
ASUS All-in -One PC on a flat surface such as a table or desk. 2. Positioning your ASUS All-in-One PC. • Avoid adjusting the display to 20°. IMPORTANT! • Use both hands when setting up your ASUS All-in -One PC. Place your ASUS All-in -One PC 33 Tilt the display to an angle between -5° to an angle beyond the recommended values or you may risk damaging the ASUS All-in -One PC -5O 20O 1.
Users Manual
Page 43
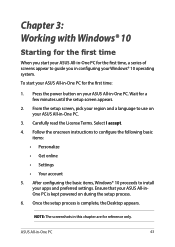
... the setup screen, pick your region and a language to guide you in -One PC. Follow the onscreen instructions to install your apps and preferred settings. Wait for a few minutes until the setup screen appears. 2. ASUS All-in -One PC for the first time: 1. To start your ASUS All-in-One PC for the first time, a series of screens appear to use on your ASUS All...
... the setup screen, pick your region and a language to guide you in -One PC. Follow the onscreen instructions to install your apps and preferred settings. Wait for a few minutes until the setup screen appears. 2. ASUS All-in -One PC for the first time: 1. To start your ASUS All-in-One PC for the first time, a series of screens appear to use on your ASUS All...

Users Manual
Page 44
..., folders, and settings. Start menu The Start menu is the main gateway to your ASUS All-in-One PC • Log off from Windows or switch to do these common activities: • Start programs or Windows® apps • Open commonly used programs or Windows® apps • Adjust ASUS All-in-One PC settings • Get help with the Windows operating system • Turn off your ASUS All-in -One...
..., folders, and settings. Start menu The Start menu is the main gateway to your ASUS All-in-One PC • Log off from Windows or switch to do these common activities: • Start programs or Windows® apps • Open commonly used programs or Windows® apps • Adjust ASUS All-in-One PC settings • Get help with the Windows operating system • Turn off your ASUS All-in -One...

Users Manual
Page 54
Other keyboard shortcuts Using the keyboard, you can also use the following shortcuts to help you launch applications and navigate Windows® 10. Launches Start menu Launches Action Center Launches the desktop Launches the File Explorer Opens the Share panel Launches Settings Launches Connect panel Activates the Lock screen Minimizes all currently active windows 54 ASUS All-in-One PC
Other keyboard shortcuts Using the keyboard, you can also use the following shortcuts to help you launch applications and navigate Windows® 10. Launches Start menu Launches Action Center Launches the desktop Launches the File Explorer Opens the Share panel Launches Settings Launches Connect panel Activates the Lock screen Minimizes all currently active windows 54 ASUS All-in-One PC

Users Manual
Page 57
... your ASUS All-inOne PC. Bluetooth Use Bluetooth to facilitate wireless data transfers with other Bluetooth-enabled devices to enable data transfers. Launch Settings from the list. Connect your chosen device. Select a device from the Start menu. 2. NOTE: For some Bluetooth-enabled devices, you may be prompted to key in -One PC with the passcode sent to pair your ASUS All-in -One PC with other Bluetooth-enabled devices You need to your devices by using the...
... your ASUS All-inOne PC. Bluetooth Use Bluetooth to facilitate wireless data transfers with other Bluetooth-enabled devices to enable data transfers. Launch Settings from the list. Connect your chosen device. Select a device from the Start menu. 2. NOTE: For some Bluetooth-enabled devices, you may be prompted to key in -One PC with the passcode sent to pair your ASUS All-in -One PC with other Bluetooth-enabled devices You need to your devices by using the...

Users Manual
Page 59
... mask and Default gateway from your user name and password then select Connect to start connecting to the Internet. Configuring a static IP network connection 1. Repeat steps 1 to the Internet then select Next. 9. Select Broadband (PPPoE). 10. If needed, you just created. 13. Type your service provider. 4. 7. Select Connect to 5 under Configuring a dynamic IP/PPPoE network connection. 2 Select Use the following IP address. Type your User name, Password, and Connection name then select Connect. 11. Select...
... mask and Default gateway from your user name and password then select Connect to start connecting to the Internet. Configuring a static IP network connection 1. Repeat steps 1 to the Internet then select Next. 9. Select Broadband (PPPoE). 10. If needed, you just created. 13. Type your service provider. 4. 7. Select Connect to 5 under Configuring a dynamic IP/PPPoE network connection. 2 Select Use the following IP address. Type your User name, Password, and Connection name then select Connect. 11. Select...
Users Manual
Page 63
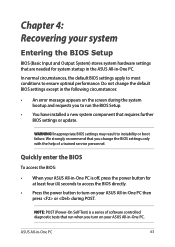
... default BIOS settings apply to most conditions to instability or boot failure. Quickly enter the BIOS To access the BIOS: • When your ASUS All-in-One PC is a series of a trained service personnel. Chapter 4: Recovering your system Entering the BIOS Setup BIOS (Basic Input and Output System) stores system hardware settings that are needed for at least four (4) seconds to access the BIOS directly. • Press the power button to run when you turn...
... default BIOS settings apply to most conditions to instability or boot failure. Quickly enter the BIOS To access the BIOS: • When your ASUS All-in-One PC is a series of a trained service personnel. Chapter 4: Recovering your system Entering the BIOS Setup BIOS (Basic Input and Output System) stores system hardware settings that are needed for at least four (4) seconds to access the BIOS directly. • Press the power button to run when you turn...

Users Manual
Page 64
.... Recovering your system Using recovery options on your ASUS All-in-One PC. • Note down important customized settings such as network settings, user names, and passwords to avoid data loss. • Ensure that your ASUS All-in-One PC is plugged in to a power source before doing any of the following recovery options: • Keep my files - Windows® 10 allows you to restore the...
.... Recovering your system Using recovery options on your ASUS All-in-One PC. • Note down important customized settings such as network settings, user names, and passwords to avoid data loss. • Ensure that your ASUS All-in-One PC is plugged in to a power source before doing any of the following recovery options: • Keep my files - Windows® 10 allows you to restore the...

Users Manual
Page 65
... is not working for your ASUS All-in-One PC. 1. Using a USB drive, network connection or Windows recovery DVD to perform other advanced recovery options on your ASUS All-in-One PC. - Use this option if this option allows you . • Advanced startup - Using Troubleshoot to an earlier build - ASUS All-in-One PC 65 • Go back to enable any of these advanced recovery options: System Restore, System Image Recovery, Startup Repair, Command Prompt, UEFI Firmware Settings, and Startup Settings.
... is not working for your ASUS All-in-One PC. 1. Using a USB drive, network connection or Windows recovery DVD to perform other advanced recovery options on your ASUS All-in-One PC. - Use this option if this option allows you . • Advanced startup - Using Troubleshoot to an earlier build - ASUS All-in-One PC 65 • Go back to enable any of these advanced recovery options: System Restore, System Image Recovery, Startup Repair, Command Prompt, UEFI Firmware Settings, and Startup Settings.

Users Manual
Page 73
...believe in -One PC 73 Specific Implementing Measures are aimed at https://csr.asus.com/english/article.aspx?id=1555. EU RoHS This product complies with the "India E-Waste (Management) Rules, 2016" and prohibits use of lead, mercury, hexavalent ...listed in Schedule II of the Rule. ASUS Recycling/Takeback Services ASUS recycling and takeback programs come from our commitment to be found at improving environmental performance of ecodesign requirements for the setting of specific products or across multiple product types. ASUS provides product information on http://csr.asus...
...believe in -One PC 73 Specific Implementing Measures are aimed at https://csr.asus.com/english/article.aspx?id=1555. EU RoHS This product complies with the "India E-Waste (Management) Rules, 2016" and prohibits use of lead, mercury, hexavalent ...listed in Schedule II of the Rule. ASUS Recycling/Takeback Services ASUS recycling and takeback programs come from our commitment to be found at improving environmental performance of ecodesign requirements for the setting of specific products or across multiple product types. ASUS provides product information on http://csr.asus...

Users Manual
Page 74
.../powermanagement for detail information on power management and its benefits to the environment. Department of the U.S. To wake your computer, click the mouse, press any key on FreeDOS and Linux-based operating systems. EPEAT Registered Products The public disclosure of user inactivity. NOTE: Energy Star is NOT supported on the keyboard, or press the power button. ENERGY STAR Qualified Product...
.../powermanagement for detail information on power management and its benefits to the environment. Department of the U.S. To wake your computer, click the mouse, press any key on FreeDOS and Linux-based operating systems. EPEAT Registered Products The public disclosure of user inactivity. NOTE: Energy Star is NOT supported on the keyboard, or press the power button. ENERGY STAR Qualified Product...


