
User Manual
Page 4
... the first time 3-1 3.2 Turning off the computer 3-2 3.2.1 Using the OS shut down function 3-2 3.2.2 Using the dual function power switch 3-2 Chapter 4 BIOS setup 4.1 Managing and updating your BIOS 4-1 4.1.1 AFUDOS utility 4-1 4.1.2 ASUS CrashFree BIOS 3 utility 4-3 4.2 BIOS setup program 4-4 4.2.1 BIOS menu screen 4-5 4.2.2 Menu bar 4-5 4.2.3 Navigation keys 4-5 4.2.4 Menu items 4-6 4.2.5 Sub-menu items 4-6 4.2.6 Configuration fields 4-6 4.2.7 Pop-up window 4-6 4.2.8 Scroll bar 4-6 4.2.9 General...
... the first time 3-1 3.2 Turning off the computer 3-2 3.2.1 Using the OS shut down function 3-2 3.2.2 Using the dual function power switch 3-2 Chapter 4 BIOS setup 4.1 Managing and updating your BIOS 4-1 4.1.1 AFUDOS utility 4-1 4.1.2 ASUS CrashFree BIOS 3 utility 4-3 4.2 BIOS setup program 4-4 4.2.1 BIOS menu screen 4-5 4.2.2 Menu bar 4-5 4.2.3 Navigation keys 4-5 4.2.4 Menu items 4-6 4.2.5 Sub-menu items 4-6 4.2.6 Configuration fields 4-6 4.2.7 Pop-up window 4-6 4.2.8 Scroll bar 4-6 4.2.9 General...

User Manual
Page 5
... 4.6.5 Security 4-32 4.7 Exit menu 4-34 Chapter 5: RAID configuration 5.1 Setting up RAID 5-1 5.1.1 RAID definitions 5-1 5.1.2 Installing hard disk drives 5-1 5.1.3 RAID controller selection 5-2 5.1.4 Setting the RAID item in BIOS 5-2 5.2 LSI Software RAID Configuration Utility 5-3 5.2.1 Creating a RAID set 5-4 5.2.2 Adding or viewing a RAID configuration 5-10 5.2.3 Initializing the virtual drives 5-11 5.2.4 Rebuilding failed drives 5-15 5.2.5 Checking the...
... 4.6.5 Security 4-32 4.7 Exit menu 4-34 Chapter 5: RAID configuration 5.1 Setting up RAID 5-1 5.1.1 RAID definitions 5-1 5.1.2 Installing hard disk drives 5-1 5.1.3 RAID controller selection 5-2 5.1.4 Setting the RAID item in BIOS 5-2 5.2 LSI Software RAID Configuration Utility 5-3 5.2.1 Creating a RAID set 5-4 5.2.2 Adding or viewing a RAID configuration 5-10 5.2.3 Initializing the virtual drives 5-11 5.2.4 Rebuilding failed drives 5-15 5.2.5 Checking the...

User Manual
Page 6
...Non-RAID 5-28 5.3.5 5.3.6 Recovery Volume Options 5-29 Exiting the Intel® Matrix Storage Manager 5-30 5.3.7 Rebuilding the RAID 5-30 5.3.8 Setting the Boot array in the BIOS Setup Utility 5-32 Chapter 6: Driver installation 6.1 RAID driver installation 6-1 6.1.1 Creating a RAID driver disk 6-1 6.1.2 Installing the RAID controller driver 6-4 6.2 Intel® chipset... Running the support DVD 6-18 6.5.2 Drivers menu 6-18 6.5.3 Utilities menu 6-19 6.5.4 Make disk menu 6-19 6.5.5 Contact information 6-19 Appendix: Reference information A.1 Z8NR-D12 model block diagram A-1 vi
...Non-RAID 5-28 5.3.5 5.3.6 Recovery Volume Options 5-29 Exiting the Intel® Matrix Storage Manager 5-30 5.3.7 Rebuilding the RAID 5-30 5.3.8 Setting the Boot array in the BIOS Setup Utility 5-32 Chapter 6: Driver installation 6.1 RAID driver installation 6-1 6.1.1 Creating a RAID driver disk 6-1 6.1.2 Installing the RAID controller driver 6-4 6.2 Intel® chipset... Running the support DVD 6-18 6.5.2 Drivers menu 6-18 6.5.3 Utilities menu 6-19 6.5.4 Make disk menu 6-19 6.5.5 Contact information 6-19 Appendix: Reference information A.1 Z8NR-D12 model block diagram A-1 vi

User Manual
Page 9
... descriptions of the BIOS parameters are not part of the standard package. Optional documentation Your product package may include optional documentation, such as warranty flyers, that may refer to the ASUS contact information. 2. How this guide This user guide contains the information you need when installing and configuring the motherboard. ix About this...
... descriptions of the BIOS parameters are not part of the standard package. Optional documentation Your product package may include optional documentation, such as warranty flyers, that may refer to the ASUS contact information. 2. How this guide This user guide contains the information you need when installing and configuring the motherboard. ix About this...

User Manual
Page 24
... 2-20 2-21 2-22 2-22 Page 2-23 2-23 2-23 2-23 2-23 2-23 2-23 2-23 2-4 Chapter 2: Hardware information DDR3 DIMM sockets 3. VGA controller setting (3-pin VGA_SW1) 3. Force BIOS recovery setting (3-pin RECOVERY1) 7. Serial (COM1) port 6. 2.2.4 Layout contents Slots / Sockets 1. PIKE slot Jumpers 1. iBTN RAID setting (3-pin IBTN_SEL1) 5. Fan controller setting (3-pin FAN_SEL1) 8. PS...
... 2-20 2-21 2-22 2-22 Page 2-23 2-23 2-23 2-23 2-23 2-23 2-23 2-23 2-4 Chapter 2: Hardware information DDR3 DIMM sockets 3. VGA controller setting (3-pin VGA_SW1) 3. Force BIOS recovery setting (3-pin RECOVERY1) 7. Serial (COM1) port 6. 2.2.4 Layout contents Slots / Sockets 1. PIKE slot Jumpers 1. iBTN RAID setting (3-pin IBTN_SEL1) 5. Fan controller setting (3-pin FAN_SEL1) 8. PS...

User Manual
Page 34
Ensure to the card. Remove the system unit cover (if your motherboard is completely seated on BIOS setup. 2. Align the card connector with the slot and press firmly until the card is already installed in a chassis). 3. See Chapter 4 for the card.... 2. Install the software drivers for later use . Remove the bracket opposite the slot that you physical injury and damage motherboard components. 2.5.1 ...
Ensure to the card. Remove the system unit cover (if your motherboard is completely seated on BIOS setup. 2. Align the card connector with the slot and press firmly until the card is already installed in a chassis). 3. See Chapter 4 for the card.... 2. Install the software drivers for later use . Remove the bracket opposite the slot that you physical injury and damage motherboard components. 2.5.1 ...

User Manual
Page 38
... will cause system boot failure! Clear RTC RAM (CLRTC1) This jumper allows you to pins 2-3. Hold down the key during the boot process and enter BIOS setup to pins 1-2. 3. Plug the power cord and turn ON the computer. 4.
... will cause system boot failure! Clear RTC RAM (CLRTC1) This jumper allows you to pins 2-3. Hold down the key during the boot process and enter BIOS setup to pins 1-2. 3. Plug the power cord and turn ON the computer. 4.

User Manual
Page 41
Set the jumper to pins 1-2. 6. Set the jumper back to pins 2-3. 3. Turn on the system to update the BIOS. 4. Use the AFUDOS uitility version 2.38 to quickly update or recover the BIOS settings when it becomes corrupted. Shut down the system. 5. Insert the floppy disk then turn on the system. To update the BIOS: 1. ASUS Z8NR-D12 2-21 Force BIOS recovery setting (3-pin RECOVERY1) This jumper allows you to flash the BIOS. Prepare a floppy disk that contains the original or latest BIOS for the motherboard (XXXXXX.ROM) and the AFUDOS.EXE utility. 2. 6.
Set the jumper to pins 1-2. 6. Set the jumper back to pins 2-3. 3. Turn on the system to update the BIOS. 4. Use the AFUDOS uitility version 2.38 to quickly update or recover the BIOS settings when it becomes corrupted. Shut down the system. 5. Insert the floppy disk then turn on the system. To update the BIOS: 1. ASUS Z8NR-D12 2-21 Force BIOS recovery setting (3-pin RECOVERY1) This jumper allows you to flash the BIOS. Prepare a floppy disk that contains the original or latest BIOS for the motherboard (XXXXXX.ROM) and the AFUDOS.EXE utility. 2. 6.

User Manual
Page 42
... the DDR3 DIMMs to run at +1.35V. 2-22 Chapter 2: Hardware information 7. DDR3 voltage setting (4-pin LVDDR3_SEL1/2) These jumpers allow you to control DDR3 voltage by BIOS settings (default). Set to pins 1-2 when using 4-pin fans or pins 2-3 when using 3-pin fans. • If you use a 4-pin fan but set the jumper...
... the DDR3 DIMMs to run at +1.35V. 2-22 Chapter 2: Hardware information 7. DDR3 voltage setting (4-pin LVDDR3_SEL1/2) These jumpers allow you to control DDR3 voltage by BIOS settings (default). Set to pins 1-2 when using 4-pin fans or pins 2-3 when using 3-pin fans. • If you use a 4-pin fan but set the jumper...

User Manual
Page 50
.... Message LED (2-pin MLED) This 2-pin connector is for the message LED cable that connects to this connector. The speaker allows you turn on the BIOS settings. The IDE LED lights up when you to this connector. Connect the HDD Activity LED cable to hear system beeps and warnings. 4. Pressing the...
.... Message LED (2-pin MLED) This 2-pin connector is for the message LED cable that connects to this connector. The speaker allows you turn on the BIOS settings. The IDE LED lights up when you to this connector. Connect the HDD Activity LED cable to hear system beeps and warnings. 4. Pressing the...

User Manual
Page 55
...up when you turned on , hold down the key to a power outlet that all the connections, replace the system case cover. 2. AMI BIOS BIOS Beep One short beep One continuous beep followed by two short beeps then a pause (repeated) One continuous beep followed by three short beeps ...or POST. Check the jumper settings and connections or call your monitor complies with a surge protector. 5. System power 6. ASUS Z8NR-D12 3-1 After making all switches are running, the BIOS beeps (see anything within 30 seconds from the time you press the ATX power button. Connect the power cord to ...
...up when you turned on , hold down the key to a power outlet that all the connections, replace the system case cover. 2. AMI BIOS BIOS Beep One short beep One continuous beep followed by two short beeps then a pause (repeated) One continuous beep followed by three short beeps ...or POST. Check the jumper settings and connections or call your monitor complies with a surge protector. 5. System power 6. ASUS Z8NR-D12 3-1 After making all switches are running, the BIOS beeps (see anything within 30 seconds from the time you press the ATX power button. Connect the power cord to ...

User Manual
Page 56
... then select Turn Off Computer. 2. Pressing the power switch for less than four seconds lets the system enter the soft-off mode, depending on the BIOS setting. 3.2 Turning off the computer 3.2.1 Using the OS shut down function If you are using Windows® XP: 1. The power supply should turn off after... is ON, pressing the power switch for more than four seconds puts the system to sleep mode or to soft-off mode regardless of the BIOS setting. 3-2 Chapter 3: Powering up
... then select Turn Off Computer. 2. Pressing the power switch for less than four seconds lets the system enter the soft-off mode, depending on the BIOS setting. 3.2 Turning off the computer 3.2.1 Using the OS shut down function If you are using Windows® XP: 1. The power supply should turn off after... is ON, pressing the power switch for more than four seconds puts the system to sleep mode or to soft-off mode regardless of the BIOS setting. 3-2 Chapter 3: Powering up

User Manual
Page 57
This chapter tells how to change the system settings through the BIOS Setup menus. Detailed descriptions of the BIOS parameters are also provided. 4 BIOS setup
This chapter tells how to change the system settings through the BIOS Setup menus. Detailed descriptions of the BIOS parameters are also provided. 4 BIOS setup

User Manual
Page 58
Chapter summary 4 4.1 Managing and updating your BIOS 4-1 4.2 BIOS setup program 4-4 4.3 Main menu 4-7 4.4 Advanced menu 4-13 4.5 Server menu 4-27 4.6 Power menu 4-29 4.7 Exit menu 4-34 ASUS Z8NR-D12
Chapter summary 4 4.1 Managing and updating your BIOS 4-1 4.2 BIOS setup program 4-4 4.3 Main menu 4-7 4.4 Advanced menu 4-13 4.5 Server menu 4-27 4.6 Power menu 4-29 4.7 Exit menu 4-34 ASUS Z8NR-D12
User Manual
Page 59
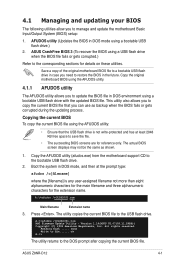
... - Boot the system in the future. Press . The actual BIOS screen displays may not be the same as backup when the BIOS fails or gets corrupted during the updating process. ASUS Z8NR-D12 4-1 Save a copy of the original motherboard BIOS file to a bootable USB flash drive in case you to copy... the current BIOS file that the USB flash drive is not write...
... - Boot the system in the future. Press . The actual BIOS screen displays may not be the same as backup when the BIOS fails or gets corrupted during the updating process. ASUS Z8NR-D12 4-1 Save a copy of the original motherboard BIOS file to a bootable USB flash drive in case you to copy... the current BIOS file that the USB flash drive is not write...

User Manual
Page 60
... ...... done Please restart your computer A:\> 4-2 Chapter 4: BIOS setup A:\>afudos /iZ8NRD12.ROM The utility verifies the file, and then starts updating the BIOS file. Version 1.19(ASUS V2.07(03.11.24BB)) Copyright (C) 2002 American Megatrends...BIOS file To update the BIOS file using the AFUDOS utility: 1. A:\>afudos /iZ8NRD12.ROM AMI Firmware Update Utility - WARNING!! done Advance Check ...... Erasing flash ...... Erasing flash ...... Visit the ASUS website (www.asus.com) and download the latest BIOS file for the motherboard. Reboot the system from the motherboard...
... ...... done Please restart your computer A:\> 4-2 Chapter 4: BIOS setup A:\>afudos /iZ8NRD12.ROM The utility verifies the file, and then starts updating the BIOS file. Version 1.19(ASUS V2.07(03.11.24BB)) Copyright (C) 2002 American Megatrends...BIOS file To update the BIOS file using the AFUDOS utility: 1. A:\>afudos /iZ8NRD12.ROM AMI Firmware Update Utility - WARNING!! done Advance Check ...... Erasing flash ...... Erasing flash ...... Visit the ASUS website (www.asus.com) and download the latest BIOS file for the motherboard. Reboot the system from the motherboard...

User Manual
Page 61
... devices for this utility. ASUS Z8NR-D12 4-3 Restart the system after the utility completes the updating process. DO NOT shut down or reset the system while recovering the BIOS! Doing so would cause system boot failure! Prepare a USB flash drive containing the updated motherboard BIOS before using ASUS CrashFree BIOS 3 1. 4.1.2 ASUS CrashFree BIOS 3 utility The ASUS CrashFree BIOS 3 is an auto recovery...
... devices for this utility. ASUS Z8NR-D12 4-3 Restart the system after the utility completes the updating process. DO NOT shut down or reset the system while recovering the BIOS! Doing so would cause system boot failure! Prepare a USB flash drive containing the updated motherboard BIOS before using ASUS CrashFree BIOS 3 1. 4.1.2 ASUS CrashFree BIOS 3 utility The ASUS CrashFree BIOS 3 is an auto recovery...

User Manual
Page 62
... this last option only if the first two failed. This requires you are installing a motherboard, reconfiguring your system, or prompted to "Run Setup." 4.2 BIOS setup program This motherboard supports a programmable firmware chip that the computer can enable the security password feature or change...optimum performance. The Setup program is designed to make your selections from the available options using the BIOS Setup program so that you see on your screen. • Visit the ASUS website at www.asus.com to download the latest BIOS file for this motherboard. 4-4 Chapter 4: BIOS setup
... this last option only if the first two failed. This requires you are installing a motherboard, reconfiguring your system, or prompted to "Run Setup." 4.2 BIOS setup program This motherboard supports a programmable firmware chip that the computer can enable the security password feature or change...optimum performance. The Setup program is designed to make your selections from the available options using the BIOS Setup program so that you see on your screen. • Visit the ASUS website at www.asus.com to download the latest BIOS file for this motherboard. 4-4 Chapter 4: BIOS setup

User Manual
Page 63
...the bottom right corner of the navigation keys differ from one screen to configure system Date. ←→ Select Screen ↑↓ Select Item +- ASUS Z8NR-D12 4-5 Use [+] or [-] to another. Some of a menu screen are the navigation keys for that particular menu. Use the navigation keys to select ... Main Advanced BIOS SETUP UTILITY Server Boot Exit System Time [13:44:30] System Date [Tue, 11/04/2008] Legacy Diskette A [1.44M, 3.5 in the menu and change the settings. Change Field Tab Select Field F1 General Help F10 Save and Exit ESC Exit v02.61 (C)Copyright 1985...
...the bottom right corner of the navigation keys differ from one screen to configure system Date. ←→ Select Screen ↑↓ Select Item +- ASUS Z8NR-D12 4-5 Use [+] or [-] to another. Some of a menu screen are the navigation keys for that particular menu. Use the navigation keys to select ... Main Advanced BIOS SETUP UTILITY Server Boot Exit System Time [13:44:30] System Date [Tue, 11/04/2008] Legacy Diskette A [1.44M, 3.5 in the menu and change the settings. Change Field Tab Select Field F1 General Help F10 Save and Exit ESC Exit v02.61 (C)Copyright 1985...

User Manual
Page 64
...screen. You cannot select an item that is a brief description of the field opposite the item. Advanced BIOS SETUP UTILITY CPU Bridge Chipset Configuration USB Functions USB Port Configure USB 2.0 Controller HDA Controller SMBUS Controller [... list of the menu screen is not user-configurable. To change the value of the selected item. 4-6 Chapter 4: BIOS setup Refer to 4.2.7 Pop-up window. 4.2.7 Pop-up window Select a menu item then press to display the other...Option General Help Save and Exit Exit v02.61 (C)Copyright 1985-2008, American Megatrends, Inc.
...screen. You cannot select an item that is a brief description of the field opposite the item. Advanced BIOS SETUP UTILITY CPU Bridge Chipset Configuration USB Functions USB Port Configure USB 2.0 Controller HDA Controller SMBUS Controller [... list of the menu screen is not user-configurable. To change the value of the selected item. 4-6 Chapter 4: BIOS setup Refer to 4.2.7 Pop-up window. 4.2.7 Pop-up window Select a menu item then press to display the other...Option General Help Save and Exit Exit v02.61 (C)Copyright 1985-2008, American Megatrends, Inc.


